Creality Ender 3 Webcam Setup for OctoPrint and The Spaghetti Detective
tip
Can't find a Raspberry Pi? Check out Orange Pi for OctoPrint. Boards and complete kits are available now!
Creality Ender 3 is one of the most solid and affordable 3D printers you can get. And OctoPrint is undoubtedly the best solution for monitoring your prints with a webcam.
This brief tutorial is meant to help someone who is interested in using a camera with their 3D printer to take advantage of OctoPrint's amazing monitoring capability with an inexpensive Pi Camera. This setup will work perfectly for The Spaghetti Detective too.
The first thing I realized soon after I owned a 3D printer was that prints can take a long time. The second thing I learned was that they can fail. I was concerned about leaving the house while a print was in progress and quickly discovered that others had recognized this problem and solved it. There are several methods to achieve this, I am going to describe what seemed to be the best solution for me. I will mention the software and hardware that is needed but defer to the many excellent YouTube videos available on the actual implementation of these. The focus here will be to document the steps and provide some tips that I learned in getting it all working. The printed parts were specifically for the Ender 3 V2 printer but most of the information is not printer specific.
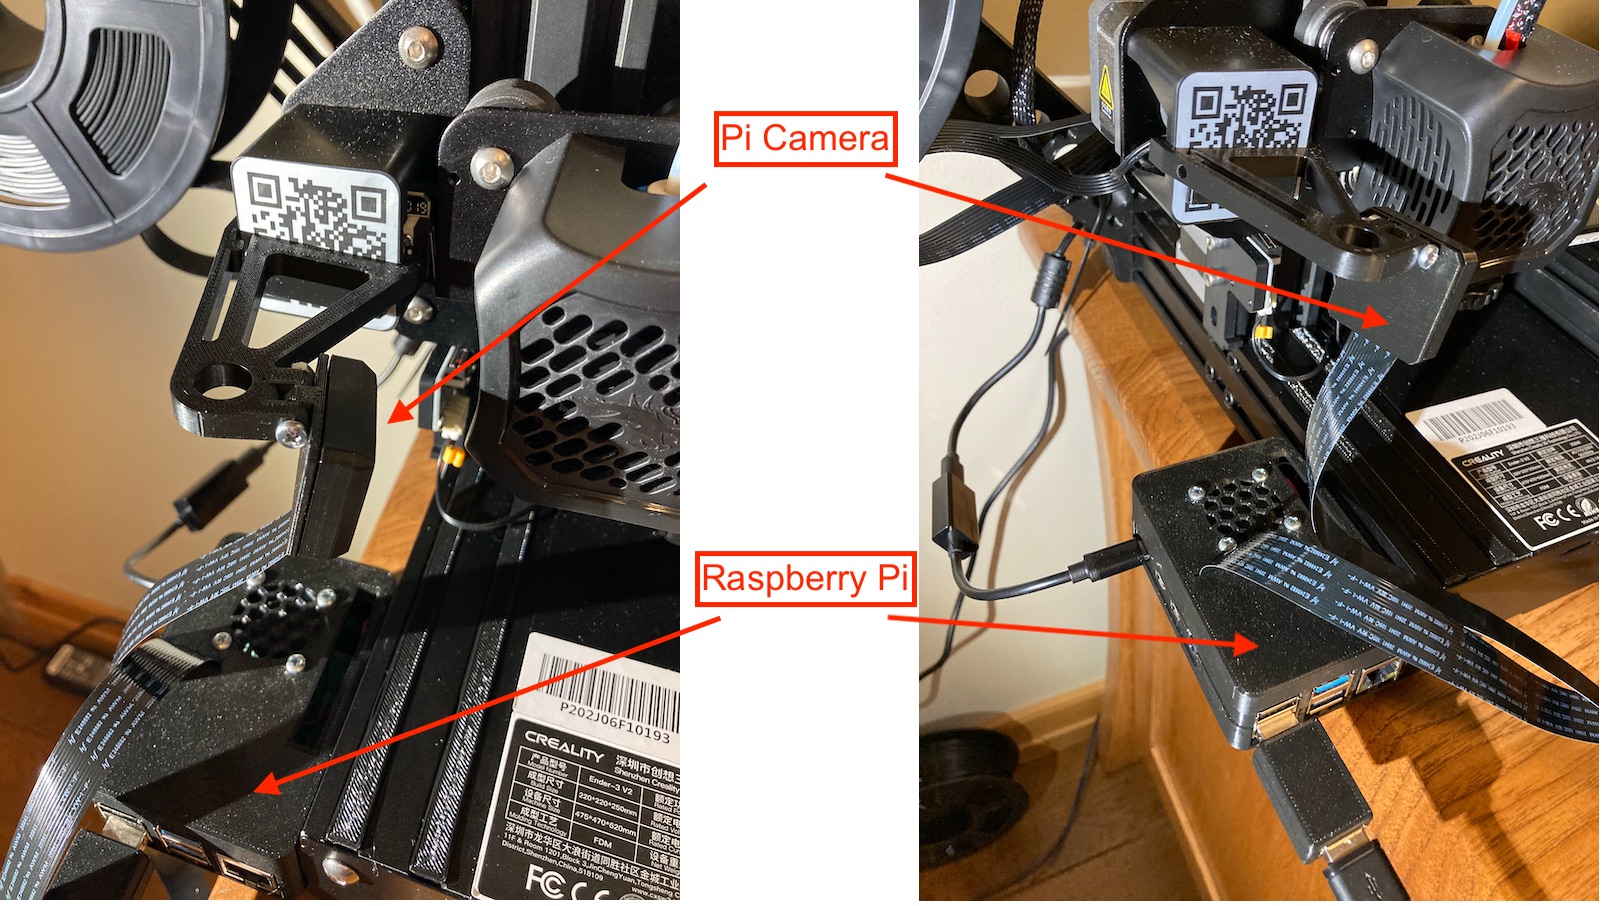
The solution I chose involved purchasing a Raspberry Pi computer and installing OctoPi on it. This allows you to use OctoPrint to control the printer from your computer. OctoPi is an image that is put on an SD card and resides in the Raspberry Pi computer and provides the link between your computer and your printer. The Spaghetti Detective is a plugin available to be installed in OctoPrint. While it will work on older versions, I purchased a kit that included the Raspberry Pi 4B. The Raspberry Pi has a port for a “native” camera and USB ports where you could plug some other webcam in. I chose the Raspberry Pi Camera Module V2 as it was inexpensive but had decent specs. I mounted the camera on the z-axis cross beam which meant I needed a longer cable to insure it reached the top of the printer. All the mounting hardware was printed from items I found on Thingiverse (or to be honest were links in the YouTube videos I watched).
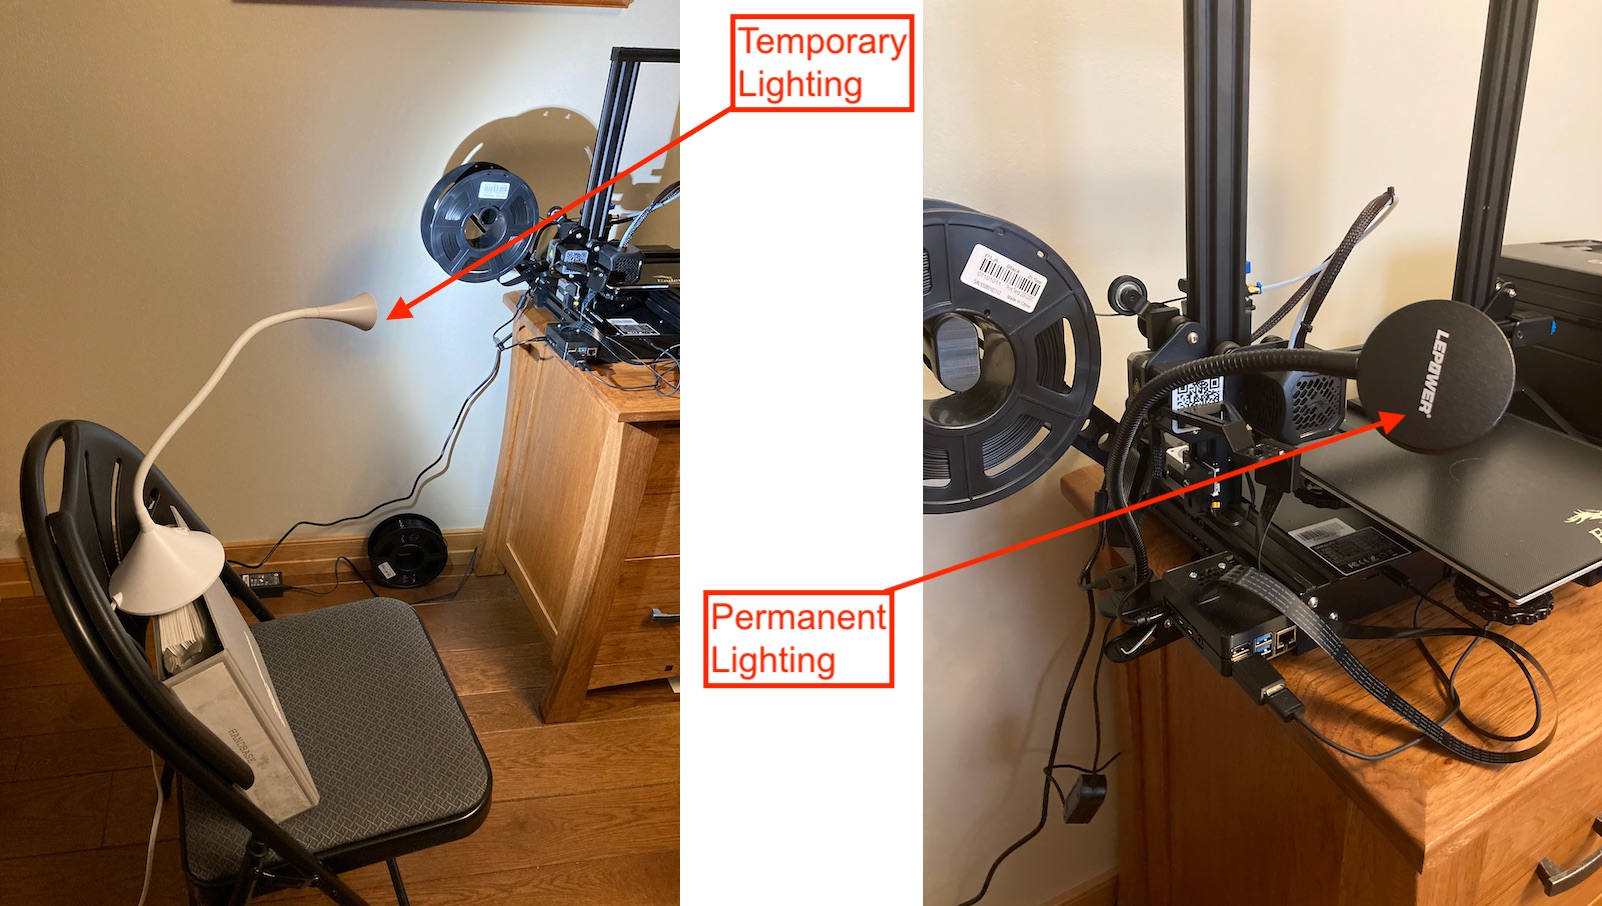
When I first installed the camera the picture was OK but not great. I wasn’t sure if the Spaghetti Detective would have a good enough view to do her thing. I did not have the best lighting, so I rigged up something temporary to see if that helped the image. Better lighting did help so I ordered a permanent solution – an led light that clipped to the table the printer sits on. Be sure to place any light source behind the camera.
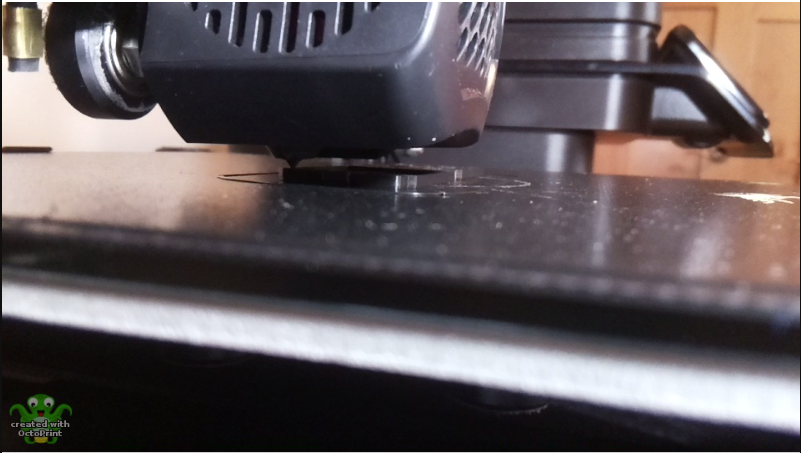
After all the videos I watched it still wasn’t clear to me if the Raspberry Pi camera could be focused. I had seen it described as a fixed focal length camera and some users described removing some glue to allow the lens to turn. I could see no evidence of glue on the module that I received and I was able to turn the lens with a very small needle nose pliers. It is very easy for these to slip as there isn’t much to grab. I imagine one could damage the lens if they weren’t careful. I placed a small object in the middle of the print bed that had some white tape with black lettering on it. While watching the image in OctoPrint I rotated the lens until the text was as clear as I could make it. Here is a still shot of a print in progress with my arrangement:
The Raspberry Pi kit that I purchased included a case but I ended up using this one. It mounts on the side of my printer and has a slot for the camera cable. Ender 3 Raspberry Pi 4 Case by gspro - Thingiverse.
This is a link to the 3D printed mount that I used. I had to modify it slightly to fit on my printer. I wanted to post the remix but at the time of this writing it seems the Thingiverse remix function is unavailable Creality Ender 3 Pi Cam Mount by Modmike - Thingiverse.
This is a link to the clip light I purchased on Amazon LEPOWER Clip on Light/Reading Light/Light Color Changeable/Night Light Clip on for Desk, Bed Headboard and Computers (Black) - - Amazon.com