3D Printer Wifi - All You Need to Know

3D printing is an evolving technology and engineers are constantly upgrading it to eliminate any primal issues in it. Till recently it was common to tether your 3D printer to your computer to run print jobs. But now, you can easily add WiFi to your 3D printer.
Adding WiFi to your 3D printer gives you an unprecedented advantage and we will be discussing the same in this article and how to set it up with ease.
The Basics of 3D Printing?
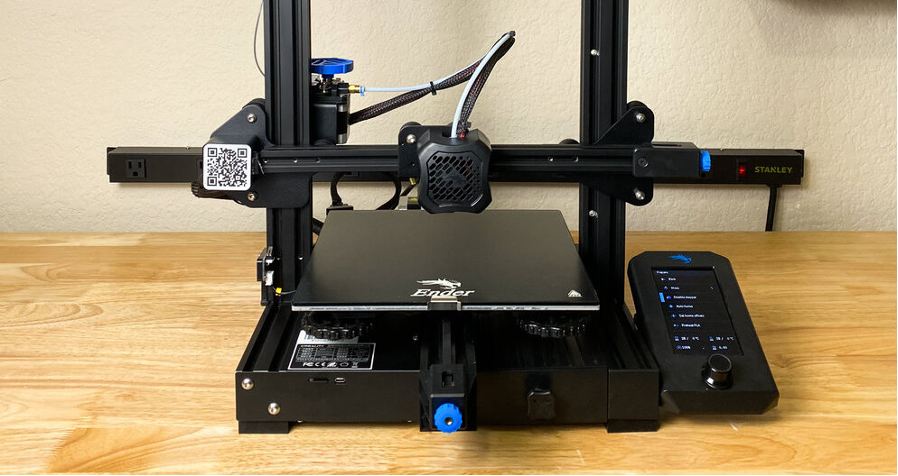
Creality Ender 3 FDM 3D printer/Courtesy: Creality
3D printing is a manufacturing technology that creates three-dimensional objects by adding layers of material one on top of the other until the entire object is formed. Because it produces objects in an additive manner, the process is also known as additive manufacturing.
In comparison to traditional manufacturing methods, this process eliminates the need for tooling and reduces material waste.
The entire ecosystem of the 3D printing process can be used to explain how it works. Here's a quick rundown:
- Software: 3D printing begins with design software, which is used to create a 3D model. After that, the 3D model is sliced in a slicing software to generate a G-code file.
- Hardware: As the 3D printer can only read G-code files, the file is uploaded to the printer, which prints the designed object.
- Materials: Materials for 3D printing include filaments, resins, polymer or metal powders, and metal wires.
- Post-processing: After the 3D printer prints the object, the part usually needs to go through some sort of post-processing stage, such as support structure removal, sanding, acetone vaporing, UV curing, washing, coloring, dyeing, Hot Isostatic Pressing annealing, and so on.
Benefits of adding WiFi to your 3D printer

Failure detection from mobile/Courtesy: Obico
Manufacturing has become more accessible thanks to 3D printing. 3D printers have reached the average person's home, giving him the ability to manufacture a product right in his bedroom or garage. Even a $200 entry-level printer can produce high-quality products that can be sold. However, entry-level printers are inconvenient and have limited features and can even be annoying at times. They lack the majority of the features found in premium printers.
This can be overcome by adding and upgrading your printer with useful features. Wireless 3D printing is one such feature. By adding WiFi to your 3D printer, you can enjoy wireless printing while also comfortably controlling and monitoring your 3D printer.
Adding WiFi to your 3D printer has a number of advantages, including:
Remote monitoring and control
The most significant benefit of adding WiFi to your 3D printer is remote monitoring. You can also control your 3D printer using a WiFi connection. This feature is useful because it allows you to not only command your 3D printer to start, pause, and stop prints, but also to watch live streaming of the prints, detect failure, and save your prints, among other things.
3D print from your phone
Wireless printing is no longer limited to your desktop; you can control your 3D printer from the convenience of your smartphone. There are numerous Android and Apple mobile applications available that can be used to control your 3D printer from your phone.
Check-in on your prints with a camera
You can connect a camera to your 3D printer once you've established a wireless connection (Raspberry Pi camera, Webcam or DLSR camera). You can activate this camera and check-in on your 3D prints from anywhere at any time. You can not only watch the live stream, but you can also receive regular updates on the print status (more on this below).
3D Print status notifications
One of the most valuable advantages of adding WiFi to your 3D printer is the ability to receive status updates. Sometimes you don't want to watch a live stream and instead just want to know how the print is progressing. Is the print finished? How long will it take for the print to be finished? Is there anything wrong with it? Many other questions arise in your mind when you are not physically near your 3D printer. The best solution for this is to receive regular 3D printer status notifications about your active prints. You can set notifications for a specific time, number of layers, and so on. This way, you'll always be aware of what's going on with your printer.
How to add WiFi to your 3D printer?
There are several ways to add wifi to your 3D printer, but the easiest and most popular method we'll cover here is OctoPrint.
What is OctoPrint?
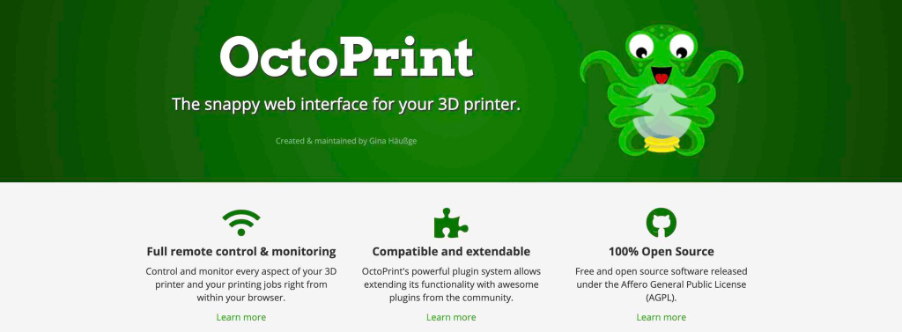
OctoPrint Software/Courtesy: OctoPrint
OctoPrint was founded in 2012 and since then, has grown to become one of the most popular remote monitoring, management, and control software applications for your 3D printer. Many adopters chose the software because of its ease of use and simplicity, and the features and functionality it offers, mostly for free through its plugins.
While the community is expanding, many newcomers are still unaware of the advantages OctoPrint offers. As a result, we've compiled a list of genuine reasons why you should and need OctoPrint.
If you are a newcomer who has not yet installed OctoPrint, please take a moment to read our guide on how to set up OctoPrint to get it up and running.
How to install OctoPrint?
Installing OctoPrint is fairly simple, and if you follow the steps outlined below and in our dedicated article on how to set up OctoPrint, you'll be up and running in no time. A summary of the installation procedure is provided below.
- Download and Install the Raspberry Pi Imager
- Secure your Raspberry Pi connections by using a strong and safe username and password.
- Enable WiFi in the OctoPrint setup window to configure it.
- Connect your Raspberry Pi chip to the 3D printer, as well as any other hardware you have, such as heat sinks, webcams, and so on.
- Start or restart your 3D printer and go to your desktop to access the OctoPrint user interface. OctoPrint will be installed after you complete the final steps suggested by the setup wizard.
Klipper firmware with Fluidd or Mainsail
Klipper is a rapidly growing alternative to the popular Marlin firmware. It is an open-source 3D printer firmware designed to work with a 3D printer mainboard and a single-board computer, such as a Raspberry Pi, to increase the 3D printer's computing power.
Klipper has a fairly basic user interface that isn't particularly appealing or user-friendly, so the most popular way to use Klipper is with Fluidd/Mainsail. Both Fluidd and Mainsail are open-source web interfaces designed specifically for Klipper.
Klipper also works with Fluidd and Mainsail for remote access, and this article will explain how to get and set up remote access for Klipper using Fluidd and Mainsail.
What are Klipper, Fluidd, and Mainsail?
Klipper is a piece of firmware that requires a graphical user interface to control and operate. Fluidd and Mainsail are two of the most popular graphical user interfaces for handling Klipper for remote monitoring and controlling. These programs make it simple to interact with your printers and provide access to a wide range of features that enhance the remote user experience of 3D printing.
Fluidd and Mainsail OS have been developed specifically for use with Klipper firmware on 3D printers. These programs serve as a communication link between you and your 3D printer, allowing you to wirelessly monitor, control, and interact with it.
How to Install Klipper with Fluidd or Mainsail

Fluidd Web Interface/Courtesy: Fluidd
Klipper firmware installation is also simple, and if you follow the steps we provide, it will be even easier. Klipper can be configured with any user interface, such as Fluidd or Mainsail. We already have a detailed article on installing Klipper with Fluidd for Ender 3 (the process is universal and can be replicated for any printer), but we'll give you a quick rundown of the process. In addition, we have a detailed article on Klipper installation with Mainsail.
- Download Balena Etcher: It is a file-flashing tool used to transfer operating system files to portable media. It is the preferred method for flashing the Fluidd software.
- Download Fluiddpi image: There are other methods, but the Fluiddpi image is the simplest way to install software on the Raspberry Pi.
- Flash FluiddPi using Balena Etcher
- Add Wi-Fi credentials to Fluiddpi: You must add wifi credentials to Fluiddpi, just as you did with OctoPrint. This step will require Notepad++. With this step, you will be able to connect your Raspberry Pi to your network. Follow the steps outlined in ourKlipper with Fluidd for Ender 3 article.
- Find Raspberry Pi IP Address
- Configure Klipper firmware: Klipper is designed for a variety of 3D printers, and we must configure it for your specific 3D printer.
- Retrieve the configured firmware: You'll need to flash and install the Klipper firmware in your 3D printer at this point.
- Flash Klipper firmware to your 3D printer.
- Configure Fluidd for Klipper and your 3D printer.
Next Steps
With Klipper successfully installed, you will see multiple benefits like better print speed, better print quality, better dimensional accuracy and more as experienced by its users. Furthermore, to enhance your 3D printing experience, consider installing Obico for Klipper so you can access it from anywhere in the world.
Setting up Obico for Klipper
- Obico for Klipper setup is simple if you follow the steps we've outlined. But first, you must ensure the following:
- You have correctly installed and connected the Klipper and Moonraker to your 3D printer. Use a web interface, such as Mainsail/Fluidd, if possible.
- A webcam is linked to Mainsail/Fluidd/Moonraker and configured to work with your printer.
- There is enough lighting to illuminate the printing area of your printer. You should be fine if your printer is in a well-lit area. If you intend to print with the lights off, ensure that the printing area is illuminated while your printer is printing. It is sufficient to use a small LED lamp or LED strip.
After completing these steps, you can download the Obico for Klipper mobile app (Android orApple) and follow our Set up Obico for Klipper guide for a simple installation.