Prusa Slicer Supports - All You Need to Know

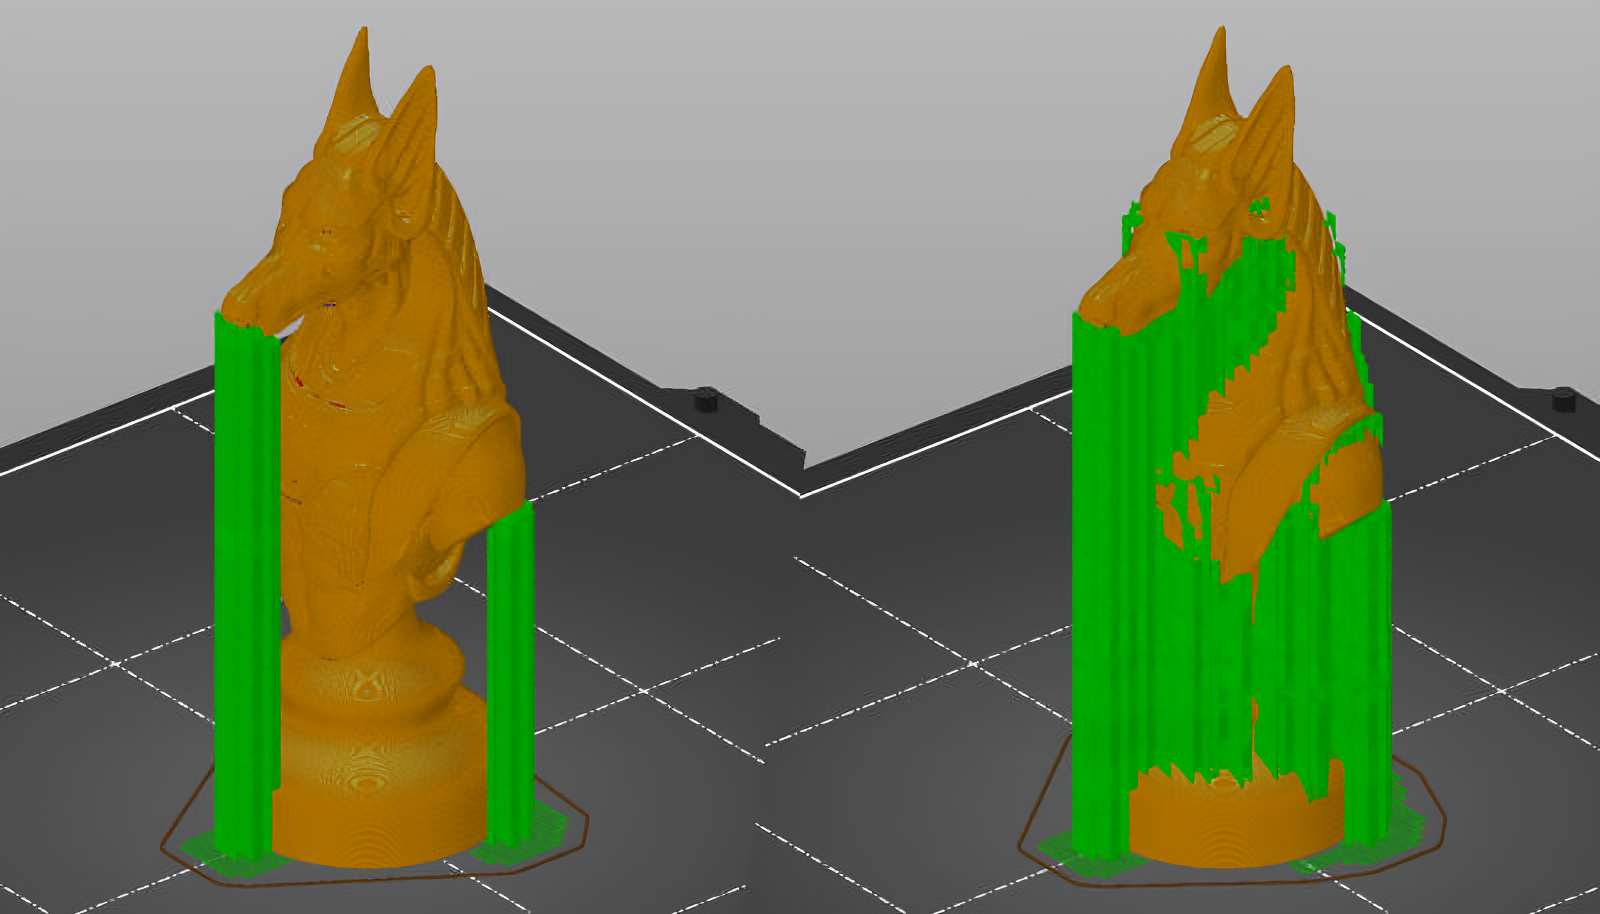
Image Courtesy of Prusa 3D
PrusaSlicer is one of the most popular 3D printing slicers used by many 3D printing enthusiasts. Its ease of use, broad printer compatibility and rich features make it a powerful slicer available today.
One such key feature of the PrusaSlicer is its Support Generation which lets you 3D print complex designs easily. Supports in PrusaSlicer have come a long way, and each new update brings some improvements to the PrusaSlicer's supports.
In this article, we'll understand everything there is to know about using the Supports in PrusaSlicer. We'll review the support settings and various options and understand how you can optimize the supports to get clean-looking, high-quality 3D models.
Without any further ado, let's start this 'support' full article.
Why Do 3D Prints Need Supports?
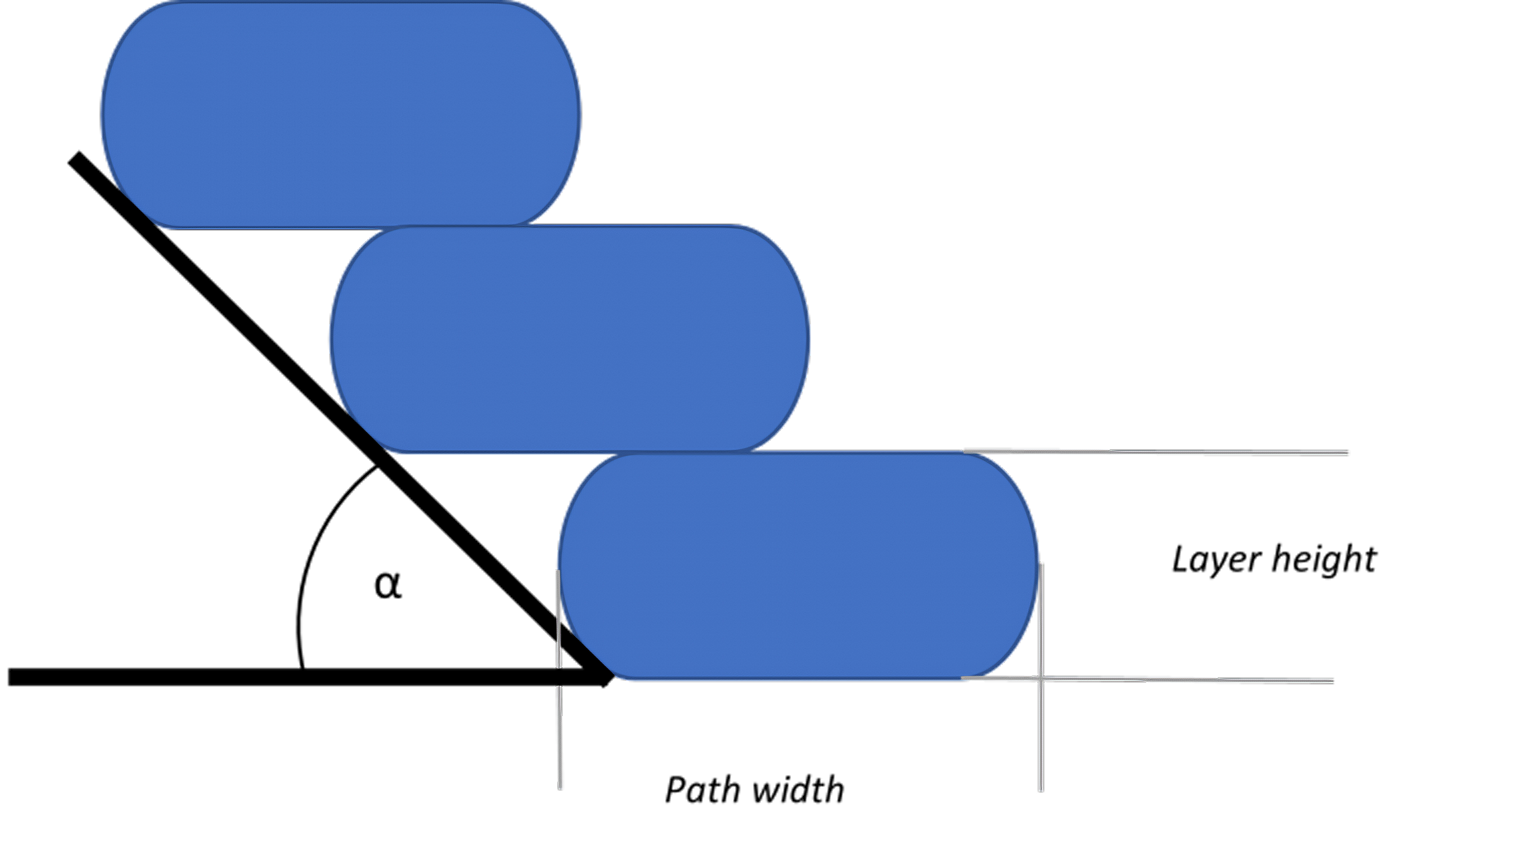
Image Courtesy of Omni3D
In FDM 3D printing, a 3D printer stacks layers on each other to create a 3D printed part. Each layer acts as a support for the layer above it. But, in some designs, the layer on the top might go beyond the previous layer's boundaries and extend beyond it. This is known as 'Overhang' in the 3D printing dictionary.
A typical FDM 3D printer can print overhangs up to a certain angle (45 - 55°) without affecting the print quality. But, beyond those limits, the layers begin to drool down, as the nozzle is basically extruding hot material in the air. It affects the print quality and, in some cases, might even cause a print failure.
Similarly, some 3D prints like human face, miniatures, and figurines have complex areas like ears, chins, and hands, which have no base layer. For example, in the above image, the layers for the chin of the model are floating in the air and have no base support beneath them.
In such instances, support structures play a crucial role by ensuring the overhangs in your 3D prints have enough material underneath them to avoid any filament drooling. Supports also act as base layers for those areas of the model that would have otherwise been printed in thin air.
In this way, supports help you 3D print complex designs which might have plenty of overhang structures. And once configured correctly, you can easily remove them without affecting the print quality of your 3D models.
Miniatures, human figures, animal models, lengthy bridge structures, etc., heavily rely on supports, and it would be almost impossible to 3D print these models without them.
Now that we understand the need for support in 3D printing let's look at how these work in the PrusaSlicer.
Supports in PrusaSlicer
The PrusaSlicer team has, over time, improved and optimized the support parameters and continues adding new features with each update. In this section, we'll briefly look at the various functionalities that you get with PrusaSlicer's Supports.
Per Model Supports
PrusaSlicer allows you to customize the support settings for every model on your build plate. It comes in handy when you're printing several models in a single print cycle, each with its unique geometry.
Using Per Model Supports, you can personalize the supports according to the model's geometry and ensure each overhang is adequately supported. It helps to optimize print time and speed while balancing print quality.
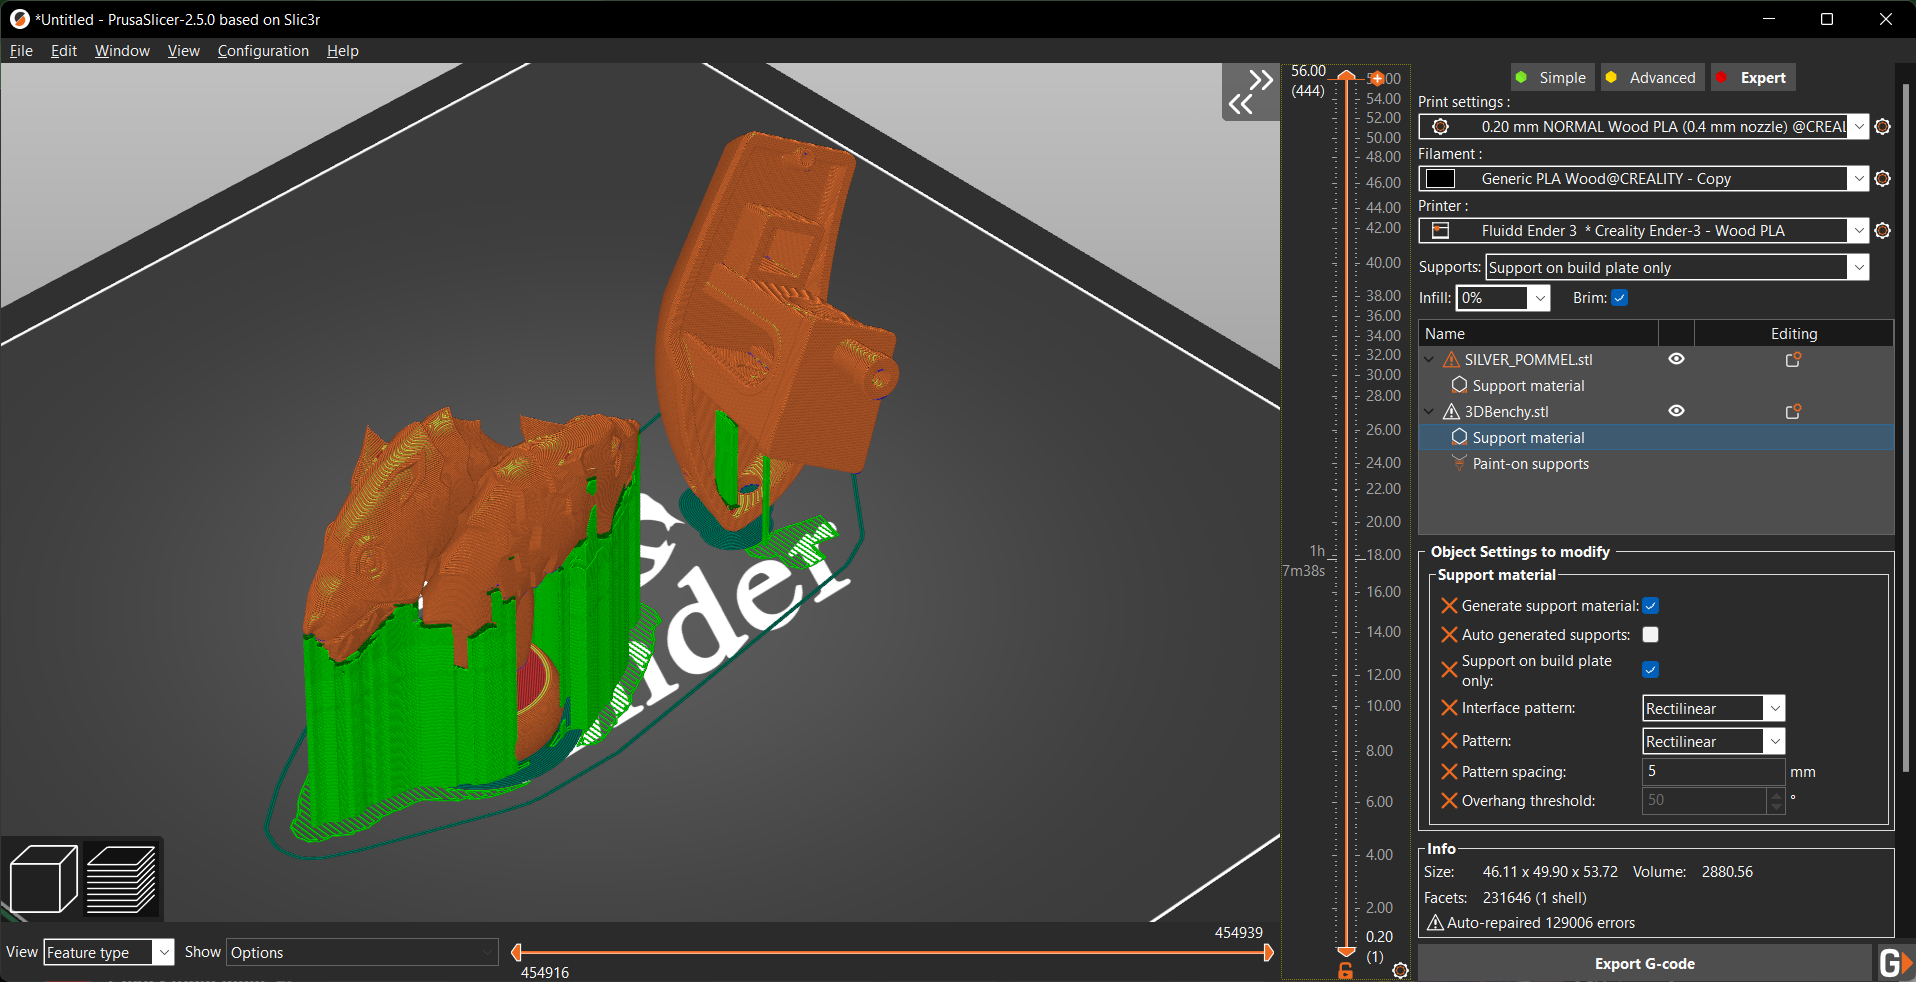
Paint On Support
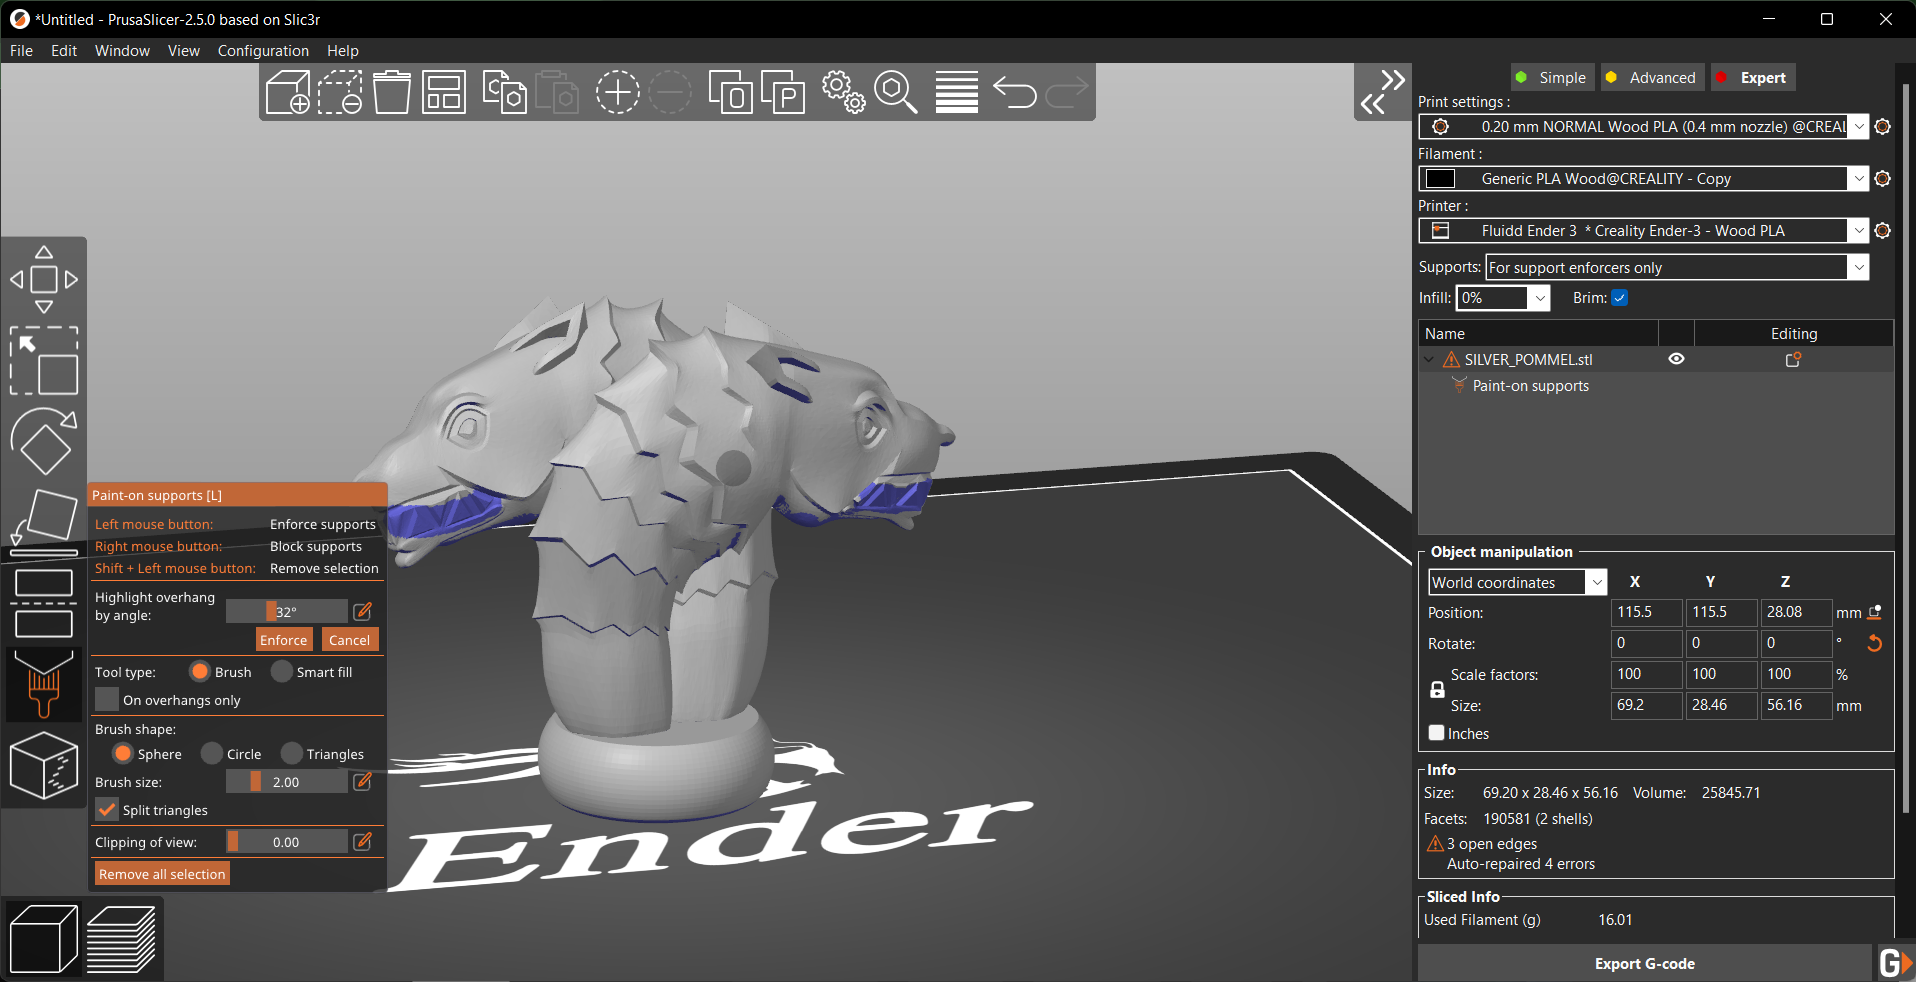
Paint On Supports are highly convenient and let you individually nit-pick your models' support structures for particular overhangs. As the name suggests, you can directly Paint Supports to the model's support, and PrusaSlicer will place support structures solely for these areas.
The Paint On Supports have a slight learning curve, but it's way easier than manually adding support structures and lets you customize the supports for your 3D prints. You can also save these supports as a separate 3MF project file and use it for future projects or when you share your 3D prints.
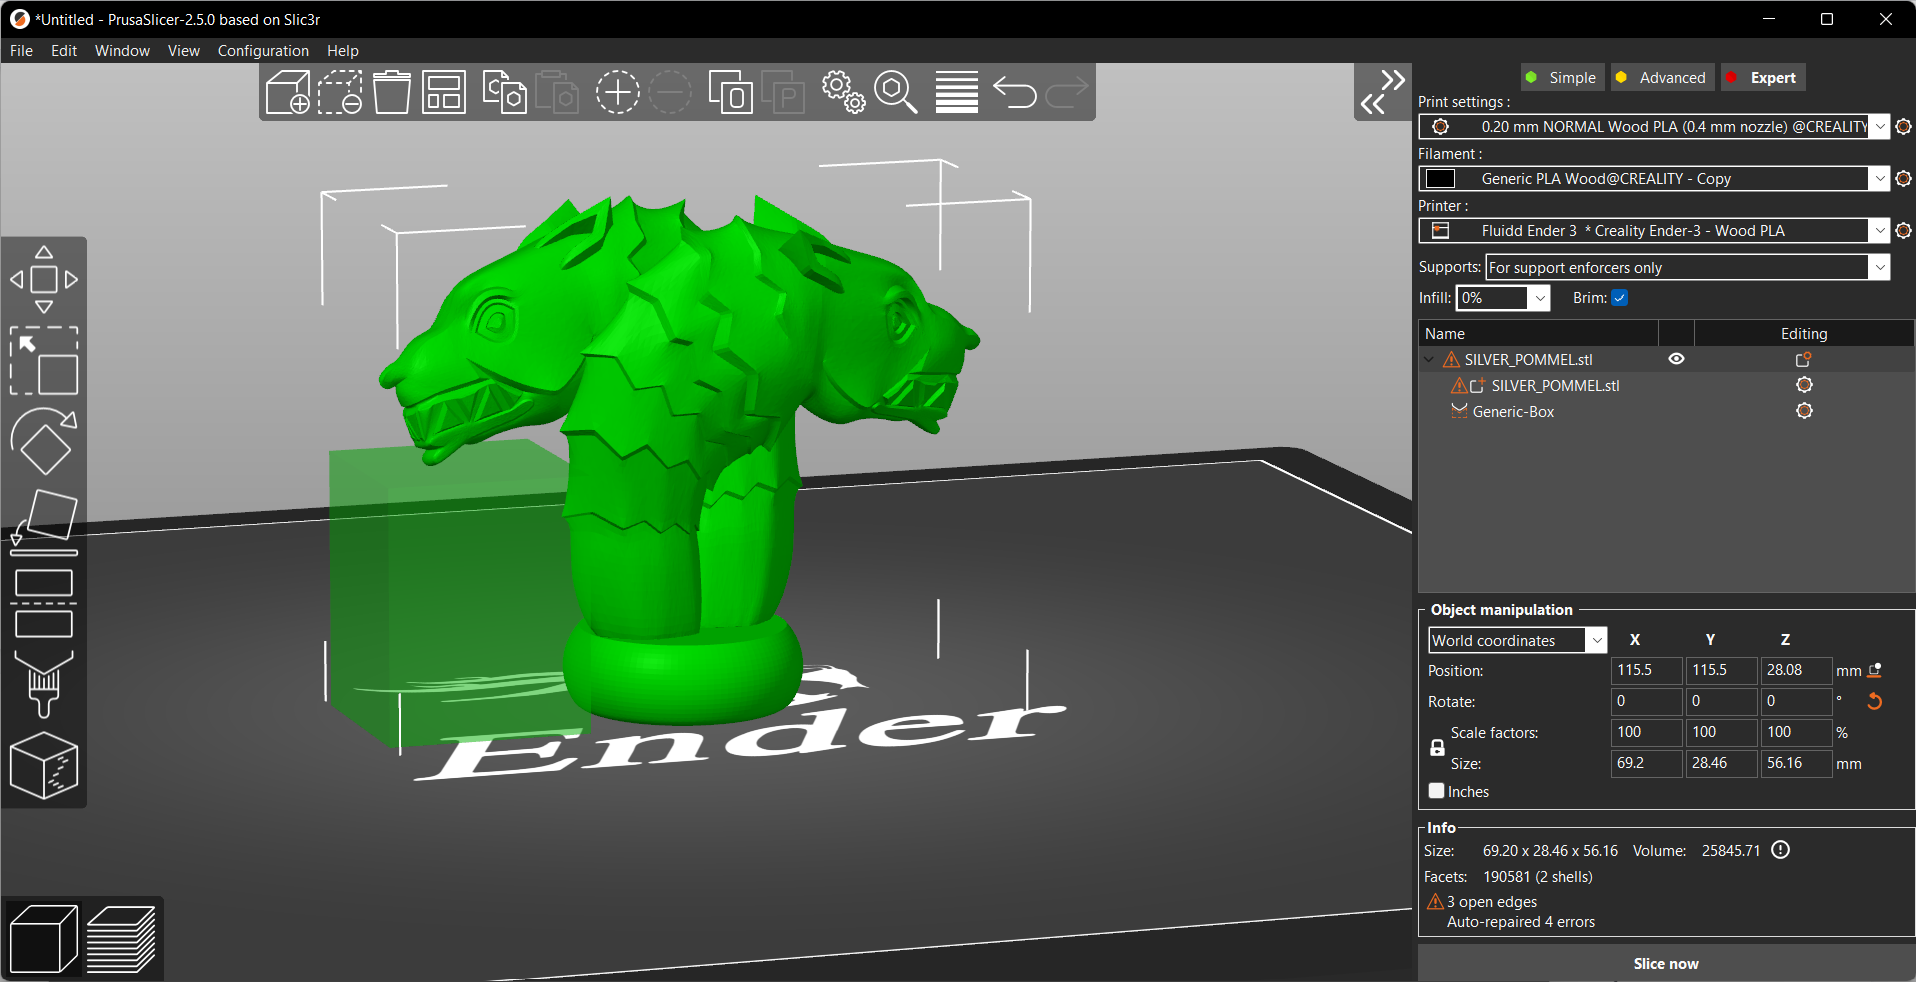
Support Enforcers
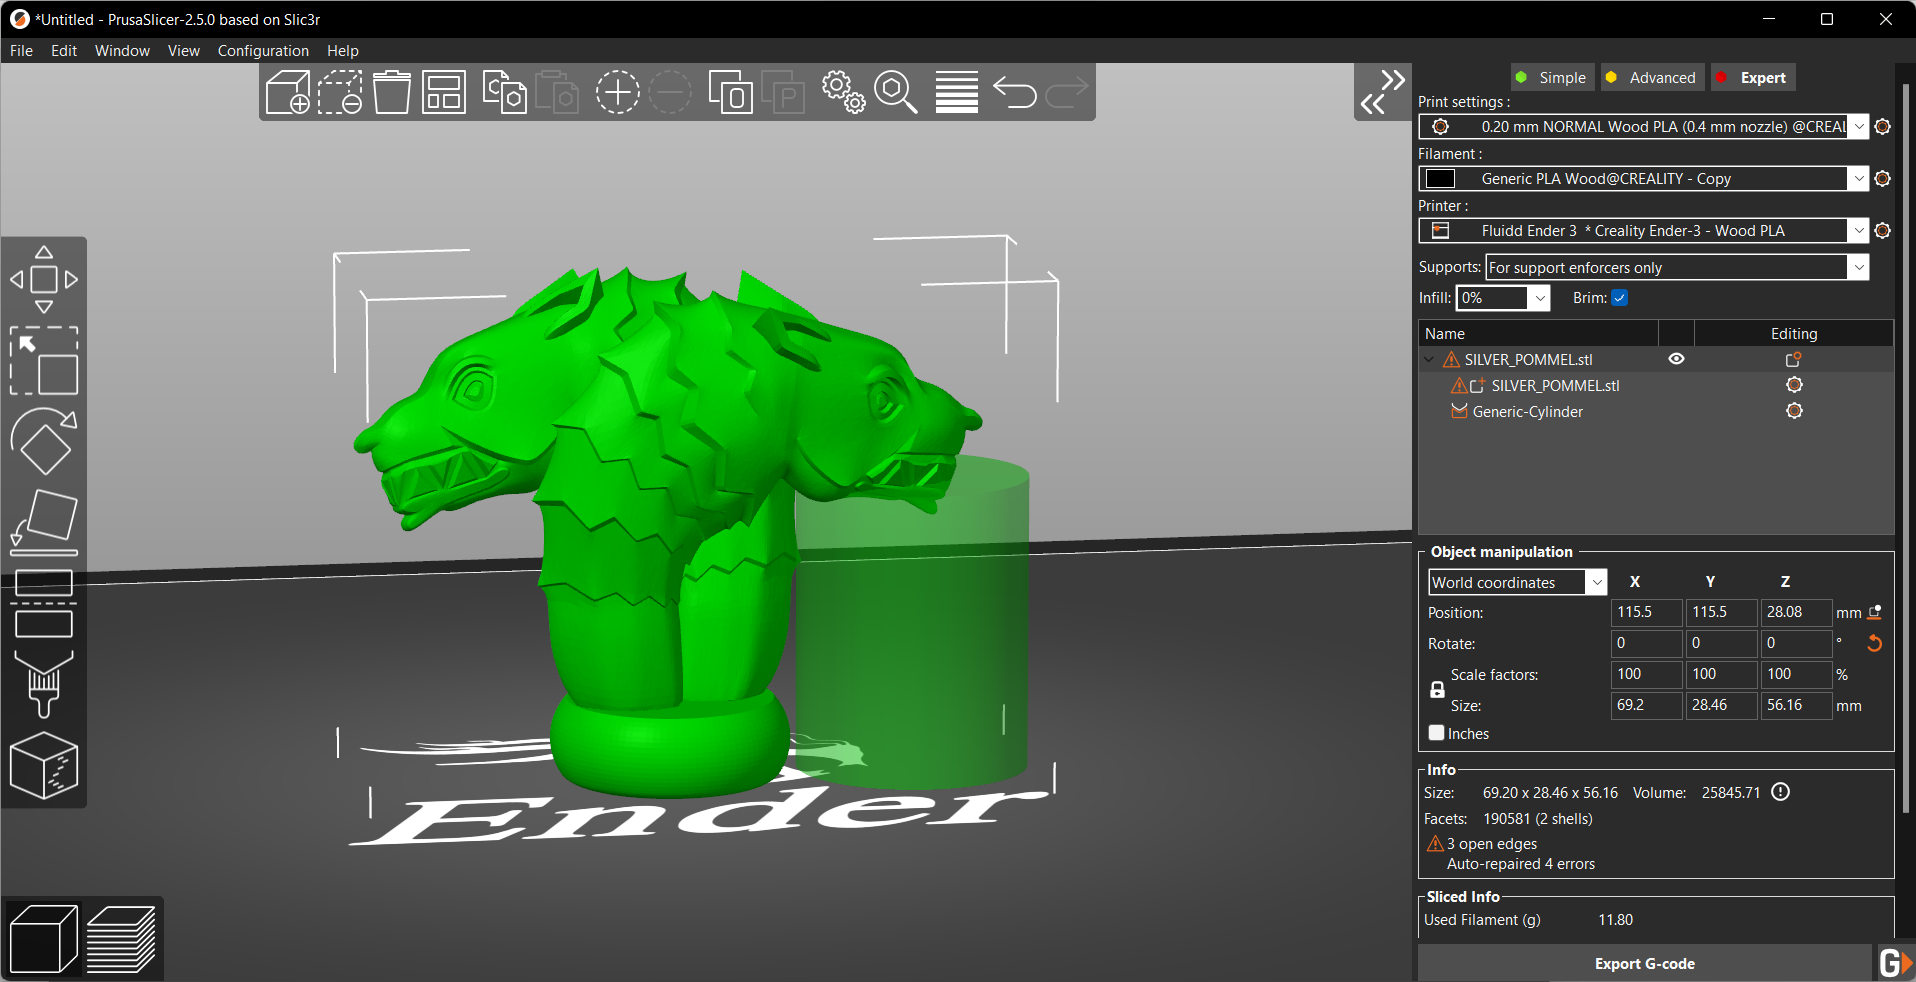
Support Enforcers are predefined shapes you can use as support structures for your models. These are an alternative method to customize the supports for your 3D prints, albeit more effort-intensive than the Paint On Supports.
The default shapes available in PrusaSlicer are Box, Cylinder, Sphere, and Slab, which you can completely customize per your overhangs. Additionally, PrusaSlicer has a gallery of 3D designs that you can use as supports, but they're more models than supports structures.
Nonetheless, they're a great and easy option if you want only a few supports and don't want the automatic supports all over your model. They're also an excellent way to customize easy-to-remove support structures in hard-to-reach areas.
Support Blockers
Support Blockers, as their name suggests, block the support structures in places you don't want them to be. It's a handy tool to optimize your support settings and ensure that your model has support only in selective places, not the entire area.
Using it wisely can save some filament material and print time, further increasing your 3D printing output.
Let's now get on with how you can optimize the support settings in PrusaSlicer to print better quality supports.
PrusaSlicer Support Settings
Overhang Threshold
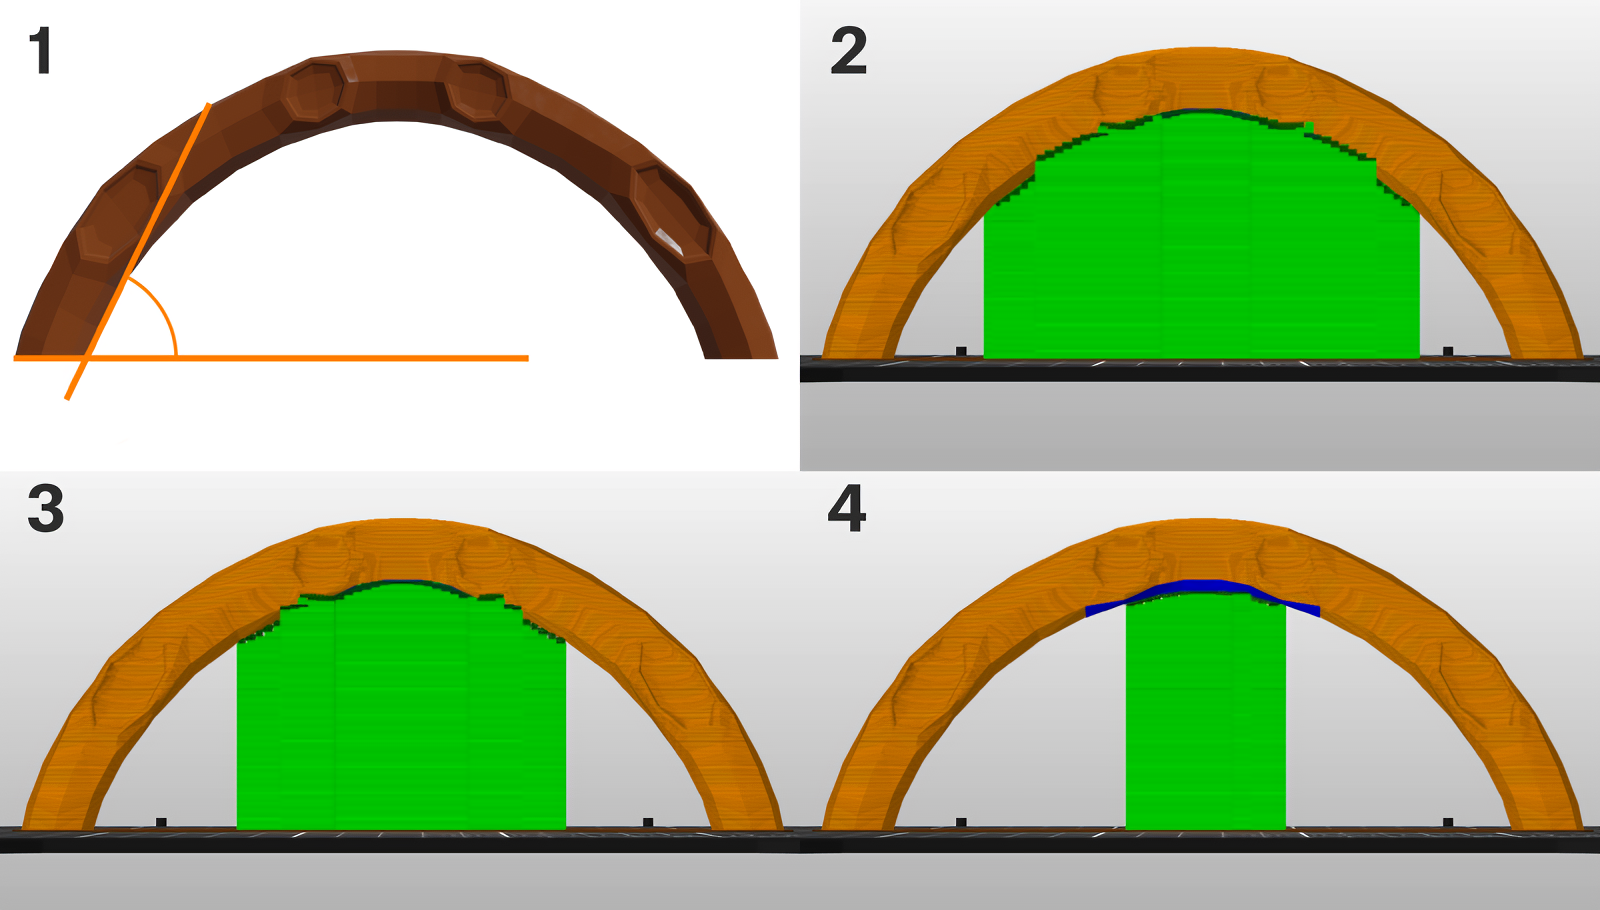
Image Courtesy of Prusa 3D
This setting dictates the minimum angle of overhangs, beyond which PrusaSlicer will generate automatic supports for your 3D models. This value primarily depends on your printing temperature, speeds, and cooling power.
Ideally, you can keep it as high as 55 °C if you have a finely tuned 3D printer. Beyond this value, the overhangs will most likely begin to drool and ruin your print quality.
Support Styles
As of writing this article, PrusaSlicer offers two styles of support structures - Snug and Grid Supports. Both styles are more or less the same but have some subtle differences that affect the support removal process. Let's take a look at both of these structures individually.
Grid Supports
Grid supports are the default style in PrusaSlicer. These are boxy, vertical pillars that neatly support the overhang areas. The boxy pillars stabilize the support structures and make them more stable.
The drawback, however, is that Grid Supports extend beyond the overhangs, increasing the print time and support material. Hence, these are useful only for supporting thin overhang areas, where the stability of support structures is crucial.
Snug Supports
Snug supports are similar to Grid ones, except these don't extend beyond the overhangs but instead conform to the shape of the overhang wall. The result is a clean support structure that hugs the model and reduces filament wastage.
But, small overhang areas such as earlobes and chin in a human figure might have thin support structures which might not be as stable as Grid style. As a result, it's important to carefully inspect the overhangs of your models and choose the support style accordingly.
In our experience, Snug Supports work well and are slightly easier to remove than the Grid structures. Try to experiment with these styles before fixing one for your 3D models.
Pattern Spacing
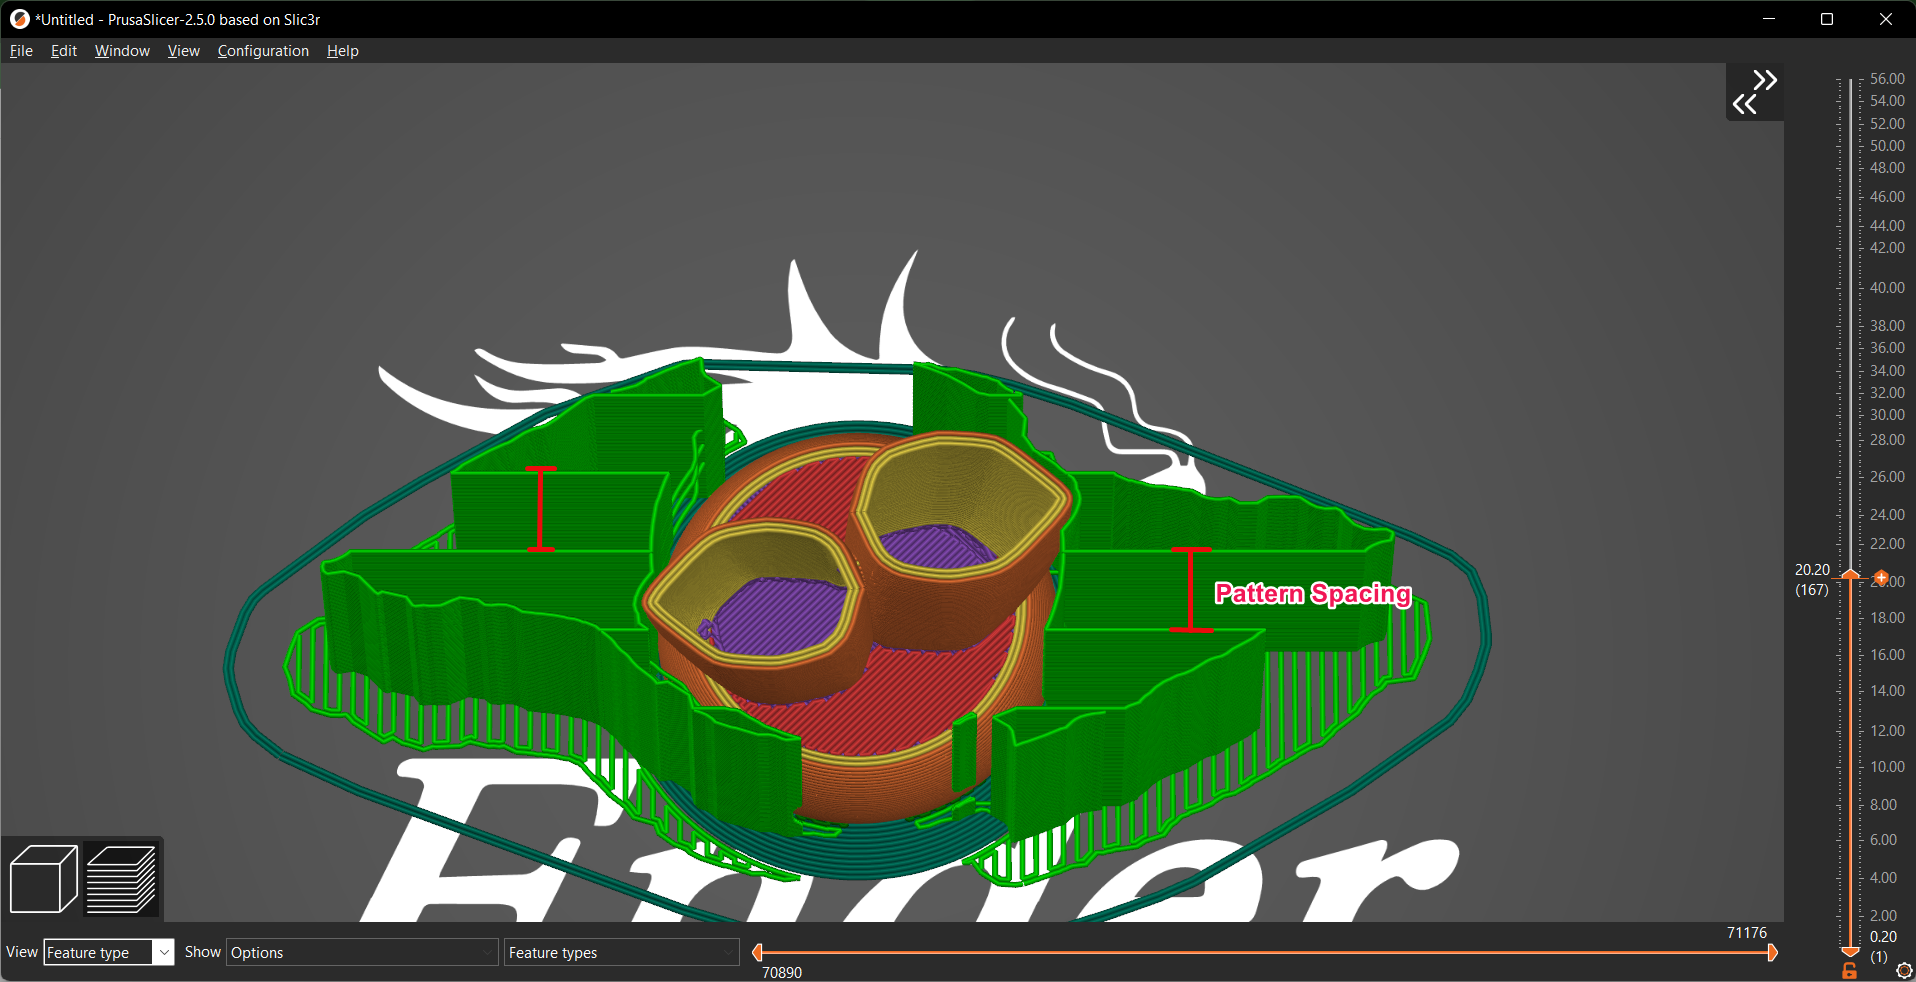
Pattern Spacing is an alternative term for adjusting the density of supports for your 3D prints. This parameter controls the distance between two support pillars that lift your overhang areas.
Reducing the spacing distance brings the support structures closer to one another, resulting in better support for bridges and overhangs. But, it makes support removal a challenging task and increases the print time and material.
In contrast, when you increase the spacing between two pillars, it reduces the density of support structures but makes it easy to remove the supports. However, increase the distance too much and risk sagging in your bridges and weak connections with your layers.
The exact value depends on your particular model geometry, but a good middle point is between 3-6 mm. Try a value between these limits, and then configure the one that best suits your models.
Support Distance
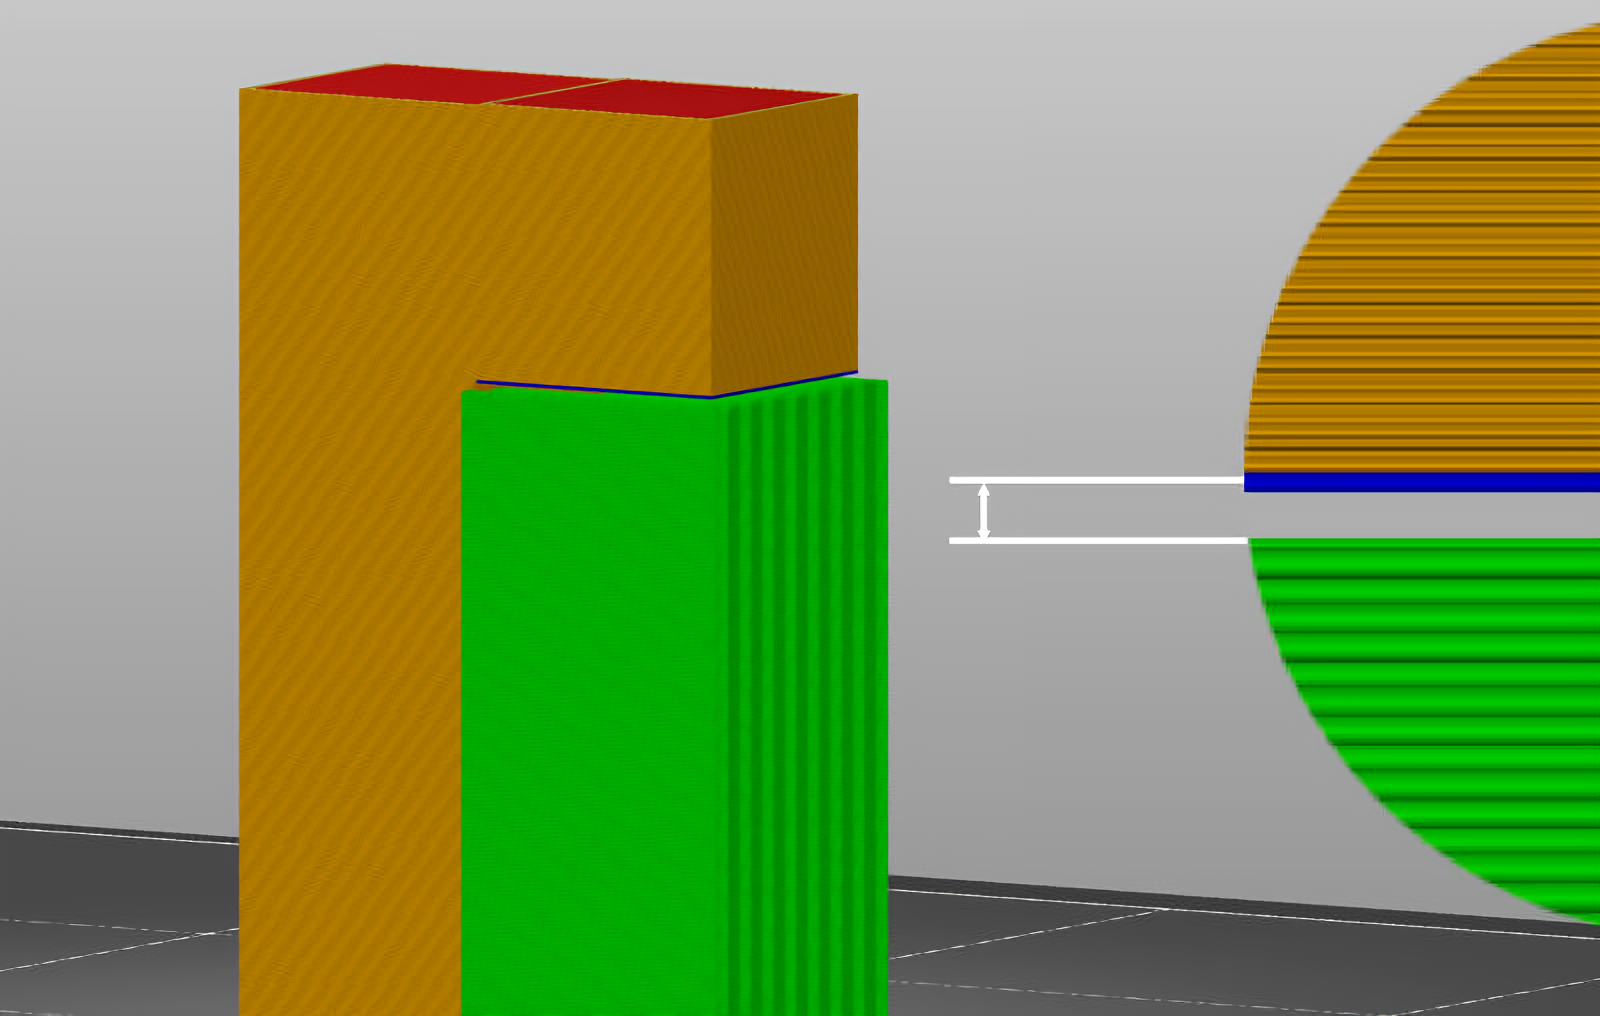
Image Courtesy of Prusa 3D
This parameter adjusts the Support Distance between the 3D print's surface and Support pillars. There are three distance settings that come under this parameter - Top, Bottom, and XY.
Top Contact Z Distance
It's the gap between the top of the support structure and the first layer of your model's overhang area. It highly influences the support removal and surface quality of your supported areas.
A higher Top Z-distance value will make the supports easy to remove. But it can also increase the sagging of your overhang surface. Keeping this distance between 50 - 75% of your layer height will give you the best results and balance the surface quality and removal very well.
Bottom Contact Z-Distance
When your support structure rests on your model's surface, this setting will let you control the distance between the bottom layer of your support pillar and the top of your model's surface.
By adjusting this setting, you can reduce the chances of supports adhering to your print's surface and ensure they come off quickly. Similar to the Top Z-Distance, a value of 50 - 75% of your layer height will ensure a good support structure without affecting your print quality.
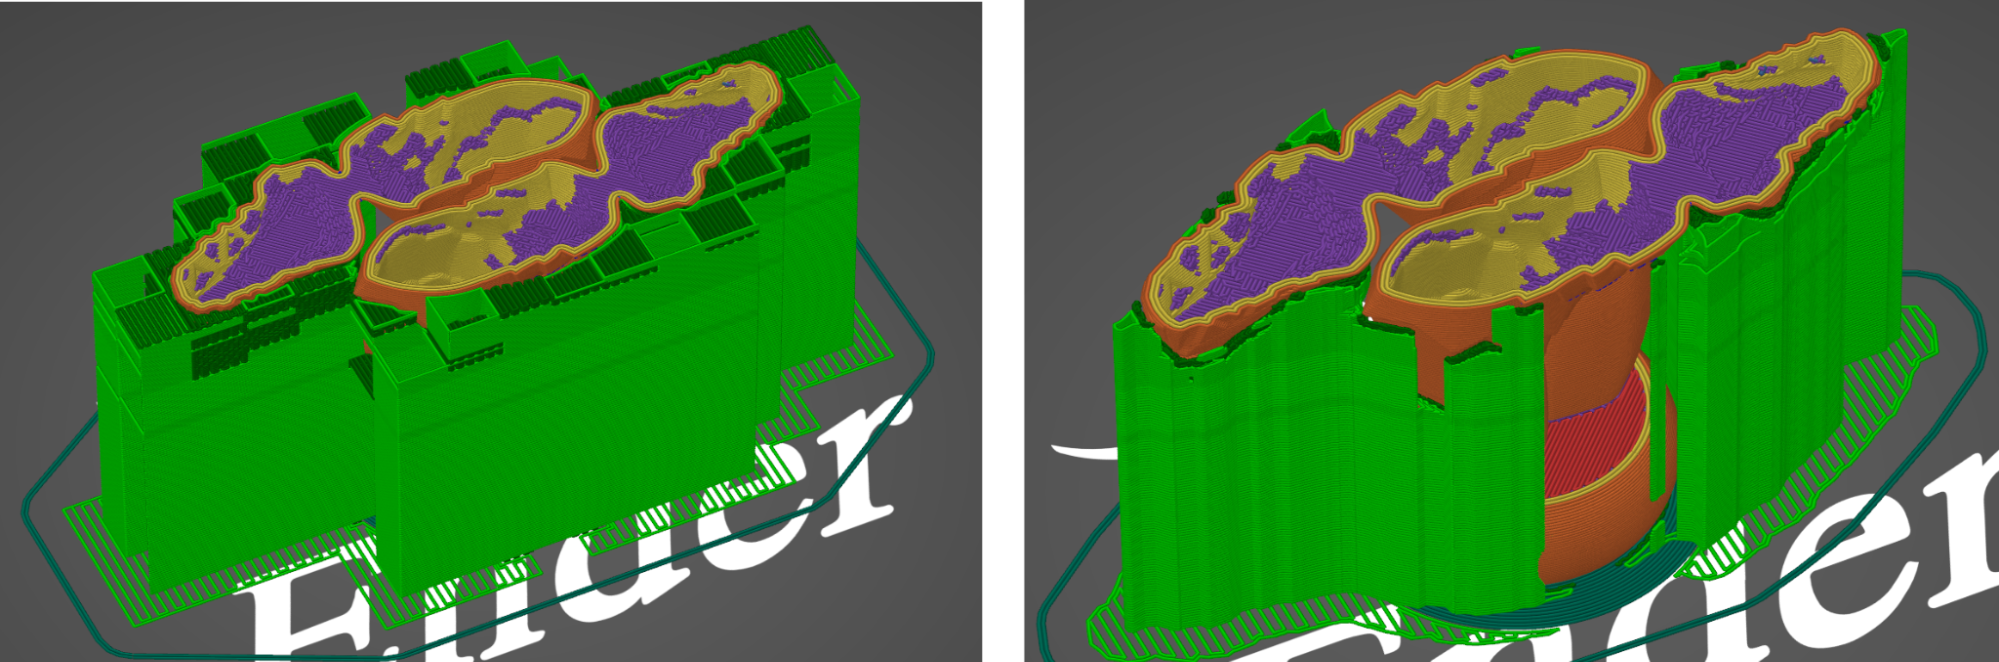
XY Separation Gap
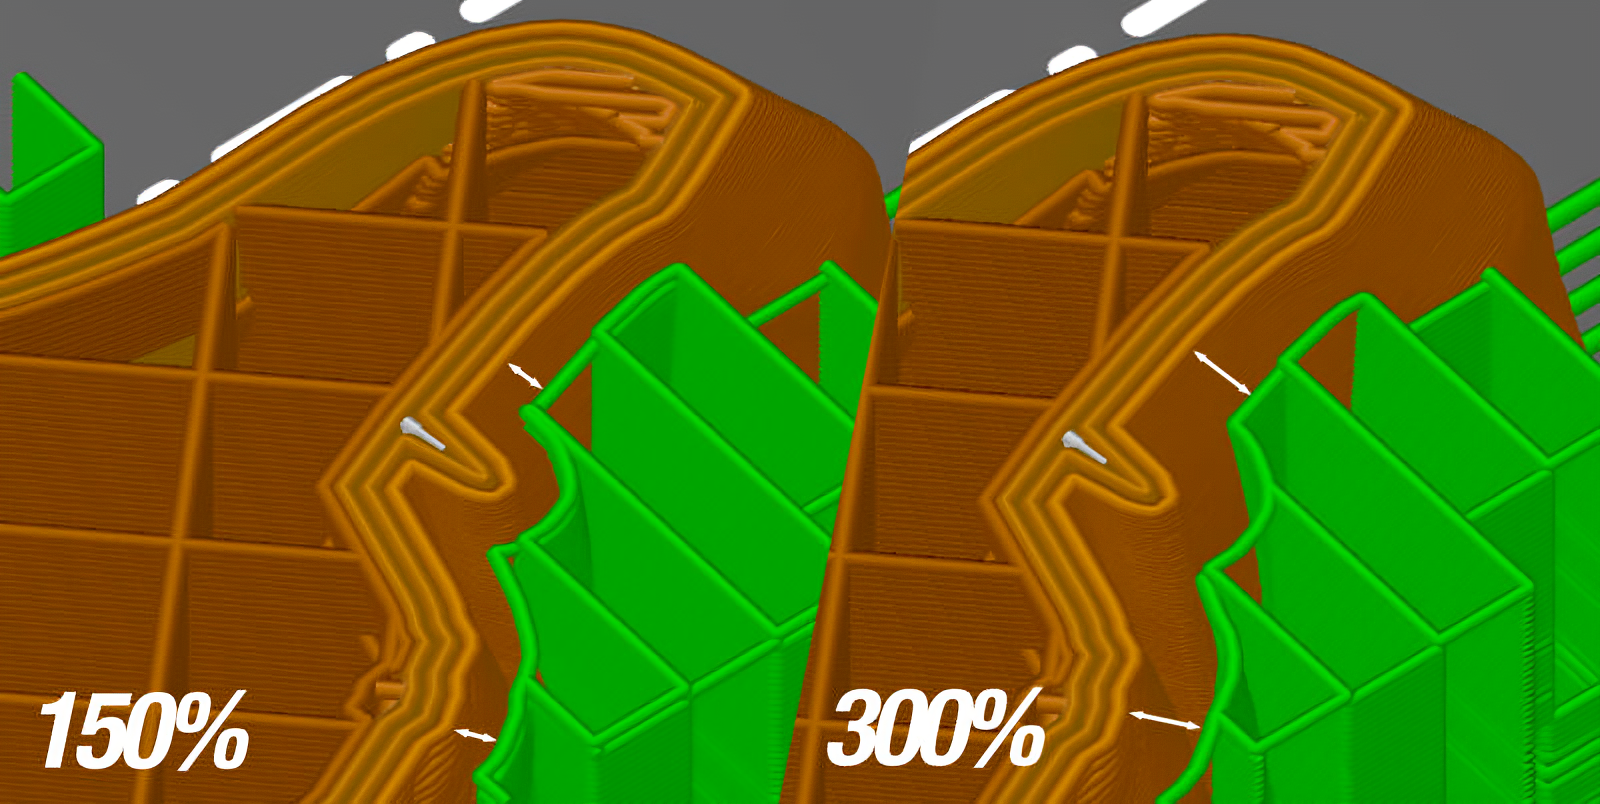
Image Courtesy of Prusa 3D
The XY gap is the horizontal distance between your model's outermost perimeter and the support structures. This setting controls the distance between your model's surface and the support pillars and directly affects the effectiveness of supports in your 3D prints.
The value is calculated as a percentage of your external perimeter width. If you keep it less, your overhangs will have better support, but chances are your supports could fuse with the model. Less distance also makes it difficult to remove the supports, and you risk damaging the model's surface.
If you keep it too high, the contact area between the model and support reduces. But it makes support removal a breeze and reduces the chances of damage to your print's surface.
An ideal value is somewhere between 70-150%. It maintains a good balance between the support contact area for overhangs and the distance of support pillars from the model's surface.
Support Pattern

Support Pattern denotes the structure of your support material. PrusaSlicer offers three support patterns - Rectilinear, Rectilinear Grid, and Honeycomb.
The rectilinear pattern is composed of parallel straight lines connecting and forming the entire support structure. It's the default support type in PrusaSlicer and the easiest to remove. It's also easy to print and reduces the support material used for your 3D print.
The Rectilinear Grid pattern is a slightly better version of the previous pattern. Instead of merely straight lines, this pattern consists of a grid structure that's more stable and rigid than Rectilinear. Supports in a Grid pattern have fewer chances of failure but are often harder to remove.
Lastly, the honeycomb pattern is structurally the solid support pattern in PrusaSlicer. It has a wide coverage and ensures excellent stability throughout the printing process. However, it's the most challenging one to remove and is overkill for most 3D prints.
In our opinion, the default Rectilinear Supports work well for most models. They're easy to configure and remove and print nicely with minimal material.
Interface Layers

Interface layers are dense support layers that form a thick surface between the support pillar and your 3D model. These layers are denser than your support structures and are designed to offer optimal support for your overhangs.
PrusaSlicer allows you to control the number of top and bottom interface layers in your 3D prints. The top interface layers are between the top of your support and the overhang area. On the contrary, the bottom interface layers denote the layers between your model's surface and the bottom of the support pillars.
A higher number of interface layers increases the quality of overhangs but can also make the supports harder to peel away from the model. On the bottom, a higher value will give your supports more stability but might ruin the print's quality.
Two or, at most, three interface layers are great, to begin with and offer significant support surfaces while maintaining the print quality.
These settings cover the majority of parameters you need to understand to optimize your support structures for your 3D prints. Our recommendations are a starting point to help you out, and the final values will depend on your specific model's requirements.
PrusaSlicer Organic Supports
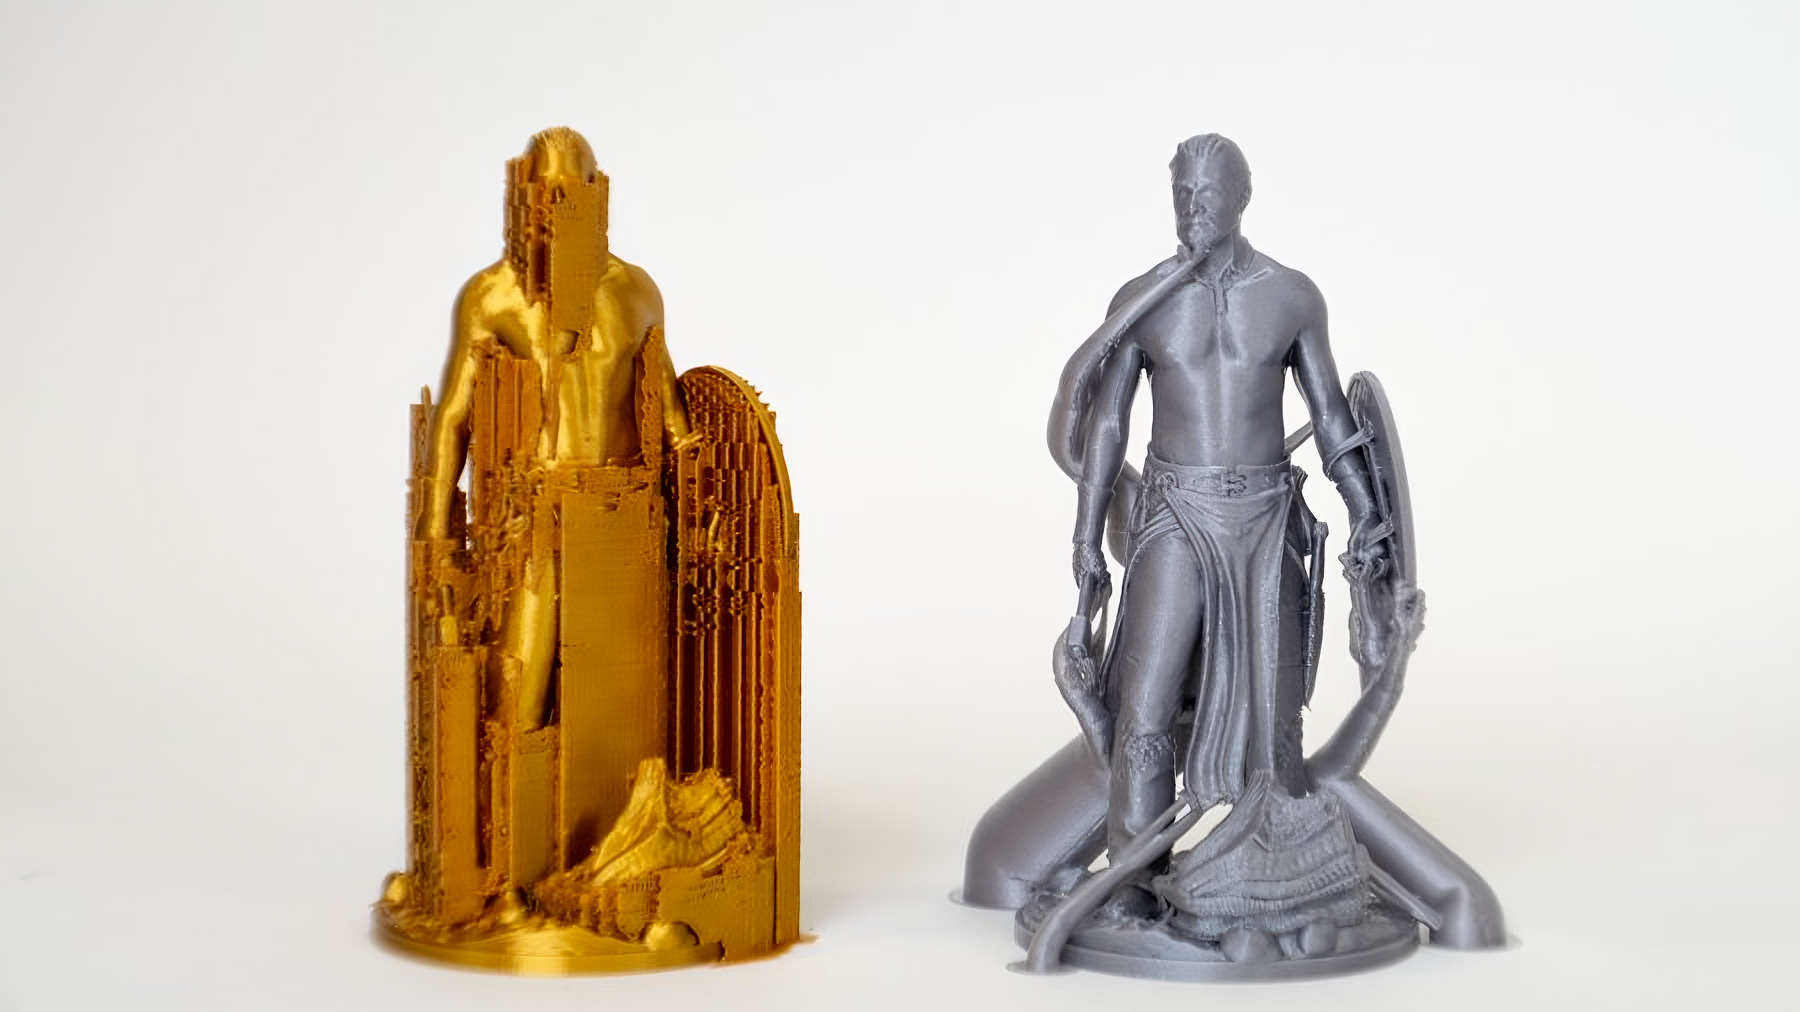
Image Courtesy of Prusa 3D via Twitter
Organic supports might be one of the most awaited features in PrusaSlicer for a long time. These are similar to Cura's Tree Supports, and PrusaSlicer has recently announced that they're currently testing out this functionality for the PrusaSlicer 2.6 release.
There's very little information available regarding this support type, except for a recent tweet by Josef Prusa and a brief video proof in a YouTube interview. There's also a Reddit post about these Organic supports getting popular on the Internet that showcases a 3DBenchy supported via Organic Supports.
The public beta of the PrusaSlicer 2.6 update is still not available, but it should be released before the end of 2022. We're eager to see how these organic supports fare against Cura's tree supports and help improve your 'Supports experience.'
Final Thoughts
PrusaSlicer supports offer great flexibility and many options to customize every aspect of support structures for your models. They allow you to 3D print intricate designs easily while maintaining the print quality of your 3D printed parts.
We hope this guide serves you well in configuring support for your models in PrusaSlicer. While it's not a definitive guide, it's a good reference article that you can refer to and learn more about supports in PrusaSlicer.
Let us know your experience using these settings, and if there's anything else you'd like to add, feel free to comment below.
Till then, Happy 3D Printing!
Related Articles:
Get Started with Free 3D Printer Remote Monitoring and Control from Anywhere
Monitoring and Controling Your 3D Printer Remotely