Best 3D Printer Upgrades for 2022

Would you like to upgrade your 3D printer? There are several modifications you can make to your 3D printer to transform it into an impressive machine. These modifications apply to the hardware, software, and firmware features of the 3D printer. The beauty of it is some of these modifications can be 3D-printed directly at home. Others can be purchased and mounted on your 3D printer to improve specific aspects of your 3D printing activities.
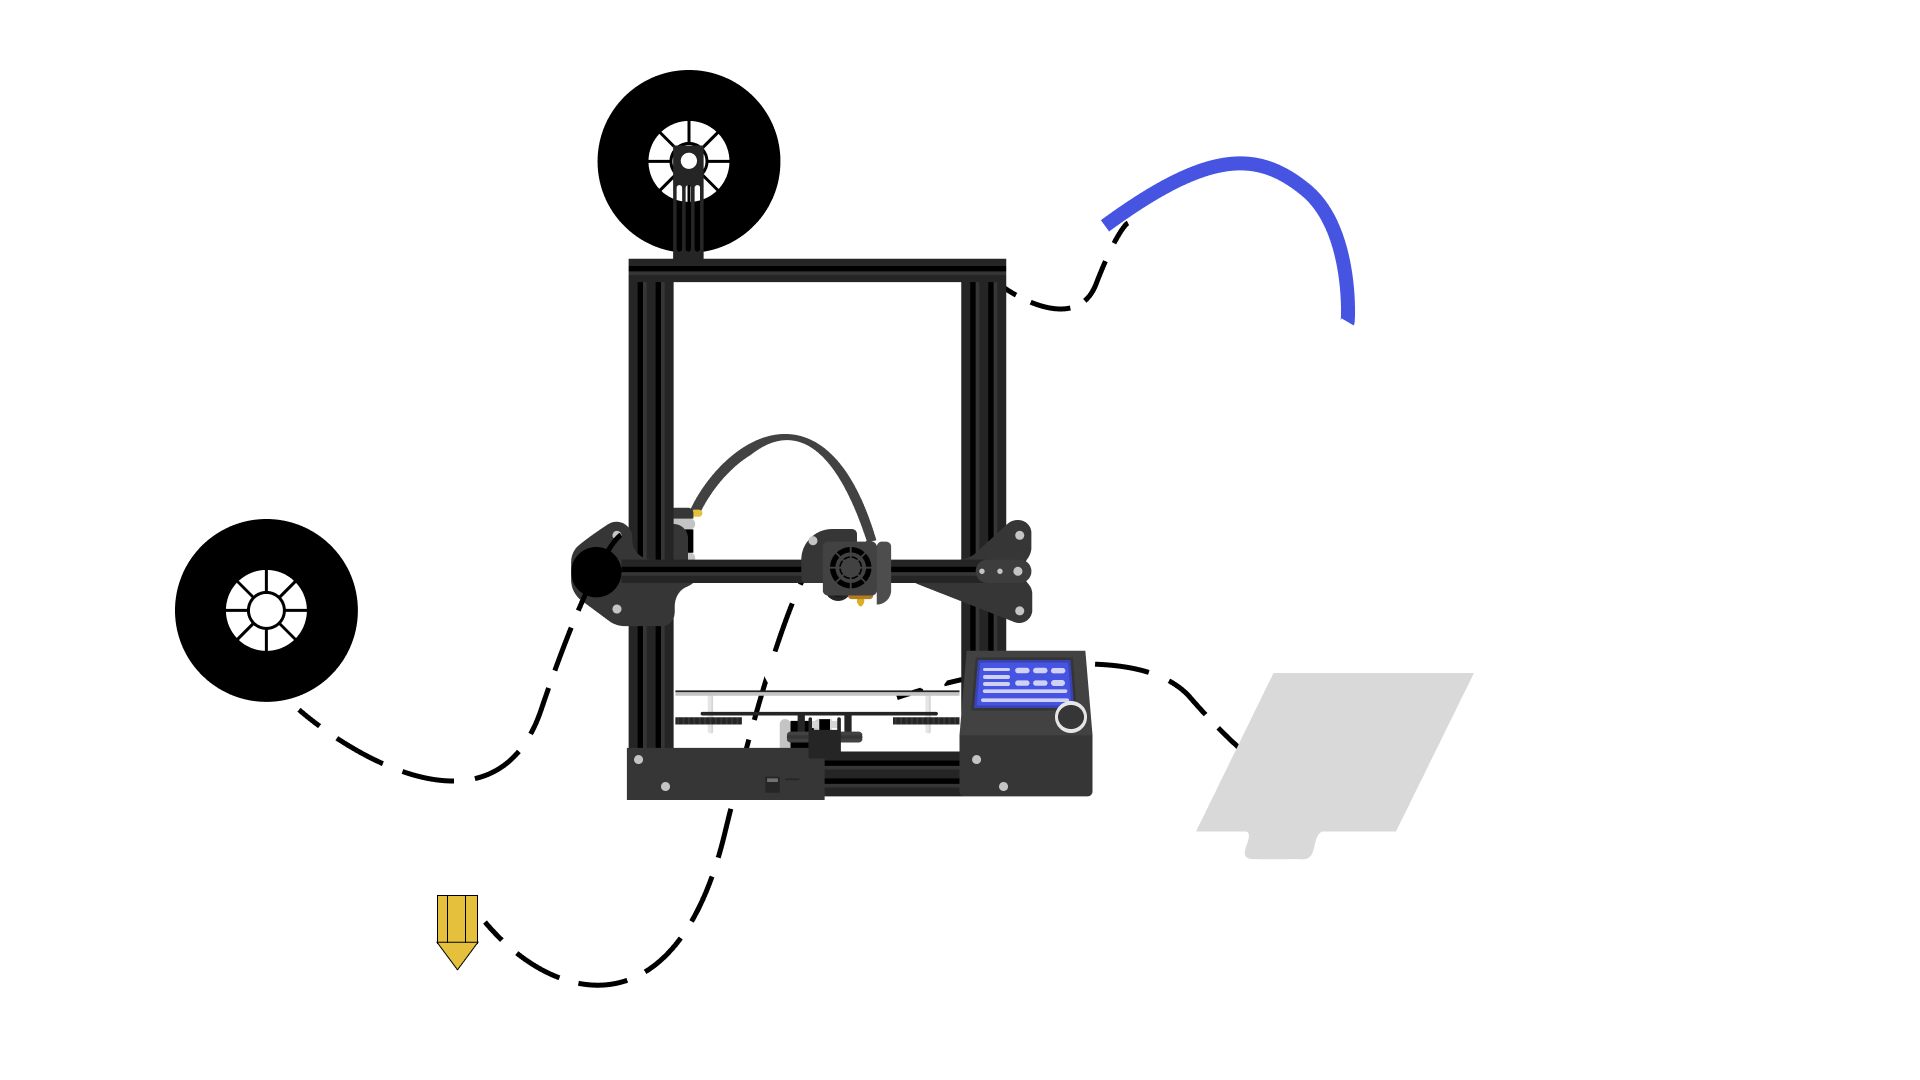
We have compiled the best of these upgrades and modifications for the 3D printer in the list below. From a brand new automatic bed levelling sensor to a simple 3D printable extruder, you won't recognize your 3D printer once you're done with these upgrades. Unlike these Ender 3 upgrades, which are for a specific model, note that this is a general guide for various 3D printer upgrades that can help improve 3D printing quality and user experience. It isn't for any specific printer and will generally apply to most open-source 3D printers on the market.
When and Why Should You Upgrade Your 3D Printer?
You should upgrade your 3D printer if, first, the stock firmware has some issues. You may also need to do this to make the printer faster, more accurate, and effective with its function. Upgrading the 3D printer is also done to protect the machine, user, the printed objects and make it easier to use.
But 3D machine upgrades and modifications are best left to the pros. If you're a new beginner, we recommend not doing a bunch of hardware upgrades. Instead, take some time to get to know the machine. Often, people do too many upgrades when first starting, but they don't understand why they are doing them or if they are even necessary at all.
You need to know the machine, its strengths, and its weaknesses. You should not necessarily upgrade when unsure what the problem is, as it is easy to misdiagnose issues this way.
Best 3D Printer Upgrades
There are many upgrades and improvements for the 3D printer that you can print out yourself. However, for most of them, it will be necessary to buy them. In this section, we have listed the essential components, software, and firmware that will improve both your 3D printer and the quality of the prints.
Hardware upgrades
1. Automatic Bed Leveling Sensors
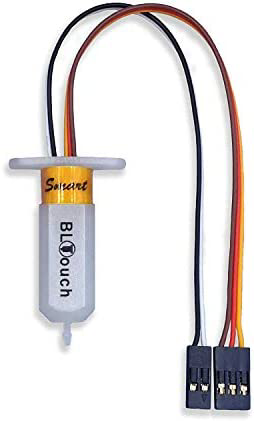
Automatic bed leveling is a feature that significantly increases user-friendliness. Any 3D printer user who has ever had to calibrate their machine manually knows how handy an auto-leveling sensor can be. Manual calibration is often particularly tedious. And once completed, the slightest imbalance will cause immense frustration.
So why not add an auto-leveling sensor to your 3D printer? This upgrade to the 3D printer is available for under $20; it will save you so much time.
There are several factors you will need to consider before jumping into the purchase of an auto-leveling sensor. Some, like the BL Touch , are more expensive, but they're much better than inductive sensors if you use a glass print bed. If you've kept the basic print bed that came with your 3D printer, a lower-end sensor may well be more effective.
2. Solid Bed Mounts
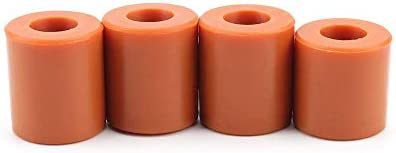
Leveling the heat bed with silicone mounts like the FYSETC Solid Bed Mounts helps to reduce vibration, unlike solid plastic. Once set, these leveling bed mounts can't go anywhere.
The solid print bed holders are made for CR-10 and Ender 3 3D printers. They can replace springs found beneath your printer's heated bed. The silicone buffers replace the original springs on your heated bed.
3. A New Extruder
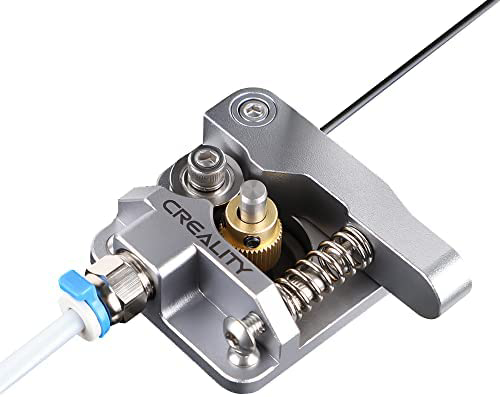
The extruder is the printing part of a printer. Here, the filament is melted and extruded. Getting a new one allows better control of the extruded materials. However, there are two types of extruders:
Direct-drive extruder
With a direct extruder, all components are located directly on the print head, which means that extrusion is even and cleaner.
The advantage of this variant is the short distance from the feed to the nozzle. As a result, the reaction path during extrusion and the retraction (retraction of the filament) is very short.
Again, with direct drive extruders, there's faster and more precise extrusion. There are very large filament selections - ideal for flexible filaments.
3D printers with direct extrusion include Creality CR-10 V3, the Prusa i3 MK3S+, and Anycubic Kobra. There's also the E3D Titan extruder which reduces the risk of clogging. According to E3D, the Titan extruder has a gear with custom-machined cogwheels to better grip the filaments. The particularly lightweight nature of this kit allows for more torque and better resolution for printing.
Bowden extruder
With the Bowden extruder, the filament is fed into the extruder on the frame of the 3D printer through a PTFE tube. Due to the longer path to the extruder, the feed with Bowden extruders is slower and delayed.
The same applies to the retraction, which is why the correct adjustment of the retraction is essential. If the settings for the retraction were not made correctly on the Bowden extruder, unsightly after-running from the nozzle could occur during printing.
The advantages of Bowden extruders, however, include clean movements due to the lower weight of the extruder. They're also easier to maintain. You can use them for larger construction volumes due to the smaller extruder.
However, the downside of Bowden extruders is that many filaments cannot be processed through the PTFE hose. There's also a longer response time during extrusion and retraction.
Some of the best 3D printers that use a Bowden extruder include the Elegoo Neptune 2S, Prusa Mini+, and the Ender 3 series from Creality.
4. Nozzle

Depending on the model and requirements, changing the nozzle can be extremely worthwhile. A lot of printing time can be saved with larger nozzles without losing much quality. Switching to a small nozzle can give a highly detailed model the finishing touch.
The type
Due to their thermal conductivity and ease of manufacture, brass nozzles are the most common. They are suitable for all non-abrasive filaments but wear out the fastest. So it's better to change them with other types of nozzles.
Stainless steel nozzles are durable with less wear. They are ideal for abrasive filaments such as wood, metal, or glow-in-the-dark filaments. Because of the poor thermal conductivity, the nozzle temperature should be increased during printing.
A2 steel nozzles are also very hard and wear-resistant nozzles, similar to stainless steel nozzles. However, the nozzles are not protected against corrosion and can rust easily. However, there are no quality defects!
The professional nozzles from Micro Swiss are provided with a non-stick coating and are extremely robust and wear-resistant. They have a very smooth extrusion and are suitable for professional environments. Furthermore, they are manufactured to a very high standard and have very low tolerances.
The size
The gold standard at the moment is the 0.4mm nozzle that most 3D printers come with from the factory. These offer a good balance between resolution, level of detail, and speed. Simply the perfect compromise.
Smaller nozzles are ideal for models with very fine and delicate details. Small lettering and numbers can be printed perfectly. The print resolution is also higher, particularly with jewelry and organic 3D models.
Despite the finer printing detail, the small nozzles have a few disadvantages, which is why these sizes are only used for certain models, such as small figures.
The printing time is considerably longer than with a 0.4mm standard nozzle. In addition, the risk of clogging the nozzle is much higher, and some filaments (e.g., with particles) are not compatible with small nozzles.
5. Hot End
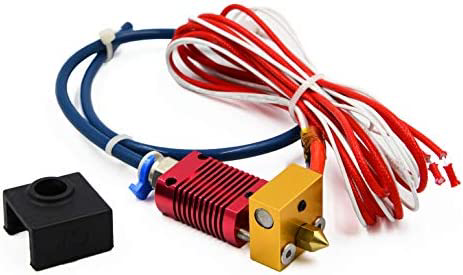
The hotend consists of the heating block, the heating cartridge, and the nozzle. In the hotend, the filament is melted and extruded through the nozzle. Most problems with extruders are often related to the hotend and are noticeable by clicking, crunching or grinding sound on the extruder.
A bad hotend could also get clogged. And a clogged hotend can cause filament jams and the extruder can spin or block.
So, besides switching to a new extruder, you can also get a hot end like the E3D v6 hotend. Made of metal, this will guarantee more reliability during your 3D prints at high temperatures.
Another advantage of v6 is that it is fully customizable and compatible with the rest of the E3D ecosystem. This upgrade of the 3D printer goes perfectly with the Titan extruder.
Interestingly, you can find an E3D v6 clone for a much lower price, but how well this replica performs compared to the original hotend is yet to be seen. The v6 hotend is an essential upgrade if you want to take your 3D printer to the next level.
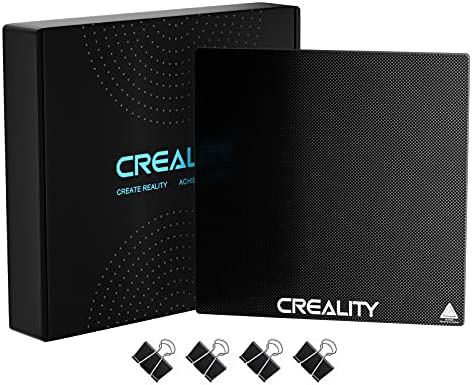
6. New Build Plate
If you had asked us 3 years ago which 3D printing bed we would recommend as an upgrade print bed, we would have said glass bed. But now we're not so sure anymore. The progress in 3D printer development is truly amazing. Today you have a wide choice between PC spring steel sheet, PEI plate, carborundum glass, or the good old flexible magnetic construction plate. But what is the best surface for a 3D print bed?
- Magnetic Plate
Magnetic plates were once the most popular 3D printing beds. With a magnetic plate for 3D printers, you don't need clippers or additional accessories to create a great 3D print. These print beds stick to the frame with the help of magnetic force. Suitable with PLA and SILK, these panels adhere extremely well, but we still recommend using Dimafix Spray or 3dlac. These sprays will help the first few layers stick firmly to the bed while making removing them easier once the 3D model has cooled. You usually need a spatula for this, or you can bend the plate a bit so that the model comes loose.
One of the downsides is durability; the heat can affect the magnetism of the platform. Also, using a spatula or removing it will damage the print bed. Almost every use leaves a scratch on the surface. This magnetic platform is easy to clean using alcohol or acetone.
- Carborundum glass print bed
If we had to compare the magnetic board with the glass bed, we would prefer glass because of the durability and the sturdy, dense and cheap material. Carborundum glass is smooth and flat. And when the glass is about 3-4mm thick, you can easily heat it to 150-400 degrees. It has a nanomolecular coating that appears very viscous after heating.
Again, we recommend using Dimafix or 3dlac to make it easier to remove the 3D model. Because of its strength and rigidity, the lifespan of a glass bed is longer than that of a magnetic board. In addition to the spray, you must use clips and a spatula when removing the 3D model.
- Removable PC spring steel plate
The magnetic PC plate is much stronger and more resilient than the old magnetic plate that comes with the Ender 3 PRO, for example. It can withstand higher temperatures and is more flexible.
In addition, it is detachable and sticks very well to magnets. It goes great with PLA, PETG, ASA, TPU, PEEK, ABS, and other filaments. In addition, no tape, spray, or spatula is required with this panel. The filament is easy to attach to the printing surface, and finished prints can easily detach by slightly bending the plate. The PC spring plate is included in the Ender 3v2 NEO, Ender 3 S1, and Ender 3 S1 Plus.
- Flexible PEI steel sheet
We've decided to keep the best for the last. PEI stands for Polyetherimide, a surface used for all filament types on a heated or unheated print bed. This platform does not need any additional clips, sprays, or spatulas. Removing 3D prints has never been so easy! In addition, no surface preparation is required either, making this 3D printer platform the most practical of all.
The latest Creality printers like the CR-10 Smart Pro and the Ender 3 S1 PRO already have the PEI plate integrated.
If we compare the PEI magnetic sheet with the classic magnetic sheet, you'll see a difference in the surface and how the sheets are put together. Magnetic sheets have magnets on both sides, while PEI sheet consists of two parts; first need to fix the sticky part on the aluminum bed and then put the PEI magnetic sheet on it. The protective film is then removed.
- BuildTak surface
BuildTak is a thin but durable plastic film that adheres to the build plate of FDM/FFM 3D printers. BuildTak is made of several quality, heat-resistant materials: to remove it cleanly and easily, just use the BuildTak spatula.
The surface of the BuildTak adheres perfectly to the tray and the object, thus minimizing the risk of deformation (warping).
BuildTak works great with various materials, like PLA, ABS, wood, PET, rubber bands, etc. No pre-treatment is necessary (application of a fixing lacquer, etc.). Also, it is easy to install, clean to peel, and leaves no adhesive residue. When well-maintained, it can be used for many prints. There is an optimal adhesion between the object and the print bed.
7. 3D printer fans and shrouds
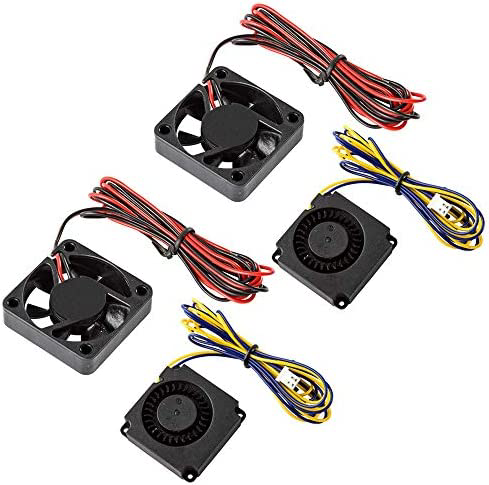
The 3D printer fans allow the machine to cool the components of your printer to avoid overheating. Improving part cooling can increase printing quality and speed. If you notice an unpleasant odor from your device, change the fan as soon as possible before worse damages occur.
When the temperature rises, the components may burn out, and the printer becomes unusable. The 3D printer needs fans in multiple areas. Some of the most common fans used for modification works include hotend fans, part cooling fans, PSU, and main board fans.
However, these fans can make the machine noisier. But this is where fan shrouds can help. They're like a casing for managing air flow and shielding the fans from making noise.
8. 3D Printer Enclosure
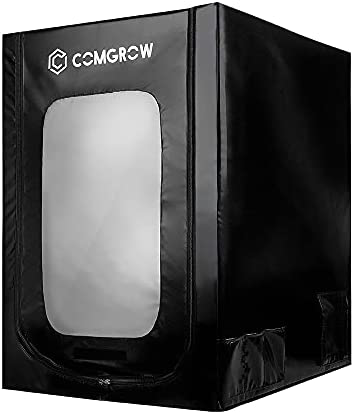
Does the constant buzzing and beeping of your 3D printer bother you? Are you tired of dust constantly soiling the guides of the 3D printer and tired of the stench of some filaments? Do you want uniform ambient temperature to minimize warping of your 3D printed parts? Then it's time to build or buy a 3D printer enclosure!
Almost all commercially available desktop FDM/FFF 3D printers are in an open design. The advantage is that they can be produced cheaply for replacements and upgrades. Also, there is less noise, fewer odors, no dust on the 3D printer, and less warping
Another advantage of 3D printer housings is the higher and, above all, more stable ambient temperature. This improves the printing result and reduces the distortion (warping) of the components.
9. Replace the Motherboard
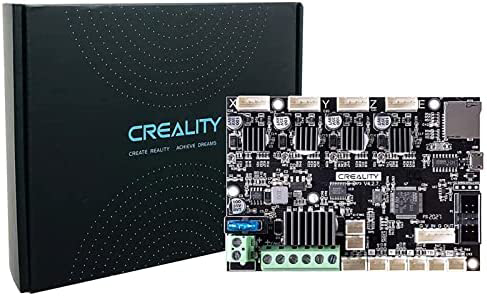
There are also replacement motherboards for 3D printers on the market. An example is the Creality Motherboard V1.15. This is designed for more 3D printers and is compatible with the Ender 5, CR-10, Ender 3, and Ender 3 Pro. As the name suggests, the Creality motherboard is designed to help your 3D printer emit minimal noise.
Add a MOSFET
Buying a MOSFET is one of the most important upgrades you can make to your 3D printer. Among the thriving community of 3D printer enthusiasts on the internet, many are concerned about the fire hazards of some 3D printers, which is why many users consider adding a MOSFET.
The MOSFET will reduce the risk of the motherboard overheating and ensure that it does not take too much pressure. This upgrade of the 3D printer would minimize the fire risk and provide better voltage for the motors.
You can add a MOSFET to the CR-10S or the Anet A8. Adding a MOSFET is especially important if you're printing with ABS, as this filament typically requires higher temperatures for the build plate and extrusion. But even when sticking to low-temperature materials for your 3D prints, such as PLA, it's still a good idea to ensure your heated bed isn't overloading your motherboard.
In addition to the safety benefits, the MOSFET also allows users to add a second power supply, dramatically reducing the time it takes for your heated bed to reach temperature.
10. Filament runout Sensor
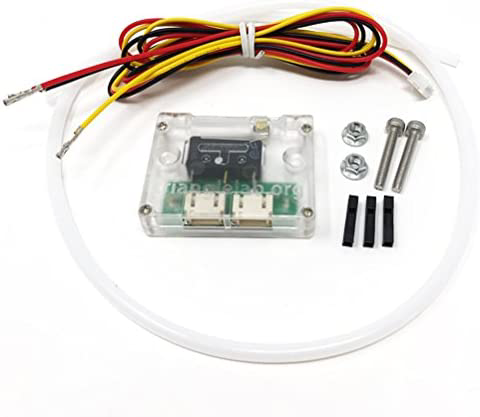
In practice, the end of filament detector is a simple switch. When the extruder pulls the wire, and it disappears, the switchblade jumps and triggers the control. Everything can be connected to a Raspberry Pi. The computer interprets this data via a plug-in in Octoprint to automatically pause the print.
When starting a large-size print, you may run out of filament before the print is finished. Without the end of filament detector, the printer then continues to print in a vacuum, and it is not possible to recover the print.
With a filament runout sensor, there's no more weighing your spools to know if you have enough filament left to make an impression.
You no longer have to stay behind your printer to know when to change your spool. The end of filament sensor takes care of it! It senses when you're out of filament and pauses your printer so you can switch easily
11. Exotic Materials
Some exotic materials can provide exotic print jobs. Most of these include printing filaments, of course.
CX5: A 3D printing filament for sculpt jobs
American studio specializing in traditional sculpture, Adam Beane Industries, has imagined a revolutionary filament allowing the user to sculpt his objects with 3D printing. Made from sculpting waxes called Cx5 and Cx5s, the filament behaves like clay when heated. A temperature of around 50°C is sufficient to make the material malleable.
FILAMET: To print pure metal objects
Filamet is a metallic filament developed by the American start-up " The Virtual Foundry ". This new material has a very high metal powder content, i.e., 88% compared to 40% on average for other metal filaments on the market.
The innovation lies in its ability to print objects in 99% pure metal. To achieve this result, all you have to do is put the prints in the oven. The binder then evaporates under the effect of the heat, giving way to the metal, which fuses and hardens. Filamet is available in the form of copper and bronze filaments.
ENTWINED: A hemp-based filament
Although often associated with cannabis and its psychotropic effects, hemp is used in many fields, such as textiles, food, and cosmetics. Like these numerous applications, the American manufacturer 3DOM has imagined an amazing hemp-based filament.
Called Entwined (entangled), this new exotic material developed in partnership with the company c2renew, makes it possible to print with beautiful brown color with several shades of tint. With properties similar to PLA, Entwined filament prints between 180 and 210°C.
12. Concrete Paver
A solid concrete paver is a great addition to a 3D printer. It can be useful in helping to reduce noise from printer vibrations.
13. LED Lights
LED lights look nice. And they can help you keep an eye on your print remotely if you have a camera connected.
Software Upgrades
14. Upgrade Your Slicer Software
Upgrading your slicer software can correct glitches and bugs with your current software. It will also deliver new features for better print quality, user experience, and more.
You have to upgrade according to the slicer software and brand. If your printer came with Cura, manufacturers often send a forked version of Cura along with the printer, but they tend not to maintain it. But if you have a Cura slicer, you must keep upgrading it. Ultimaker updates it regularly with new functions.
Other upgradable slicer software include Simplify 3D, SelfCAD, OctoPrint, KISSlicer, PrusaSlicer, Slic3r, and more.
15. Setup OctoPrint for 3D printer remote Access
OctoPrint is a server solution with an associated web interface for controlling a 3D printer. While setting OctoPrint up, the 3D printer is connected to the server via USB.
The printer can then be conveniently controlled and monitored from any device with a browser and in the same network. Starting print jobs, managing files, and viewing the current status of the 3D printer can be done very conveniently.
However, OctoPrint can also be downloaded for Windows and Linux and installed manually. So if you have an old laptop lying around or maybe a computer that's gathering dust under the table, you can also install OctopPrint on it.
16. Connect a camera to OctoPrint
To monitor your 3D printer on the go or for timelapse recordings, you can install a camera.
Probably the best camera solution for OctoPrint is to use a Raspberry PI as a server for this. The Raspberry + OctoPrint solution is one of the smartest and most efficient setups. OctoPrint is more fun with a camera or webcam.
17. Install Obico for OctoPrint
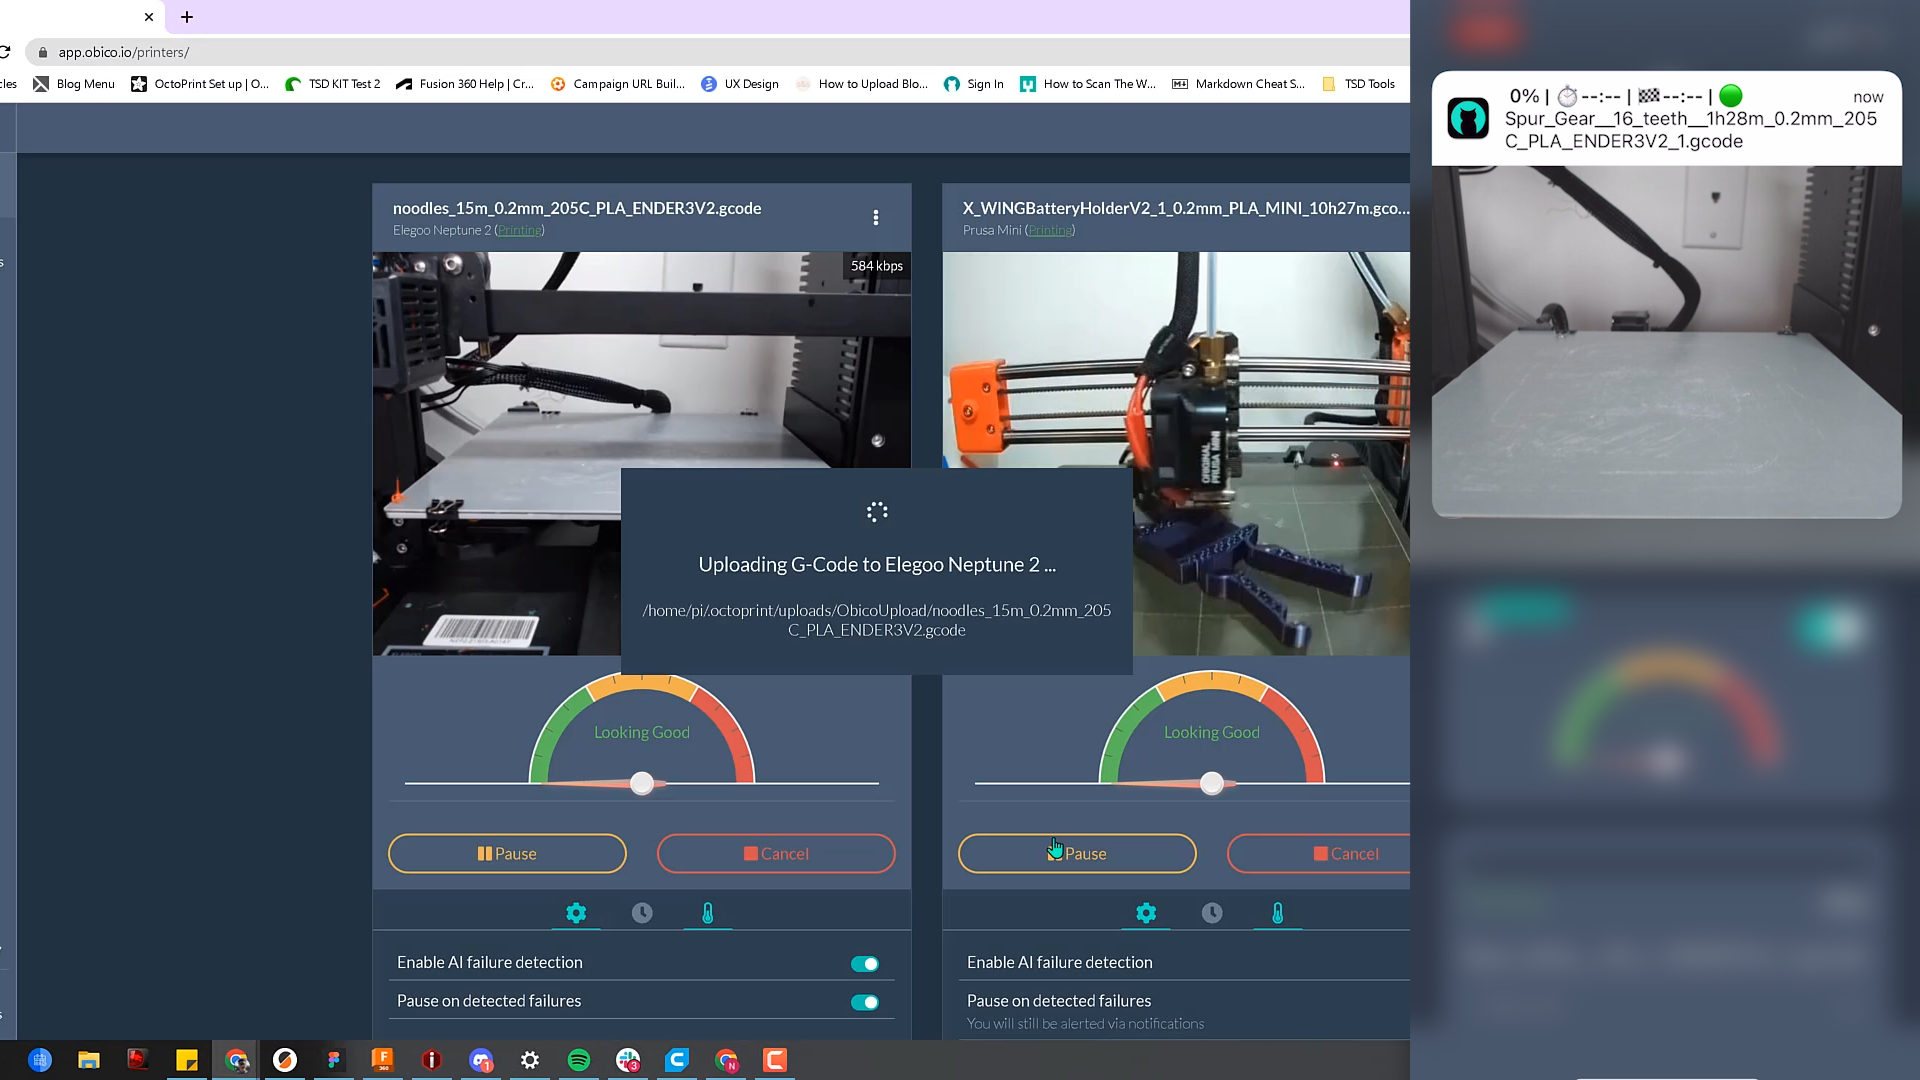
You can also install Obico for Octoprint to monitor and control your printer. This provides added peace of mind with AI failure detection. Obico is an open-source smart 3D Printing platform formerly called The Spaghetti Detective.
Like OctoPrint, Obico is a high-quality webcam streaming and remote printer monitoring tool that works with all USB-based cameras and Pi Cameras. You can start, pause, resume, or cancel your prints in the Obico web or mobile app from anywhere.
The Obico system has a failure detection system that has caught over 800,000 failures and saved over 17,000 kg of filament.
Firmware Upgrades
18. Enable bonus features in your Marlin firmware
The Marlin firmware comes with extra features which you can enable to optimize your machine's effectiveness.
Some features that can be enabled in Marlin firmware that often come disabled by the manufacturers include:
- Auto Bed Leveling to correct irregular or tilted print bed
- Autostart for executing G-code during startup
- EEPROM
- Firmware Retract
- LCD Menu Tree
- Linear Advance
- Temperature Control
- Temperature calibration
- Trinamic drivers
- Unified Bed Leveling
Note that you can also re-compile the firmware to enable host action commands.
19. Install Klipper firmware
Klipper is a firmware for 3D printers. Not just any firmware, it is the most popular 3D printer firmware. The advantage of this is that the printer can get significantly faster, and the print quality can be increased a little.
Unfortunately, there are rarely advantages without disadvantages: in this case, the need for a Raspberry Pi, which is thus firmly tied to the printer.
At Klipper, the calculation for printing is done by the Raspberry Pi. This only forwards the results to the mainboard, which controls the motors and extruders. The result is noticed quite quickly: the printer is faster!
Thanks to the better calculations and some of the properties of Klipper, the printed image is even more beautiful!
Note : Installing Klipper requires OctoPi version 0.16.0 or higher and OctoPrint 1.3.12 or higher to be installed. This is, of course, the case with a newly installed OctoPrint (for older versions, please carry out an update at this point).
20. Install Obico for Klipper
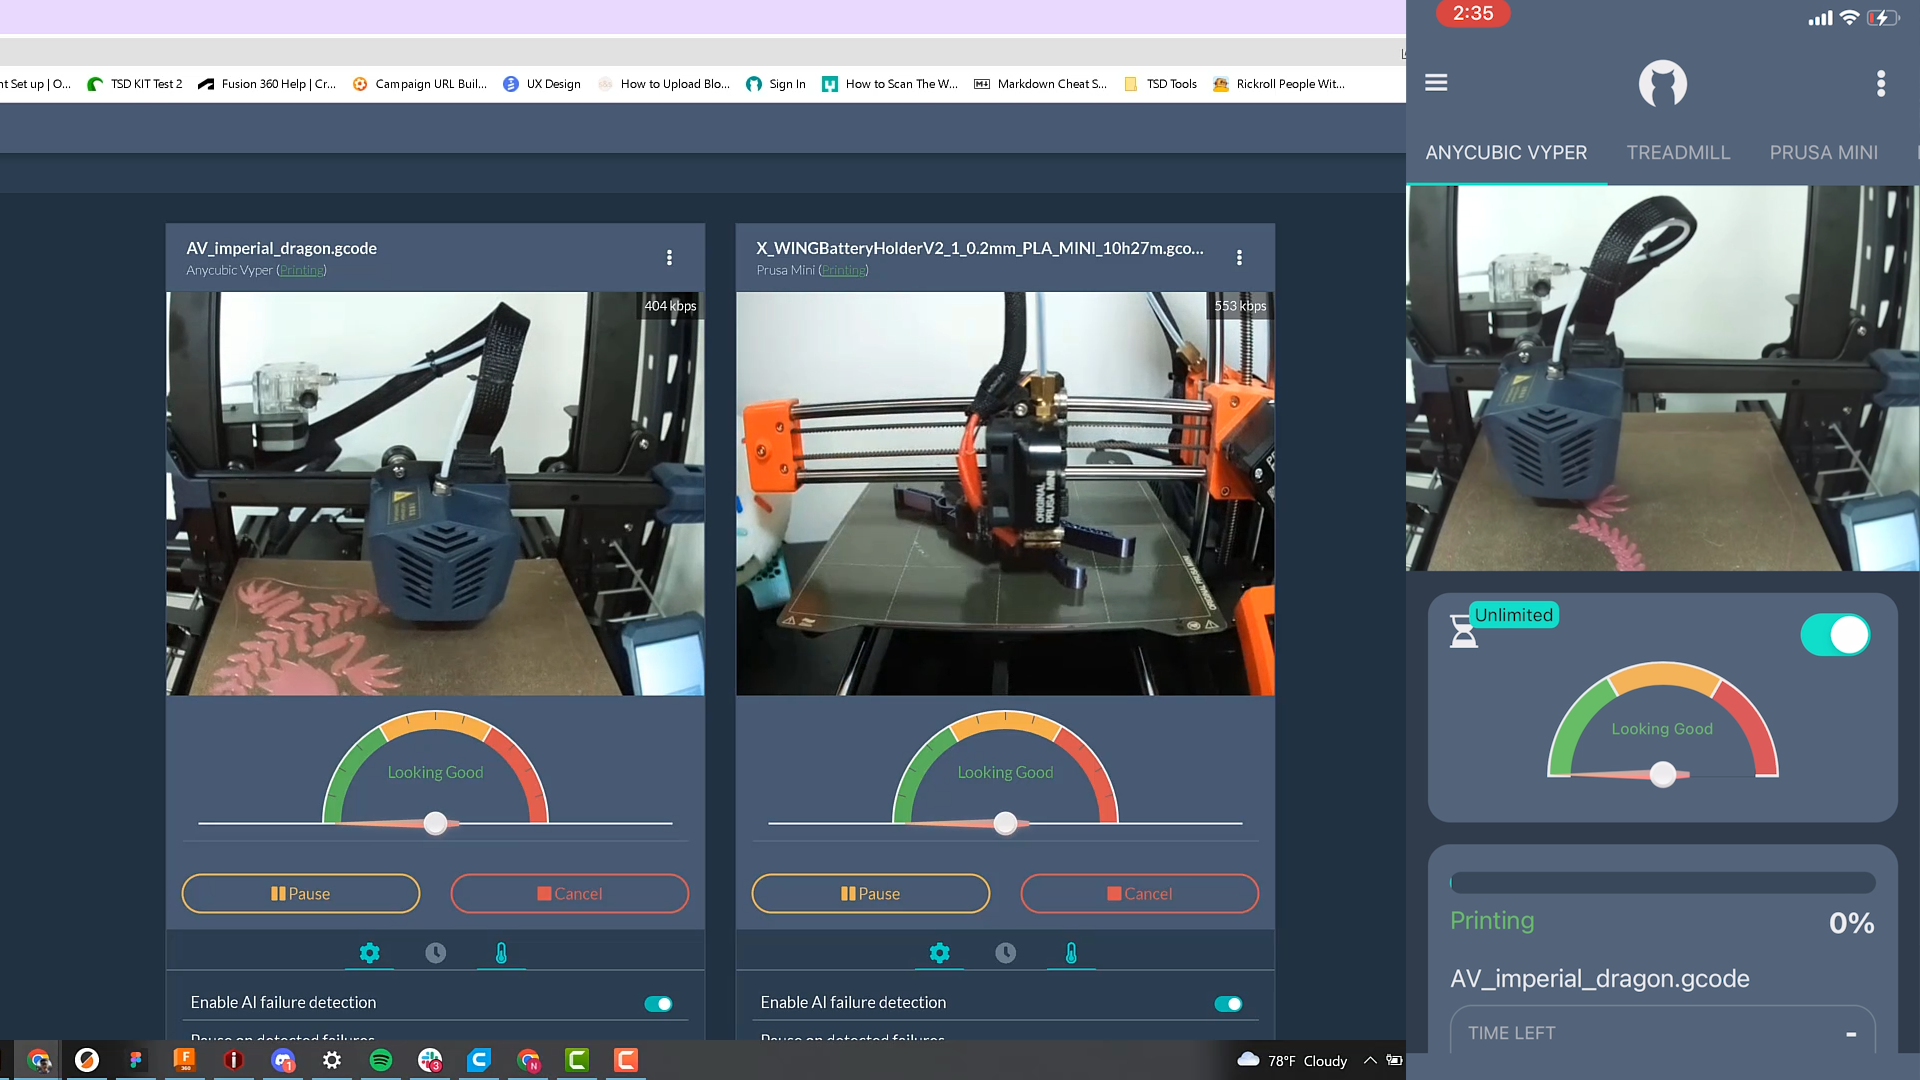
Finally, you can install Obico for Klipper to monitor and control your printer from anywhere. Once you install Klipper, you will likely use Mainsail or Fluidd to monitor your printer instead of OctoPrint, so you can install Obico for Klipper to monitor and control your printer from anywhere and get the added peace of mind with AI failure detection.
Obico even has a mobile app that is available for iOS and Android, and you can get started with Obico for free.