Biqu Huraken - Klipper Remote Access and AI
Introduction
The world of 3D printing has evolved, and the Biqu Huraken stands at the forefront of innovation. In this guide, we will explore the Biqu Huraken 3D printer and its cutting-edge capabilities. Notably, we'll delve into the exciting possibilities of enabling remote access and AI monitoring through the integration of Obico.

Introduction to Biqu Huraken
The Biqu Huraken is not your ordinary 3D printer. It's a state-of-the-art machine that pushes the boundaries of what's possible in the realm of 3D printing. With its exceptional features and advanced technology, it's a must-have for both enthusiasts and professionals.
Biqu Huraken Features and Specification Overview
Let's take a closer look at the features and specifications that make the Biqu Huraken a standout in the 3D printing world:
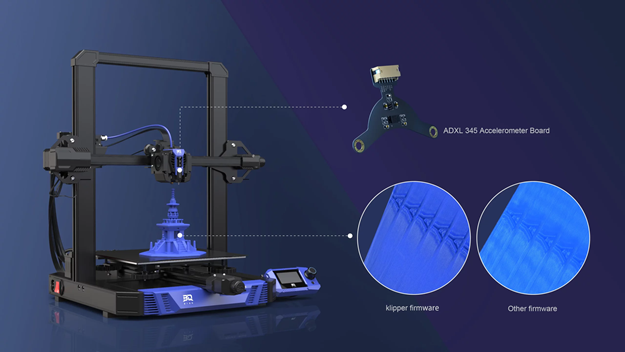
- Out-of-the-Box Klipper Printer: The Biqu Huraken comes pre-installed with Klipper firmware, offering speed, precision, and convenience right from the start.
- Wireless Printing: Thanks to its built-in WiFi module, remote printing becomes seamless. You can effortlessly monitor and control your prints from various devices, all while staying connected to the same WiFi network as your printer.
- Adjustable Heat Bed: The innovative partitioned hotbed design allows you to tailor the hotbed's power consumption, promoting energy efficiency.
- Automatic Leveling: Featuring the BIQU MicroProbe auto-leveling sensor, this printer offers high-precision leveling capabilities while maintaining a lightweight profile.
- Silent Printing: TMC2209 ultra-silent motor drivers reduce printing noise significantly, ensuring a quieter printing experience.
- Material Break Detection: The filament runout sensor can automatically pause a print when filaments run out or break, saving both time and materials.
- RGB Lighting: Customizable RGB lighting adds a stunning visual dimension to your prints, with over 16.8 million color options accessible via the web interface or display screen.
- Modular Design: Assembling the Biqu Huraken is fast and enjoyable thanks to its user-friendly modular design.
For more information and details about the printer or if you want to buy one, simply visit the official website through this link: Biqu Huraken Official Website
Biqu Huraken and Klipper Firmware Compatibility with Obico
One of the standout features of the Biqu Huraken is its compatibility with the Obico platform. With pre-installed Klipper firmware, this printer seamlessly integrates with Obico, offering exciting possibilities for remote access and AI monitoring. In the following sections in this article, we will guide you through the steps to enable these cutting-edge features.
Importance of Remote Access for 3D Printing:
Remote access has significantly transformed the way users interact with and manage their 3D printers. Here's why remote access is vital for 3D printing:
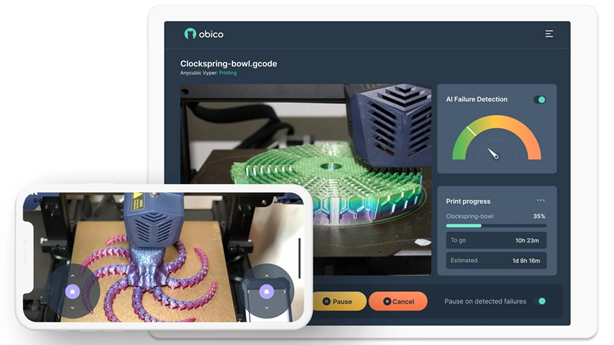
- Continuous Monitoring: Remote access allows users to keep an eye on their print jobs without being physically present. This helps in ensuring that the print is progressing as expected.
- Flexibility: With remote access, users can start, stop, or adjust print jobs from anywhere, providing an enhanced level of flexibility.
- Timely Interventions: If a potential issue arises during a print job, remote access enables users to intervene promptly, reducing the risk of print failures.
- Optimization: Users can tweak printer settings or make model adjustments on-the-fly, leading to better print quality and reduced waste.
- Safety: In the case of any anomalies or potential hazards, users can remotely shut down the printer, ensuring safety.
- Efficiency: By being able to access the printer remotely, users save time and resources they would otherwise spend physically monitoring the machine.
- Enhanced Collaboration: Teams working on a joint project can monitor and collaborate on print jobs even if they're located in different geographical locations.
Step-by-Step: Installing Obico for Klipper on Biqu Huraken
If you now have a Biqu Huraken 3D printer, and you want to install Obico for Klipper to enable remote access and AI features, follow these simplified steps:
Step 1: SSH into Your Printer's Board
To begin, you'll connect to your printer's internal computer using a secure method called SSH. Here's how:
- Open a Terminal or Command Prompt on Your Computer: Think of this as opening a door to your printer's computer.
- Type the Following Command and Press Enter:
ssh mks@your-printer-ip-address
Replace your-printer-IP-address with the actual IP address of your printer.
Note: You can find the IP address in the Advance Settings on the display screen on your printer.
-
Enter Your Credentials:
-
When prompted, enter the following credentials:
- Username: mks
- Password: makerbase
-
It's like logging into your printer's computer system.
-
Username: mks
Password: makerbase
Once you've successfully entered these credentials, you'll be connected to your printer's board, and you're ready to proceed with the installation of Obico for Klipper.
Step 2: Clone the Obico for Klipper Repository
Now, let's move on to the second step:
-
Navigate to Your Home Directory:
-
In the terminal where you connected to your printer's board, you're in your printer's computer system now. Go to your home directory using this command:
cd ~Think of this like going to your computer's "home" folder.
-
-
Clone the Obico for Klipper Repository:
-
Next, let's bring in the Obico for Klipper software from GitHub. Enter this command:
git clone https://github.com/TheSpaghettiDetective/moonraker-obico.gitThis is like downloading a program to your computer.
-
You've successfully cloned the Obico for Klipper repository to your printer's computer. Now, you're ready to proceed with the installation.
Step 3: Change Directory to the Obico Repository
Let's move on to the next step:
-
Enter the Newly Cloned Repository:
-
To work with the Obico for Klipper files you just downloaded, you need to navigate into the repository folder. Do this with the following command:
cd moonraker-obicoThink of it as opening a folder on your computer.
-
Now, you're inside the Obico for Klipper repository, and you're ready to proceed with the installation.
Step 4: Run the Installation Script
You're almost there! Let's move on to the next step:
-
Execute the Installation Script:
-
To install Obico for Klipper, you need to run a special script. Enter the following command and press Enter:
./install.shThis script will set up Obico for Klipper on your printer's computer.
-
Now, Obico for Klipper is being installed on your printer. Please follow the on-screen prompts for the next steps in the installation process.
Step 5: Follow Installation Prompts
Now, let's continue with the next step, where you'll provide specific configurations:
-
During the Installation Process:
-
While the installation script is running, it will ask you for some specific settings. Here's what to enter when prompted:
-
Moonraker Host: When asked for the Moonraker host, type in:
127.0.0.1This tells Obico where to find the Moonraker software.
-
Moonraker Port: When prompted for the Moonraker port, enter:
7125This sets the communication port for Moonraker.
-
Moonraker Config File: You'll be asked to specify the path to your Moonraker configuration file. Usually, it's located at:
/home/mks/klipper_config/moonraker.confMake sure to enter the correct path to your configuration file.
-
Klipper Log Directory: When asked for the Klipper log directory, provide the path to your Klipper log files. Typically, it's located at:
/home/mks/klipper_logsThis helps Obico find the Klipper logs.
-
-
By providing these settings, you're helping Obico for Klipper communicate effectively with your 3D printer's software. Continue following the installation prompts as needed.
After completing these steps, you'll have successfully installed Obico for Klipper on your 3D printer. To make the most of this setup, follow these additional steps:
Step 1: Sign up for an Obico Account
If you haven't already, you'll need to create an Obico account to get started. You can do this through the Obico mobile app or the web app. Here's how:
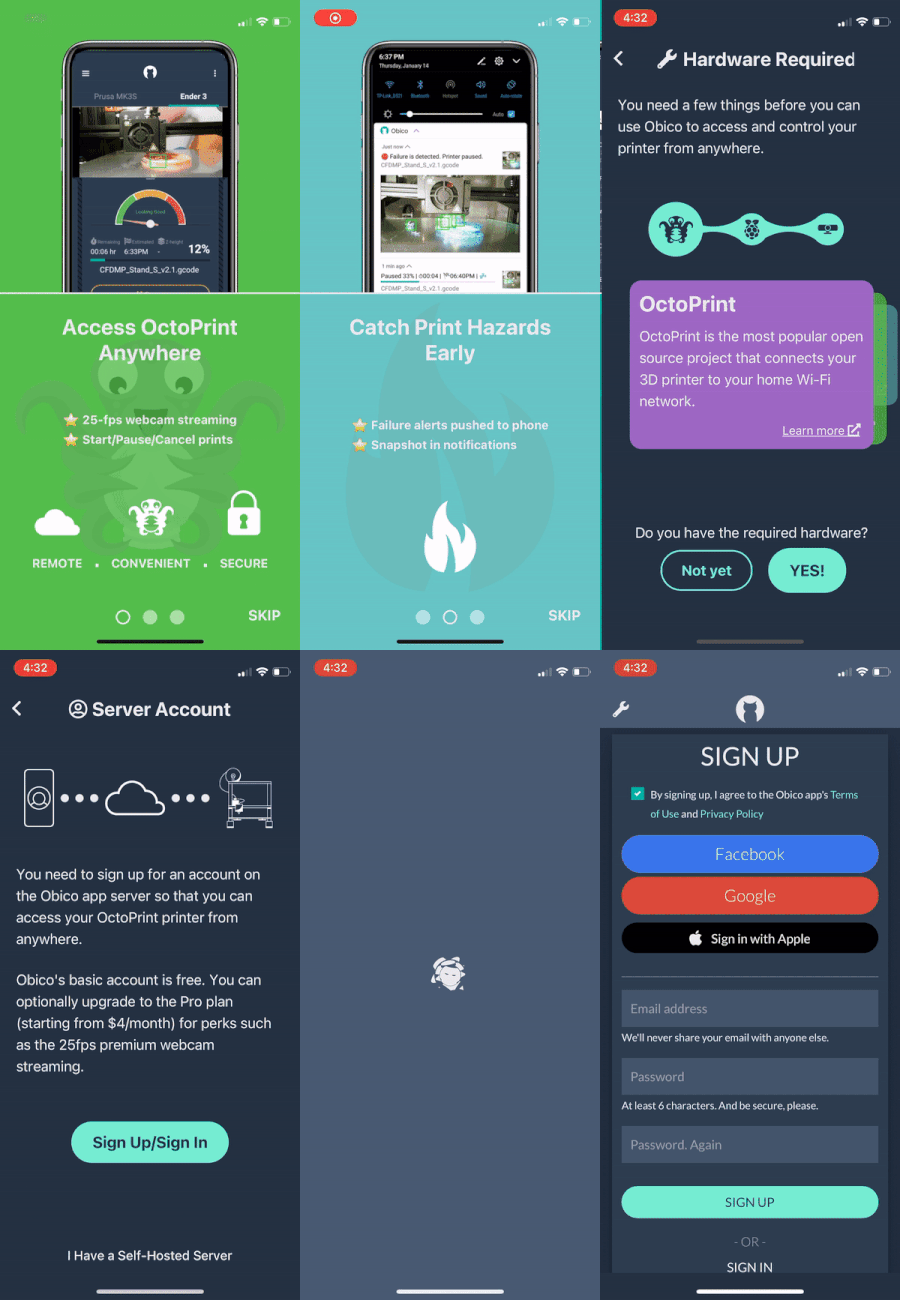
- 📱 Mobile App: If you're using the mobile app, open it and follow the on-screen prompts to sign up for an Obico account.
- 🌐 Web App: If you prefer to use the web app, open a web browser and go to the Obico website Click on the "Sign Up" option and follow the registration process.
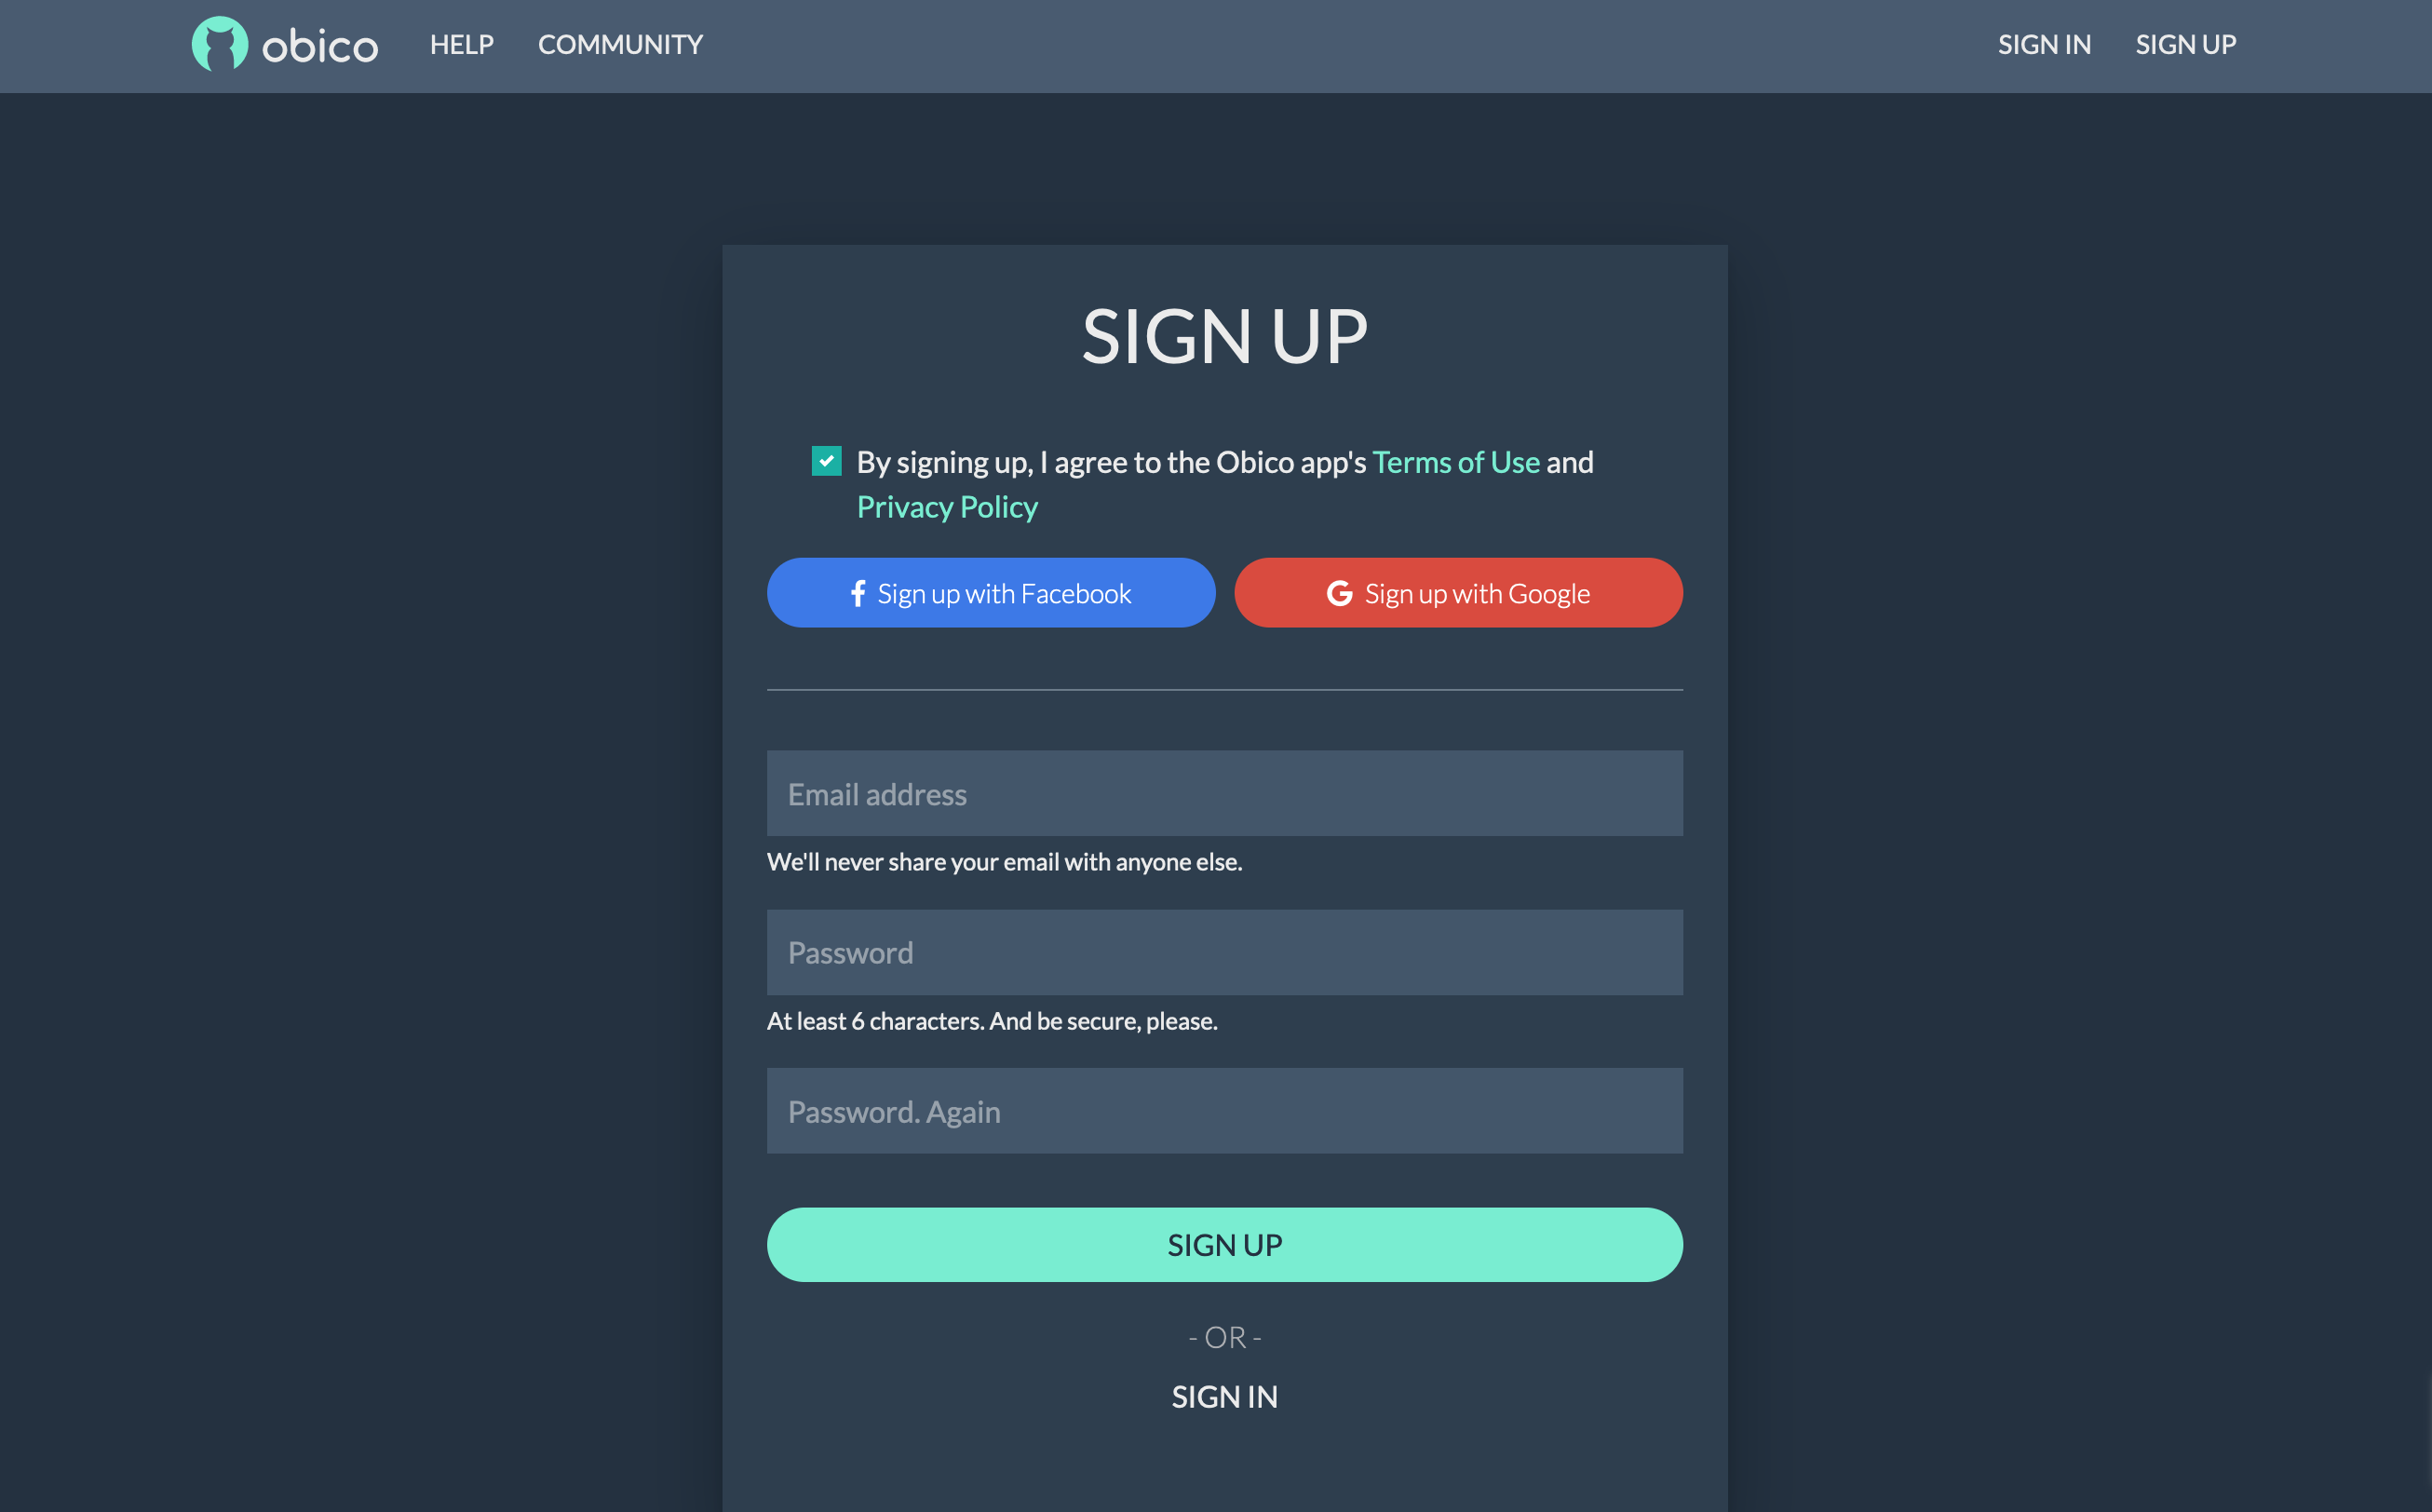
You can sign up with your email, Google, or Facebook account.
Step 2: Link Your Printer to Obico
To connect your 3D printer to Obico and unlock its remote access and AI-powered features, follow these steps:
- 🌐 Visit the Obico Website: Access the Obico website (or your own Obico server if you have one).
- 🌐 Sign In: Log in to your Obico account using the credentials you just created.
Once logged in, navigate to the "Printers" page on the Obico platform.
Step 3: Select "Klipper" and Connect Your Printer

- Select "Klipper": Click "Link New Printer," and when prompted to choose your printer platform, select "Klipper" and then click “next”.
- Automatic Recognition: At this point, the Obico app should automatically detect your printer if it's on the same local network. If it is recognized, you can simply click the "Link" button in the Obico app to establish the connection between Obico and your printer.
Step 4: Give Your Printer a Custom Name (Optional)
You have the option to provide a custom name for your 3D printer if you prefer.
Step 5: Explore Your Printer Feed
With the setup complete, you can now enjoy the benefits of real-time monitoring, failure detection, and remote control of your 3D printer through the Obico platform.
By following these steps, you'll have successfully set up Obico for Klipper on your 3D printer, granting you remote access and AI-powered features to enhance your 3D printing experience.
Note: If Auto-Discovery Doesn't Work: Link Your Printer Manually
In case your printer isn't automatically recognized on the Obico website, you can manually link it by following these steps:
- Enter Manual Linking Mode: Go back to your terminal and enter 'y' to enter manual linking mode.
- Switch to Manual Setup: In the Obico app, select "Switch to manual setup instead."
- Retrieve a Six-Digit Code: You'll be provided with a six-digit code.
- Paste the Code: Paste the code into the terminal to manually link your printer.
These steps ensure that even if auto-discovery doesn't work, you can still establish the connection between Obico and your 3D printer.
Unlocking the Full Potential of Your Biqu Huraken with Obico
Obico is offering a suite of features designed to enhance the 3D printing experience for Biqu Huraken users. Let's delve into the exciting offerings that Obico has in store for you:
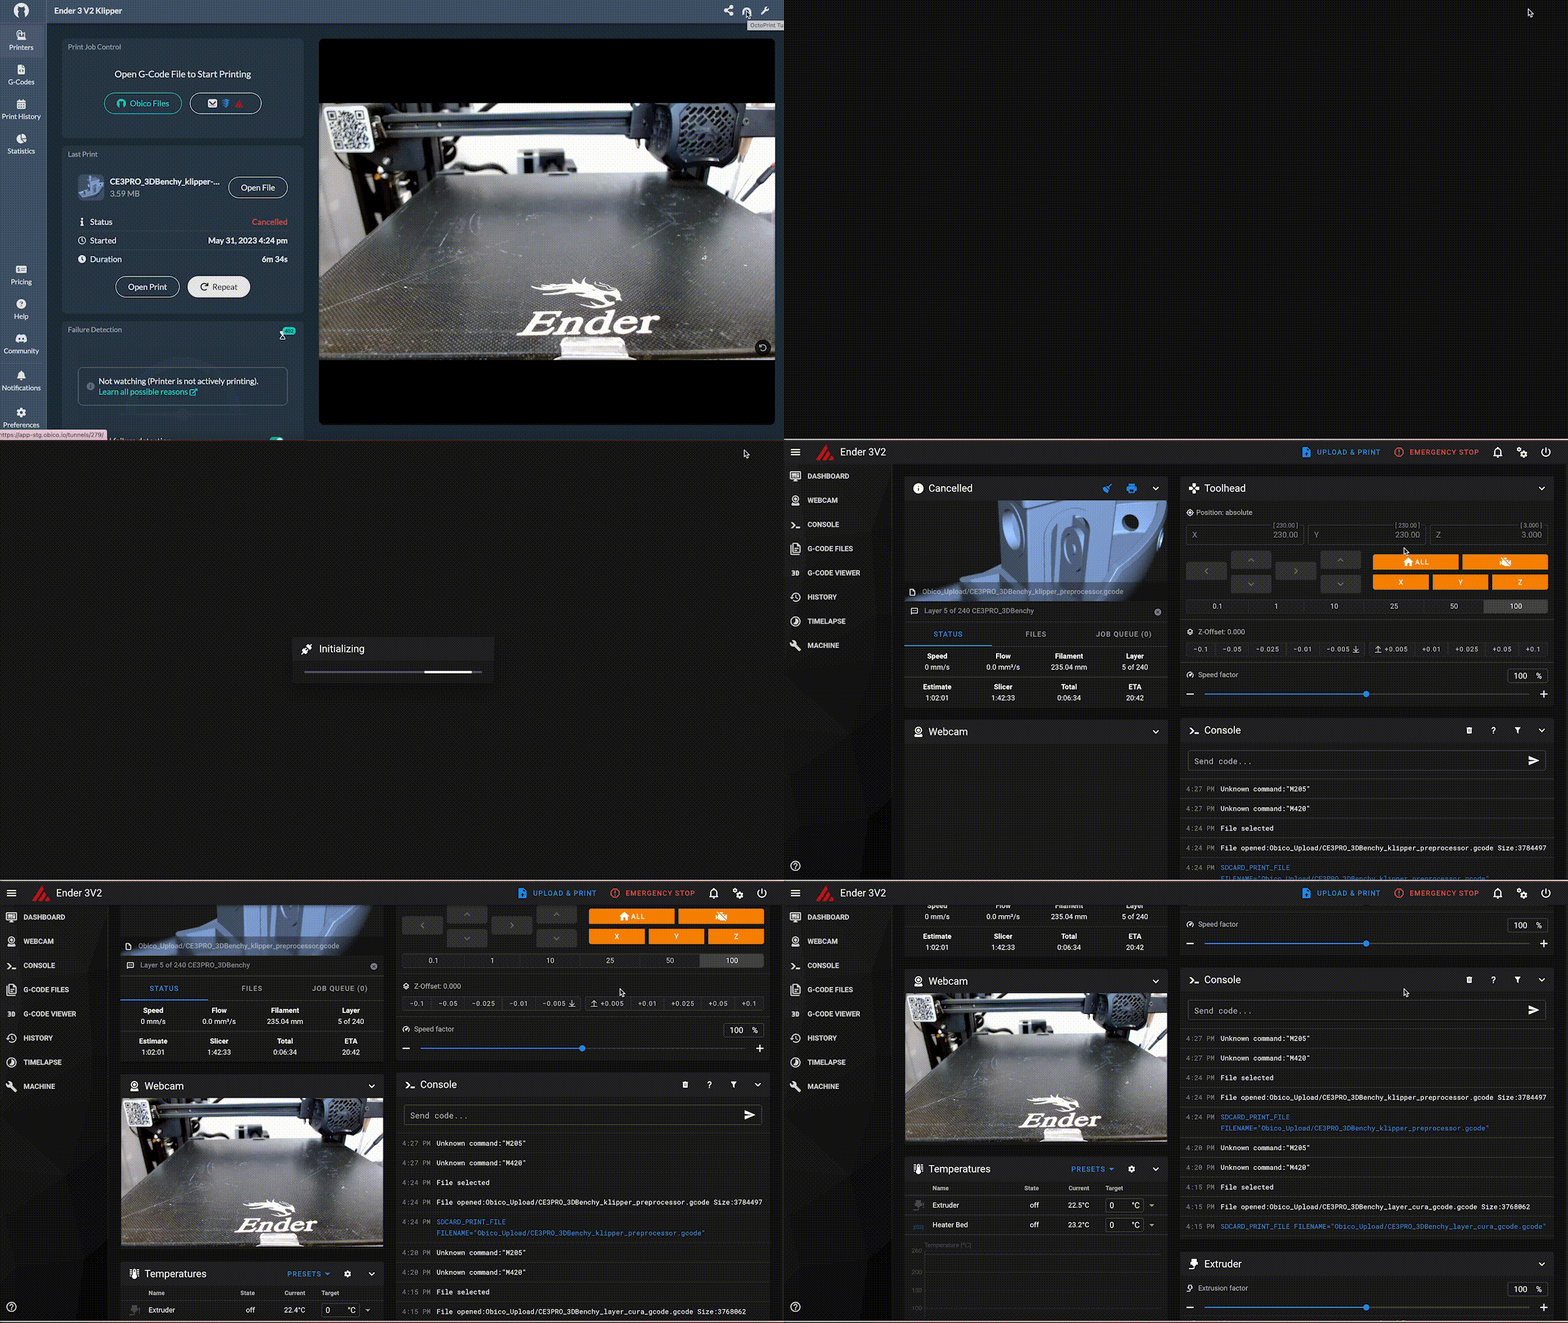
- Integration with Mainsail and Fluidd: Users can seamlessly manage their printer through user-friendly web interfaces, making it easy to control and monitor their prints.
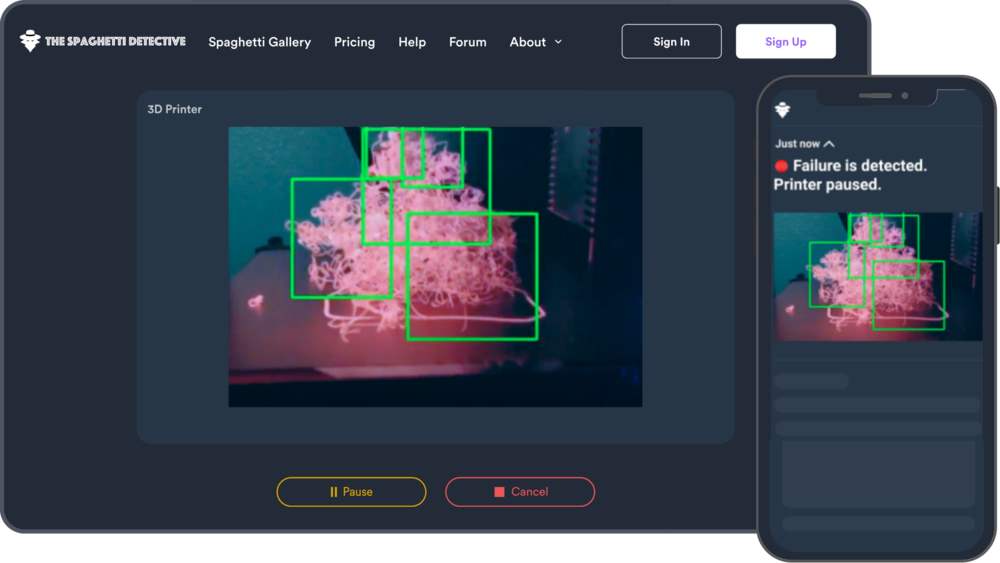
- AI-Powered Failure Detection: Obico's AI algorithms monitor the printer's performance in real-time and alert users to issues or potential failures, preventing costly print failures and material wastage.
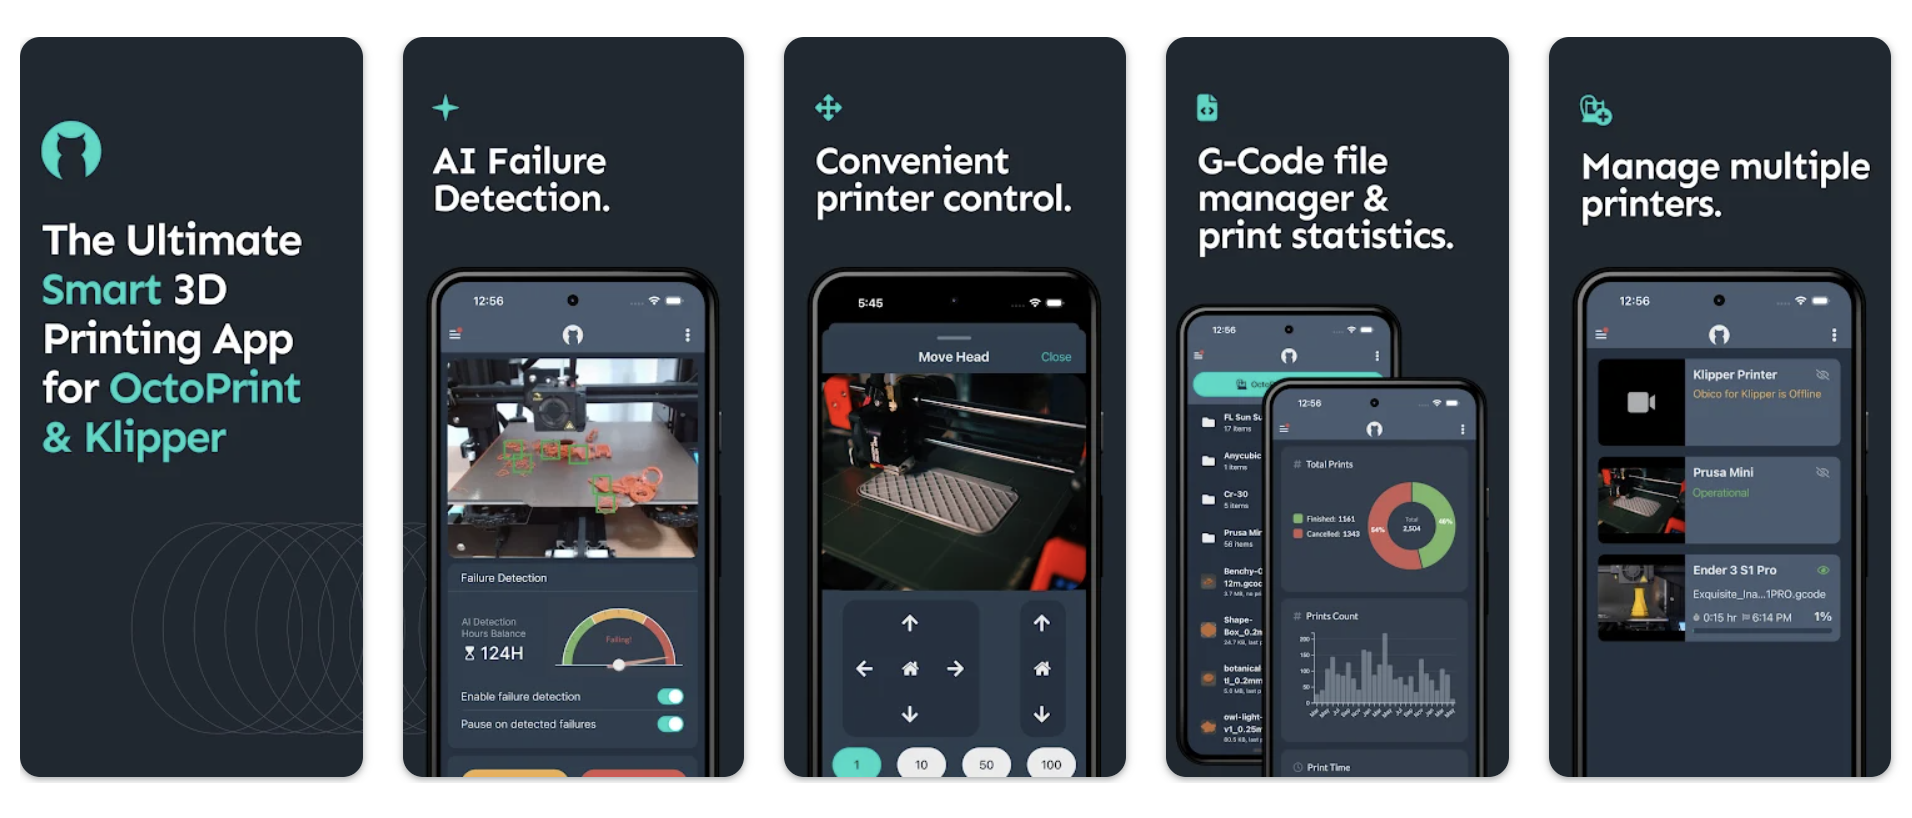
- Obico Mobile Apps: Available for both iOS and Android, these mobile apps provide remote access to the printer, allowing users to control and monitor prints from anywhere.
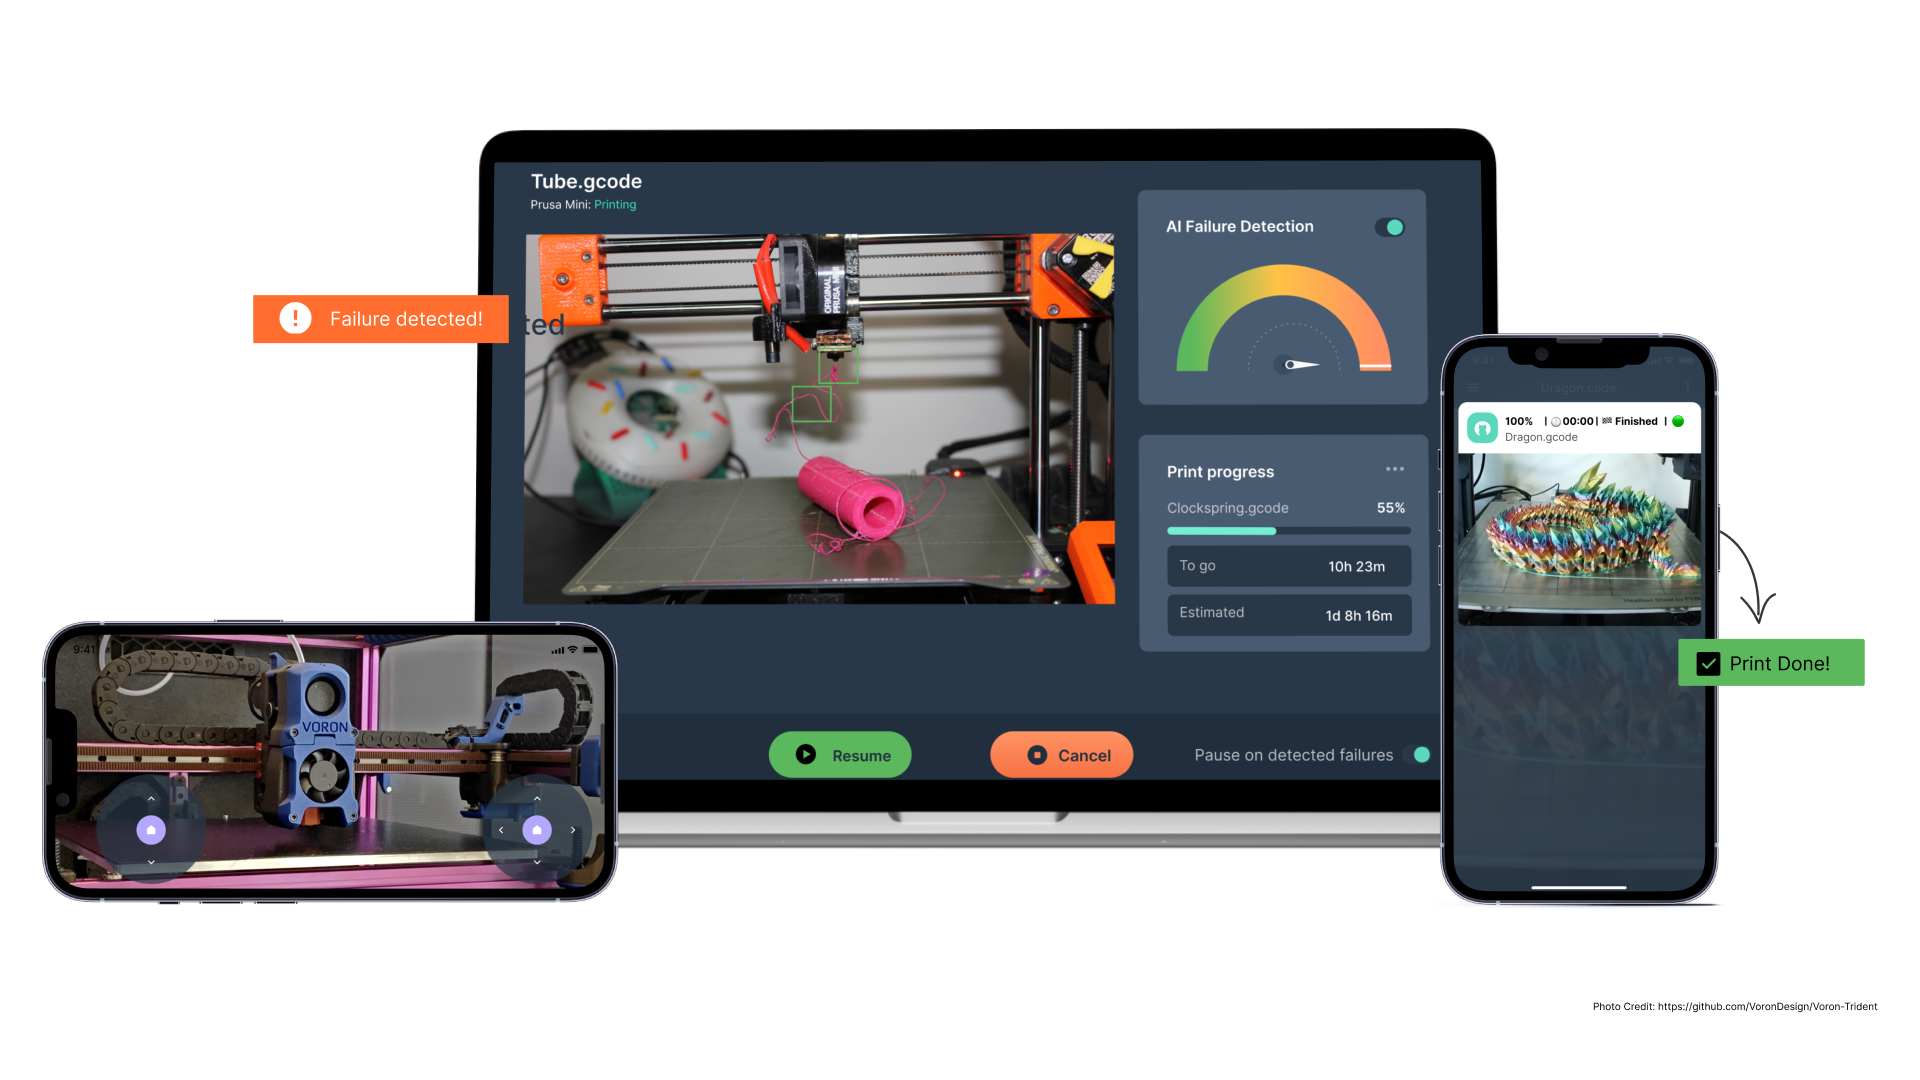
- Real-time Printer Status Notifications: Users receive real-time notifications on their devices, keeping them informed about their printer's status, job progress, and critical updates.
Conclusion
In conclusion, the Biqu Huraken 3D printer represents a remarkable leap forward in the world of 3D printing technology. Its outstanding features and specifications, including pre-installed Klipper firmware, wireless printing capabilities, adjustable heat bed, automatic leveling, silent printing, material break detection, RGB lighting, and modular design, make it a standout choice for both enthusiasts and professionals seeking precision and convenience.
However, what truly sets the Biqu Huraken apart is its compatibility with the Obico platform, opening up a world of possibilities for remote access and AI monitoring. Remote access has become an indispensable tool for 3D printing, offering continuous monitoring, flexibility, timely interventions, optimization, safety, efficiency, and enhanced collaboration. These advantages are now within reach for Biqu Huraken users, thanks to the seamless integration of Obico.
