Elegoo Neptune 4 Series - Klipper Remote Access
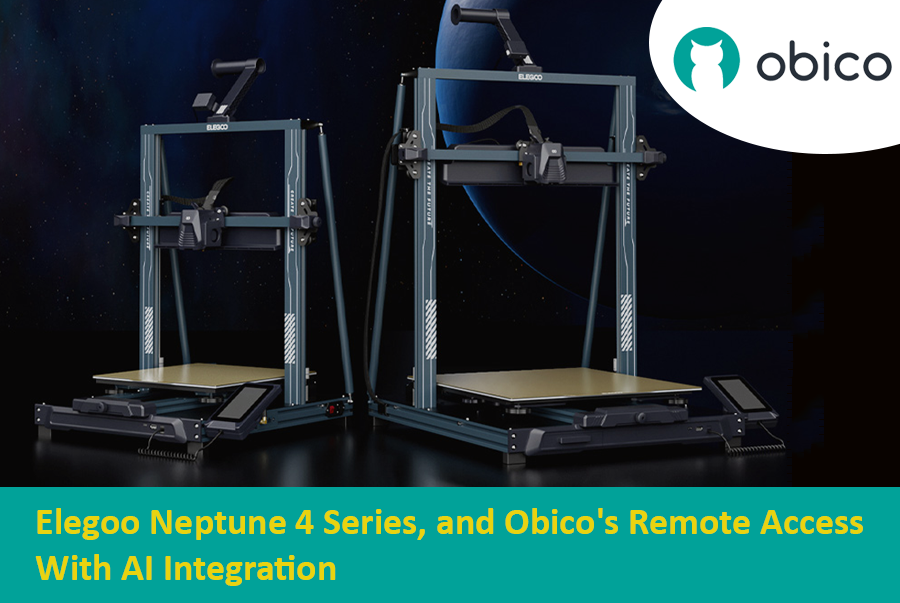
The Rise of Elegoo in the FDM World
Elegoo, a name previously synonymous with high-quality resin printers, has embarked on a new journey in the realm of FDM printing with its Neptune 4 series. The world of Fused Deposition Modeling (FDM) printing has been evolving rapidly, and it’s not just the technology giants who are leading this transformation. Niche manufacturers like Elegoo have stepped into the arena, bringing innovative solutions and captivating designs. With the Neptune 4 series, Elegoo has successfully established a foothold, striking a balance between cost-efficiency, performance, and user-friendliness. It's no wonder that enthusiasts and professionals alike are keeping a close eye on Elegoo's latest offerings.
Overview of Klipper's Integration with 3D Printers
Klipper, an open-source firmware solution, has revolutionized the way 3D printers operate. Rather than relying solely on the limited computational power of a printer's onboard microcontroller, Klipper collaborates with more powerful devices like Raspberry Pi to manage printer operations. The result? Enhanced performance, speed, and precision. The union of Klipper with Elegoo's Neptune 4 series is a testament to the future of 3D printing, offering users an enhanced printing experience. By leveraging the prowess of Klipper, users can enjoy faster print speeds without compromising on accuracy. Moreover, with the advent of remote access solutions like Obico, the possibilities of what one can achieve with Klipper and the Neptune 4 series are truly boundless. Stay tuned as we delve deeper into the intricacies of remote access and explore the full potential of the Elegoo Neptune 4 series powered by Klipper and Obico.
Dive into the Elegoo Neptune 4 Series
The Elegoo Neptune 4 Series represents a significant step forward in the world of 3D printing, offering a range of options to cater to various user needs. This series consists of three models: the Neptune 4, Neptune 4 Pro, and Neptune 4 Max. Each of these printers boasts its own unique set of features and capabilities, making it essential to understand the differences between them to make an informed choice.
Neptune 4 Printer: A Closer Look
The Neptune 4 serves as the foundation of the series, providing a solid starting point for those new to 3D printing or seeking a reliable workhorse for their projects. With a print volume of 225x225x265mm, it offers a respectable amount of space for a wide range of creations. Key features include auto bed leveling, a 300°C high-temperature nozzle, and support for materials like PLA, PETG, ABS, TPU, and Nylon. It comes equipped with USB and LAN transfer options, providing flexibility in how you connect to and control the printer.
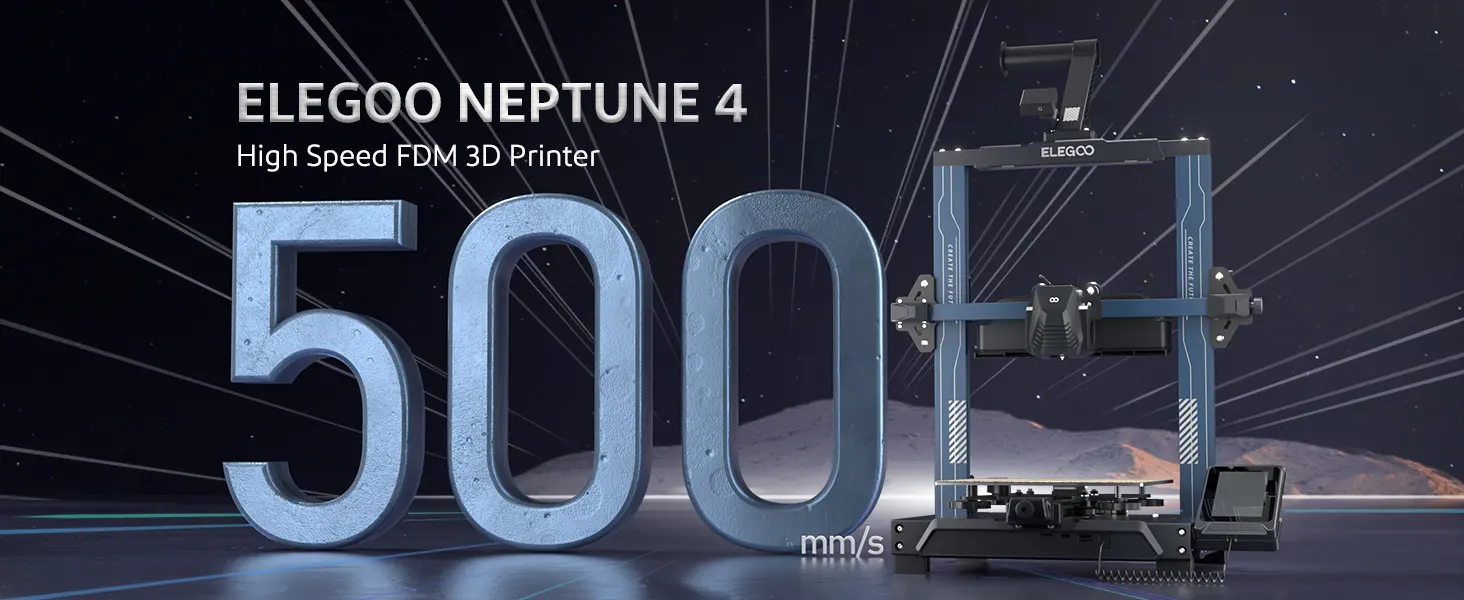
To find more in-depth technical specifications and make a purchase, please follow this link to the official website: By clicking here.
Neptune 4 Pro Printer: Features and Enhancements
Stepping up to the Neptune 4 Pro introduces a plethora of enhancements designed to elevate your 3D printing experience. The printer is pre-installed with Klipper firmware, which enables faster and more efficient printing. With a maximum printing speed of 500mm/s (recommended at 250mm/s), it's a speed demon. The dual-gear direct drive extruder, combined with the copper-titanium bi-metal throat pipe and extended hot end, ensures smooth and consistent extrusion, even when working with a wide range of materials.
One of its standout features is the intelligent segmented heatbed. This innovative addition allows for precise temperature control, automatically recognizing model size during slicing. The Neptune 4 Pro also supports auto bed leveling with 121 points, further ensuring the quality and accuracy of your prints. Efficient cooling, power loss recovery, filament detection, and LAN networking printing are just a few more of its practical features. All these improvements come at an attractive price point of $299.00, making it a compelling option for both beginners and advanced users.
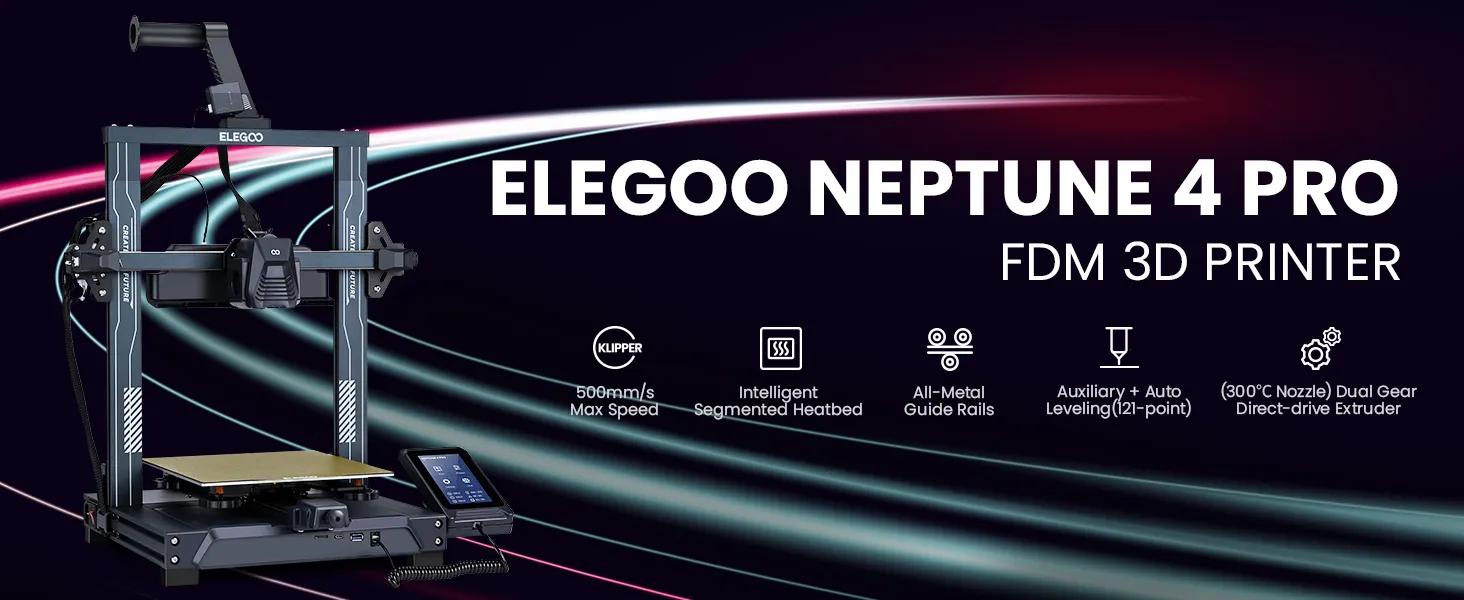
For a deeper dive into the technical specifications and the option to purchase the printer, please feel free to explore the official website: By clicking here.
Neptune 4 Max Printer: The Premium Experience
For those who demand the utmost in performance and capabilities, the Neptune 4 Max takes the lead in the series. With a generous print volume of 420x420x480mm, it offers ample space for large-scale projects. Although the bed temperature is slightly lower at 85°C, it compensates with the same 320W hotbed power as the Neptune 4 Pro, ensuring a stable and controlled printing environment.
The nozzle and throat pipe on the Neptune 4 Max are upgraded to an all-titanium alloy heat tube, ensuring compatibility with high-temperature and complex filaments like carbon fiber and ABS. The 60W ceramic heating element and brass heating block further enhance its performance.
Like its siblings, the Neptune 4 Max features Klipper firmware for swift and efficient printing at speeds of up to 500mm/s. With WiFi connectivity in addition to LAN and USB transfer options, it offers flexibility in how you interact with and control your printer. Priced at $470.00, the Neptune 4 Max represents the premium choice in the series, catering to professionals and enthusiasts who demand top-tier 3D printing capabilities.
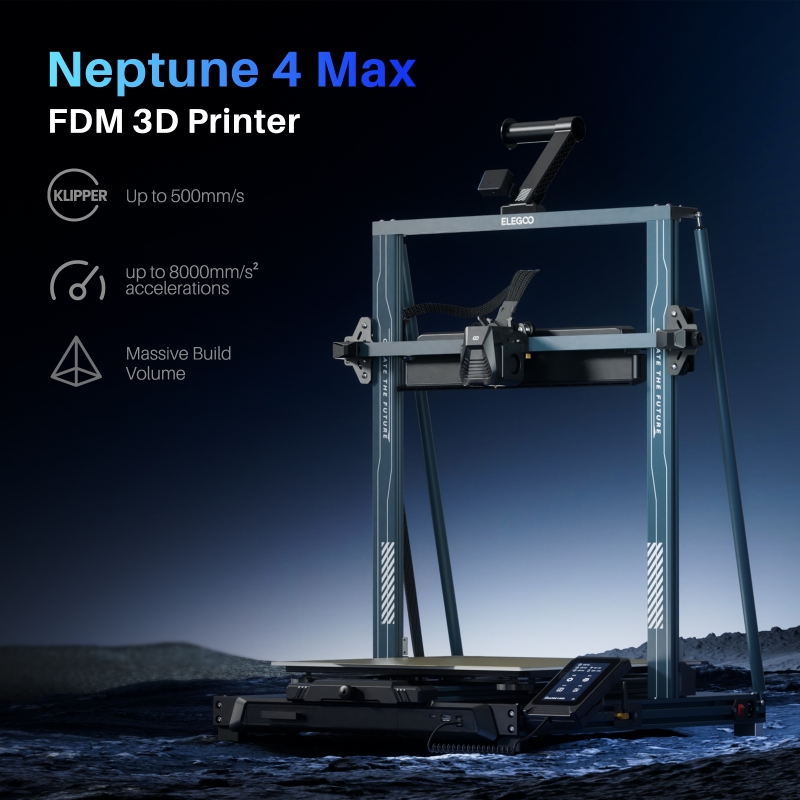
To obtain more information about the printer and make a purchase, kindly click on this link to access the official website: By clicking here.
The Need for Remote Access in 3D Printing
In the realm of 3D printing, the ability to remotely access and control your printer has become increasingly essential. As technology continues to evolve, so do the demands and challenges that 3D printing enthusiasts and professionals face. This section will delve into why remote access has become a necessity in 3D printing by exploring the modern-day challenges and the invaluable benefits of real-time monitoring.
Modern-Day 3D Printing Challenges
- Time Constraints: In today's fast-paced world, time is a precious commodity. Printing a 3D object can be a time-consuming process, often taking several hours or even days to complete, depending on the complexity and size of the project. People have busy lives and cannot always be present to oversee their prints. Remote access allows individuals to initiate, pause, or stop prints as needed, even when they're not physically present.
- Complex Print Jobs: As 3D printers become more advanced, they can tackle increasingly complex print jobs. However, these intricate prints can also be prone to issues like warping, layer shifting, or nozzle jams. Remote access provides users with the ability to monitor these prints closely and intervene if problems arise, reducing the likelihood of print failures.
- Multiple Printers Management: For businesses or enthusiasts who operate multiple 3D printers simultaneously, managing them all can be a logistical challenge. Remote access streamlines the process by allowing users to control and monitor multiple printers from a single interface, ensuring efficient operation and minimizing downtime.
The Benefits of Real-Time Monitoring
- Enhanced Control: Remote access gives users unprecedented control over their 3D printers. They can adjust print settings, temperatures, and even calibrate the printer remotely. This level of control is particularly useful when fine-tuning prints or experimenting with new materials.
- Troubleshooting and Preventing Failures: Real-time monitoring allows users to catch potential issues early. If a print is veering off course, experiencing layer adhesion problems, or encountering other complications, users can make immediate adjustments or stop the print to prevent further issues. Additionally, some advanced monitoring systems use AI to detect problems and take corrective actions automatically.
- Flexibility and Convenience: Remote access offers the flexibility to initiate prints from anywhere, whether you're at home, at work, or even on vacation. This convenience means you can make the most of your 3D printer without being tethered to it physically.
- Peace of Mind: Perhaps one of the most valuable benefits of remote access is the peace of mind it provides. Users can check on their prints at any time, receive alerts in case of issues, and ensure that their printing projects are progressing as expected, all from the palm of their hand.
Step-by-Step: Installing Obico for Klipper on Elegoo Neptune 4 series
If you now have a Neptune 4 Series 3D printer, and you want to install Obico for Klipper to enable remote access and AI features, follow these simplified steps:
Step 1: SSH into Your Printer's Board
To begin, you'll connect to your printer's internal computer using a secure method called SSH. Here's how:
-
Open a Terminal or Command Prompt on Your Computer: Think of this as opening a door to your printer's computer.
-
Type the Following Command and Press Enter:
ssh mks@your-printer-ip-address
Replace your-printer-IP-address with the actual IP address of your printer.
Note: You can find the IP address in the Advance Settings on the display screen on your printer.
-
Enter Your Credentials:
-
When prompted, enter the following credentials:
- Username: mks
- Password: makerbase
-
It's like logging into your printer's computer system.
-
Username: mks
Password: makerbase
Once you've successfully entered these credentials, you'll be connected to your printer's board, and you're ready to proceed with the installation of Obico for Klipper.
Step 2: Clone the Obico for Klipper Repository
Now, let's move on to the second step:
-
Navigate to Your Home Directory:
-
In the terminal where you connected to your printer's board, you're in your printer's computer system now. Go to your home directory using this command:
cd ~Think of this like going to your computer's "home" folder.
-
-
Clone the Obico for Klipper Repository:
-
Next, let's bring in the Obico for Klipper software from GitHub. Enter this command:
git clone https://github.com/TheSpaghettiDetective/moonraker-obico.gitThis is like downloading a program to your computer.
-
You've successfully cloned the Obico for Klipper repository to your printer's computer. Now, you're ready to proceed with the installation.
Step 3: Change Directory to the Obico Repository
Let's move on to the next step:
-
Enter the Newly Cloned Repository:
-
To work with the Obico for Klipper files you just downloaded, you need to navigate into the repository folder. Do this with the following command:
cd moonraker-obicoThink of it as opening a folder on your computer.
-
Now, you're inside the Obico for Klipper repository, and you're ready to proceed with the installation.
Step 4: Run the Installation Script
You're almost there! Let's move on to the next step:
-
Execute the Installation Script:
-
To install Obico for Klipper, you need to run a special script. Enter the following command and press Enter:
./install.shThis script will set up Obico for Klipper on your printer's computer.
-
Now, Obico for Klipper is being installed on your printer. Please follow the on-screen prompts for the next steps in the installation process.
Step 5: Follow Installation Prompts
Now, let's continue with the next step, where you'll provide specific configurations:
-
During the Installation Process:
-
While the installation script is running, it will ask you for some specific settings. Here's what to enter when prompted:
-
Moonraker Host: When asked for the Moonraker host, type in:
127.0.0.1This tells Obico where to find the Moonraker software.
-
Moonraker Port: When prompted for the Moonraker port, enter:
7125This sets the communication port for Moonraker.
-
Moonraker Config File: You'll be asked to specify the path to your Moonraker configuration file. Usually, it's located at:
/home/mks/klipper_config/moonraker.confMake sure to enter the correct path to your configuration file.
-
Klipper Log Directory: When asked for the Klipper log directory, provide the path to your Klipper log files. Typically, it's located at:
/home/mks/klipper_logsThis helps Obico find the Klipper logs.
-
-
By providing these settings, you're helping Obico for Klipper communicate effectively with your 3D printer's software. Continue following the installation prompts as needed.
After completing these steps, you'll have successfully installed Obico for Klipper on your 3D printer. To make the most of this setup, follow these additional steps:
Step 1: Sign up for an Obico Account
If you haven't already, you'll need to create an Obico account to get started. You can do this through the Obico mobile app or the web app. Here's how:
- 📱 Mobile App: If you're using the mobile app, open it and follow the on-screen prompts to sign up for an Obico account.
- 🌐 Web App: If you prefer to use the web app, open a web browser and go to the Obico website. Click on the "Sign Up" option and follow the registration process.
You can sign up with your email, Google, or Facebook account.
Step 2: Link Your Printer to Obico
To connect your 3D printer to Obico and unlock its remote access and AI-powered features, follow these steps:
- 🌐 Visit the Obico Website: Access the Obico website (or your own Obico server if you have one).
- 🌐 Sign In: Log in to your Obico account using the credentials you just created.
Once logged in, navigate to the "Printers" page on the Obico platform.
Step 3: Select "Klipper" and Connect Your Printer
- Select "Klipper": Click "Link New Printer," and when prompted to choose your printer platform, select "Klipper" and then click “next”.
- Automatic Recognition: At this point, the Obico app should automatically detect your printer if it's on the same local network. If it is recognized, you can simply click the "Link" button in the Obico app to establish the connection between Obico and your printer.
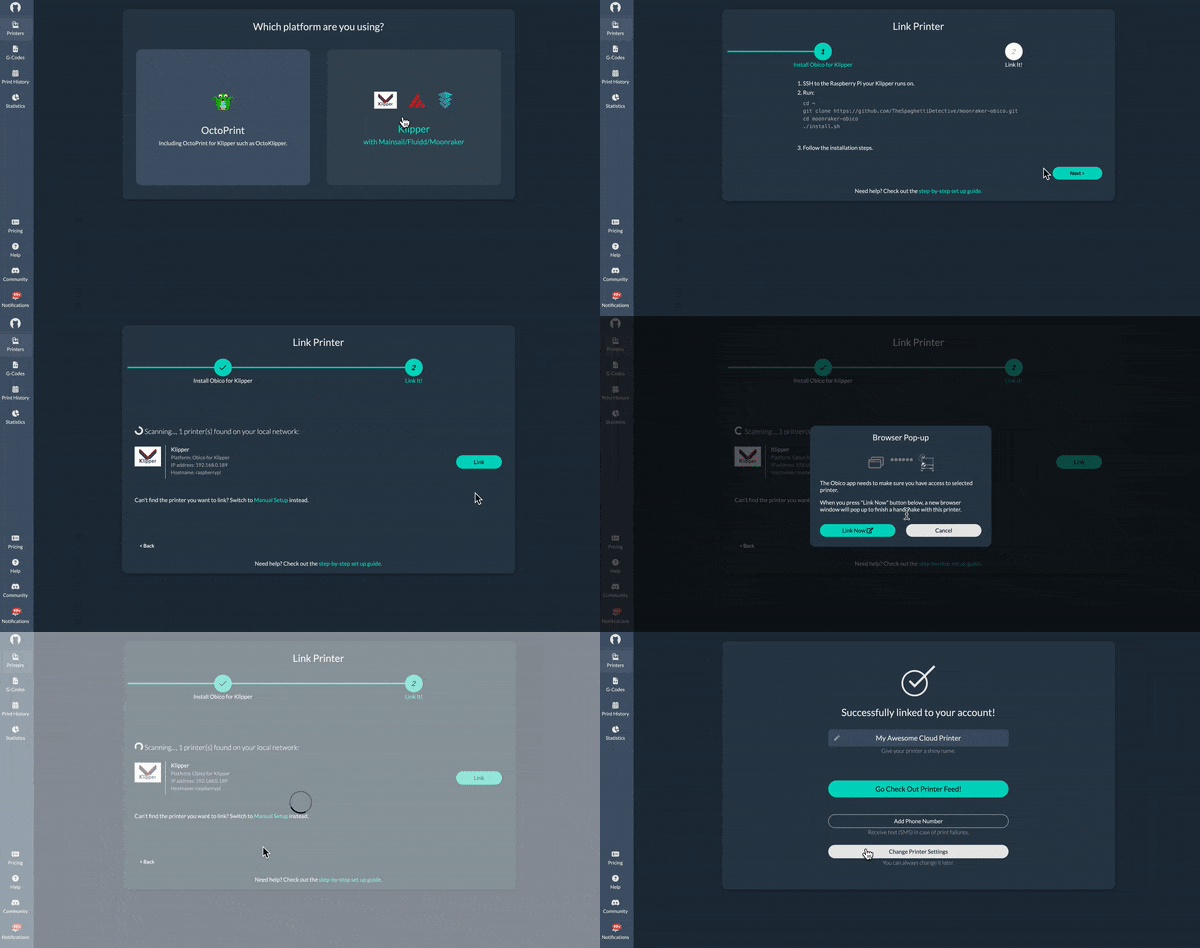
Step 4: Give Your Printer a Custom Name (Optional)
You have the option to provide a custom name for your 3D printer if you prefer.
Step 5: Explore Your Printer Feed
With the setup complete, you can now enjoy the benefits of real-time monitoring, failure detection, and remote control of your 3D printer through the Obico platform.
By following these steps, you'll have successfully set up Obico for Klipper on your 3D printer, granting you remote access and AI-powered features to enhance your 3D printing experience.
Note: If Auto-Discovery Doesn't Work: Link Your Printer Manually
In case your printer isn't automatically recognized on the Obico website, you can manually link it by following these steps:
- Enter Manual Linking Mode: Go back to your terminal and enter 'y' to enter manual linking mode.
- Switch to Manual Setup: In the Obico app, select "Switch to manual setup instead."
- Retrieve a Six-Digit Code: You'll be provided with a six-digit code.
- Paste the Code: Paste the code into the terminal to manually link your printer.
These steps ensure that even if auto-discovery doesn't work, you can still establish the connection between Obico and your 3D printer.
Unveiling Obico's Offerings for Klipper Users
At Obico, we are committed to enhancing your 3D printing experience with Klipper firmware. Our range of offerings is designed to seamlessly integrate with Klipper and elevate your printing capabilities to new heights. Here's a glimpse of what we have in store for you:
- Seamless Integration with Mainsail and Fluidd: We understand the importance of having a user-friendly interface for managing your 3D printer. Obico provides seamless integration with popular web interfaces like Mainsail and Fluidd, ensuring you have a smooth and intuitive experience while controlling your printer. Obico gives you full access to the Mainsail or Fluidd interface remotely from anywhere, so you can perform any 3D printing task from anywhere.
- AI-Powered Failure Detection: Saving Time and Resources: Obico's advanced AI algorithms constantly monitor your 3D printer's performance. In the event of any issues or potential failures, our system detects and alerts you promptly. This proactive approach not only saves you time but also prevents costly print failures and material wastage.
- The Obico Mobile Experience: Apps for iOS and Android: Stay connected to your 3D printer wherever you are with the Obico mobile apps for both iOS and Android. Our user-friendly mobile apps provide you with real-time access to your printer, allowing you to start, pause, or monitor your prints remotely. Experience the convenience of managing your 3D printing projects from the palm of your hand.
- Stay Informed: Real-time Printer Status Notifications: With Obico, you'll never be in the dark about your print progress. Receive real-time notifications on your mobile device, tablet, or computer, keeping you informed about your printer's status, job progress, and any critical updates. Whether you're at home or on the go, you'll always be in control.
Discover the future of 3D printing with Obico's Klipper-compatible solutions. We are dedicated to making your printing journey more efficient, convenient, and enjoyable. Join us in revolutionizing the world of 3D printing today.
Troubleshooting "Buster-backports Release no longer has a Release file" Error
Continue to this part if you only face this error in the image below when you run the ./install.sh command to install Obico in your Makerbase 3D printer.
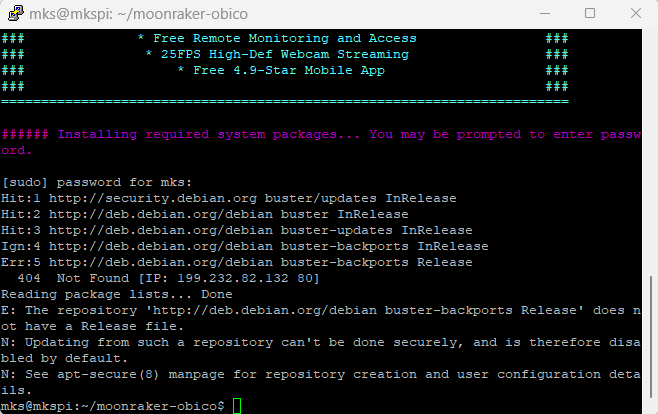
###### Installing required system packages... You may be prompted to enter password.
[sudo] password for mks:
Hit:1 http://security.debian.org buster/updates InRelease
Hit:2 http://deb.debian.org/debian buster InRelease
Hit:3 http://deb.debian.org/debian buster-updates InRelease
Ign:4 http://deb.debian.org/debian buster-backports InRelease
Err:5 http://deb.debian.org/debian buster-backports Release
404 Not Found [IP: 199.232.82.132 80]
Reading package lists... Done
E: The repository 'http://deb.debian.org/debian buster-backports Release' does not have a Release file.
N: Updating from such a repository can't be done securely, and is therefore disabled by default.
N: See apt-secure(8) manpage for repository creation and user configuration details.
mks@mkspi:~/moonraker-obico$
Just follow our easy step-by-step guide for simply solving this error so that you can continue your installing process just click here!
Conclusion
Embracing the Future of 3D Printing with Klipper and Obico
The fusion of Elegoo's Neptune 4 series, Klipper firmware, and Obico's remote access and AI-powered capabilities represents a significant leap forward in the world of 3D printing. Elegoo's commitment to innovation and performance, coupled with Klipper's ability to optimize printing processes, creates a foundation for excellence in 3D printing.
In today's fast-paced world, where time is of the essence, and complex print jobs demand precision, remote access has become an absolute necessity. Elegoo's Neptune 4 series, empowered by Klipper and enhanced by Obico's seamless integration, offers users a comprehensive solution that addresses modern-day challenges in 3D printing.
Whether you're an enthusiast seeking reliability, a professional in pursuit of efficiency, or a visionary pushing the boundaries of creativity, this amalgamation of technology caters to all. With remote access, real-time monitoring, and AI-powered failure detection, users gain unprecedented control, flexibility, and peace of mind throughout their 3D printing journey.
As we look to the future, the possibilities of what can be achieved with Klipper and Obico are truly boundless. Embrace this technological evolution and join us in revolutionizing the world of 3D printing. Together, we usher in a new era of efficiency, convenience, and creativity in the realm of Fused Deposition Modeling. The future of 3D printing is here, and it's powered by Klipper and Obico.
