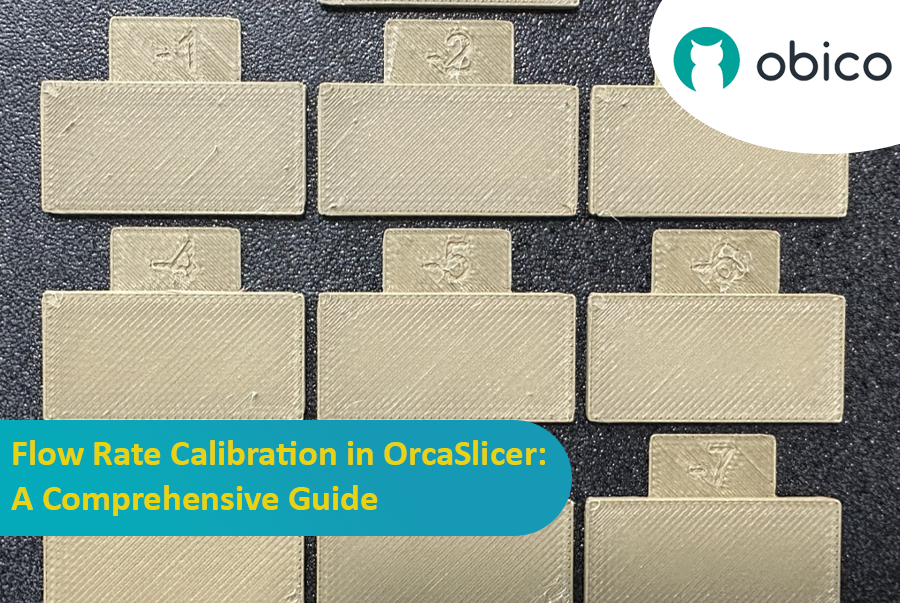
Flow Rate Calibration in OrcaSlicer: A Comprehensive Guide
Try JusPrin, the first GenAI 3D printing tool built on OrcaSlicer.
Introduction
Flow rate calibration is a crucial step in achieving high-quality 3D prints. Proper flow rate ensures consistent layer deposition, smoother surfaces, and better details. In this article, which is one of a series of OrcaSlicer calibration articles, we’ll explore the flow rate calibration process using OrcaSlicer, an open-source slicer software designed for Fused Deposition Modeling (FDM) 3D printers.
Before we delve into the flow rate calibration process in OrcaSlicer, let's pause briefly to understand what it is and its key features.
OrcaSlicer: A Powerful & Flexible Option for 3D Printing Slicing
OrcaSlicer is an open-source 3D printing slicer software for FDM printers. It's primarily designed for printers compatible with Marlin, Klipper, and Bambu Lab firmware. It supports various popular models from brands like Creality, Prusa, Elegoo, and even the open-source Voron.
OrcaSlicer Family Tree:
OrcaSlicer is based on Bambu Studio, which itself is derived from PrusaSlicer. PrusaSlicer, in turn, is based on the open-source solution Slic3r.
OrcaSlicer Key Features:
-
Modern, clean, and easy-to-understand interface
OrcaSlicer has a well-organized and intuitive interface that is easy to navigate, even for beginners.
-
Pre-made printer profiles for most all modern 3D printers
OrcaSlicer comes with pre-made printer profiles for most popular 3D printers, so you can get started quickly without having to manually configure all of the settings.
-
Klipper, Marlin, and OctoPrint support
OrcaSlicer integrates seamlessly with popular 3D printing software and firmware, such as Klipper, OctoPrint, and Marlin.
-
Built-in Calibration Tools
Orca Slicer includes a number of built-in calibration tools, such as Temperature Tower, flow rate calibration, and pressure advance calibration.
- Support for a Wide Range of Filaments
Orca Slicer supports a wide range of filaments, including PLA, ABS, PETG, TPU, and nylon from different brands.
- Regular Updates and Open-source
Orca Slicer is a constantly evolving software, with new features and bug fixes being added regularly.
If you’re interested in diving into OrcaSlicer and learning more about it, feel free to explore our comprehensive guide on using OrcaSlicer (OrcaSlicer Guide). It’s an easy introduction for beginners, and it connects you to more articles that can boost your skills with OrcaSlicer.
Now that you’re familiar with OrcaSlicer, let’s delve into the process of calibrating your printer’s flow rate using this powerful tool.
What is Flow Rate?
Flow rate, also known as extrusion multiplier, is a setting that determines how much filament is extruded by the printer nozzle. It is usually expressed as a percentage or a decimal number, where 1 or 100% means the nominal amount of filament, and higher or lower values mean more or less filament respectively.
Why is Flow Rate Calibration Important?
Flow rate calibration is important because it affects the quality and accuracy of the printed parts. If the flow rate is too high, the printer will over-extrude, causing issues like excessive filament use, blobbing, stringing, and poor dimensional accuracy. If the flow rate is too low, the printer will under-extrude, leading to problems like gaps, weak layer adhesion, and poor surface finish.
Different materials and printing conditions can significantly impact flow rate, which is why adjusting the actual flow rate factor is critical for optimal output.
Let’s explore how to calibrate flow rate using OrcaSlicer.
Are You Interested in 3D Printing? Listen to Our Podcast: Print Talk! 🎧
The following is an out-of-context ad to promote our podcast, Print Talk, tailored for 3D printing enthusiasts.
Stay ahead in the world of 3D printing with Print Talk, the go-to podcast for makers, hobbyists, and professionals. Hosted by the dynamic duo Neil Hailey and Kenneth Jiang, Print Talk delivers:
- Expert advice to improve your prints.
- Inspiring insights into the latest 3D printing innovations.
- Practical tips to solve common challenges, like stringing or material selection.
Follow us on your favorite platform! ❤️

Apple Podcasts

Spotify

Amazon Music

Podcast Index

YouTube

iHeartRadio

Podcast Addict

Podchaser

Listen Notes

Player FM
🎙️ Why wait? Explore the podcast and take your 3D printing skills to the next level! 👉 Check out our top episodes
How to Calibrate Flow Rate using OrcaSlicer
One of the best advantages of OrcaSlicer is its built-in Calibration tools, which includes flow rate calibration.
Flow Rate Calibration Procedures in OrcaSlicer
Pass 1 Calibration:
1. Creating a Test Project:
- Select your 3D printer, filament type, and process settings within OrcaSlicer and open a new project.
- Navigate to the Calibration menu and choose Pass 1.
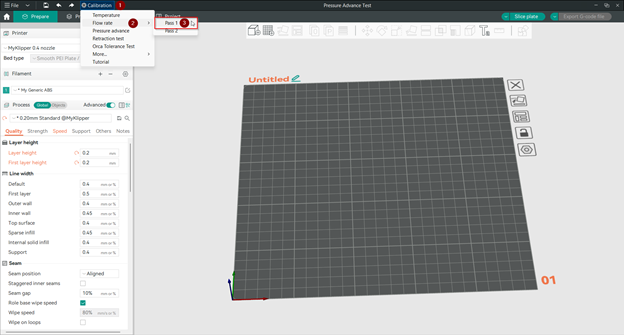
OrcaSlicer will generate a new project containing nine blocks. Each block corresponds to a different flow rate modifier.
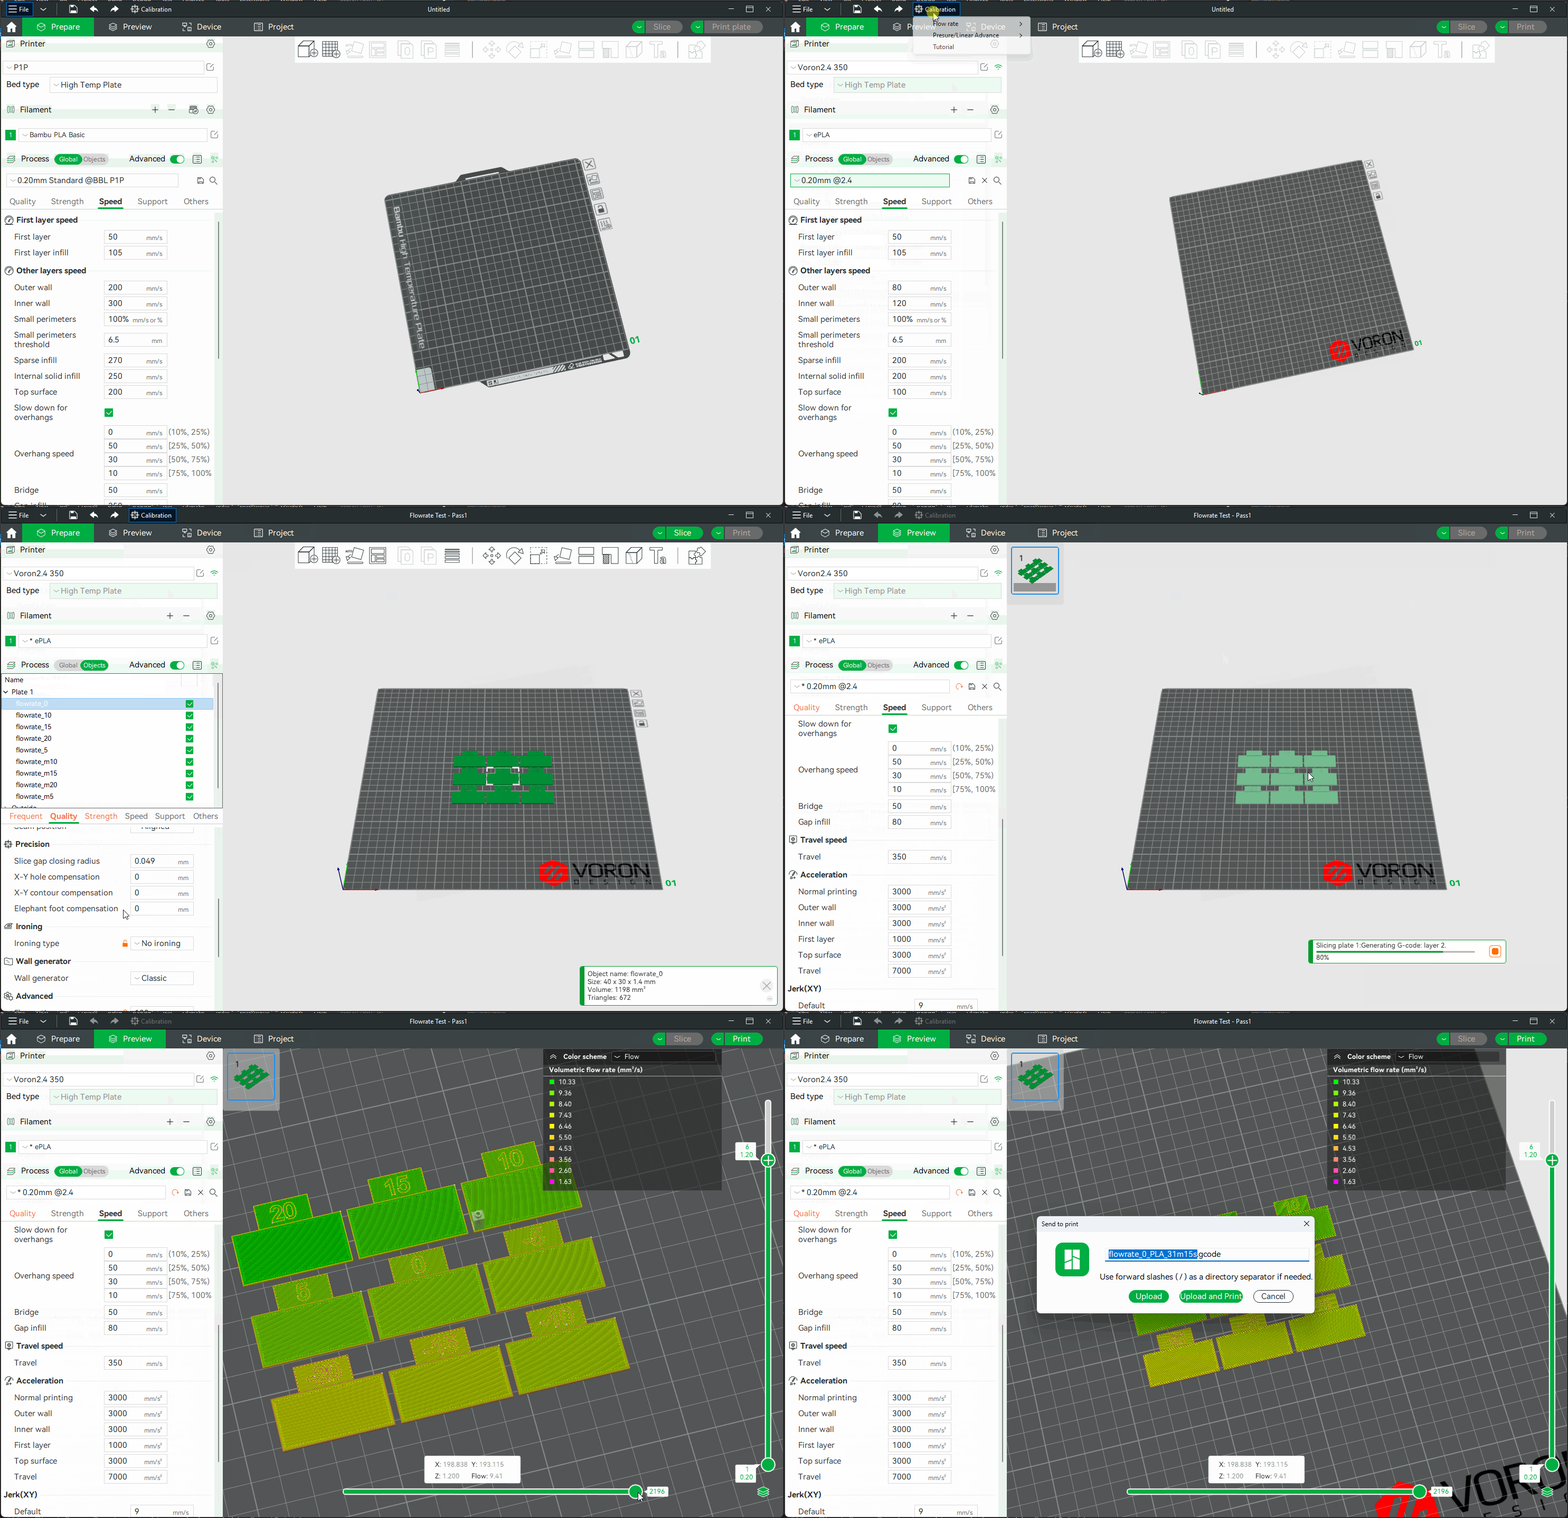
These blocks serve as test prints to evaluate the impact of varying flow rates.
2. Analyzing the Blocks:
- Slice and print the project using your preferred printer settings.
- Examine the top surfaces of each block.
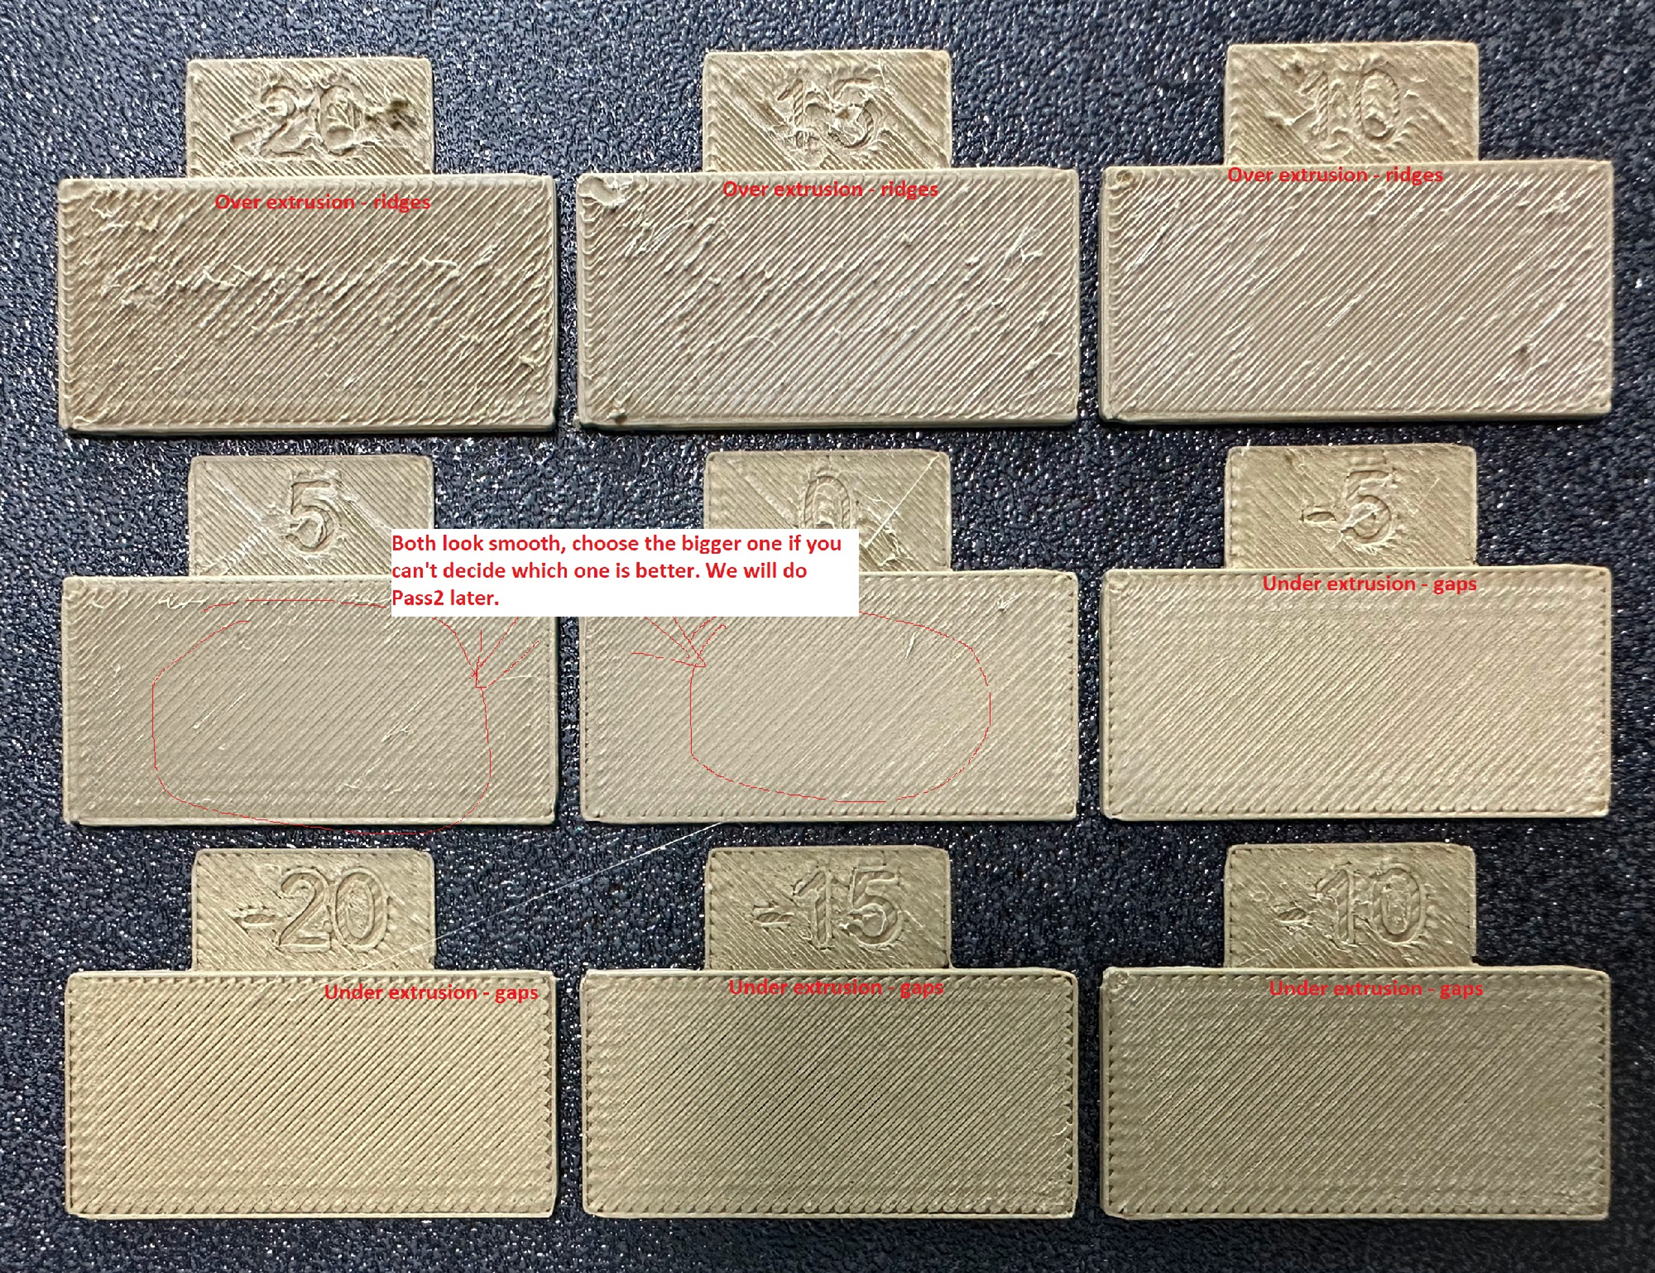
Look for the block with the smoothest top surface that does not have over or under extrusion. This indicates the optimal flow rate for your specific setup. Pay attention to details like layer adhesion, surface finish, and overall quality. Note: If you have two that are close to one another, choose the one with the higher flow rate.
3. Updating the Flow Ratio:
- Once you’ve identified the best-performing block, calculate the new flow ratio using the following equation:
FlowRatio_new = FlowRatio_old * (100 + modifier) / 100
For example, if your previous flow ratio was 0.98 and you selected the block with a flow rate modifier of +5, the new value should be calculated as:
FlowRatio_new = 0.98 * (100 + 5) / 100 = 1.029
Save the updated filament profile with the new flow ratio.
Next Steps
Once you’ve completed Pass 1 Calibration, proceed to Pass 2 Calibration for further fine-tuning.
Pass 2 Calibration: Fine-Tuning Flow Rate
-
Generate a New Project:
- Similar to Pass 1, create a new project within OrcaSlicer.
- Navigate to the Calibration menu and choose Pass 2.
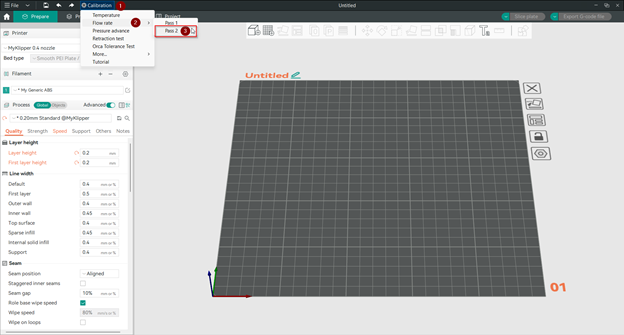
This time, the project will consist of ten blocks, each with a different flow rate modifier from -9 to 0.
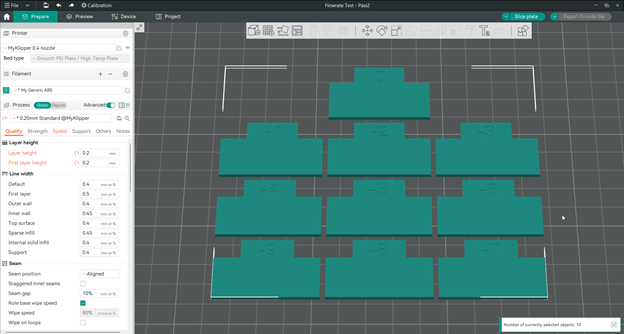
2. Evaluate and Adjust:
- Print the project using your chosen printer settings.
- Examine the top surfaces of the blocks once again.
- Determine which block yields the best results in terms of surface quality, layer adhesion, and overall print consistency.
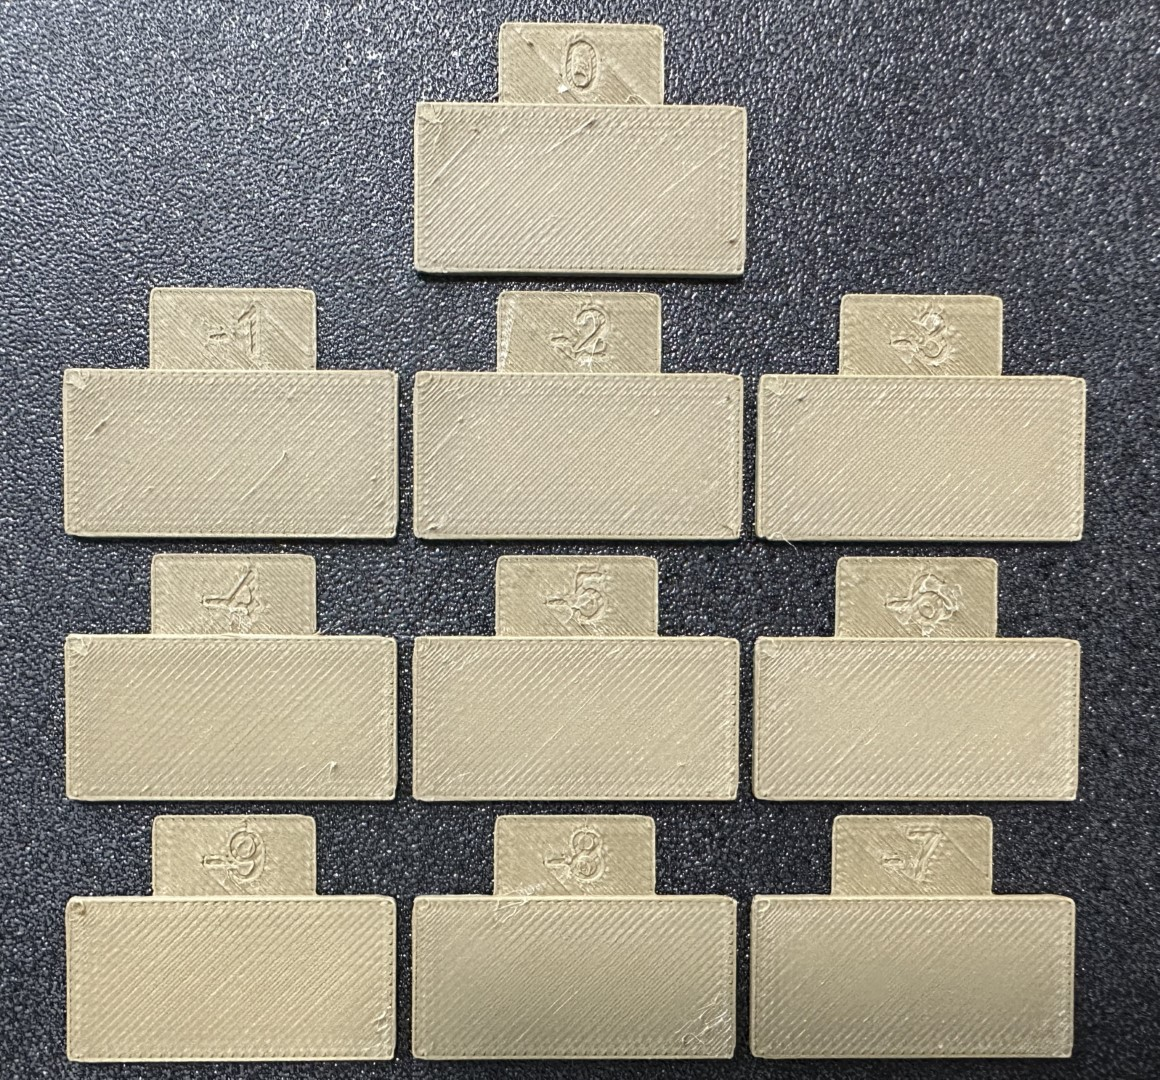
Calculate the updated flow ratio using the same formula as before:
FlowRatio_new = FlowRatio_old * (100 + modifier) / 100
For instance, if your previous flow ratio was 1.029 and you select the block with a flow rate modifier of -6:
FlowRatio_new = 1.029 * (100 - 6) / 100 = 0.96726
Save the Adjusted Filament Profile
Congratulations! 🎉 You’ve successfully calibrated your printer’s flow rate. However, keep in mind that different materials and printing conditions may require specific flow rates. To optimize your prints, consider creating a table with each material you use and its recommended flow rate. This way, you’ll achieve the best results for each filament type.
And if you’d like to delve into other calibration processes in OrcaSlicer, feel free to explore our comprehensive guide (OrcaSlicer Calibration Techniques) covering various calibration techniques.
Conclusion
In summary, getting the flow rate right is super important for making great 3D prints. OrcaSlicer is a fantastic tool that helps you do this. It's easy to use and works with lots of different types of 3D printers.
By following the steps in this guide, you can adjust your printer settings to get the flow rate just right. This means your prints will look smoother, have better detail, and be more accurate.
OrcaSlicer is always getting better with updates, and it's made by a community of people who love 3D printing. So, by using OrcaSlicer, you're joining a group of people who are passionate about making awesome stuff with 3D printers.
Once you've mastered flow rate calibration with OrcaSlicer, you'll be able to make all kinds of cool things with your 3D printer. So, give it a try and see what amazing creations you can come up with!
Also available in: Deutsch | Español | Français | Italiano | Nederlands | Polski | Português | Русский
