How to Connect Your Elegoo Neptune 4 Pro to Wi-Fi
The Neptune 4 Pro of Elegoo is an impressive 3D printer that comes with pre-installed Klipper firmware and Fluidd interface for remote control, providing many advanced features at a budget price. However, one common point of discussion among reviewers and users is its lack of built-in Wi-Fi.
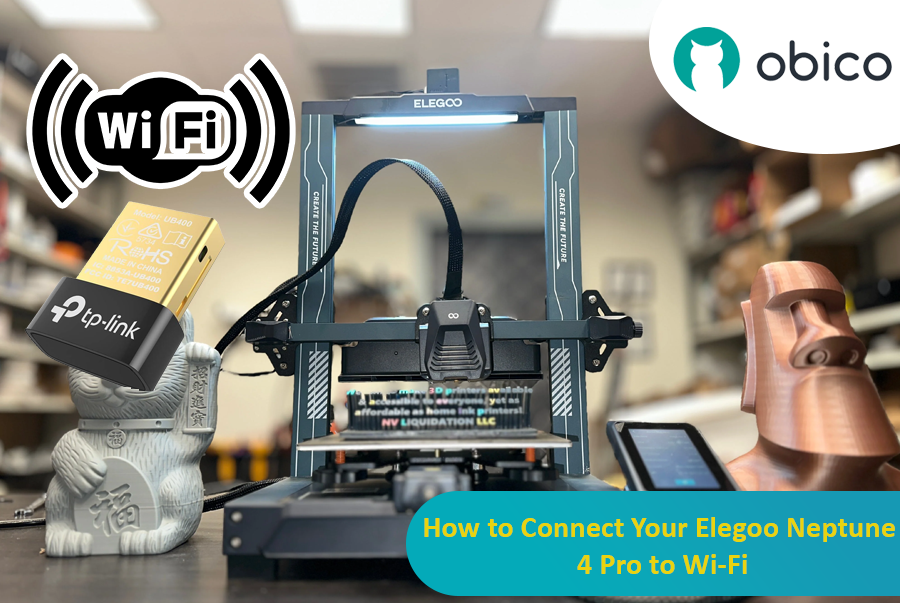
This article will show you how to add Wi-Fi capability to your Elegoo Neptune 4 Pro along with step-by-step instructions that can make your 3D printing experience better. Even if you are a beginner or an expert, this guide covers every stage in a very easy-to-follow manner.
Understanding Your Elegoo Neptune 4 Pro
Before we delve into the Wi-Fi setup process, let us first take a quick look at some key features of the Elegoo Neptune 4 Pro. If you were to put the Neptune 3 Pro right next to the 4 Pro, they would look almost identical, but there are various differences under their hoods. The Neptune 4 Pro was created for high-speed printing as it has the ability to print at speeds up to 500 mm/s and also includes other features that are mostly found in more costly machines.
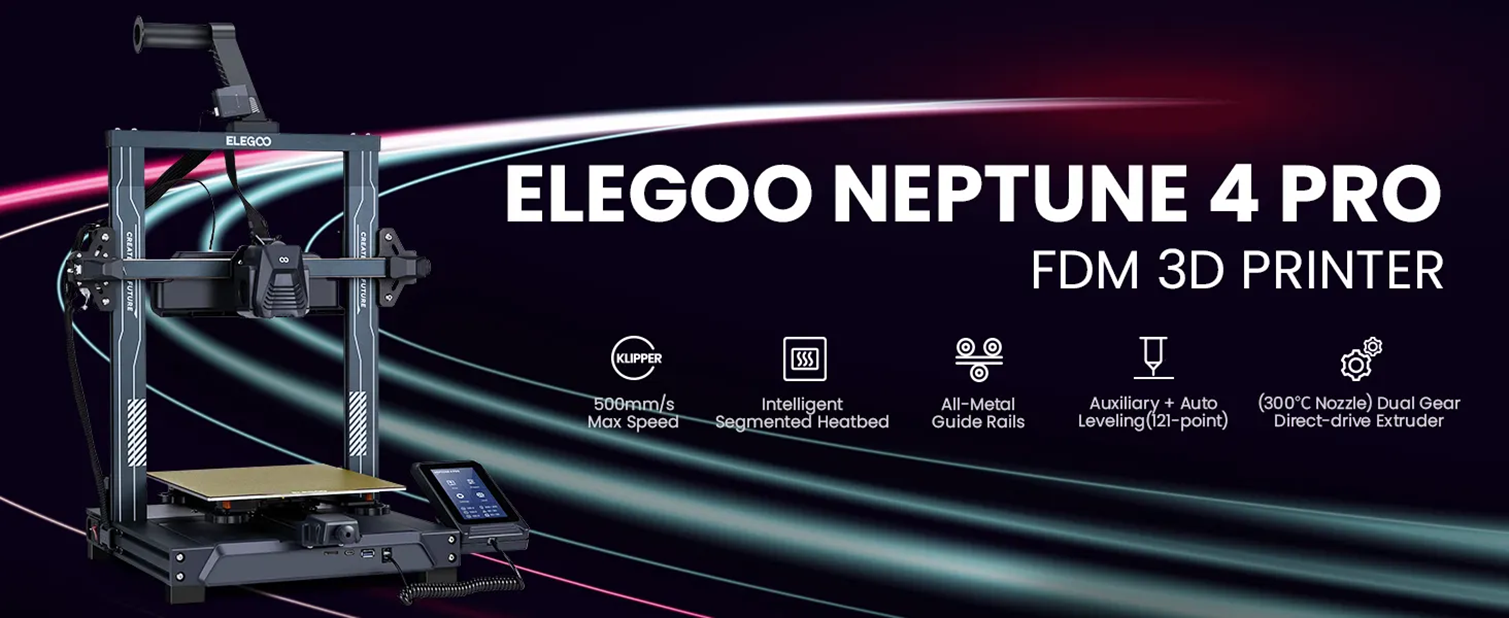
- Build Volume: 225mm x 225mm x 264mm
- Heated Bed: The heated bed has two separate heating areas: a smaller center zone (120mm x 120mm) and a larger full-size zone. With a power output of 100W+150W. The slicing software automatically recognizes the model size during slicing and activates the suitable heating zone. This allows for efficient heating and saves power and time, so if you don't need the entire bed heated, it will heat the small one only.
- Cooling: It has an auxiliary cooling system with four 4020 ball bearing fans designed to provide additional cooling (with the head cooling fans). You can adjust the noise level through the menu system with options of mute, normal, or violent mode. You can also turn it off with a small switch on the top of the unit.
- Extruder: The printer comes with a dual-gear drive extruder that has a NEMA 14 stepper motor and a high-flow hot end. It is similar in design to those found in Ender 7 or Ender 5 S1. The tool head weighs 90 grams less than the Neptune 3 Pro tool head, allowing for more stability at high speeds.
- Control Board: It is a clone of the Makerbase MKS SKIPR board, combining a single-board computer and microcontroller so it can run Klipper software without any additional hardware needed.
- Connectivity: Wired network connection using an RJ45 port with no built-in Wi-Fi.
Additional features include a filament run-out sensor that pauses printing automatically when filament runs out, dual Z-axis motors for added stability and precision, and easy belt adjustment for the X and Y axes, which greatly improves maintenance and calibration. The printer also includes an intuitive touchscreen interface that simplifies control and monitoring during prints. LED lights are installed on the tool head as well as underneath the top bar of the machine, which illuminate the work area, offering better visibility during prints.
Although this printer comes with an intuitive touchscreen interface used to operate and control it, many advanced functionalities, especially those related to Klipper firmware like pressure advance or input shaping values are not accessible through this interface.
You can easily connect the printer to your local network through the included Ethernet cable. But wireless connection is loved by many people because they find it cumbersome to connect the printer using wires, particularly when the router is in a different room. This guide is designed for such cases when you want to make your printer setup more flexible and convenient.
Well then, let’s begin!
Adding Wi-Fi Capability to Your Elegoo Neptune 4 Pro
To connect your Elegoo Neptune 4 Pro to Wi-Fi, you'll need an external USB Wi-Fi dongle and configure it via a wired network connection initially. Below is a step-by-step guide to help you through the process.
Step 1: Get a Compatible Wi-Fi Dongle
Not all Wi-Fi dongles work with Elegoo Neptune 4 Pro because the printer runs on Armbian Linux-based operating system, which only supports specific Wi-Fi drivers. After testing several dongles, I found that TL-WN725N 150Mbps Wireless N Nano USB Adapter from the tp-Link company works perfectly with the Elegoo Neptune 4 Pro.
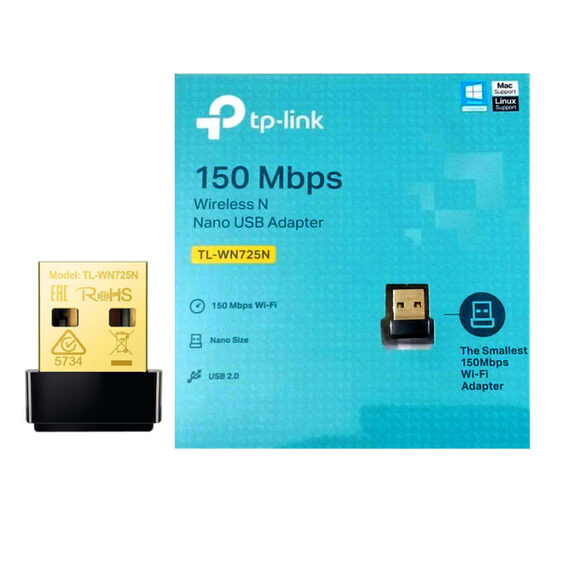
You can buy it from AliExpress through this link.
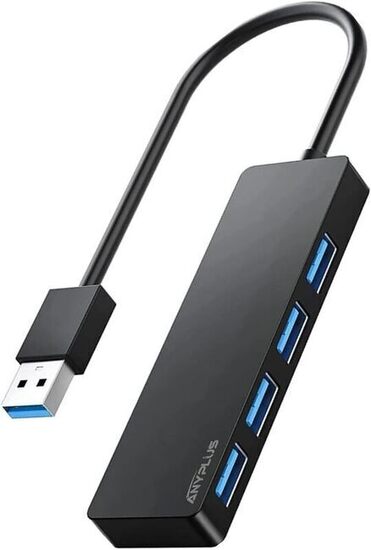
Another useful accessory is a 4 Port USB 3.0 hub splitter. Since the printer comes with only one USB port, if you want to print from a USB flash drive or use a USB webcam with Klipper for remote monitoring, you will need extra ports.
Step 2: Connect the Wi-Fi Dongle
- Plug in the Dongle: Insert the Wi-Fi dongle into the USB port on the front of the Elegoo Neptune 4 Pro.
- Connect via Wired Network: Initially, connect the printer to your local network using the RJ45 port and the Ethernet cable that comes with the printer.
Step 3: Access the Printer via SSH
To configure the Wi-Fi dongle, you need to SSH (Secure Shell) into the printer from your computer. Follow these steps:
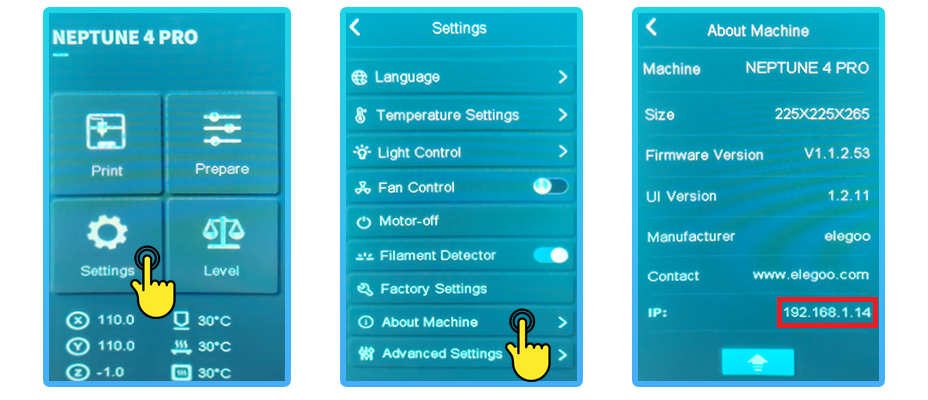
- Find the printer’s IP address: Go to the printer's settings menu, select “About Machine”, and note down the IP address listed there.
- Open SSH Client: On your computer, open an SSH client (e.g., PuTTY for Windows).
- Connect to the printer: Enter the printer’s IP address in the SSH client and click open.
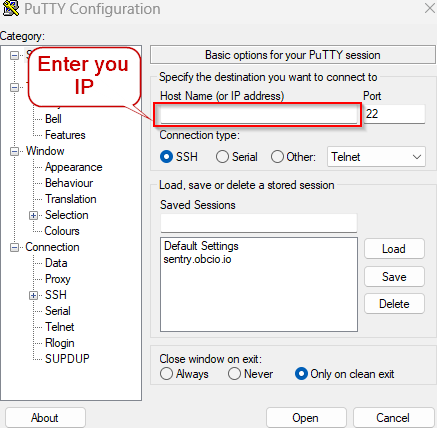
This will open another window where you will be asked to enter your printer login credentials, to access it.
The default login credentials for Elegoo Neptune 4 Pro are:
- Username: MKS (or use root for root access)
- Password: makerbase
Step 4: Verify the Wi-Fi Dongle
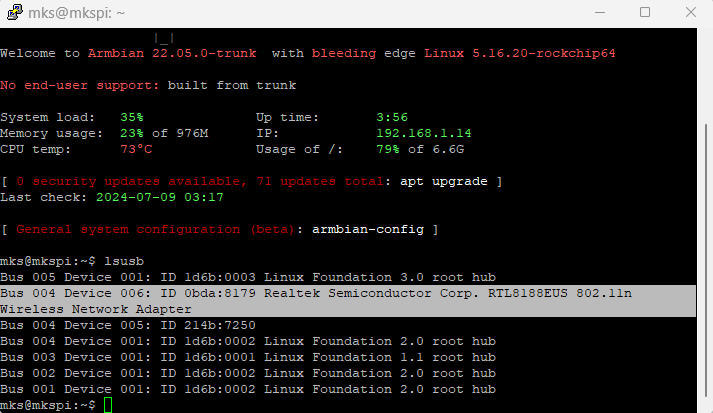
- Check USB Devices: Once logged in, type
lsusbto list all connected USB devices and ensure that your Wi-Fi dongle appears on the list.
-
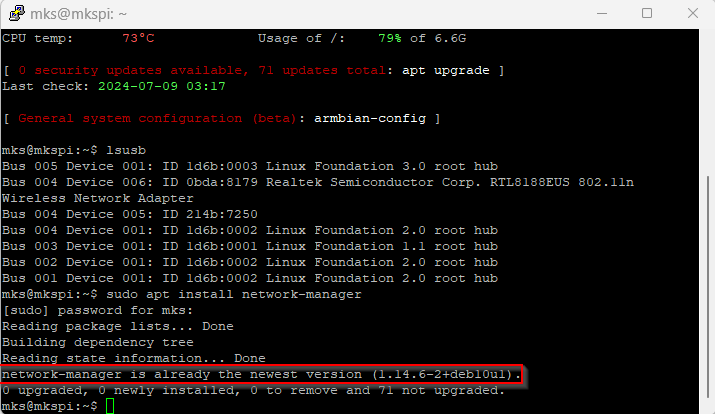
Install Network Manager: If not already installed, type
sudo apt install network-managerto install network manager.Note: You may be asked to enter the “makerbase” password again to install it.
As you can see here in the following image, I already have it installed with the latest version.
Step 5: Configure the Wi-Fi Connection
- Open Network Manager: Type
nmtuiand press Enter to open the text-based user interface of the network manager.
- Activate Connection: Use your keyboard arrows to select “Activate a connection,” then choose the Wi-Fi network that you need to connect from the appeared list.
- Enter Wi-Fi Password: You will be asked to input your Wi-Fi password to connect.
Step 6: Finalize the Wi-Fi Setup
- Disconnect Ethernet Cable: Once connected via Wi-Fi, you can remove the Ethernet cable now.
- Find the Wi-Fi IP address: You can find the new IP address of your printer by looking at the list of devices connected to your router or using a network scanning tool such as Angry IP Scanner, or just restarting your 3D printer and then going to the settings menu of the printer, selecting “About Machine,” and there you will see your new IP address like we did last time.
Step 7: Access the Printer via Web Interface
With the printer connected to Wi-Fi, you can now access the Fluidd web interface for Klipper firmware from any device on the same network. Simply enter the printer’s IP address in a web browser to access the interface and control your printer remotely.
Now you have the ability to connect your printer and have full control over your Klipper features and options through the Fluidd web interface. However, it should be known that you can only control your printer when connected to the same local network. If you want to control it from anywhere in the world to add more convenience and have more features, you can use Obico.
Having a 3D printer with Klipper firmware installed, you are one step away from using the amazing features of Obico, which comes with AI detection features and more. Let’s have a quick look at what Obico is and what features it will add to your Elegoo Neptune 4 Pro 3D printer!
Introducing Obico for Remote 3D Printer Management
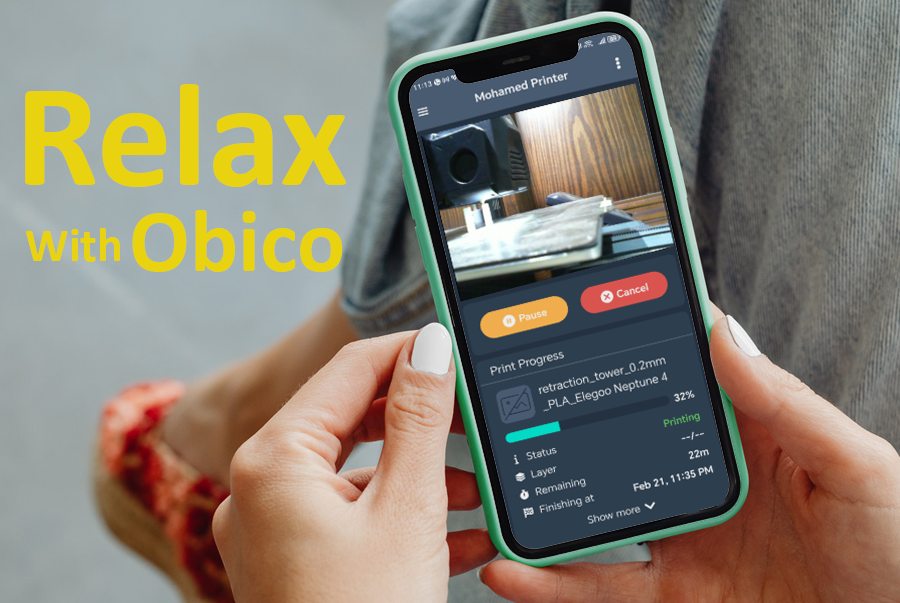
Obico is a powerful tool designed to enhance your 3D printing experience by providing remote monitoring and control capabilities, even when you're not on the same local network as your printer. With Obico, you can manage your printer from anywhere in the world, ensuring greater flexibility and peace of mind.
Key Features of Obico
- Remote Monitoring: You can watch how your print goes wherever you are right now using a mobile app or visiting a web page provided by Obico. You will get real-time video feeds along with useful information about the current status of the printing process, such as the percentage done, etc.
- AI-Powered Print Failure Detection: Obico uses AI to detect print failures, such as spaghetti messes and other common issues. If a failure is detected, it can pause the print or send alerts to the user.
- Multi-Printer Support: Having several printers at home or in the office could become quite a challenging task, especially when trying to control them all simultaneously via different interfaces. This is where Obico comes into play by allowing the management of multiple 3D printers from a single interface, thus greatly simplifying things.
- Alerts and Notifications: Obico sends notifications via email, SMS, or mobile app when a print starts, finishes, or encounters an issue. Users can customize these alerts based on their preferences.
- Print Job Management: Users can start, pause, resume, or cancel print jobs remotely. This is particularly useful for managing prints when away from the printer.
- Detailed Print Analytics: Obico provides detailed analytics on print jobs, including print duration, filament usage, and success rates. This data helps users understand their printer's performance and optimize their printing process.
- Integration with OctoPrint: For users running OctoPrint, Obico integrates seamlessly, providing additional functionality and enhancing the existing OctoPrint features.
- Cloud and Local Server Options: Users can choose to run Obico in the cloud for easy access from anywhere or set up a local server for more control and privacy.
- Full Mainsail/Fluidd Remote Access: Obico for Klipper provides seamless remote access to your 3D printer through Mainsail and Fluidd interfaces, offering you the convenience of controlling your printer from a single interface.
- AI-Powered Failure Detection: Obico for Klipper incorporates advanced artificial intelligence (AI) technology to detect potential failures during the 3D printing process, enhancing your printing experience.
How Does AI Work?
The AI analyzes print data in real-time, identifying anomalies such as spaghetti messes. It then alerts you to these issues, allowing for prompt action.
Benefits of Early Failure Detection
Early failure detection prevents print failures and reduces material waste, saving you time and resources. It also enhances the quality and success rate of your 3D prints.
The Obico Mobile App: Remote Monitoring on the Go
Obico offers a dedicated mobile app, allowing you to monitor and control your 3D printer remotely, even when you're away from your computer or workspace.
- iOS and Android Compatibility: The Obico mobile app is compatible with both iOS and Android devices, ensuring accessibility for a wide range of users.
- Features of the Mobile App: The mobile app provides a user-friendly interface for monitoring print progress, receiving alerts, and managing your 3D printer's settings from your smartphone or tablet.
Stay Informed with 3D Printer Status Notifications
Obico for Klipper keeps you informed about your 3D printer's status with various notification options.
- Push Notification Alerts: Receive push notifications on your mobile device for real-time updates on your print job's progress and any detected issues.
- Email Updates: Get email updates with detailed information about your 3D prints, including progress reports and any issues detected during printing.
- Discord Integration and Alerts: For users who prefer Discord, Obico offers integration with this platform, allowing you to receive alerts and updates directly on your Discord server, ensuring that you're always in the loop about your 3D printing projects.
If you liked Obico and want to give it a try, we have you covered! Just follow our detailed guide here: Install Obico for the Elegoo Neptune 4 series.
Troubleshooting Common Issues
Even with a clear guide, certain challenges may still arise. Here are fixes to some common problems:
Wi-Fi Dongle Not Recognized
- Ensure Compatibility: Make sure that your Wi-Fi dongle uses a compatible chipset (e.g., Realtek).
- Re-plug and Reboot: Unplug the dongle, restart the printer, and plug it back in.
- Driver Issues: Confirm installation of necessary drivers may be required; specific dongles might need manual driver installation.
Connection Drops
- Signal Strength: Ensure that the printer is within an area covered by a strong Wi-Fi signal range.
- Interference: Minimize interference from other devices or networks.
- Stable Connection: Use the wired Ethernet option for a more reliable connection.
SSH and Network Manager Issues
- SSH Access: Check whether you are using the correct IP address along with login credentials.
- Network Manager Installation: If installation fails, check the network connection, then retry.
FAQs
-
Why does the Elegoo Neptune 4 Pro lack built-in Wi-Fi?
Basically, the Elegoo Neptune 4 Pro was designed to be cheap and fast. Built-in Wi-Fi was not included so as to cut costs while still offering advanced features like Klipper firmware and the Fluidd interface; this guide helps you add it easily.
-
Which Wi-Fi dongles are compatible with the Elegoo Neptune 4 Pro?
You should note that not all dongles work with the printer. TP-Link’s TL-WN725N 150Mbps Wireless N Nano USB Adapter is recommended for use with this device since it operates perfectly on its Armbian Linux-based operating system.
-
Do I need any additional accessories to connect my printer to Wi-Fi?
Yes, a 4-port USB 3.0 hub splitter might be necessary. This is because the printer only comes with one USB port; hence, using this splitter will enable the connection of different devices, such as a USB flash drive and a USB webcam for Klipper alongside the Wi-Fi dongle.
-
How can I find the IP address of my printer?
To get your Elegoo Neptune 4 Pro’s IP address, go into the settings menu on the printer, select the “About Machine” option, and note down the listed IP address, which is very important for SSH access as well as connecting through the Fluidd web interface.
-
What are the default login credentials for SSH access to the Elegoo Neptune 4 Pro?
The default login credentials are:
- Username: MKS (or use root for root access)
- Password: makerbase
-
What should I do if my Wi-Fi dongle is not recognized?
Ensure that your Wi-Fi dongle uses a compatible chipset, such as Realtek. Try unplugging and re-plugging the dongle, restarting the printer, and checking that the necessary drivers are installed. You might need to manually install drivers for some dongles.
-
How can I enhance the stability of my Wi-Fi connection?
- Ensure the printer is within a strong signal range of the wireless network.
- Minimize interference from other devices or networks nearby.
- For a more reliable connection, use the wired Ethernet option instead.
-
Can I control my printer remotely using Obico?
Yes, Obico allows you to manage your printer from anywhere in the world, providing advanced remote monitoring and control capabilities, AI-powered print failure detection, and customizable alerts and notifications.
Conclusion
Enabling Wi-Fi on your Elegoo Neptune 4 Pro greatly improves its usability as well as convenience when it comes to managing and monitoring 3D prints. This article has given a step-by-step guide on how to set up wireless connectivity using a compatible USB Wi-Fi dongle. Through these steps, you can connect your printer to Wi-Fi and then access it remotely via the Fluidd web interface, thus gaining full control over Klipper's features and options.
Furthermore, integrating Obico with your 3D printer opens up new possibilities for remote management. Some of the features include real-time monitoring, AI-powered print failure detection, multi-printer support, customizable alerts and notifications, etc., all aimed at ensuring efficient and effective management of different 3D printing projects even when away from the local network.
Happy printing!
