How to Use the 3D Benchy to Fine-Tune Your 3D Printer
Let’s talk about the 3D Benchy, the little boat that has taken the 3D printing world by storm. At first glance, you may think that it’s a fun toy, but this little tugboat is actually one of the most powerful tools for testing and fine-tuning your 3D printer. Whether you’re new to 3D printing or an experienced user, the 3D Benchy can greatly help you with troubleshooting your 3D printer.
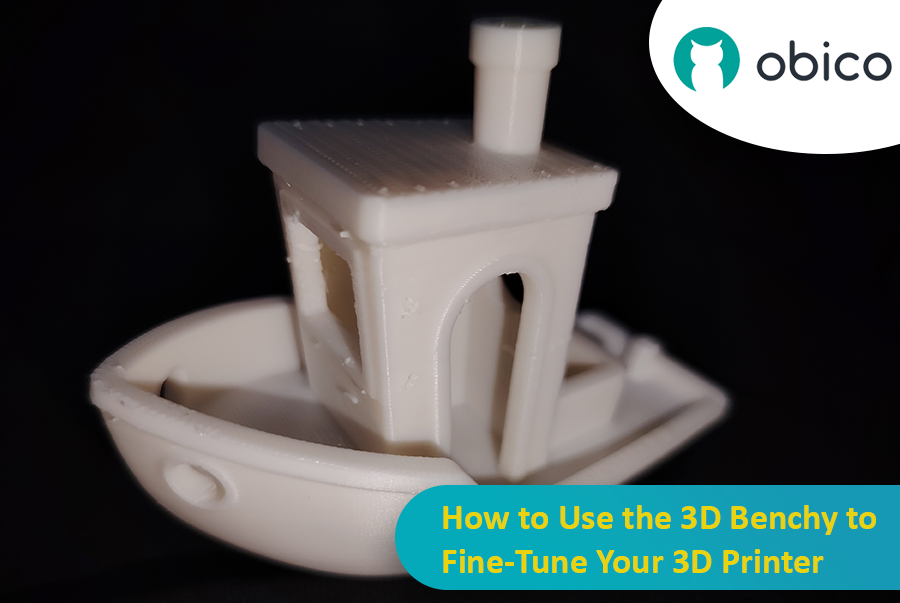
Let’s dive deeper and understand how this model can improve your printer performance.
What is 3D Benchy?
The 3D Benchy is a simple 3D model that was created in 2015 by Daniel Noree and the team at Creative Tools. Their goal was to make a model that would put any 3D printer through its paces. It had to be challenging enough to test different printing challenges but also fun and fast to print. The result was this iconic little tugboat, which has since become the world’s most printed and shared 3D model, with over 3 million downloads. Today, it’s also available as a ready-to-print G-code file that comes with many popular 3D printers, such as Bambu Lab's printers.
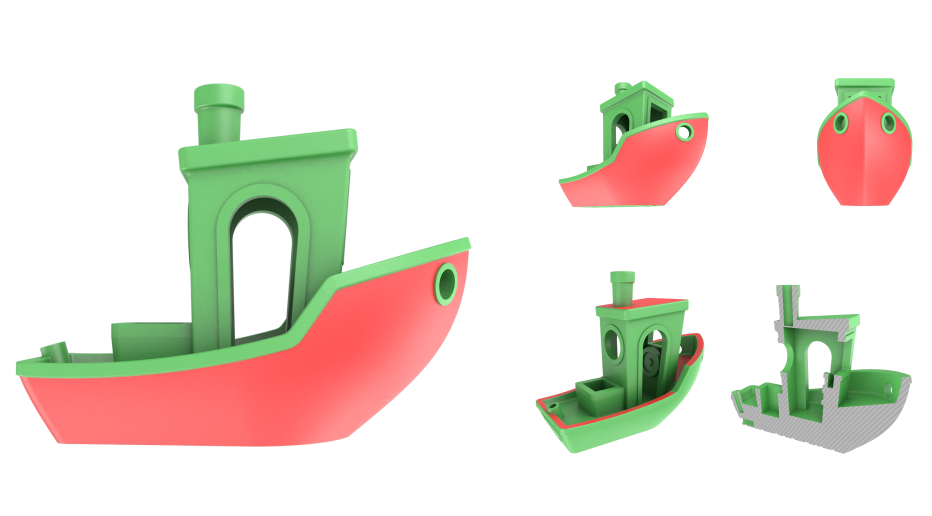
source: 3dbenchy.com
The 3D Benchy isn’t just a cute model. It was designed with a mix of shapes, curves, overhangs, and fine details that make it the perfect calibration tool. Since it’s so popular, there are tons of examples, tutorials, and advice from other users out there. So, if you run into issues with it, you can get help from the community. There’s even a Facebook fan group where people share tips, troubleshooting, and their own 3D Benchy prints.
How can the 3D Benchy help you fine-tune your 3D printer?
If you get 3D printing problems like poor surface quality, misaligned layers, or warping, 3D Benchy is the answer.
The beauty of 3D Benchy is that it tests a multitude of printing challenges with one simple model. It has many intricate parts that test different aspects of your printer. From the smooth curves of the hull to the tiny letters on the back, every part of 3D Benchy tells you how well your printer is working.
For example, the hull of the boat with its large overhangs is very hard to print perfectly if your printer isn’t set up right, so any surface imperfections will be very noticeable. 3D Benchy also allows you to measure key dimensions and compare them to the original design; for example, the boat is 60mm long. This allows you to check if your X, Y, and Z axes are calibrated correctly.
The windows and cabin roof of 3D Benchy are also great for testing your printer’s ability to handle overhangs and bridges. If these areas are droopy or uneven, it means your printer’s cooling system, supports, or bridging settings need to be improved.
How to Download the 3D Benchy File
Ready to print your own Benchy? It’s easy, and the file is free and simple to use. You can find the official 3D Benchy file at 3DBenchy.com.
The 3D Benchy file is in STL format, the most common format for 3D printing models. This format breaks the object down into tiny triangles to form a mesh that defines the shape of the boat. The standard Benchy file has over 225,154 triangles for a smooth and detailed surface.
Prepare the STL File for Printing
Now that you have downloaded the STL file, it’s time to import it into your slicer software. This software converts your 3D model into G-code, which is the language your 3D printer understands. The G-code tells your printer what to print layer by layer.
Importing the file is easy.
Open your slicer software (Orca Slicer, Cura, PrusaSlicer, Bambu Studio, or whatever slicer you prefer). Then open the 3D Benchy STL file by selecting “open” or “import” and navigate to where the file is on your computer. Once loaded, you should see the Benchy model on your virtual print bed.
After importing the 3D Benchy to your slicer, it is time for adjusting the slicing settings for optimal print quality. Here are some general settings for slicing the 3D Benchy:
- Scale: Keep the scale at 1:1. At this scale, the 3D Benchy measures 60 mm from bow to stern, and you can use this dimension as a reference to calibrate your printer.
- Layer Height: Set this to 0.2 mm for a good balance between speed and detail. This layer height provides smooth surfaces without making the print time too long.
- Infill: Use 10% infill. This keeps the 3D Benchy lightweight while still maintaining structural integrity.
- Print Speed: You can set the print speed for extrusion at up to 50 mm/s. This speed ensures that the printer moves fast enough while still delivering a good print quality.
- Print Speed (Travel): Set the travel speed (for non-extruding movements) at up to 150 mm/s. This allows your printer to move quickly between sections without compromising quality.
- Supports: The 3D Benchy is designed to be printed without supports, but you can use the tree (auto) supports option in Orca Slicer for more clean results.
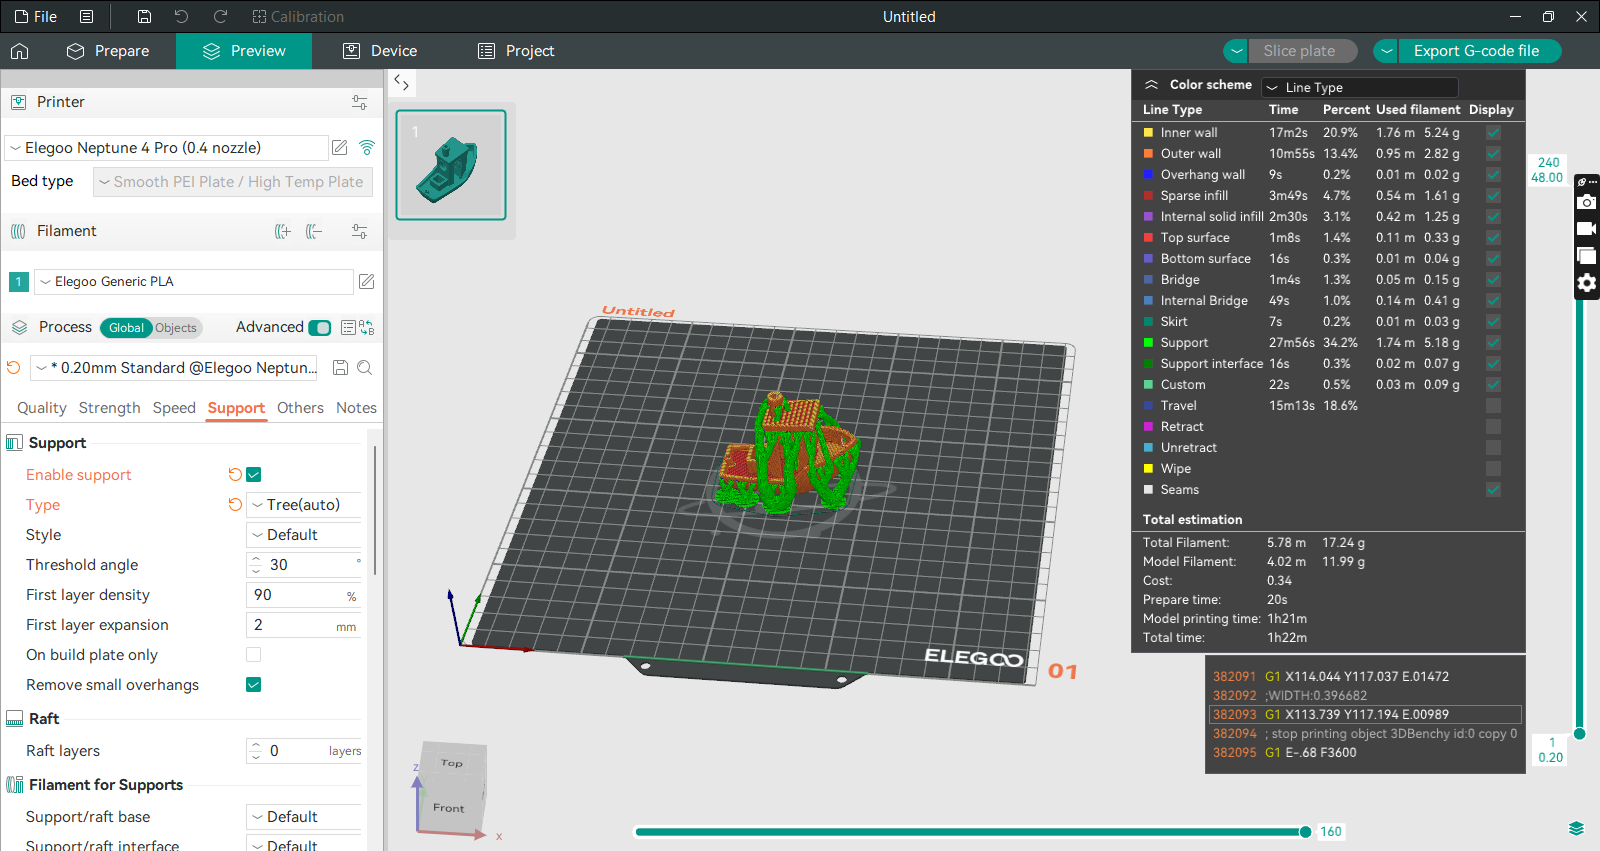
We recommend using Orca Slicer to slice the 3D Benchy model to test your printer. Orca Slicer has many features that make it the perfect slicer for this. One of those features is the auto-generated tree support that is easy to use without needing to dive deep into the support settings. These supports are easy to remove and keep the part clean.
Plus, Orca Slicer is super convenient; you don’t even have to download and manually import the 3D Benchy model yourself! Just right-click on the build plate, select “Add Handy Model,” and select 3DBenchy from the list. The model will show up in the slicer, and you can now adjust settings, slice, and then print it.
Orca Slicer also has many auto-calibration tools to help you fine-tune your printer. If you spot any printing issues, you can just print the appropriate test and identify the parameters that need adjustment.
If you’re new to Orca Slicer, you can get started with our introduction guide. It has many links to other resources and info about the different calibration tests in Orca Slicer.
Now that your 3D Benchy is printed, it’s time to inspect it for troubleshooting.
Every part of the 3D Benchy is designed to test a specific aspect of your printer’s performance, whether it’s overhangs, fine details, or dimensional accuracy.
The hull is the most challenging part because it has big, smooth curves with overhanging surfaces that many printers struggle with. If your printer isn’t well-calibrated, you’ll see rough edges, blobs, or uneven layers on the hull. These imperfections will tell you if your extrusion settings, cooling, or layer alignment are off.
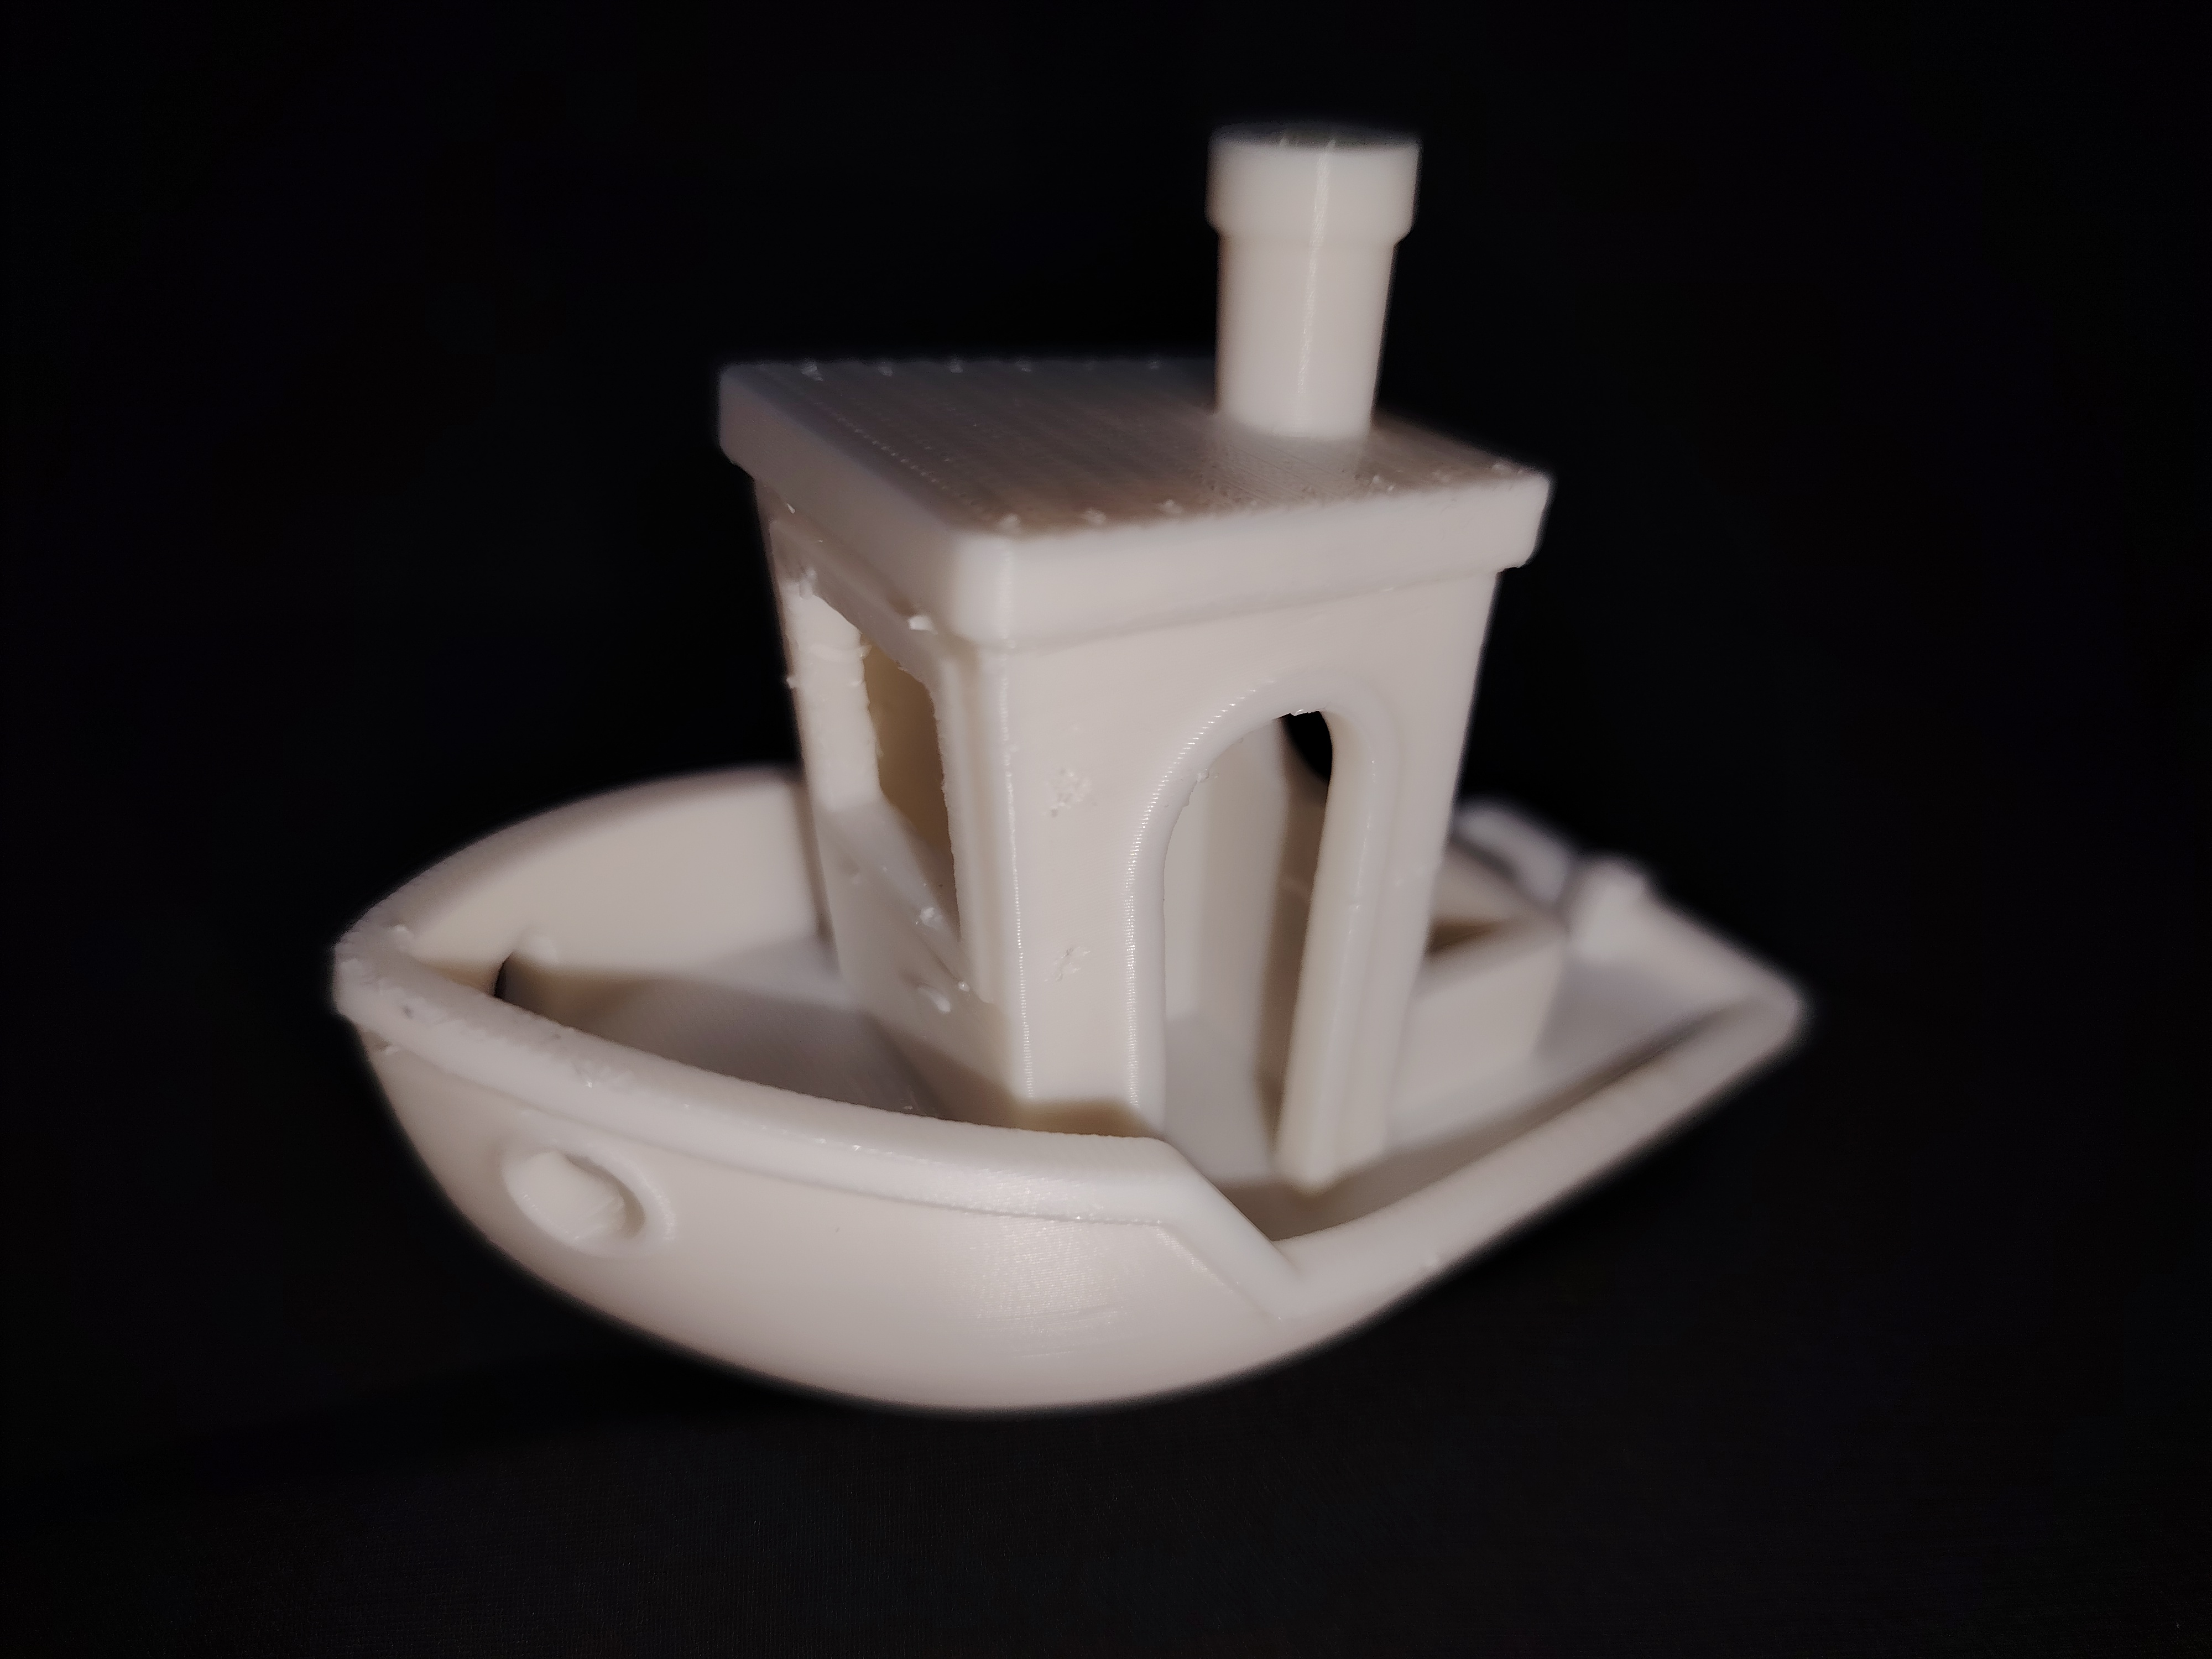
The deck house and chimney are another key test. These areas will test your printer’s ability to print cylindrical shapes, and even small deviations will show up on your X and Y axes calibration. The tiny details on the deck house—the windows and door frames—are a great test of your printer’s precision. If these details aren’t crisp or droop, it means your cooling settings need to be adjusted or you need to slow down the print speed.
Surface Finish and Small Details
One of the best features of the 3D Benchy is how it shows surface finish and tiny details, both important for good prints. The small text on the nameplate at the back of the boat and the shallow lettering on the bottom are a good indication of your printer’s resolution. These should be sharp and readable. If they are fuzzy or missing, it means your resolution is off or you are facing a problem with your first layer.
Measure the Critical Dimensions
Now that you’ve visually inspected the print quality, it’s time to get precise. The 3D Benchy has exact dimensions, so it’s a great tool to calibrate your X, Y, and Z axes.
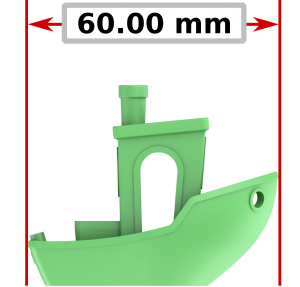
Start by measuring the bow-to-stern length (with scale 1:1), which should be 60 mm. Then measure the overall width of the boat, which should be 31 mm, and the height from the base to the top of the chimney, which should be 48 mm. If any of these measurements are off, it means you need to calibrate your printer’s X, Y, or Z axis.
source: 3dbenchy.com
Calipers are the best tool to take these measurements. By comparing the actual print dimensions to the design specifications, you can fine-tune your printer’s steps per unit (often adjusted in the firmware settings) so it will print at the correct scale. Even a small miscalculation of a fraction of a mm will affect how your printer handles larger prints. This is because the error rate is cumulative and increases according to the dimensions.
Evaluate the Underside and First Layer
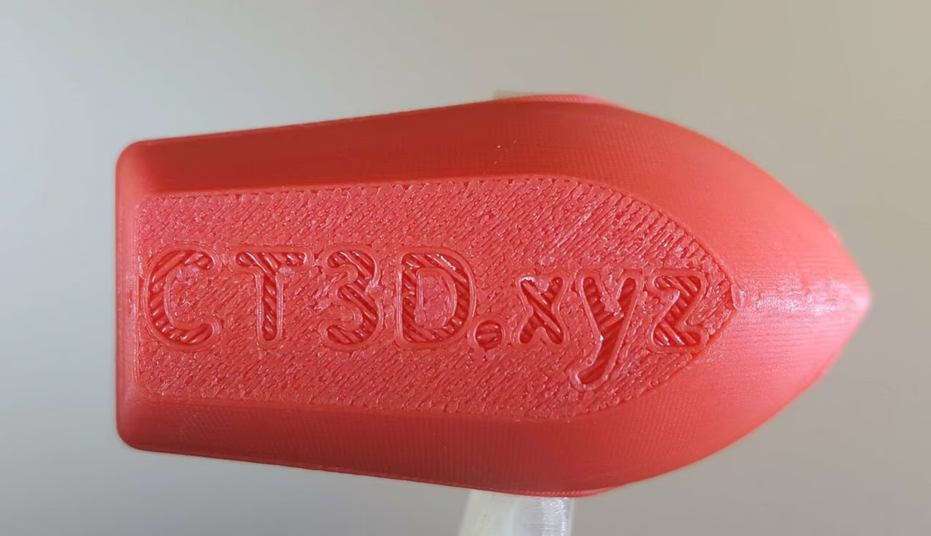
The first layer of any print is critical, and the underside of your 3D Benchy is a great way to evaluate how well your printer handles bed adhesion and first layer settings. Look at the letters on the bottom of the boat – they should be crisp and legible. If the lines are too faint or there are gaps between the extruded lines, you might need to level your bed or adjust the nozzle height.
source: all3dp.com
Another common issue with first layers is called “elephant’s foot,” where the bottom layer is squished and bulges out. This usually happens when the bed or nozzle is too hot or when the first layer is printed too close to the bed. Lowering the bed temperature or adjusting the Z-offset will fix this.
For even better first-layer monitoring, you can use Obico’s Nozzle Ninja, a first-layer AI detection system. The first layer is the foundation of your 3D print, and any imperfections at this stage can cause print failures. Nozzle Ninja uses AI to monitor the first layer and detect issues such as poor adhesion, under extrusion, over extrusion, warping, bubbling, or nozzle blobbing.
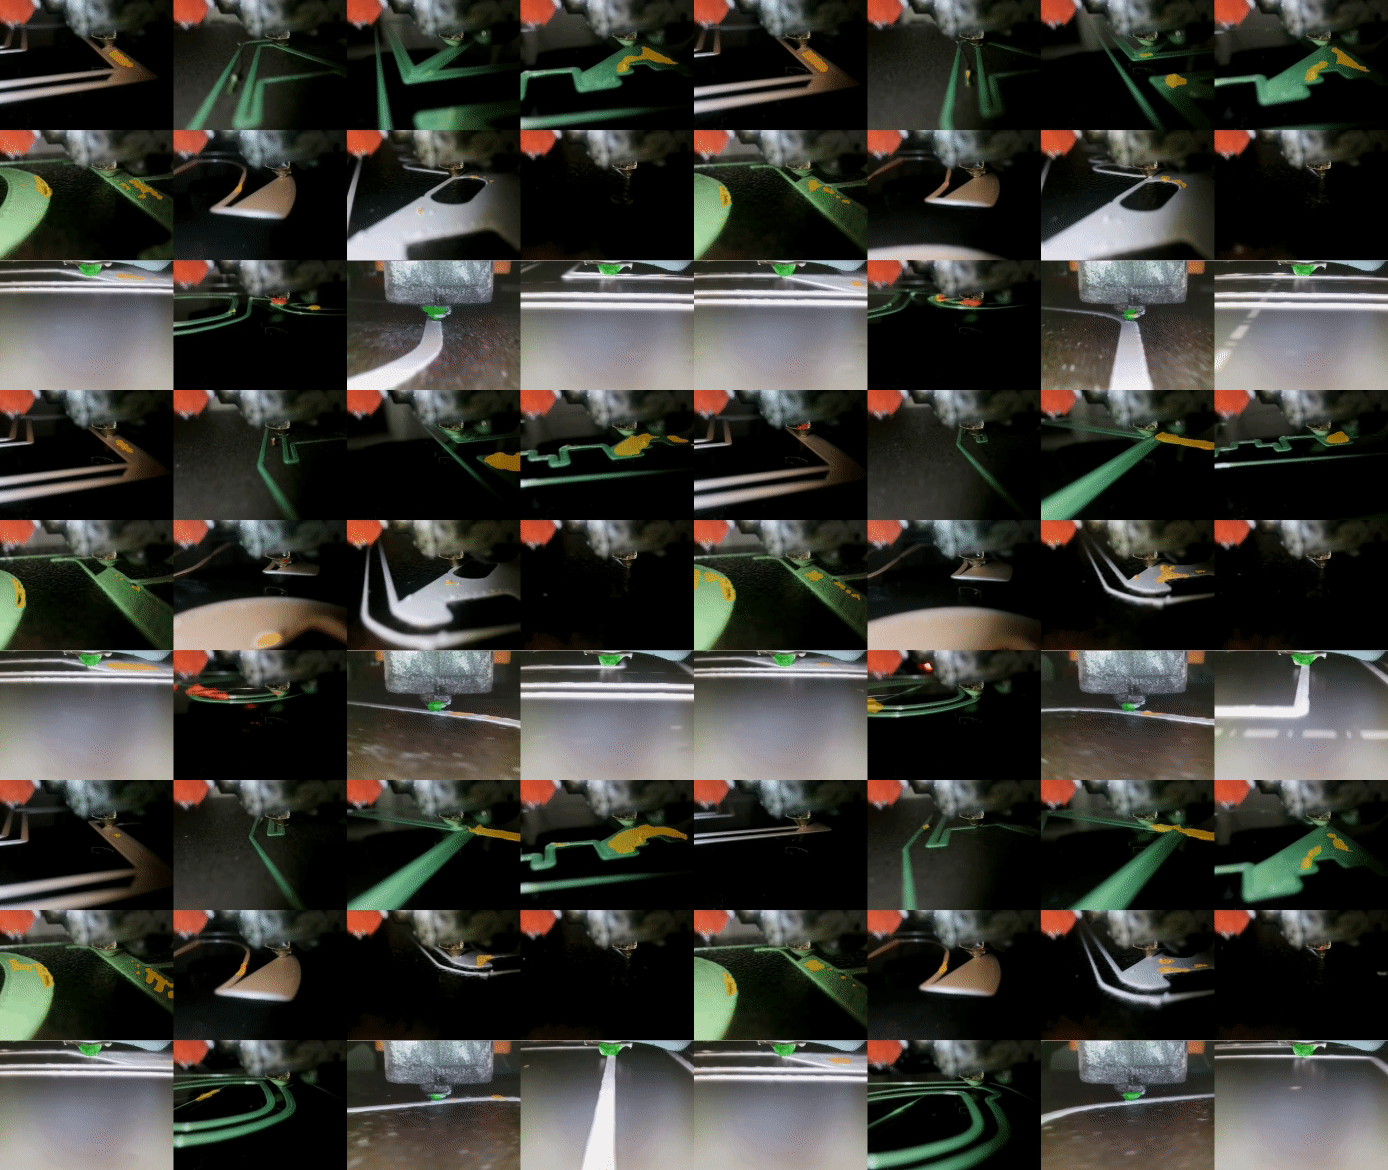
Unlike traditional webcam-based AI systems, Nozzle Ninja uses a dedicated nozzle camera mounted close to the print nozzle to give a detailed view of the first layer. The AI analyzes the data in real time and provides instant feedback through detailed reports, timelapses, and push notifications. These reports include grades (A-F) with suggestions on how to improve your first layer.
One unique feature is its layer scan capability for Klipper users. Nozzle Ninja can scan the entire first layer after it is printed, so you can catch issues before they cause larger print failures. This can save you a lot of time and material.
You can use compatible cameras like Mintion or 3DO Nozzle Camera to set up Nozzle Ninja. You can find more about Nozzle Ninja in the Nozzle Ninja - First Layer AI page or check the documentation guide here.
With Nozzle Ninja, you can get a perfect first layer and combine it with Obico’s general AI detection system to monitor the rest of your print so you have full control over your entire 3D printing process.
Review the Hull and Fine Details
The hull is a great area to test how your printer handles small details and overhangs. Check the windows, door frames, and chimney for sharp edges and clean details. If the windows are droopy or the chimney looks misshapen, your printer is probably having trouble with overhangs or not enough cooling. Slowing down the print speed or increasing fan speed will often fix this.
The chimney is especially telling as it’s printed fast with minimal cooling time between layers. If the chimney looks slouched or warped, it’s probably because your cooling system isn’t cooling enough. Increase the fan speed or lower the nozzle temperature.
Advanced 3D Benchy Troubleshooting
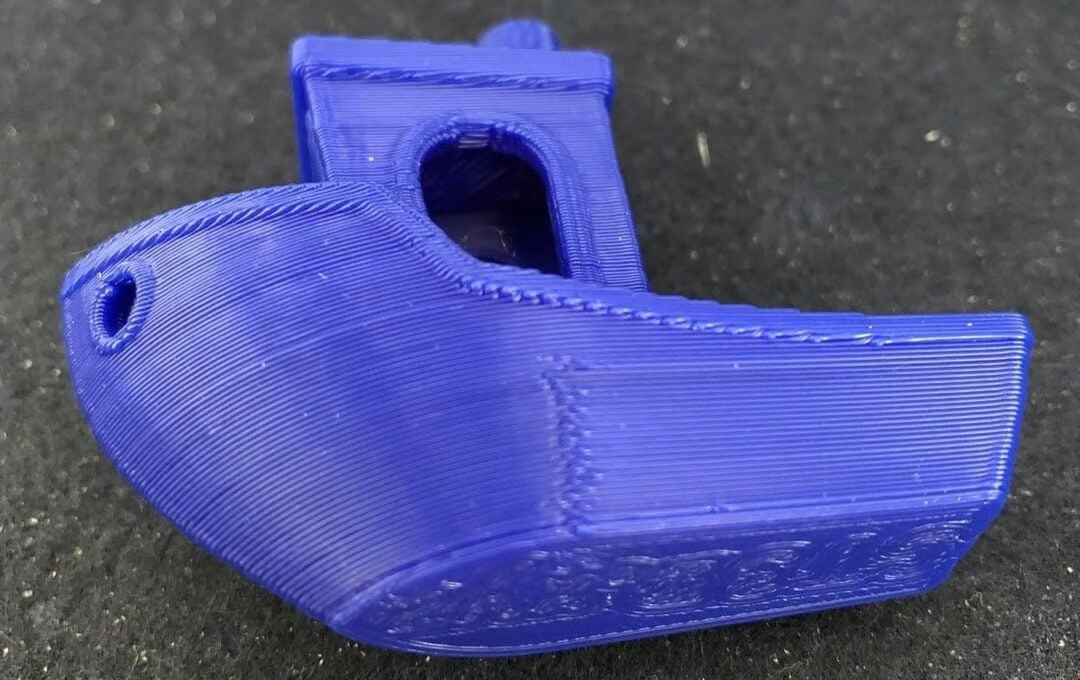
Now that you’ve got the basics of 3D Benchy down, it’s time to get into the advanced troubleshooting. One of the biggest issues is Z-seams. Z-seams are the visible lines where each new layer starts and stops. Z-seams happen when the nozzle retracts and starts a new layer at the same spot, and a small amount of filament accumulates at that point. Randomizing the seam placement or adjusting the retraction settings can help reduce them.
source: all3dp.com
If you are using Orca Slicer and want to dive deep into the seam settings for better print quality, you can check this OrcaSlicer Seam Settings Guide.
Another common issue is ringing, also known as ghosting. This happens when the printer vibrates and causes wavy patterns on flat or curved surfaces. Ringing is often caused by loose parts or printing too fast. Tightening the frame and slowing down the print speed can help reduce ghosting.
FAQs
-
Q: What is the purpose of 3D Benchy?
Answer: 3D Benchy is to test and calibrate 3D printers by challenging them with details, overhangs, and curves, so it’s a great tool for troubleshooting printer problems.
-
Q: Why is 3D Benchy the most printed 3D model?
Answer: It has become widely popular because it offers a simple way to test a printer's performance, making it easy to spot and correct issues, which improves print quality.
-
Q: What are the key areas of 3D Benchy that test printer performance?
Answer: The hull tests large overhangs and smooth surfaces, while the deck house and chimney test precision, cooling, and overhang performance. Fine details like the nameplate are great for checking first layer issues and the resolution.
-
Q: Where can I download the 3D Benchy file? Answer: You can download the official 3D Benchy STL file for free at 3DBenchy.com.
-
Q: What slicer settings should I use to print 3D Benchy?
Answer: Recommended settings include 1:1 scale (60 mm length), 0.2 mm layer height, 10% infill, 50 mm/s extrusion speed, and 150 mm/s travel speed. Supports are not necessary, but tree supports can help with clean results.
-
Q: How does 3D Benchy help calibrate dimensional accuracy? Answer: The dimensions of 3D Benchy are known (e.g., 60 mm from bow to stern), making it an excellent reference for calibrating your printer's X, Y, and Z axes using calipers.
-
Q: What is the best slicer software for printing 3D Benchy?
Answer: Orca Slicer is recommended due to its features like auto-generated tree supports, easy setup, and built-in calibration tools that make printing and troubleshooting simpler.
-
Q: What issues can I identify by printing 3D Benchy?
Answer: Common issues include blobs, Z-seams, stringing, layer shifting, under-extrusion, over-extrusion, poor overhangs, and ringing (ghosting).
-
Q: What should I do if my first layer isn’t sticking properly?
Answer: If the first layer isn't sticking, check bed leveling, adjust nozzle height, or use adhesives like glue stick or hairspray. You can also lower the bed temperature to avoid elephant’s foot issue.
-
Q: What is ‘elephant’s foot,’ and how can I prevent it?
Answer: Elephant’s foot is when the bottom layer of the print bulges out due to too much pressure. To fix this, adjust the Z-offset or reduce the bed temperature.
-
Q: What are Z-seams, and how can I minimize them?
Answer: Z-seams are vertical lines where each layer begins and ends. Randomizing seam placement or tweaking retraction settings can reduce the visibility of Z-seams.
-
Q: What is ringing (ghosting), and how do I fix it?
Answer: Ringing occurs when vibrations cause wavy patterns on the print surface. It can be minimized by tightening any loose parts on your printer and reducing the print speed.
-
Q: How can 3D Benchy help with printer cooling issues?
Answer: By inspecting the overhangs, windows, and chimney, you can see if your printer's cooling system is sufficient. Droopy or warped features indicate a need for better cooling or slower print speeds.
-
Q: How can I use Orca Slicer to improve my 3D Benchy print?
Answer: Orca Slicer has auto-calibration tools and features like tree supports. You can use its built-in tests, such as flow rate and VFA tests, to optimize your printer’s settings for a flawless Benchy print.
Final Thought
Although small, the 3D Benchy is a powerful tool for troubleshooting and fine-tuning your 3D printer. Whether you’re a beginner getting the basics right or a seasoned pro perfecting the details, the 3D Benchy is a must-have in the 3D printing world.
Its small size makes it perfect for pushing your printer to the limits. By inspecting your Benchy print, measuring the dimensions, and making adjustments, you can dial in your printer settings quickly and easily. From Z-seams to ringing, the 3D Benchy will help you find and fix even the smallest issues.
Printing a Benchy is not just about testing your printer; it’s also about being part of the 3D printing community. Each Benchy print is an opportunity to learn more about your printer and share that knowledge with others.
So, keep printing, keep testing, and most importantly, keep experimenting with your 3D Benchy. The more you learn from it, the better your prints will be!
