How to Install Klipper on the Ender 3 (With Mainsail OS)

Klipper has recently caught many eyeballs with its fantastic features and utility for 3D printing. It's a firmware that runs off a Raspberry Pi board and lets you execute high-speed 3D printing and extract the most out of your 3D printer. It has improved motion planning and precise stepper motor control and delivers excellent print quality with a slight tuning.
You can find several ways of setting up Klipper for any 3D printer. But, in this guide, we'll understand the entire process of installing Klipper on an Ender 3 3D printer using the Mainsail OS and Raspberry Pi imager. Together, Klipper and Ender 3 are one of the most popular combos, and once you grasp the idea, it's easy to emulate it for other 3D printers.
Without any further adieu, let's get started, Klipping.
What is Klipper?
Klipper is a free and open-source 3D printer firmware that runs using your printer's controller board and an external processing unit, usually a Raspberry Pi board. It's maintained by Kevin O Connor on GitHub but has contributions from several other developers. The first version was released in 2016, and the Klipper firmware has evolved considerably over the years.
It utilizes the extra processing power of the Pi to compute, execute and run your 3D printer at faster speeds with higher precision. Voron 3D printers are famous for their fast print speeds and printing quality, and these printers use a customized version of the Klipper firmware to run at speeds above 200 mm/s with minimal loss in print quality.
Its open-source nature and strong community have significantly contributed to its list of features, and the current Klipper firmware offers far more than fast print speeds.
Why should you install Klipper on your 3D printer?
The Raspberry Pi's extra computing power helps Klipper compute, execute and deliver precise stepper motor motion. It finely calculates and controls the movement of your stepper motor, ensuring a smooth printing process.
Its 'Smooth pressure advance' feature predicts the filament pressure in the nozzle and reduces the filament flow when the nozzle reaches the end of an edge or line. This function reduces filament oozing and minimizes the stringing effects at high print speeds.
Klipper readily works with Octoprint, supports multiple controllers on a single 3D printer, and is widely available for all 3D printers. It can transform an old and slow 3D printer into a fast machine that can easily put up with the latest high-end 3D printers.
Now that we have an overview of Klipper and its features let's dive into setting it up with the Mainsail OS for an Ender 3 3D printer.
What hardware is required to set up Klipper?
Klipper is solely a firmware that runs your 3D printer. It's not plug-n-play software, and you'll need to set it up carefully using some additional accessories. Here's a list of things you'll need to set up Klipper for your 3D printer.
- Raspberry Pi 3, 3B+ or 4. (You can use the Raspberry Zero, but it has limited processing power and might limit you from using certain features).
- Raspberry Pi Imager
- Mainsail OS
- PuTTY software
- Klipper configurations
- Micro SD card
- SD card reader
Besides these things, you must be aware of your 3D printer's motherboard specs. Don't worry; we'll guide you through this step and ensure you set up everything correctly.
We can start setting up the Klipper for an Ender 3 3D Printer.
How to install Klipper on your Ender 3 3D printer?
In the following steps, we'll understand the detailed procedure to install Klipper on your Ender 3. Follow these steps closely; by the end, you'll successfully run Klipper using Mainsail OS on your Ender 3.
The subsequent steps are executed on the Original Ender 3 (2018) 3D Printer. However, you can easily replicate these on the latest models, and we'll mention the changes in steps if necessary.
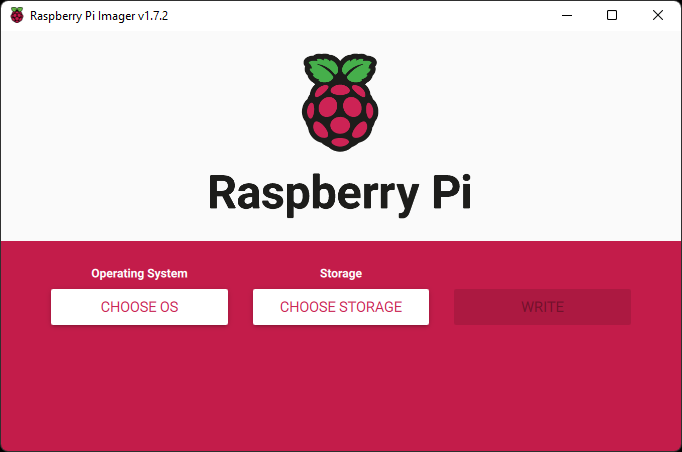
Download the Raspberry Pi Imager
Raspberry Pi Imager will let you flash and install the Mainsail OS on your Raspberry Pi. It is the recommended method on the Mainsail website and installs the OS quickly on the Pi.
- Go to the Raspberry Pi website and download the suitable Raspberry Imager for your operating system.
- Install the file and open the Imager Software
Select Mainsail OS
- Click on Choose OS in the Operating System Section.
- Select Other specific-purpose OS >> 3D Printing >> Mainsail OS

- Click on Mainsail OS. It'll now be shown under the Operating System section.
- Install your micro SD card in your computer using a card reader.
- Click on Choose storage under the Storage section and select the SD card as the Mass Storage Device.
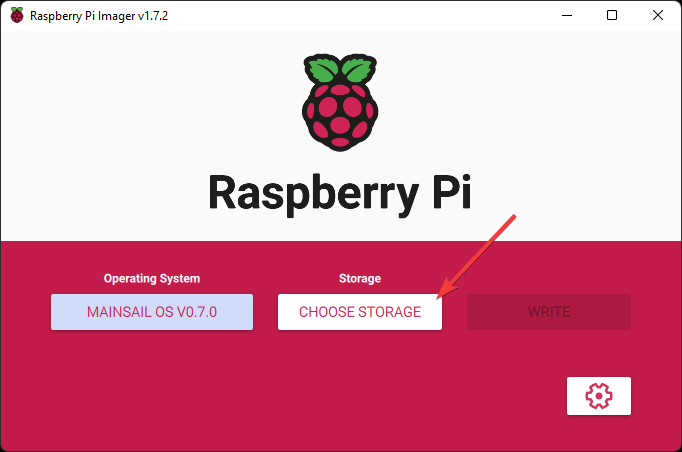
Add Wi-Fi credentials using Raspberry pi imager
- Click on the gear icon in the bottom right of the window.
![]()
- Tick Mark the Set hostname box and enter mainsail in the blank. Check the Enable SSH box and User password authentication.
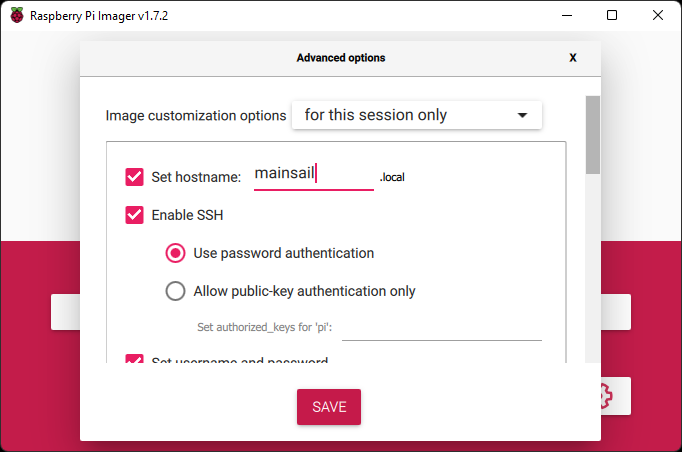
- Set username and password.
- Keep the username as pi. Mainsail OS relies on the user pi.
- Set your desired password. This password will be required when you log in to the Mainsail OS. Set a strong one and make a note of it somewhere.
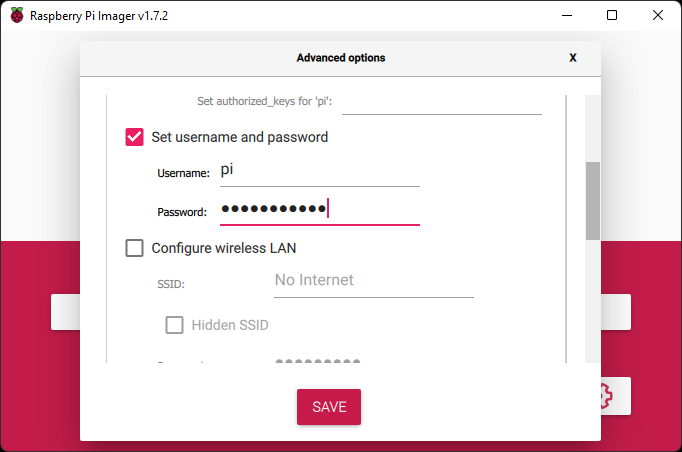
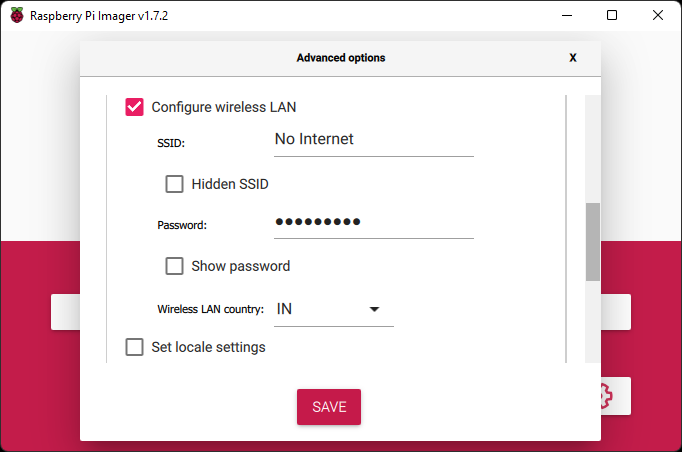
- Check the Configure Wireless LAN box.
- Set your Wi-Fi network name.
- Enter its password in the following line.
- Check the Set locale settings box and enter your timezone and Keyboard layout settings.
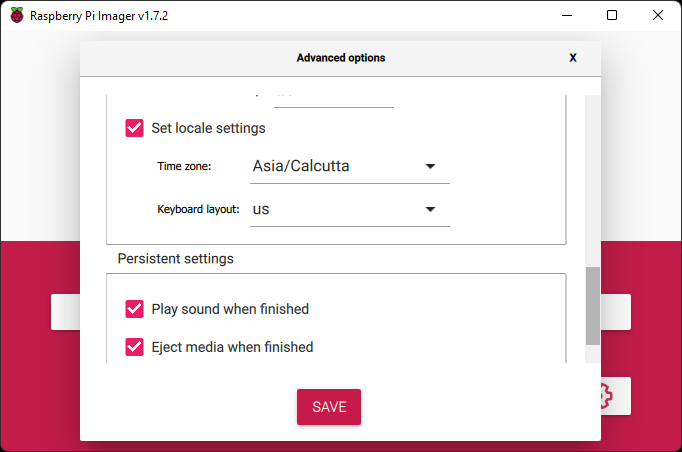
- Click on Save.
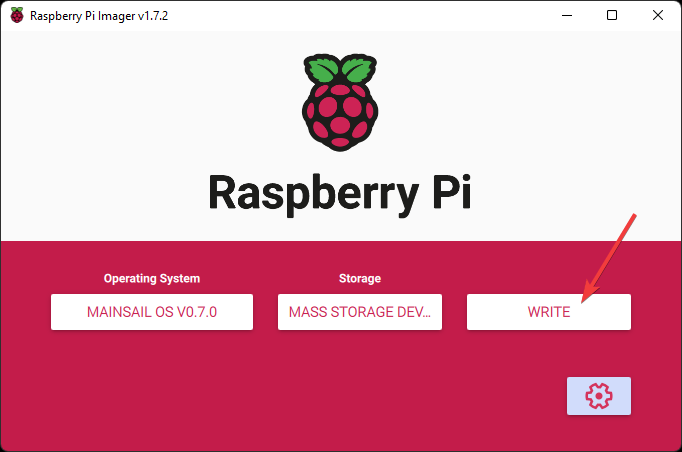
- Click on the Write option and select Yes in the next step. The Raspberry Pi Imager will now install the Mainsail OS on your SD card.
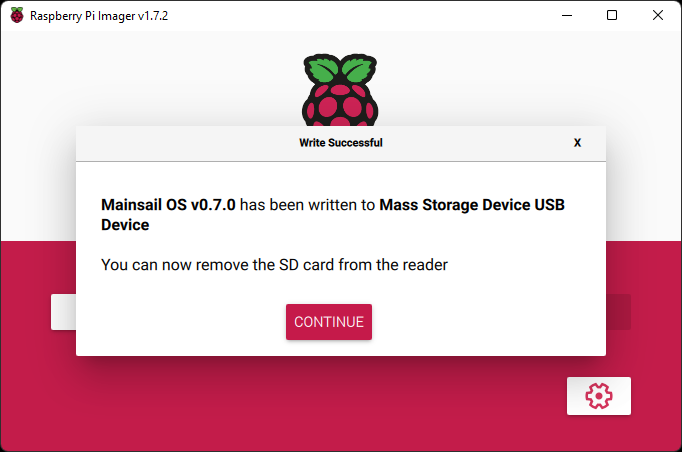
- Once finished, you'll get a pop-up indicating that the Mainsail OS was successfully installed on the sd card. Click on Continue and eject the SD card from the computer.
- Insert the SD card into your Raspberry Pi and power it using an external power source.
Boot the Raspberry pi with the sd card
At this stage, the Mainsail OS is installed on your Raspberry Pi. However, you'll need external software to interact with your Pi and configure the Mainsail OS for your Ender 3.
- Navigate to the PuTTY website and download the package file for PuTTY on the top.
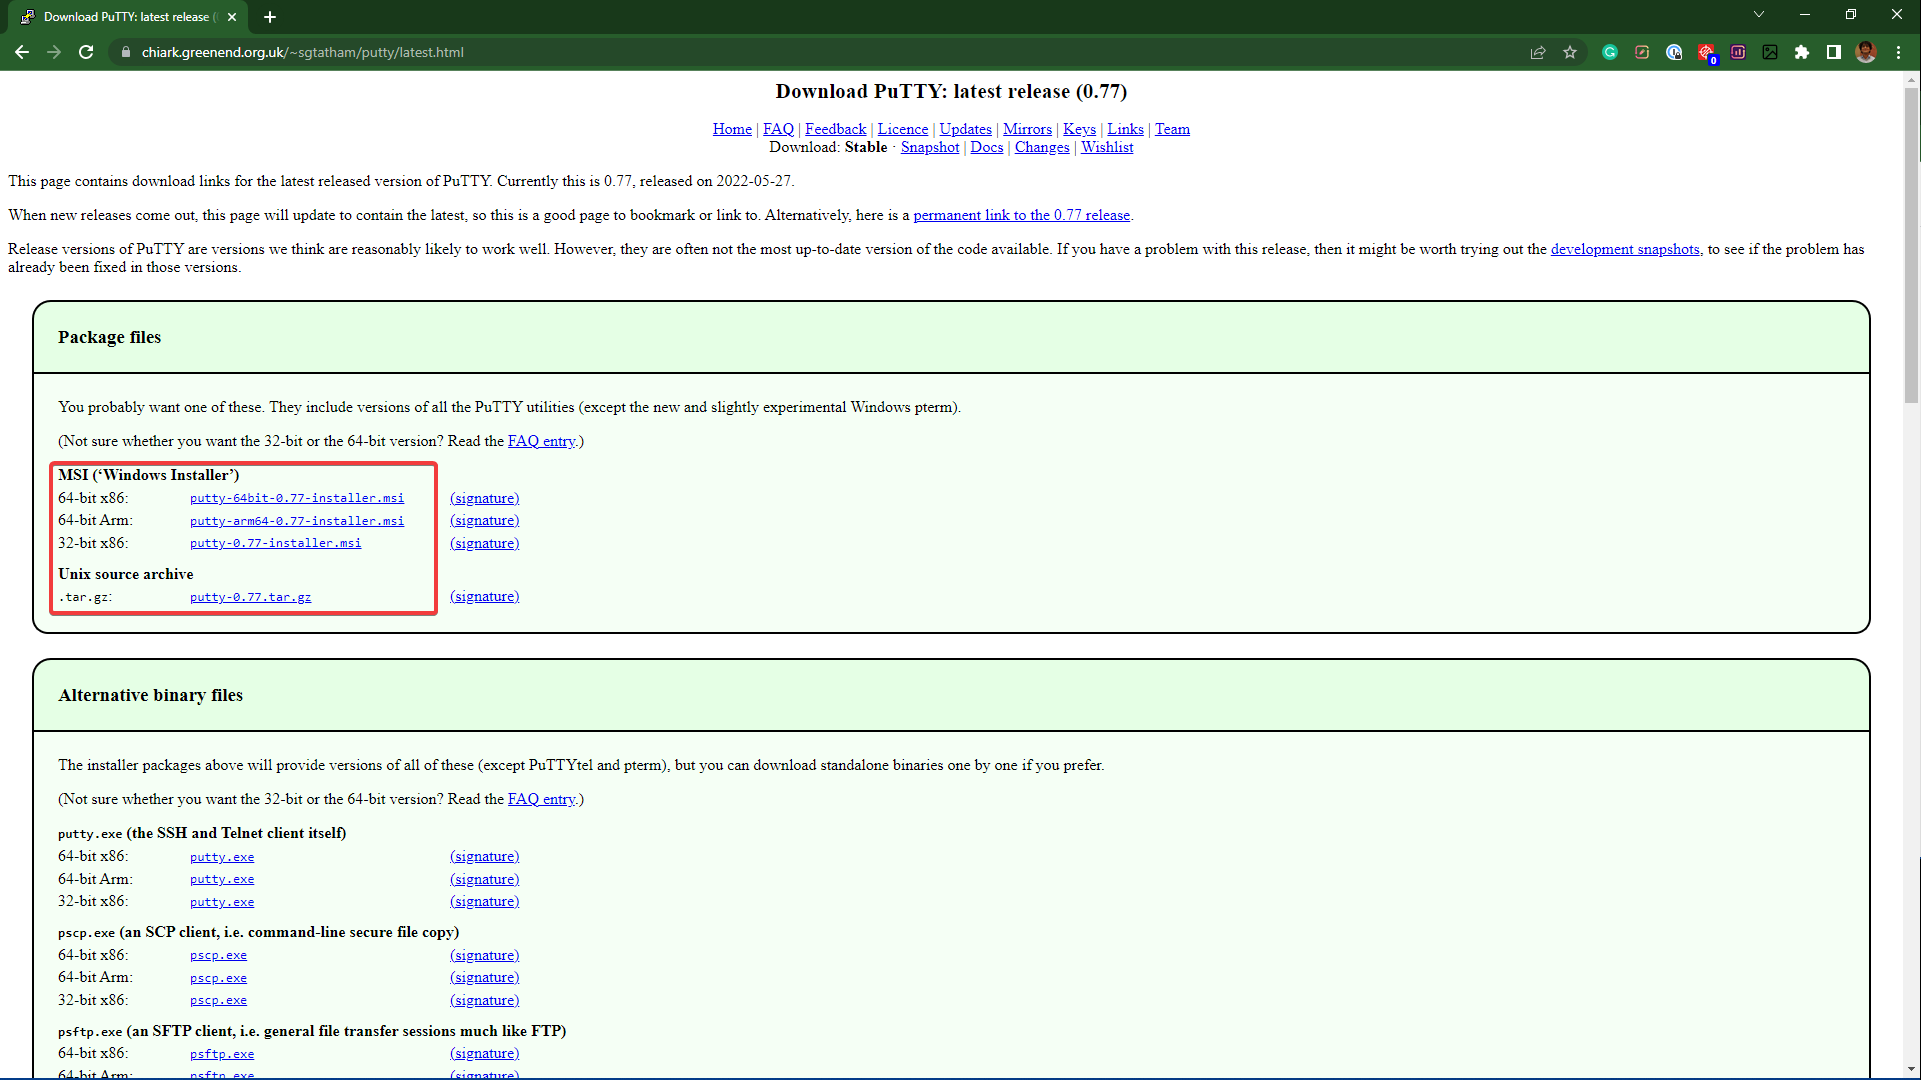
- Install and open the PuTTY software.
- Find the IP address of your Raspberry Pi.
- Input your router's IP address in your browser. Each router will have its specific IP address, and you can quickly search for it using Google. In this case, we're using a TP link Wi-Fi router which has an IP address of 192.168.0.1
- Login using your credentials. Usually, your router's username and password are admin by default.
- Navigate to DHCP settings and click on the DHCP clients list.
- Note the assigned IP for your Mainsail device.

- Input this IP address in PuTTY's window and ensure that the connection type is set to SSH.
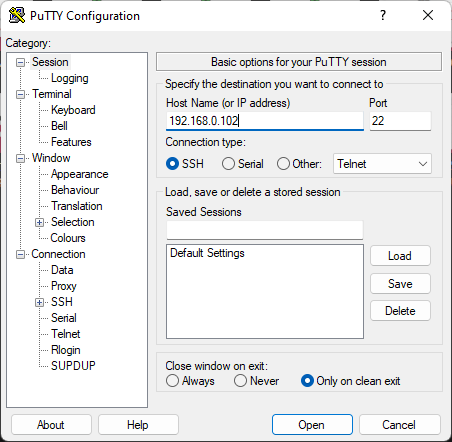
- The PuTTY software will now open a terminal command window, using which you can interact and configure the Mainsail OS.
Configure Klipper firmware
Klipper is generic firmware that's developed for a variety of 3D printers. We'll configure the Klipper for your particular 3D printer in this step. As Klipper interacts with the motherboard of your 3D printer, we'll input the controller's specification in this section.
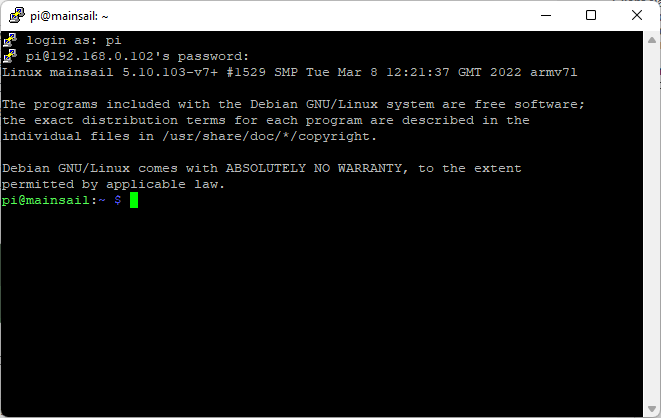
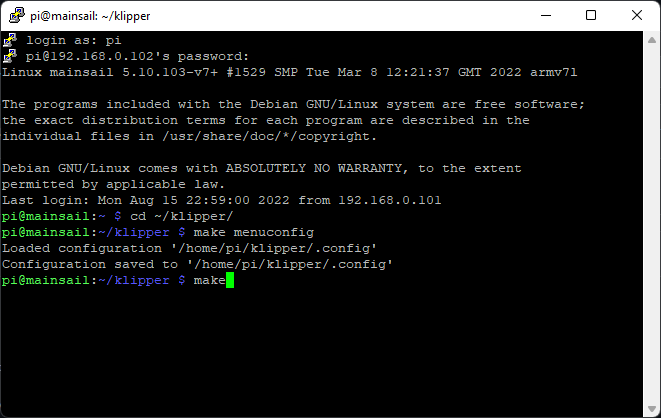
- You'll need to log in to your Raspberry Pi using the credential you set in the first step.
- Enter the username as pi , and then enter the password you set earlier.
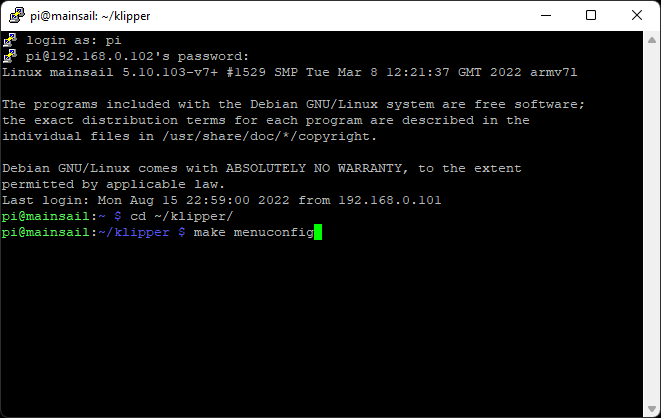
- Once logged in, type the following commands into the terminal and enter after each command.
cd ~/Klipper/
make menuconfig
- A new configuration window will open, and you'll have to input your controller configuration in these sections. These will be different for each 3D printer, and you can find your printer's configuration in Klipper documentation.
- Open the file that matches either your controller board or your 3D printer.

- The comments in the file's top section will inform you about the configuration for your specific 3D printer. In this case, we'll be configuring the Mainsail OS for Atmega AVR with an atmega1284p microprocessor.
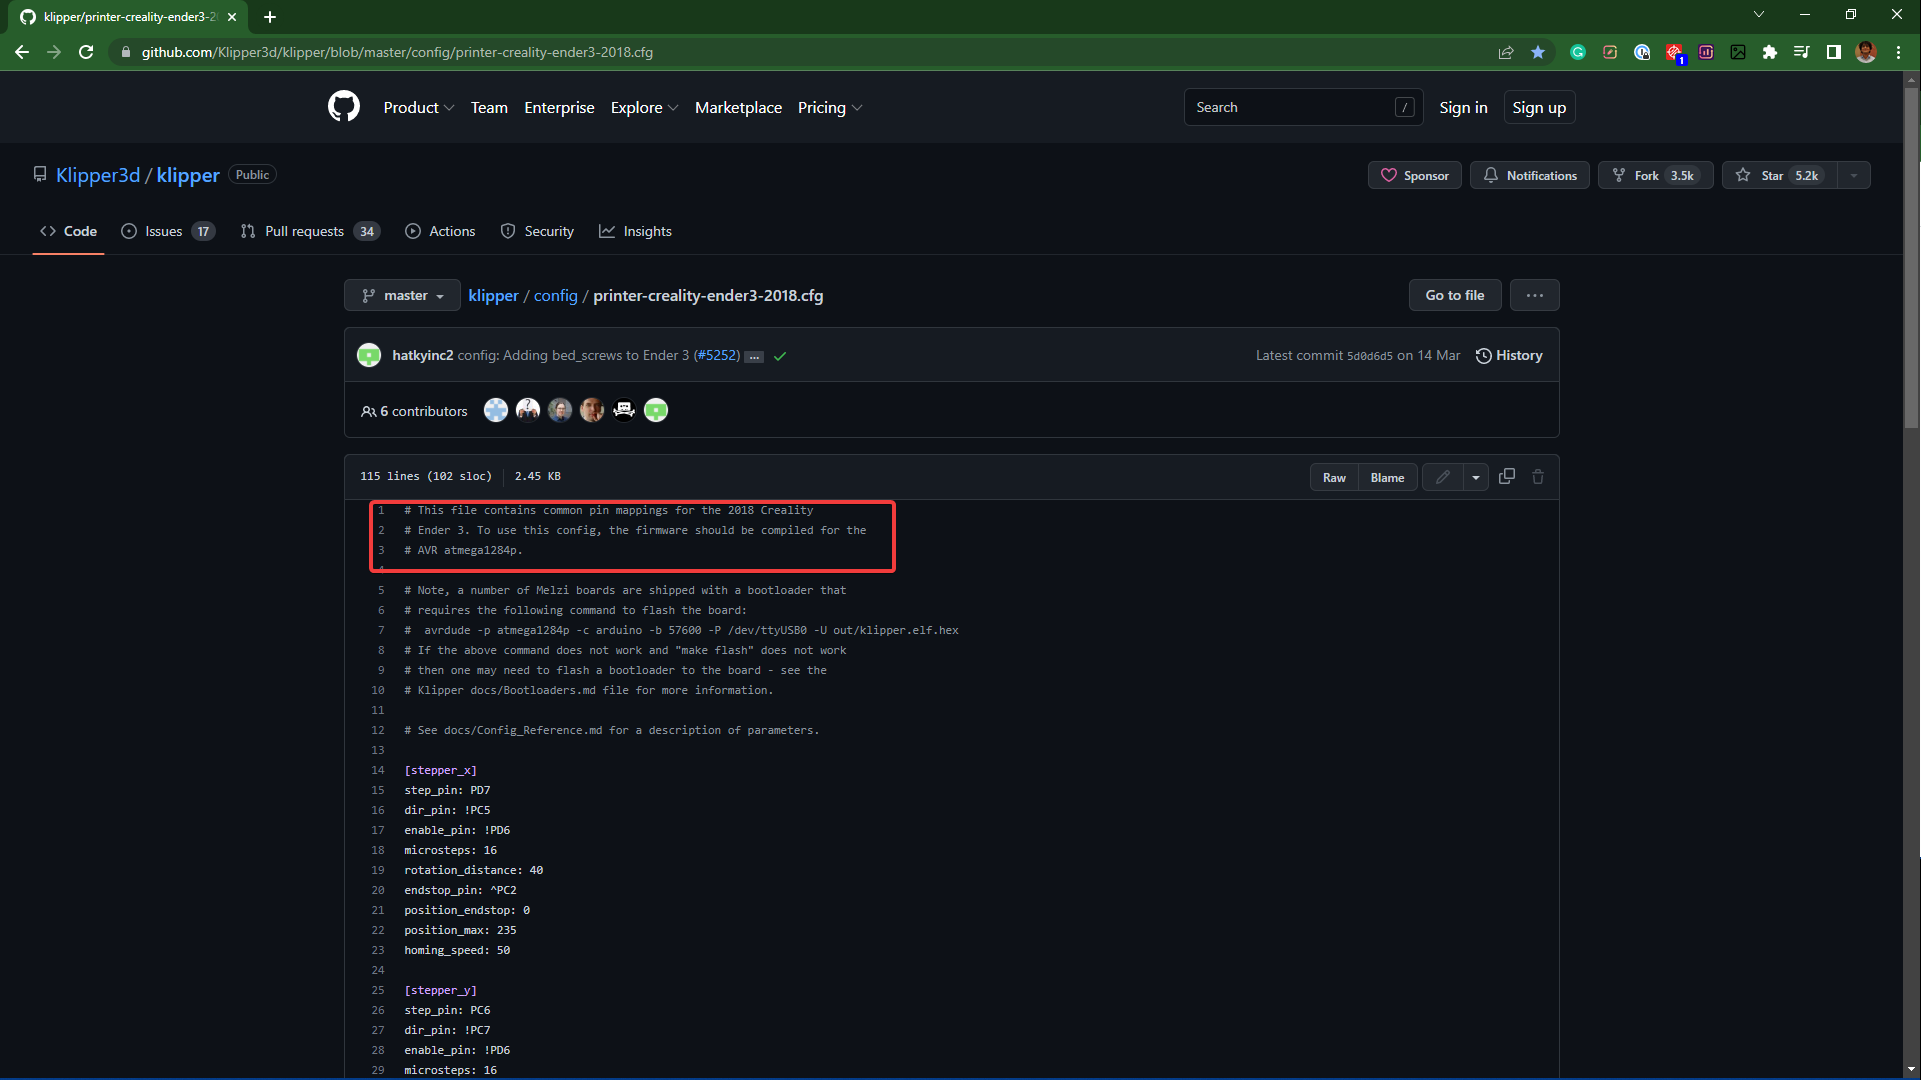
- Select and input these credentials in the configuration window.
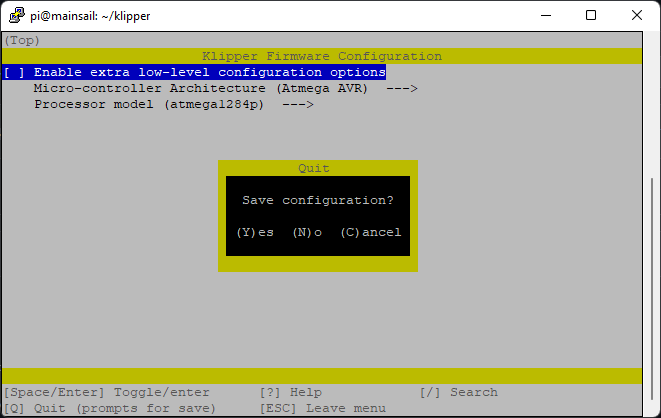
- Press Q and save the configuration by selecting Y.
- The configuration window will now close, and you'll return to PuTTY's terminal window.
- Input the command make in the following line.
- The Raspberry Pi will now configure and write the Mainsail OS for the Ender 3, and you can visualize the progress in the PuTTYs terminal.
- Once the process is finished, you'll either get a klipper.bin or klipper.elf.hex file in the end.
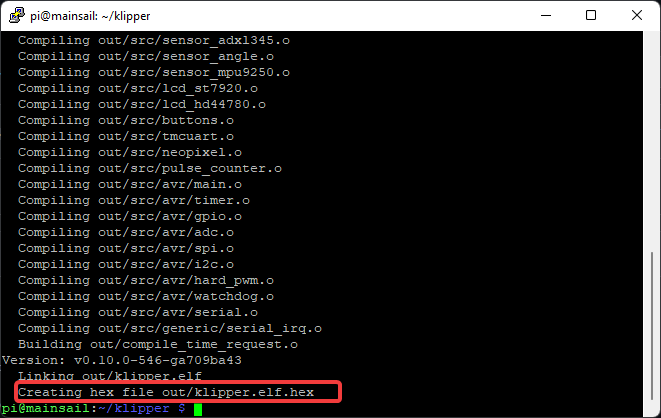
Note: The newer Ender 3's come with the latest motherboards, and if you're using an Ender 3 V2 or Ender 3 Pro, the Mainsail OS will likely generate the firmware in .bin file. In our case, as we are using the older Ender 3, it accepts firmware solely in the .hex file format.
In the following steps, we'll understand how you can install these firmware files on the Ender 3.
Retrieve the configured firmware
Now you need to transfer the .bin file to another SD card. You'll need File Transfer Protocol (FTP) software to move the file from the Raspberry Pi to the SD card. For demo purposes, we'll transfer the .hex file. Note that there are separate steps for installing the .hex firmware. This step is solely for flashing the transferring .bin from your SD card to another blank SD card.
- Install an FTP software such as WinSCP from the WinSCP website.
- Once installed, open the software and enter your Pi's credentials such as IP address, username, and password. Ensure that file protocol is set to SFTP.
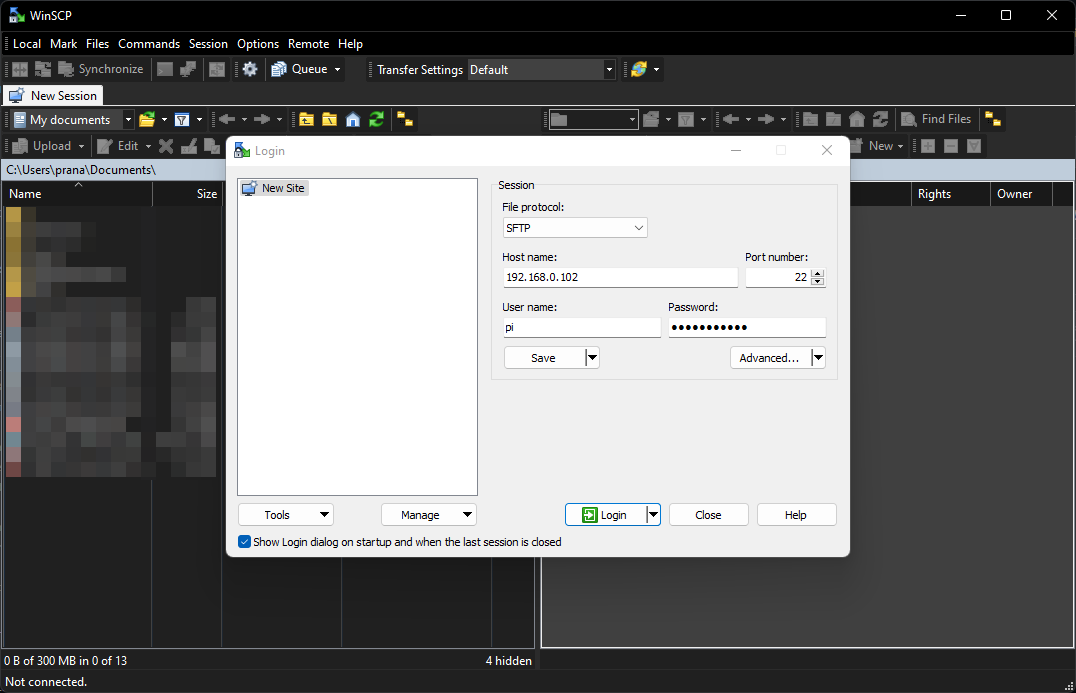
-
Insert the blank SD card into your computer using a card reader.
-
On the right side of the window, navigate to your .bin file. Open the Klipper folder and then open the out folder.
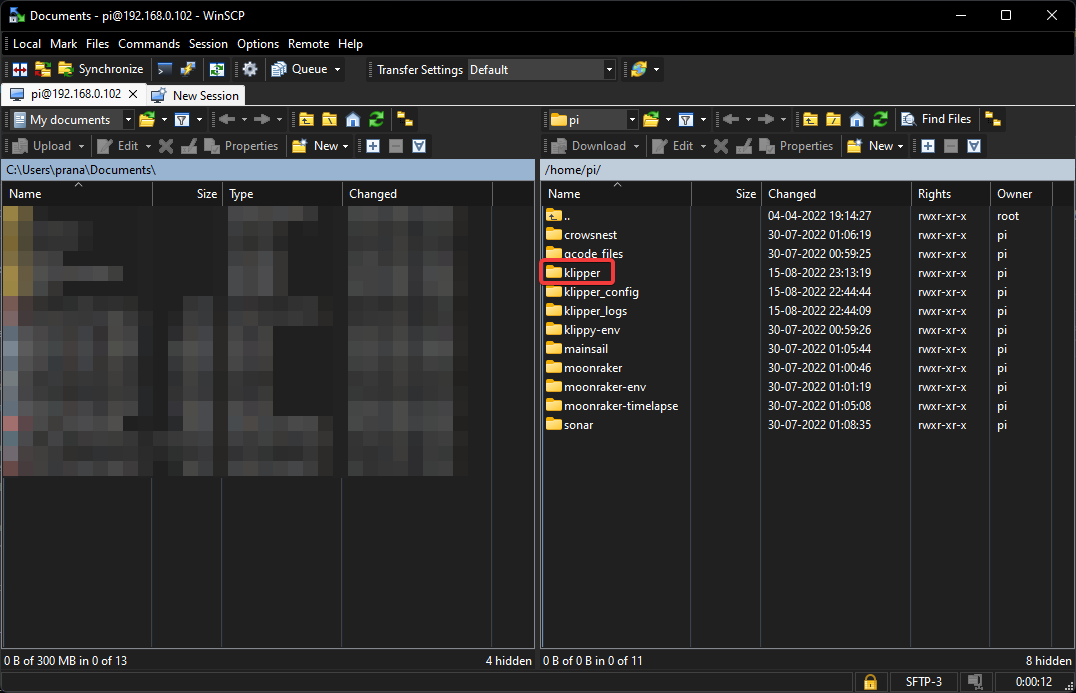
- You'll find a file named klipper.bin.
- Open the SD card on your PC and transfer the klipper.bin file.
- Rename the file as something unique. You cannot rename it to firmware.bin, and the file's name cannot be similar to the last firmware you might've flashed.
- Eject the SD card.
Flash Klipper firmware to your 3D printer (Latest Ender 3s)
- Insert the Klipper firmware SD card in your Ender 3 and power it on. The printer will automatically flash the Klipper on your motherboard.
- You must verify this step by connecting the Raspberry Pi to the Ender 3.
- After connecting the Pi to the Ender 3, open the PuTTY terminal window.
- Type the following command to verify if the Raspberry Pi communicates with the Ender 3
ls /dev/serial/by-id/*
- If the Pi is successfully connected to the Ender 3, you should get the serial port number of your 3D printer. A successful connection will indicate something like this /dev/serial/by-id/USB-1a86_USB2.0-Serial-if00-port0
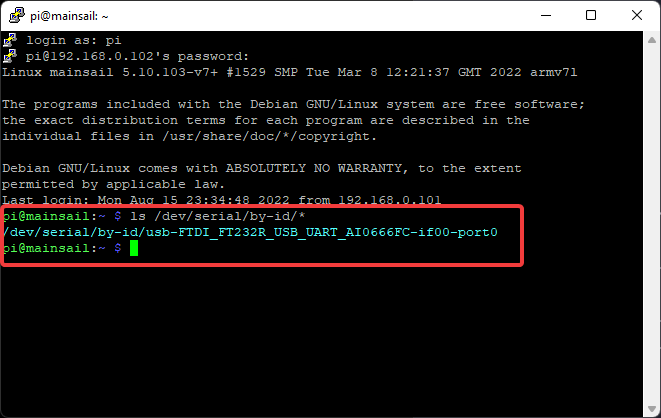
- If you get this message, your Klipper firmware is now successfully on your 3D printer, and you can access it using the Raspberry Pi.
The immediate next step is solely for old Ender 3's, and you can skip it and move to Configure the Mainsail OS for your Ender 3 step.
Flash Klipper firmware to your 3D printer (Old Ender 3)
You can skip the above two steps if you're using an 8-bit motherboard on your old Ender 3. There's no need to transfer any file or an SD card. We'll directly flash the Klipper firmware to the 3D printer using the Raspberry Pi.
- Keep PuTTY's terminal window open and connect the Raspberry Pi to the Ender 3.
- Check the Pi's connection to your Ender 3 by entering the following command.
ls /dev/serial/by-id/*
- If the Pi is successfully connected to the Ender 3, you should get the serial port number of your 3D printer. A successful connection will indicate something like this /dev/serial/by-id/USB-1a86_USB2.0-Serial-if00-port0
- To flash the klipper.hex to the Ender 3, enter the following commands in PuTTY's terminal.
sudo service Klipper stop
make flash FLASH_DEVICE=/dev/serial/by-id/usb-1a86_USB2.0-Serial-if00-port0
sudo service klipper start
- The Raspberry Pi will now flash the firmware to the Ender 3, and you'll get a message indicating the procedure's success.
Log in to Mainsail OS and configure Klipper for Ender 3
The Mainsail OS and Klipper are successfully installed on your Raspberry Pi and Ender 3, respectively. In this step, we'll configure the Mainsail OS to work correctly with the Klipper and Ender 3.
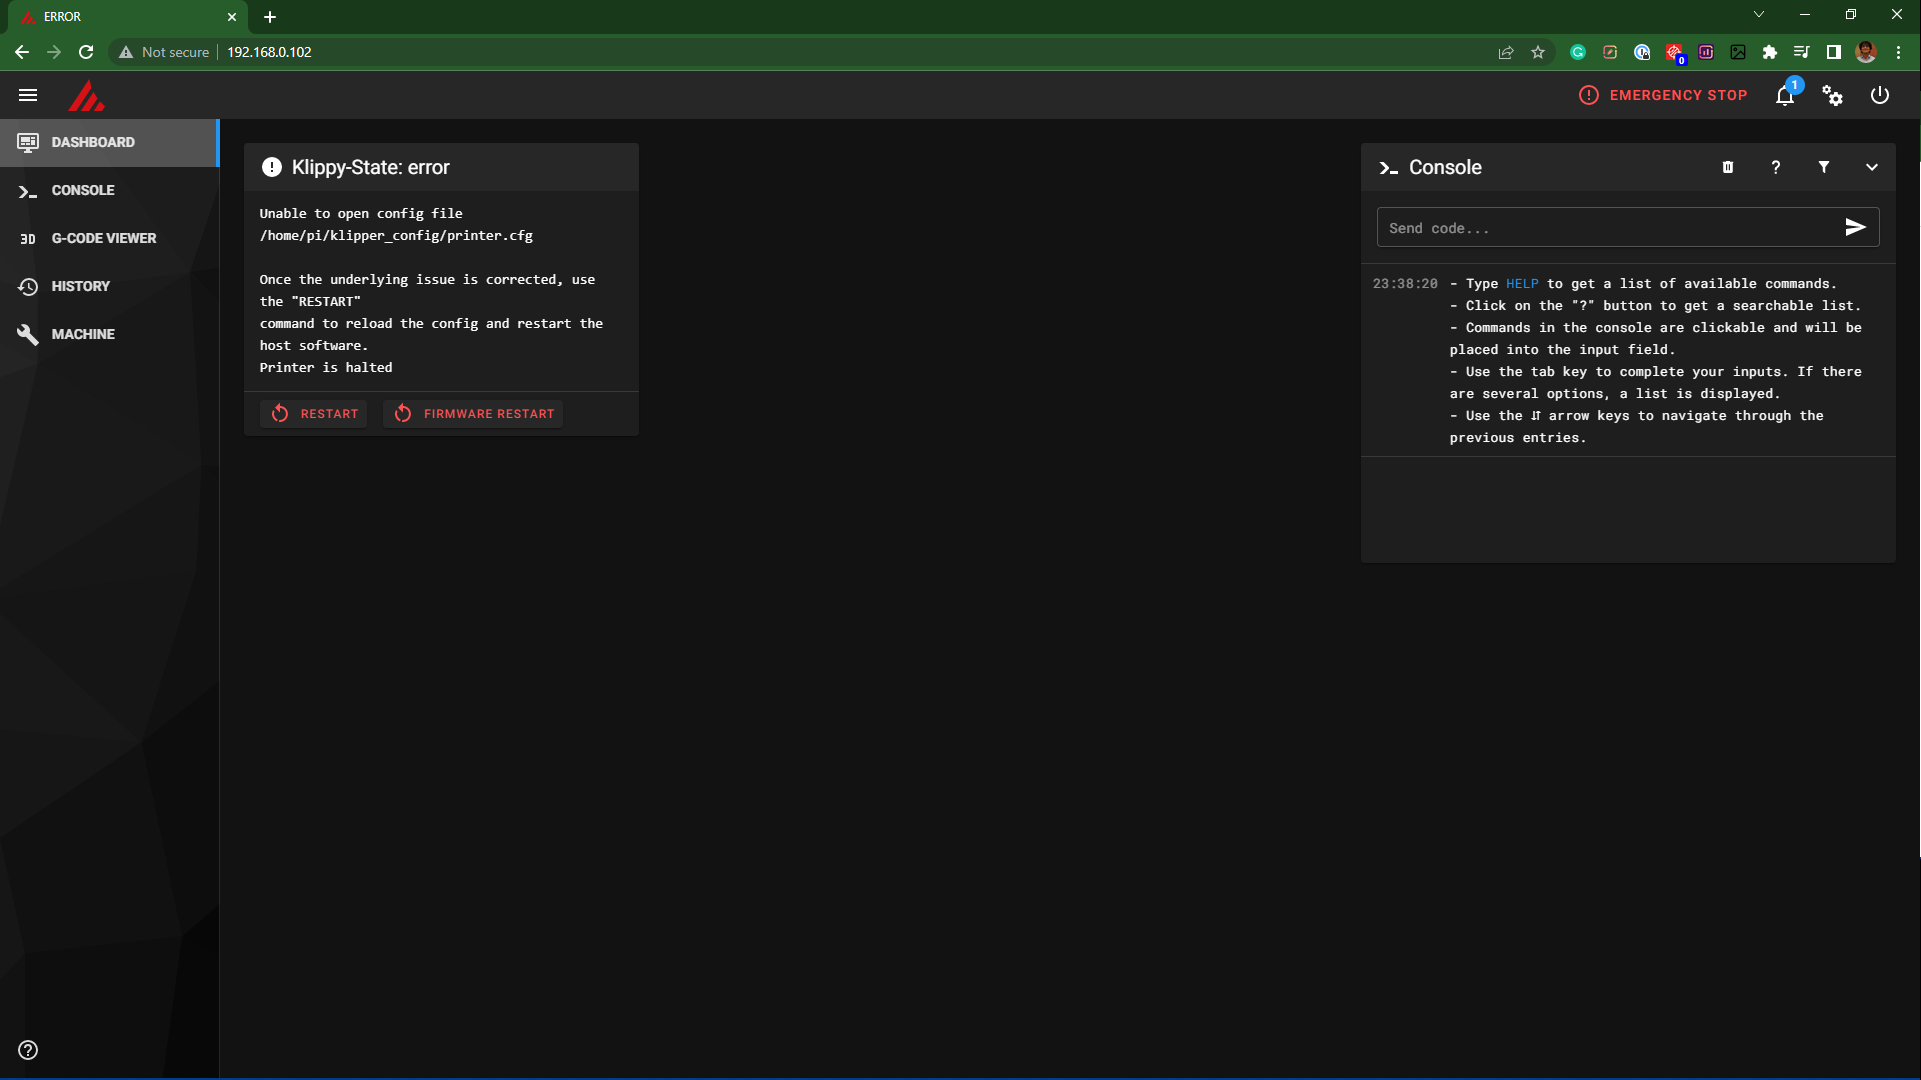
- Insert the IP address of your Raspberry Pi in the web browser and log in to the Mainsail OS.
- You'll notice an error warning.
- Click on the Machine tab on the left side.
- Select config examples , and select the suitable file for your Ender 3.
- Right-click and download the config file on your PC.

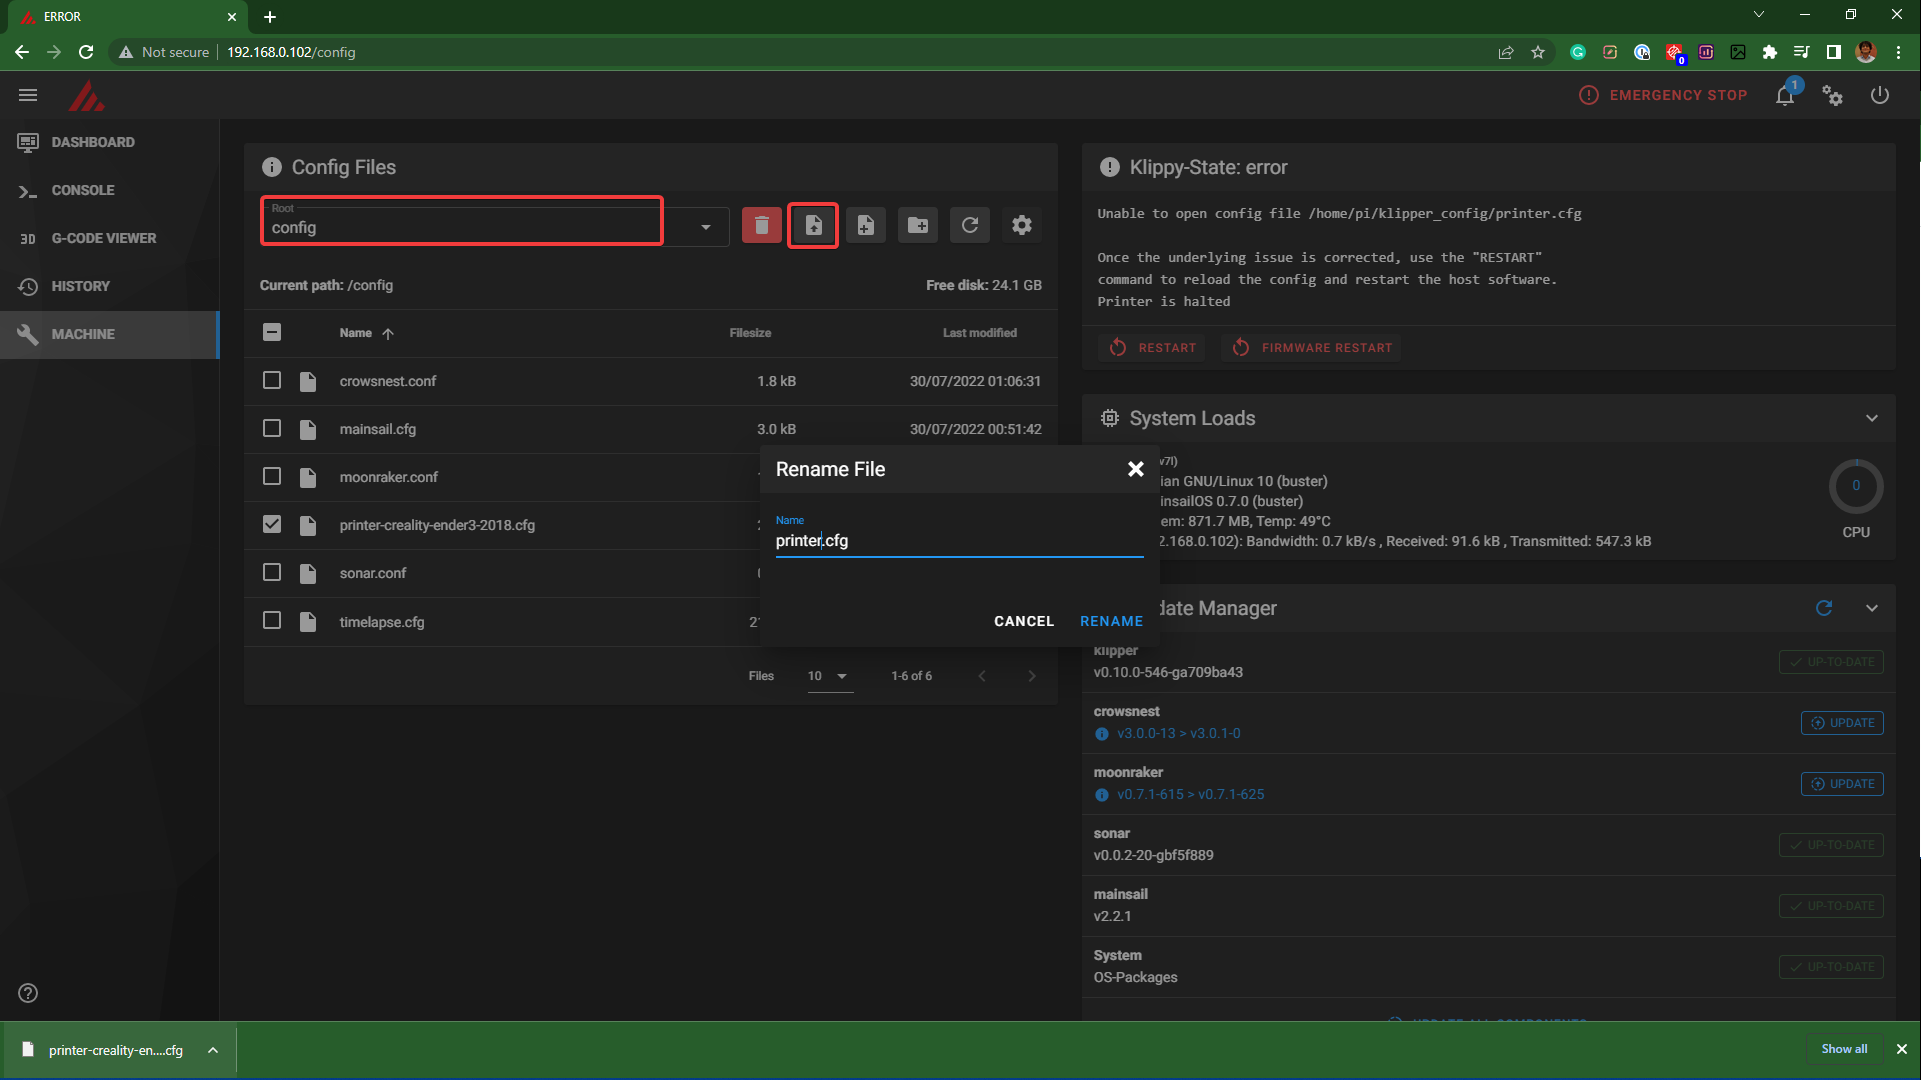
- Go back and now open the config section.
- Click on the Upload icon and upload the printer's configuration file that you recently downloaded.
- Rename it to printer.cfg.
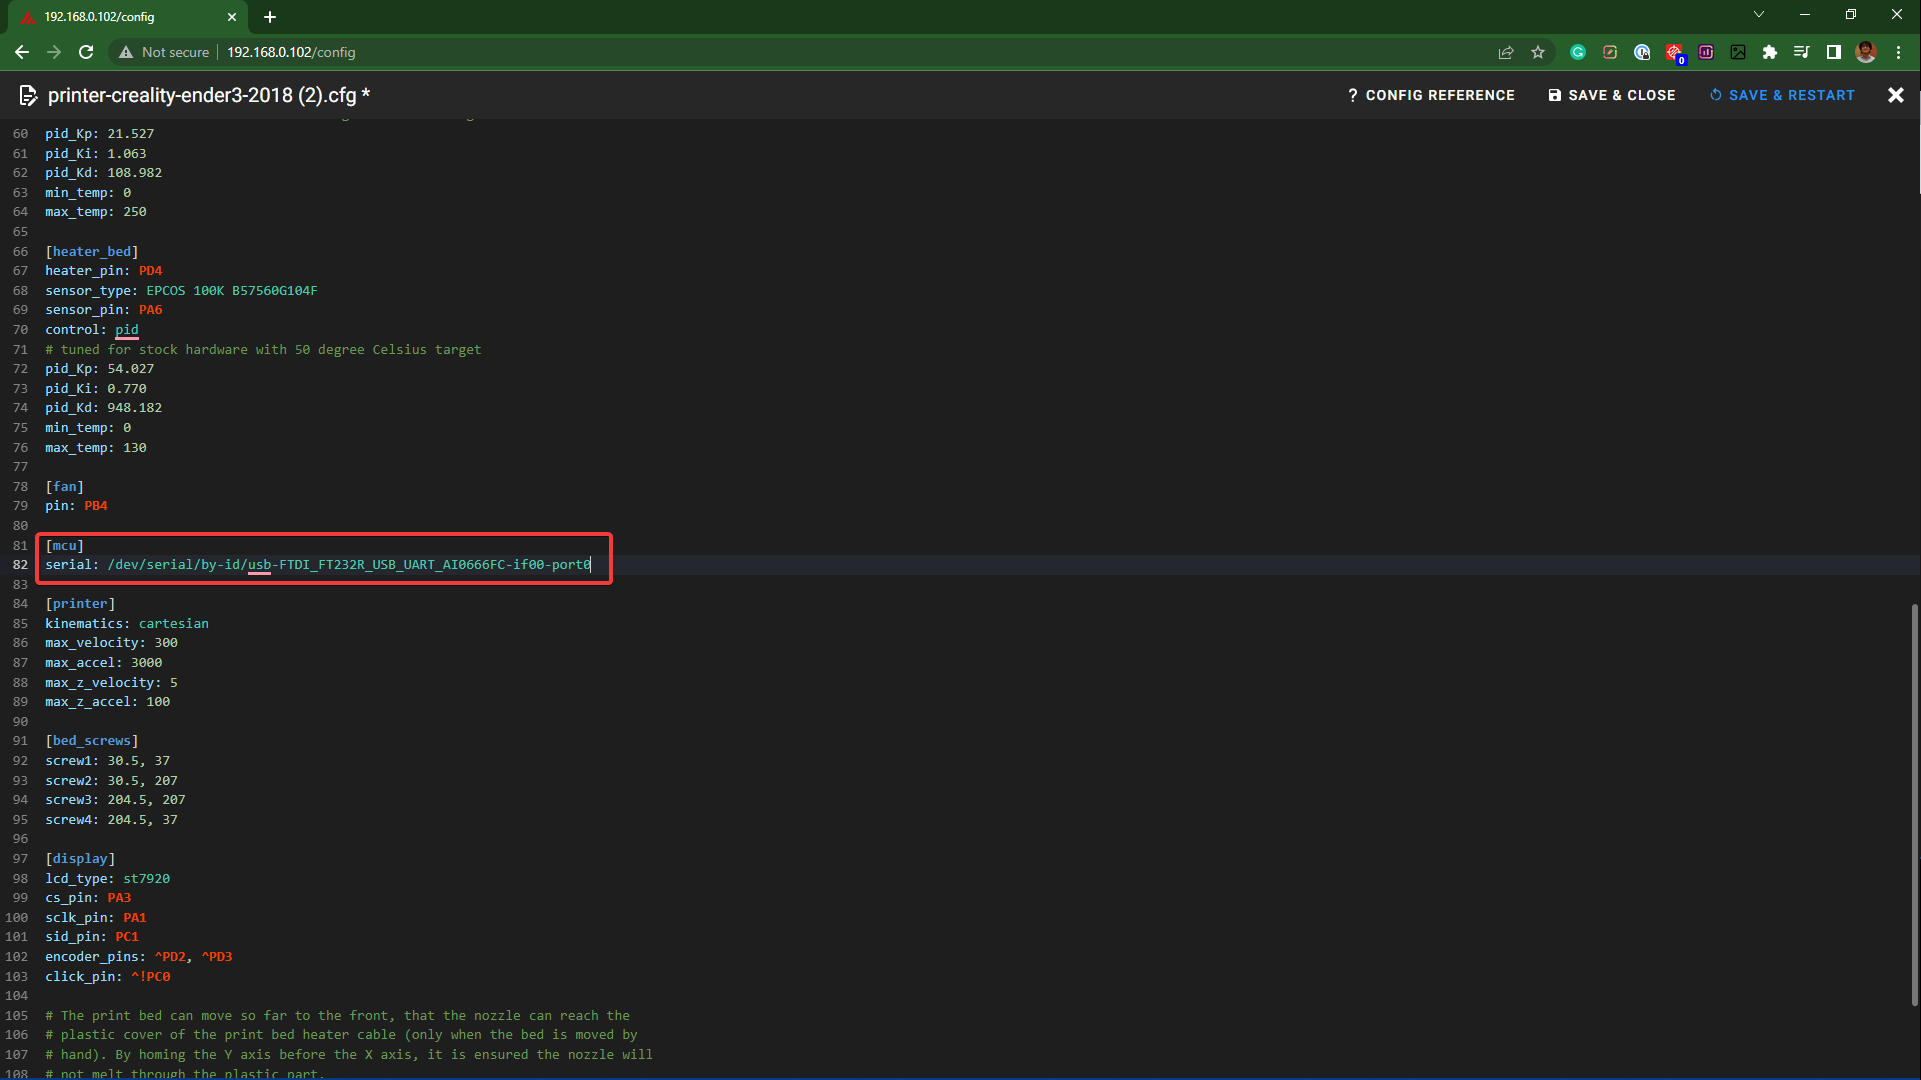
- Right-click on the file and open it.
- Go to the [mcu] section, and enter your Ender 3's device ID under the serial: section. It should look something like this.
[mcu]
serial: /dev/serial/by-id/usb-1a86_USB2.0-Serial-if00-port0
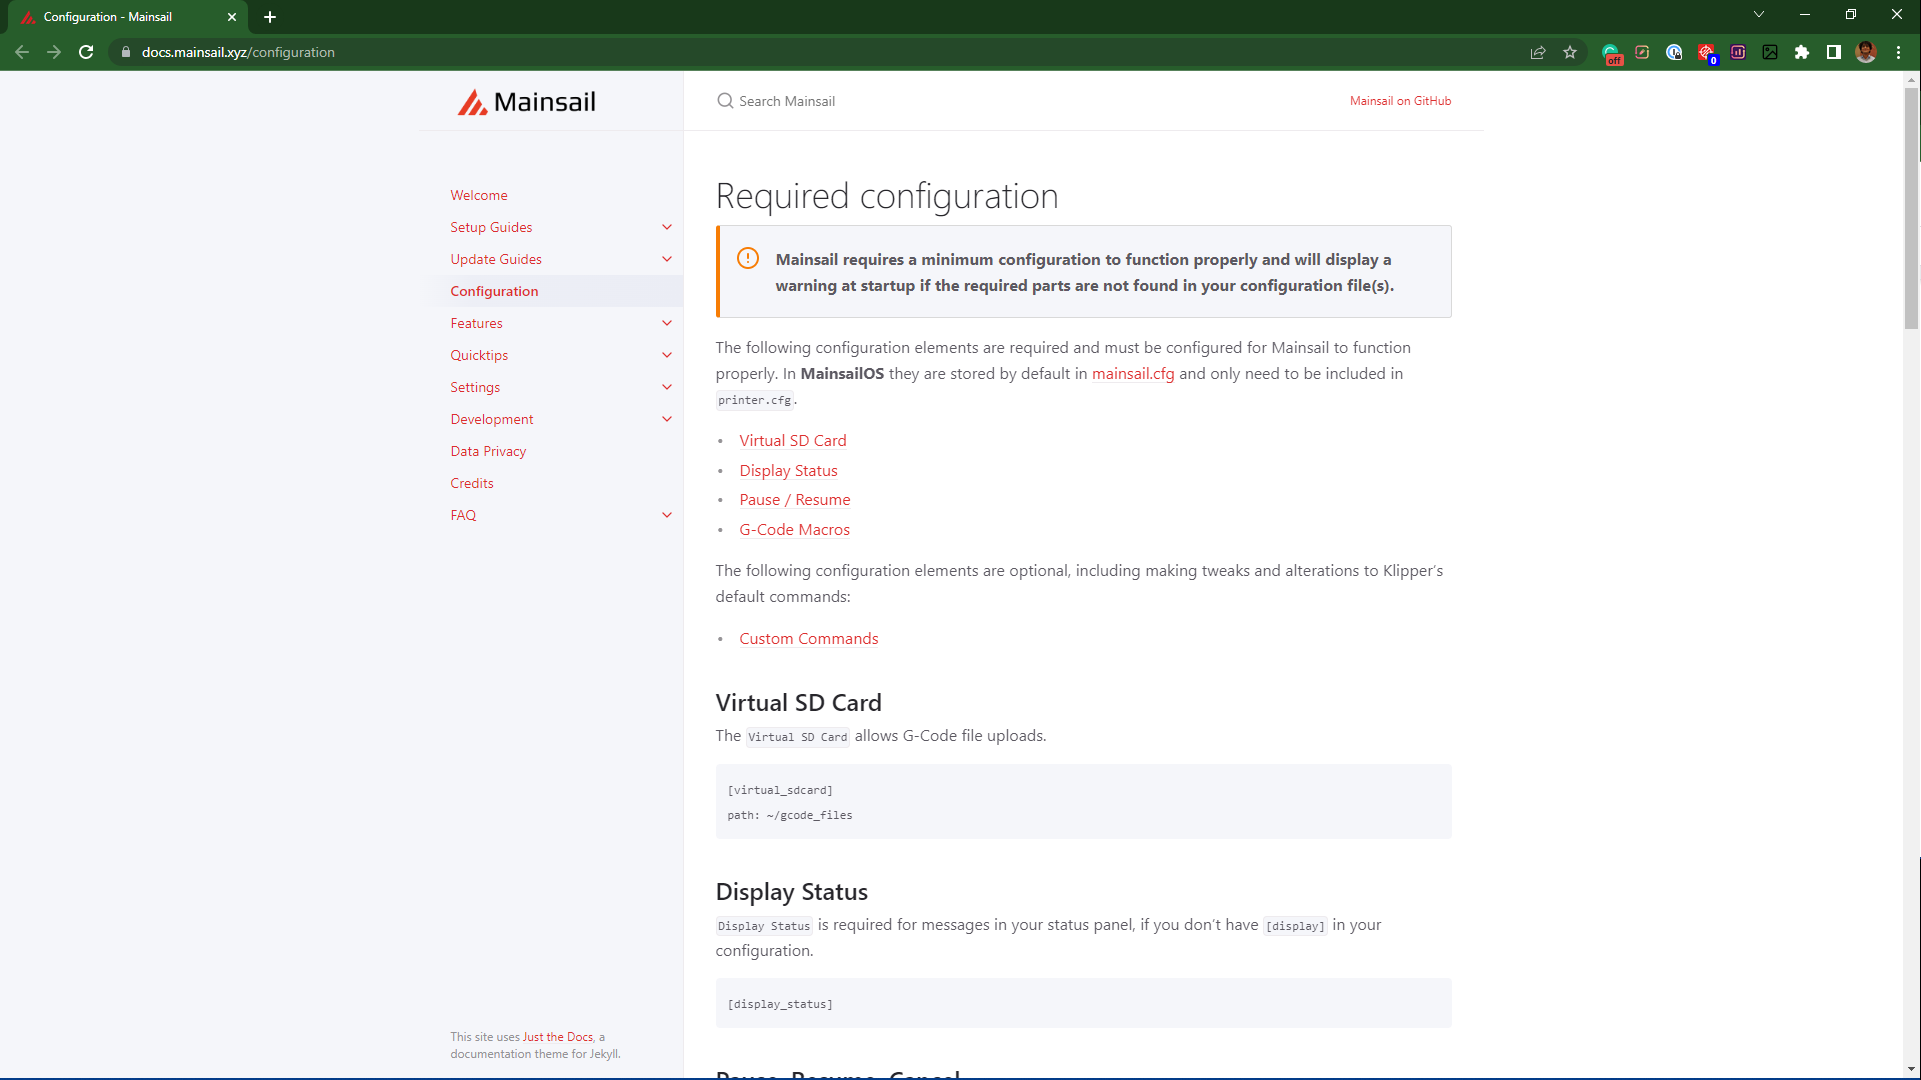
- Copy the Virtual SD Card, Display Status, Pause, Resume, Cancel, and Macros command from the Mainsail OS configuration website. You can directly insert these commands below the comments section.
- Save and close the file.
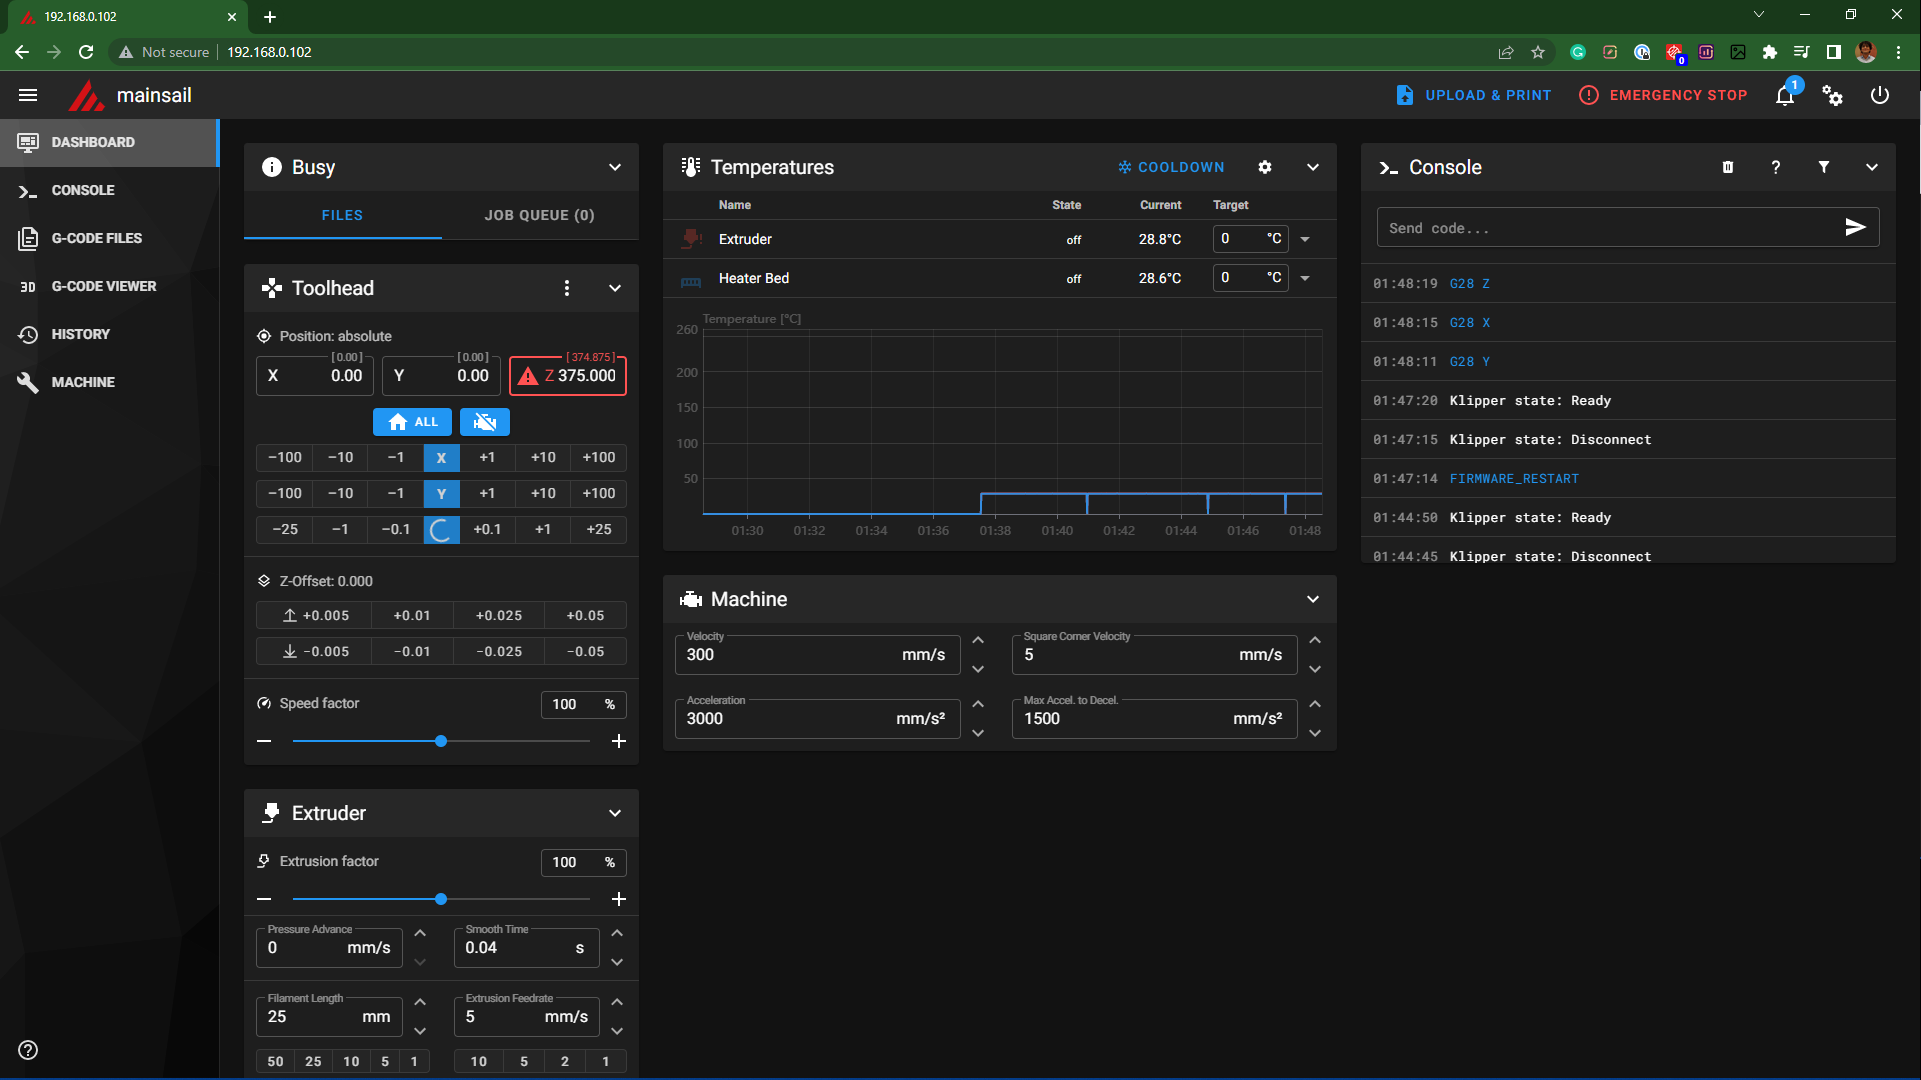
- Click on the Dashboard option and Restart Firmware.
- After a successful restart, you'll get a new display of the printer's controls on your dashboard. It indicates that you've successfully flashed Klipper on the Ender 3, and you can start 3D printing with it.
Explore Klipper Further
You can now explore Klipper as much as you'd like. The dashboard is the primary interface for interacting with the 3D printer. You can view your printer's stats, control it, and configure some settings from the single screen.
The Console tab acts as the command hub for the 3D printer. You can view your printer's current position and send Gcodes or commands for specific functionalities.
One of the significant benefits of Klipper Firmware is its remote control functionality. You can virtually control your 3D printer from anywhere on the same network. And even though the remote functionality is excellent, it comes with limitations.
To extract the most from your Klipper firmware and get all the benefits of remote monitoring and control, you can match it up with the Obico software.
Setup Obico for Klipper
Obico is an open-source, community-developed 3D printer software that lets you monitor and control your 3D printer from literally anywhere. You don't need to be on the same wireless network or have a single device. It works on an application platform, letting you use any device to control your 3D printer.
Let's set up Obico for your 3D printer and work remotely from anywhere.
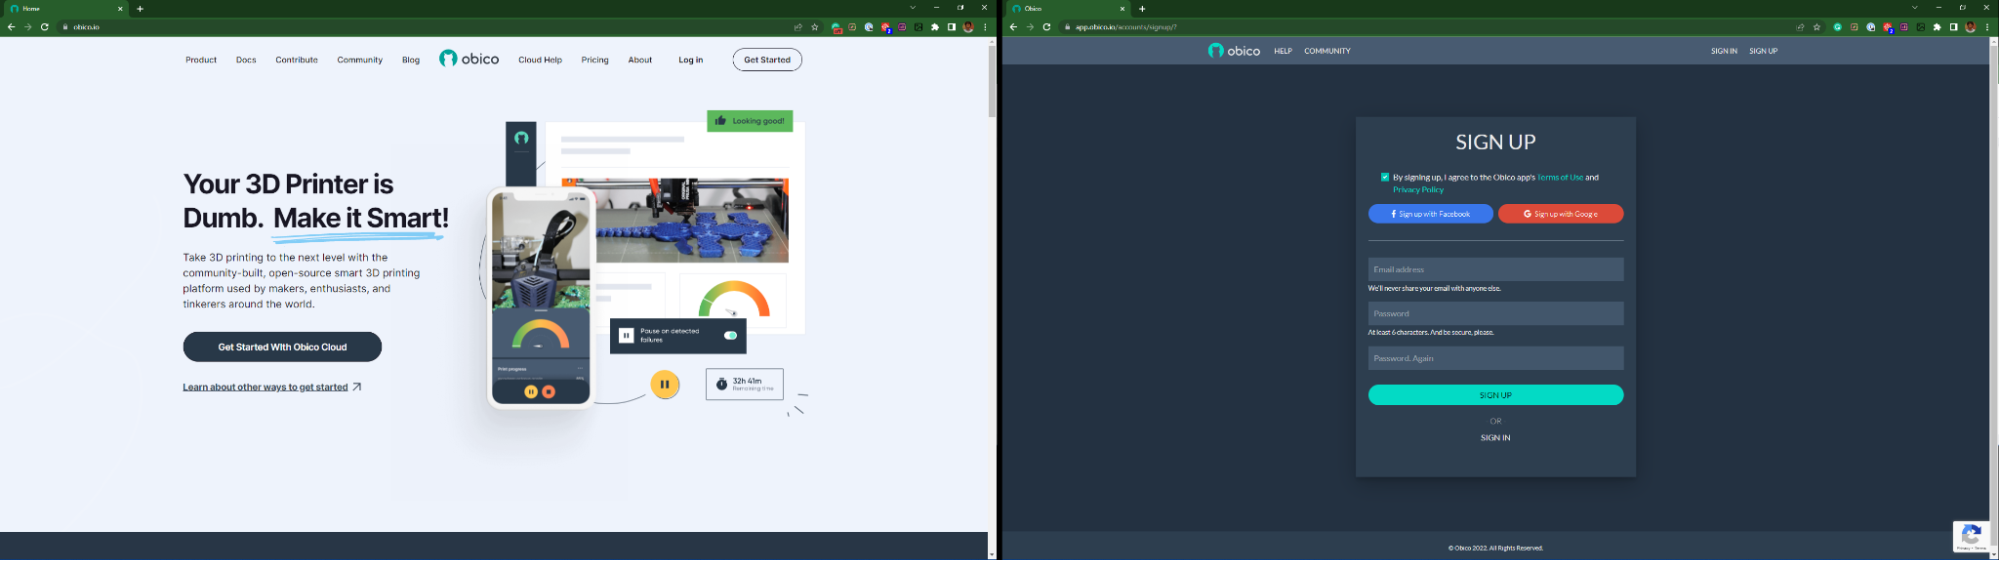
- Go to the Obico website and click on Get started.
- Setup an account using your credentials and login to the Obico interface.
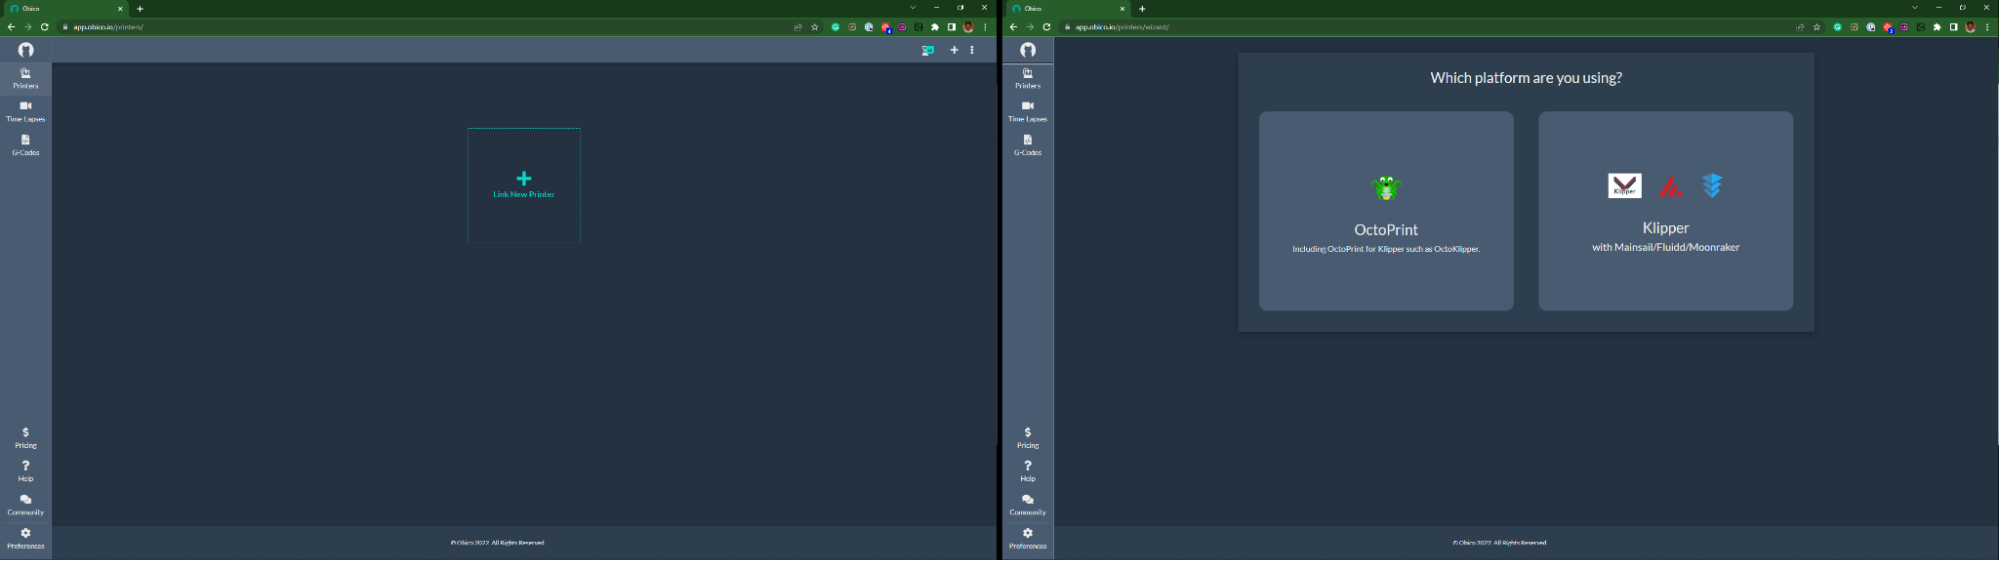
- Click on Add Printer and select Mainsail OS.
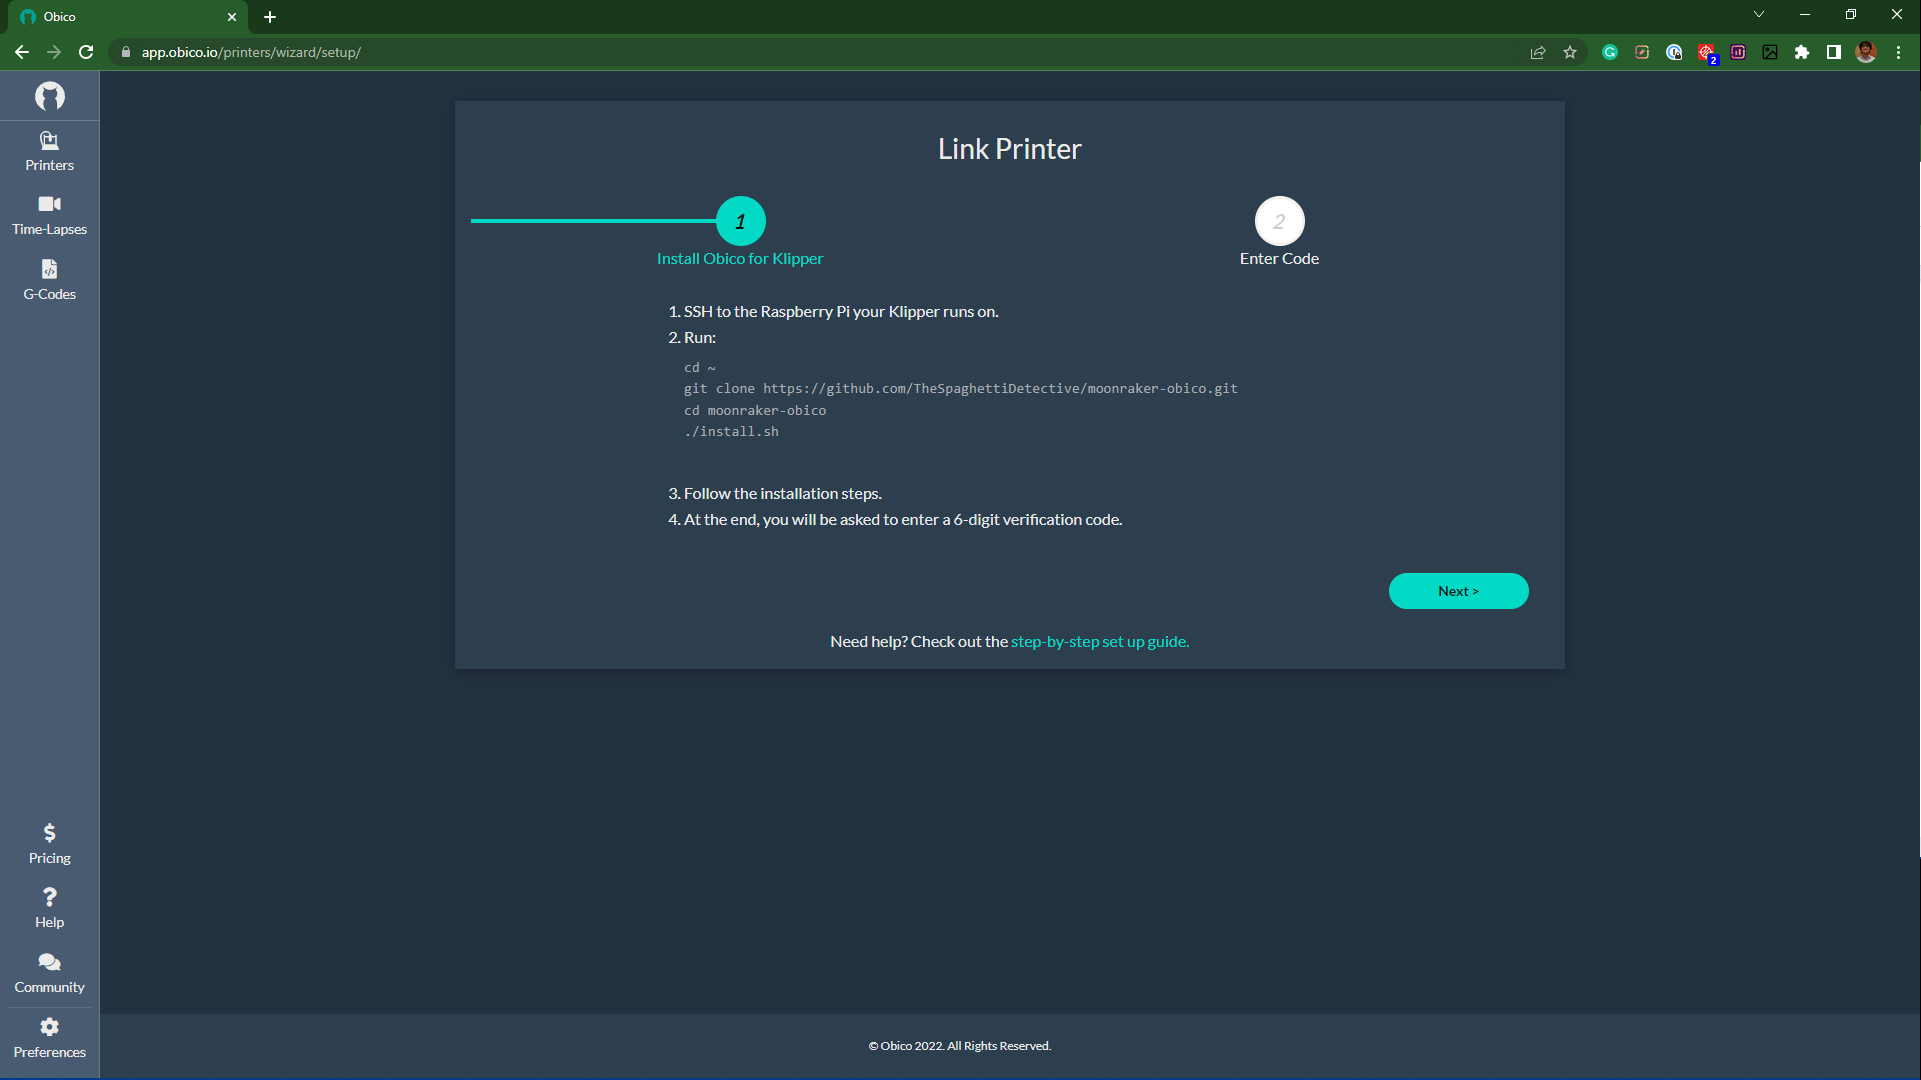
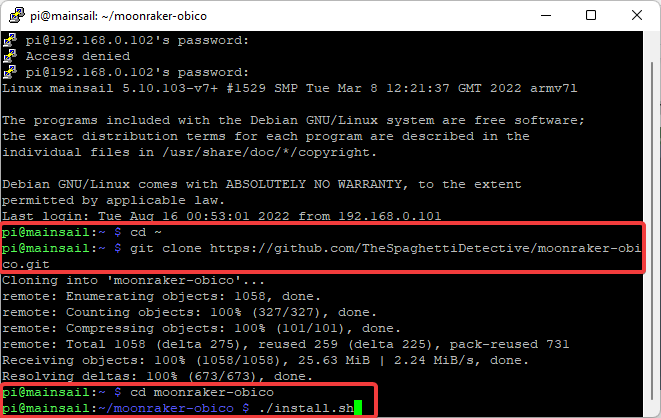
- Open PuTTY terminal window and input the following commands and hit enter.
cd ~
git clone https://github.com/TheSpaghettiDetective/moonraker-obico.git
cd moonraker-obico
./install.sh
- The Obico directories will now be downloaded and installed on your Raspberry Pi.
- Towards the end, you'll be asked for a 6-digit verification code to link your 3D printer to Obico's platform.
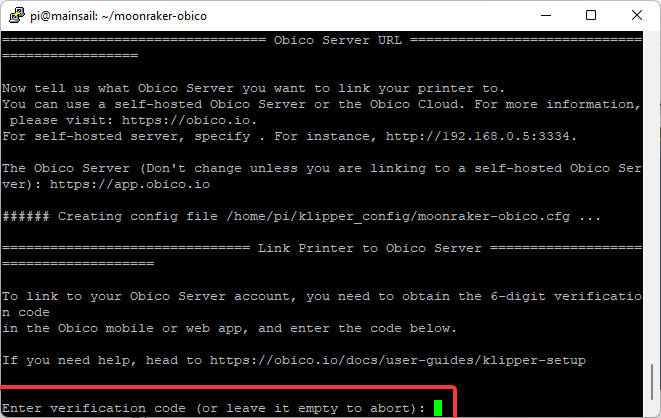
- In your web-browser, open Obico's window and go to the next step.
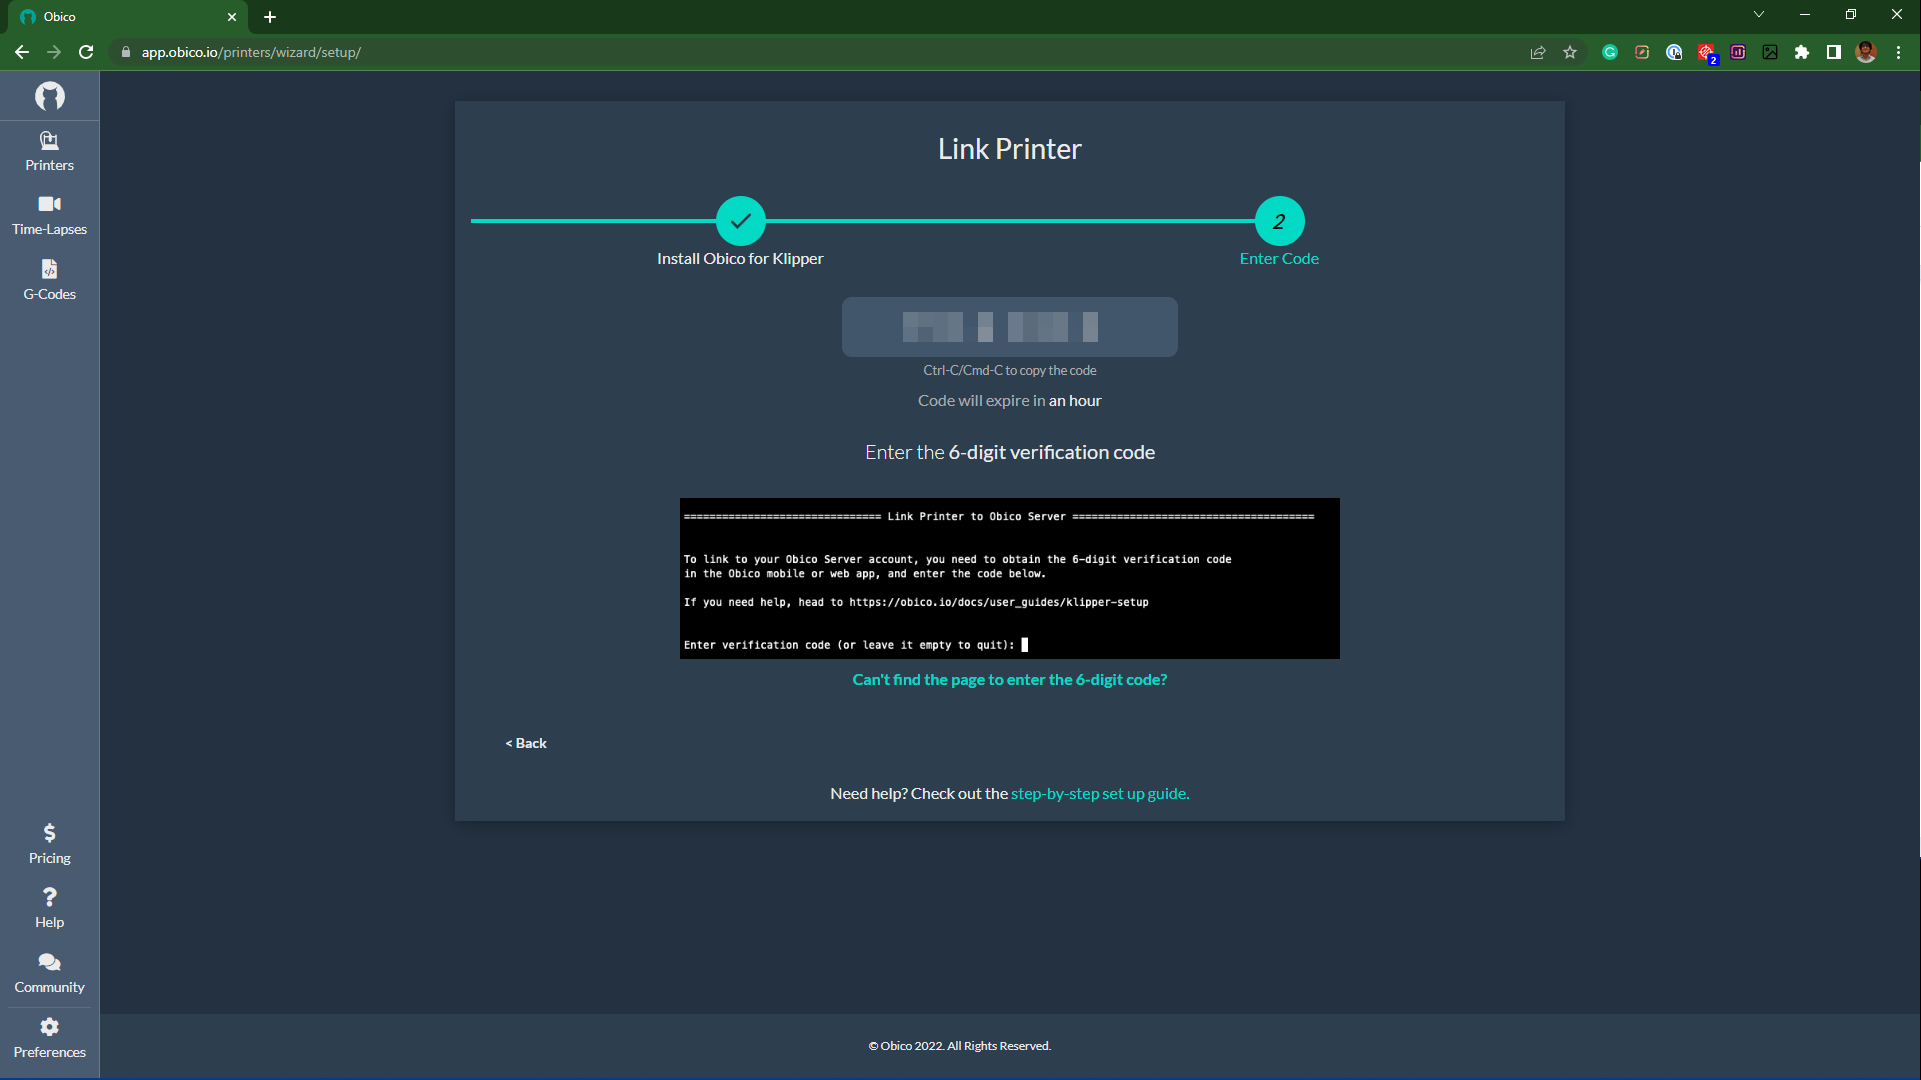
- Enter the 6-digit code in your PuTTY terminal and hit enter. You'll get a success message towards the end.
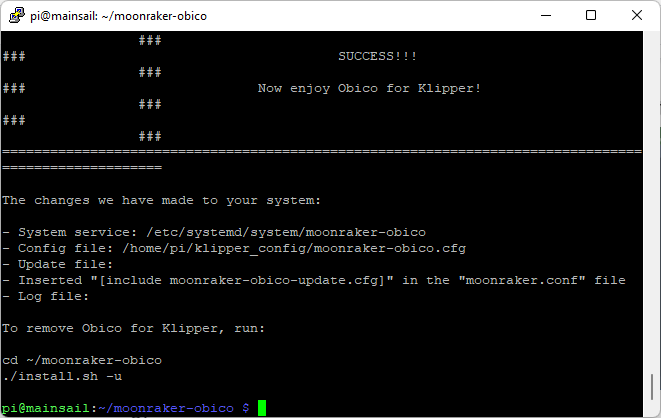
- Your Ender 3 is now connected to the Obico platform.
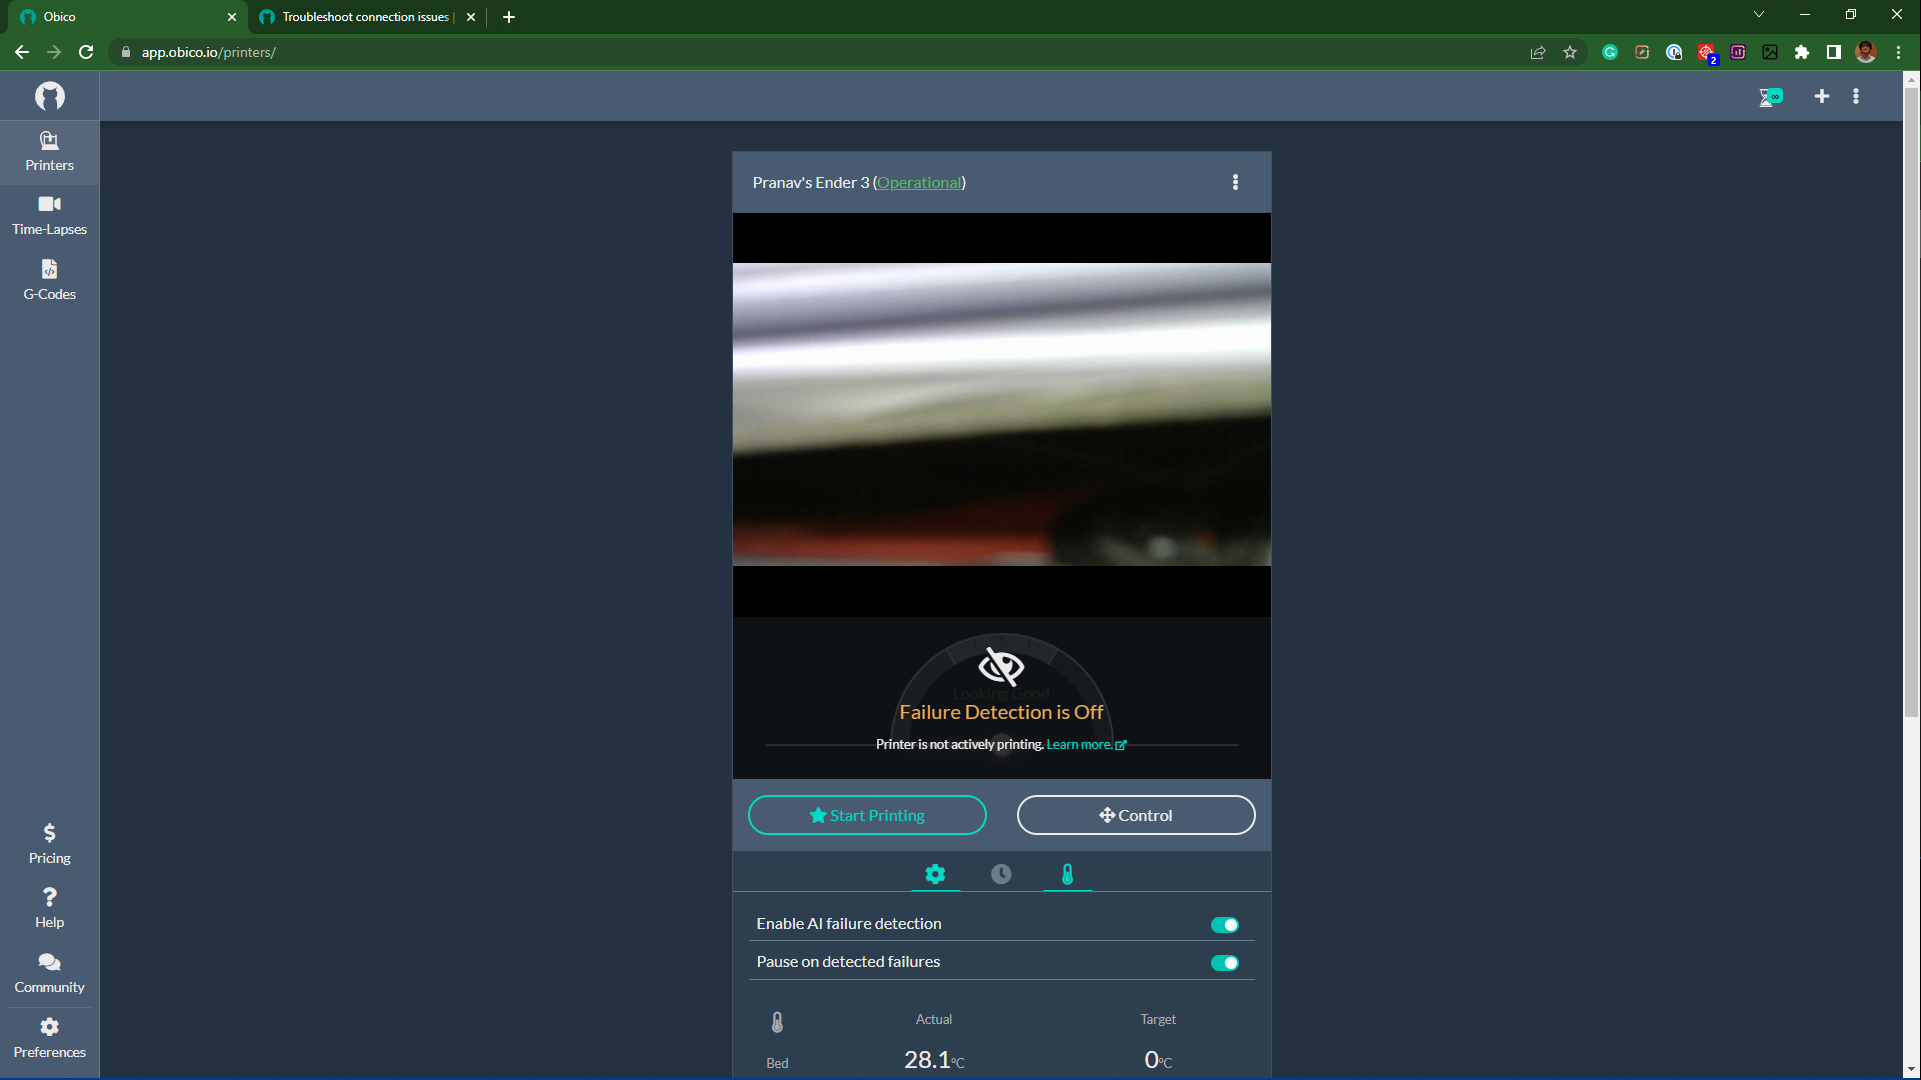
That was it. You have now successfully setup Klipper with Mainsail OS on your Ender 3 3D printer.
If you ran into any issues getting Obico for Klipper installed, checkout the full setup guide or join the Obico discord server to get help
Let us know your experience of using the Klipper for Ender 3. If you find Obico to be useful, please give us a star on github, or leave us a review on our mobile app in the iOS App Store or Google Play Store!