How to Install Klipper Themes
Picture courtesy: Mainsail
Klipper is fast, it's smooth, and it's really cool. It is quickly becoming the most used software for 3D printers. More and more commercial printers are being built using Klipper, and even more and more printers are being upgraded by enthusiasts so they can use Klipper.
Every day, more and more people hop on the Klipper train, which means that customization is more important than ever. Why shouldn't the printer's firmware be personalized by the user, much like the printer's brand, symbol, and 3D prints?
Today, we'll talk about how you can change the look and feel of your Klipper 3D printer to make it your own. This piece will go over Themes in Mainsail and Fluidd and help you personalize your machine to your liking.
Let’s Klipp away and custom-fit your machine to your taste!
Themes in Klipper: What and Why?
 Picture courtesy: Maximum-Classroom623 via Reddit
The Klipper firmware is great on many features. Input shaping, pressure advance, multiple controller support, and many more. With Klipper, you get a user interface (UI) for your 3D printer, which is one of its many advantages over other 3D printer software.
The interface allows you to manage your 3D printers from within a web browser. This gives you the freedom to check on and control your machines from a laptop, tablet, or even a smartphone.
Octoprint, Mainsail, and Fluidd are the three most popular interface choices currently available. Octoprint is more like a shell that Klipper runs in. It's not really made for Klipper, so it doesn't have as many UI choices and features as it ought to.
On the other hand, Mainsail and Fluidd are mostly for Klipper. You have easy access to different Klipper tools and many ways to change how the user interface looks.
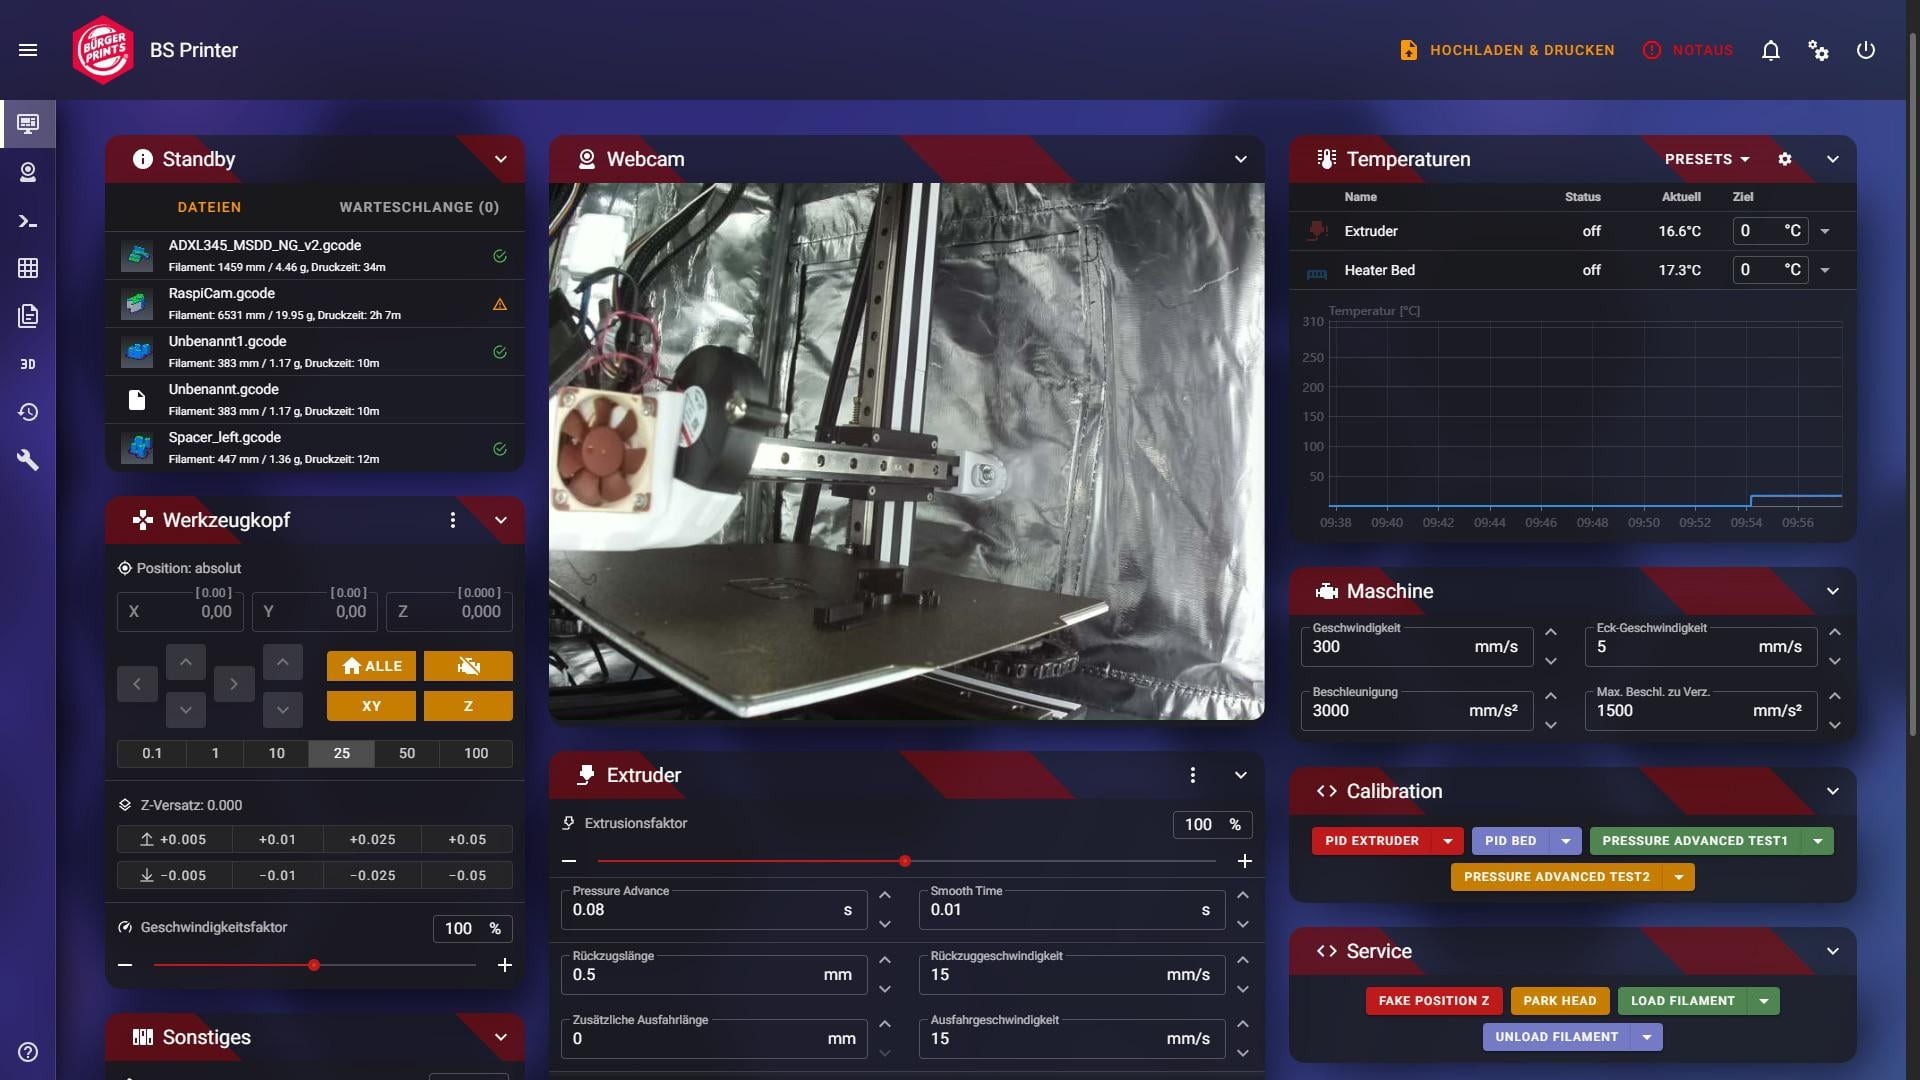
Thanks to the flexible configuration settings, your 3D printer dashboard may be tailored to your specific needs and aesthetic preferences. You can use different names for each printer, change their colors and use different icons to give the Klipper panel a unique look.
Both the Mainsail and the Fluidd use Themes to give you full power over the look and feel of your Klipper panel. There are already-made community themes that you can quickly download and install to Themeify your UI. Or, you can make your own style and change every part of your dashboard from scratch.
How to use Themes in Klipper?
In the parts that follow, we will talk about how to add styles to your Mainsail and Fluidd dashboards. Even though there are some small changes, the process is the same in both UIs. Let's start with themes for Klipper that use Mainsail.
Mainsail Themes
 Picture courtesy: Mainsail
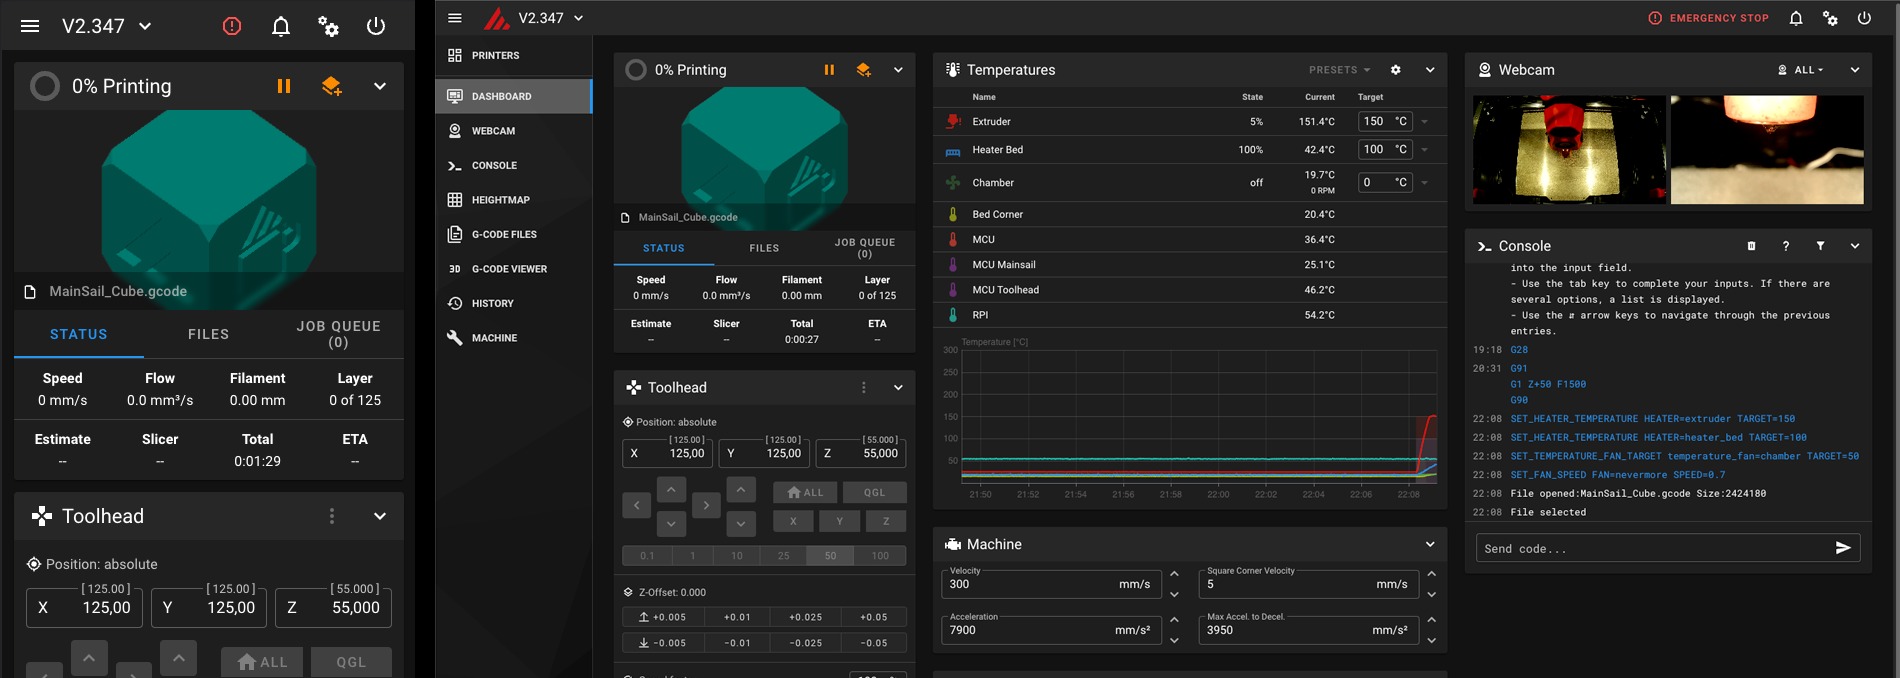
Mainsail is a popular Klipper interface because it looks good and is always getting new features. It started with the Duet Web Controller (DWC) for Klipper and grew into its own Klipper interface over time. If you're not using Mainsail yet, you can use Mainsail to look at our Klipper Installation guide.
Mainsail does not come with any themes. You only have two choices for changing the colors of the logo and how it looks in general. The real magic happens when you use the Mainsail Theme Installer.
Mainsail Theme Installer
The theme installer gives you a selected list of Mainsail interface styles made by the community. KIAUH is a tool that makes it easy to add themes to your Mainsail instance.
Install KIAUH
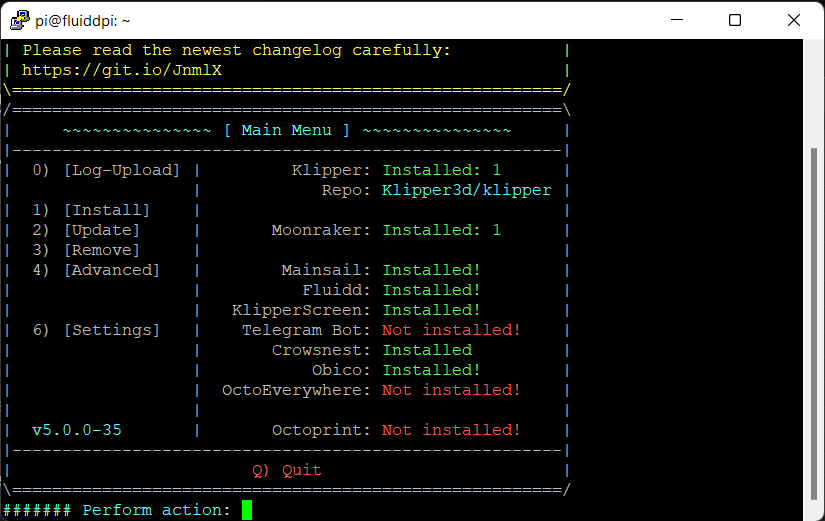
- If you’re already running Mainsail for your 3D printer, refer to the KIAUH Github instructions. SSH your Pi using PuTTY and install KIAUH by typing in the following commands.
- Enter each command separately, after the previous one is done executing. This allows you to identify if any issue comes up.
sudo apt-get install git -y
cd ~ && git clone https://github.com/th33xitus/kiauh.git
./kiauh/kiauh.sh
- After the last command, the KIAUH interface opens up in your PuTTY session and we can continue installing themes for Mainsail here onwards.
Install Themes via Theme Installer
- Go to the Advanced option by inputting the “4” number. It’ll open up the Advanced Menu.
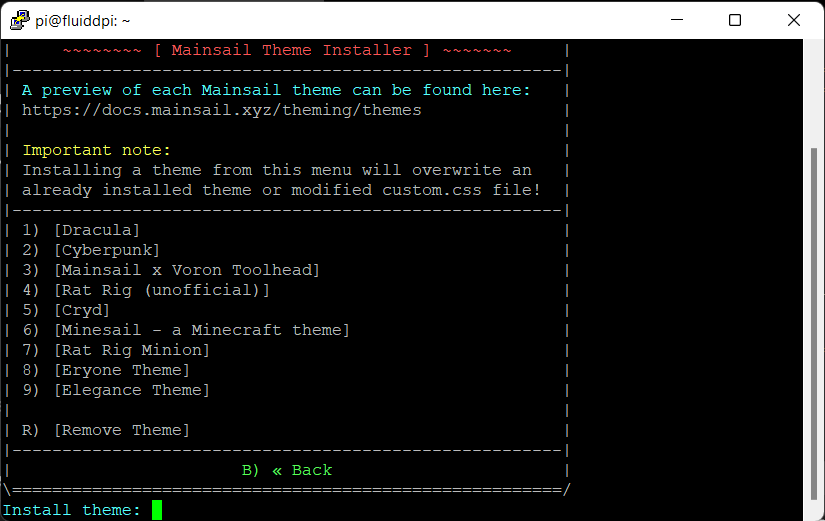
- Select option number 6, titled as Theme installer. It’ll give you a list of 9 community themes which you can readily install for your Mainsail interface.

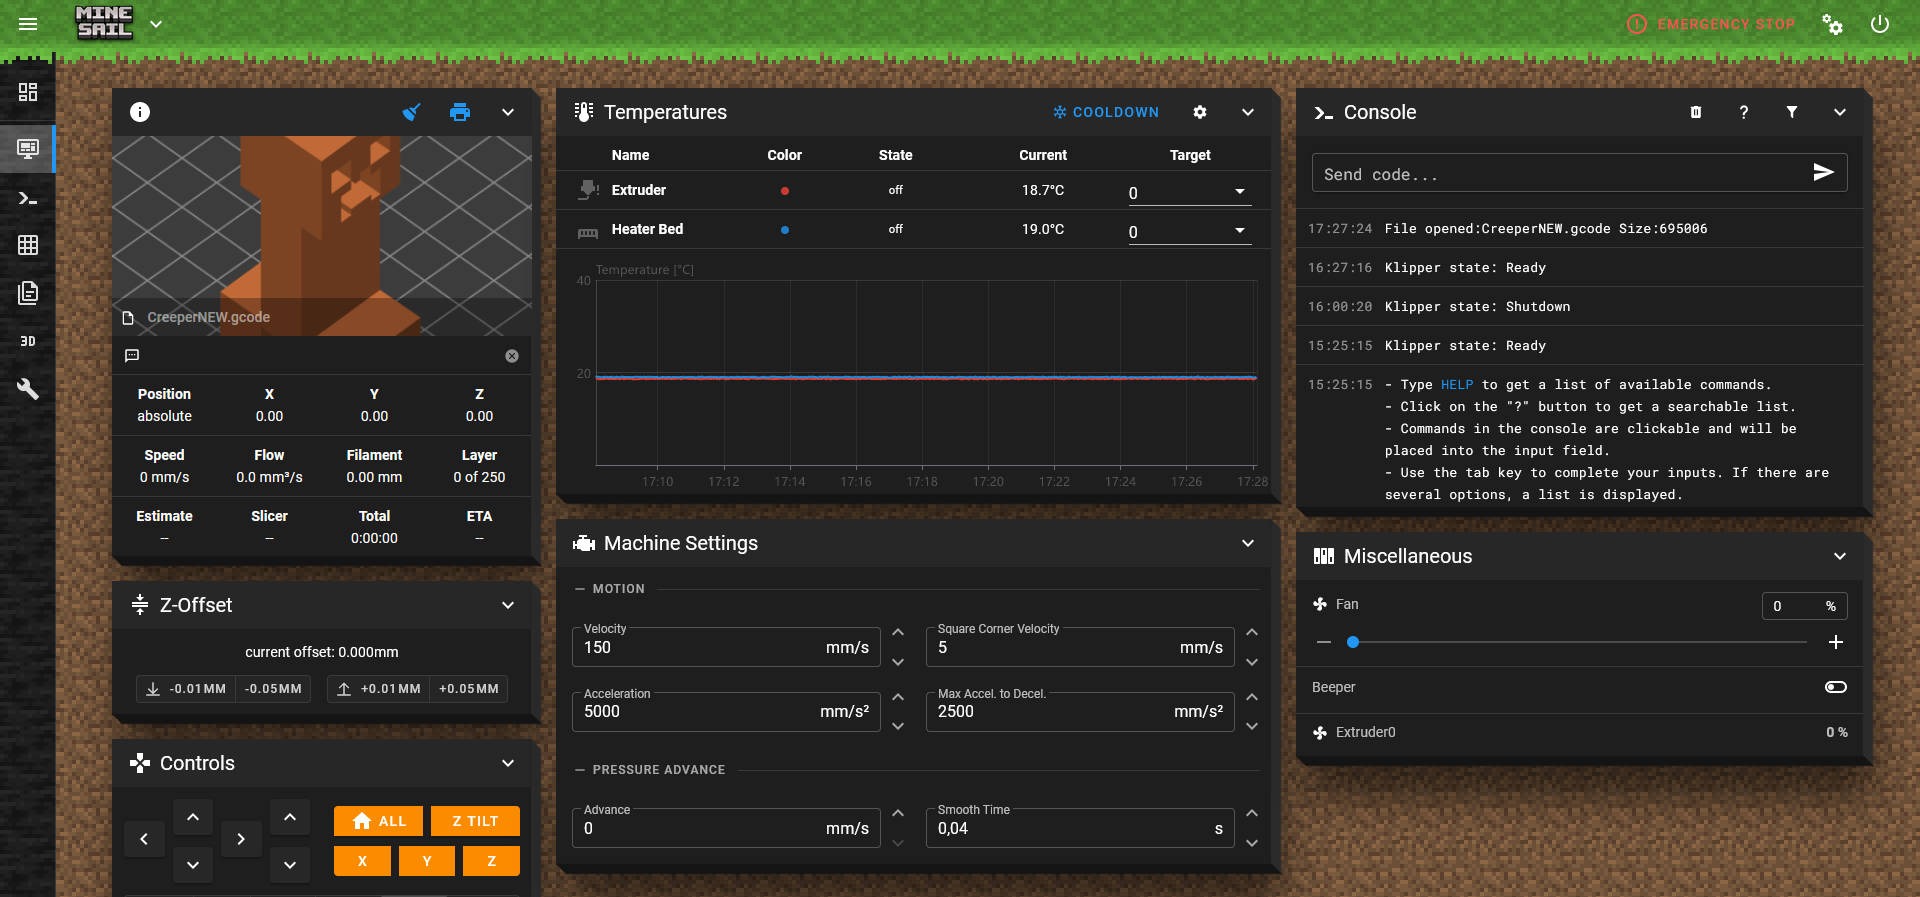
- Open the Mainsail Interface side by side and click on any one theme number to install it. We’ve selected the Minecraft theme. You can see, the KIAUH window shows the installation process. Your Mainsail window is also updated with the Minecraft theme now.
- There’s no “uninstallation” process as such. If you need to try out a different theme, select any of the other options and you’re good to go.
Fluidd Themes
Fluidd makes it easier to install community themes for your Klipper printer. The various themes are baked right into the Fluidd interface. You can just pick and choose from the multiple options in settings and you’re done.
- Go to Fluidd settings and open the Themes section.
- There’s a dropdown menu in the community presets section. Select from any of the eleven options and you’re set.
- You can customize the primary color of your theme and also toggle the Dark mode for your Fluidd dashboard.
That's all you need to know to use community themes in Klipper. Both the Mainsail and the Fluidd make it easy to add themes to Klipper.
The best thing about the theme installer and Fluidd user themes is that they let you change your homepage fast. You get pre-set choices, and you can switch between different styles whenever you get bored with one.
On the other hand, you're pretty much stuck with what the community themes have to give. What if you wanted to set the brand for your business? Change your background? Well, this is where things get more interesting.
Custom Theme for Klipper
Klipper gives you a chance to change your dashboard's logos, name, and background. You have more power over how the system looks and can make it your own in any way you want. Plus, it's very easy.
-
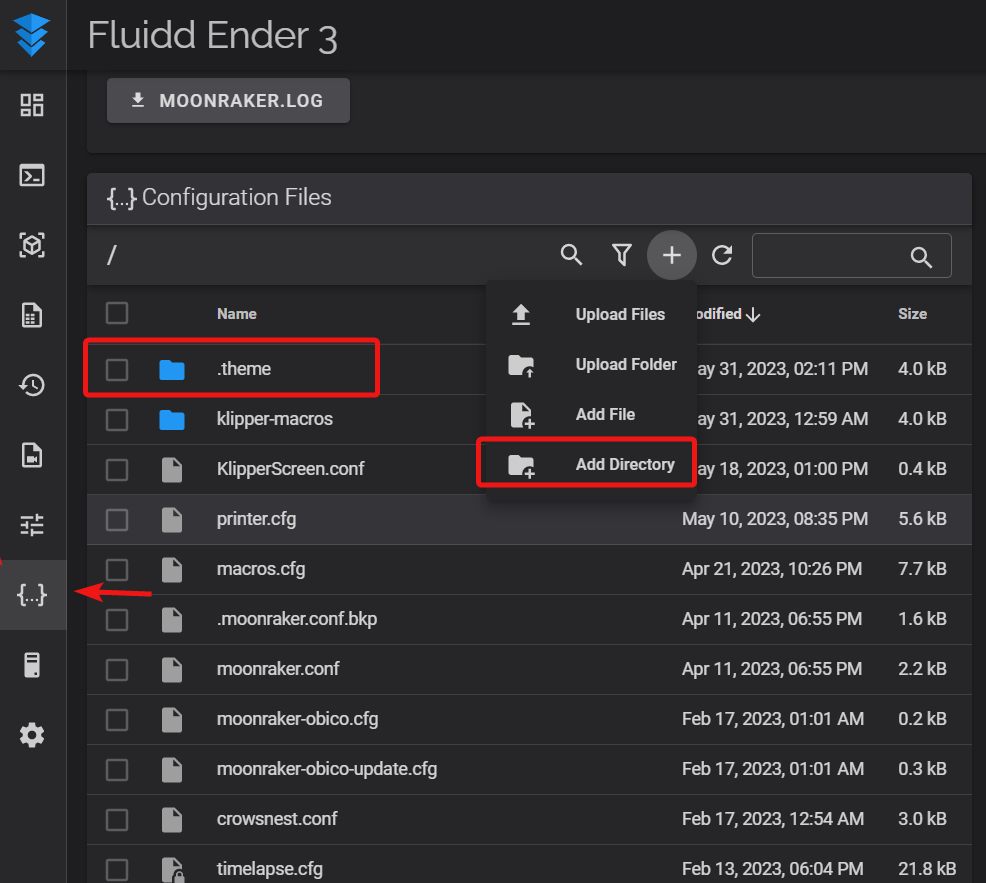
Open either Mainsail or Fluidd and head over to their configuration section. In this example, we’ll be using Fluidd. But, the procedure remains the same for Mainsail.
-
Create a new folder named as .theme in the configuration section.

-
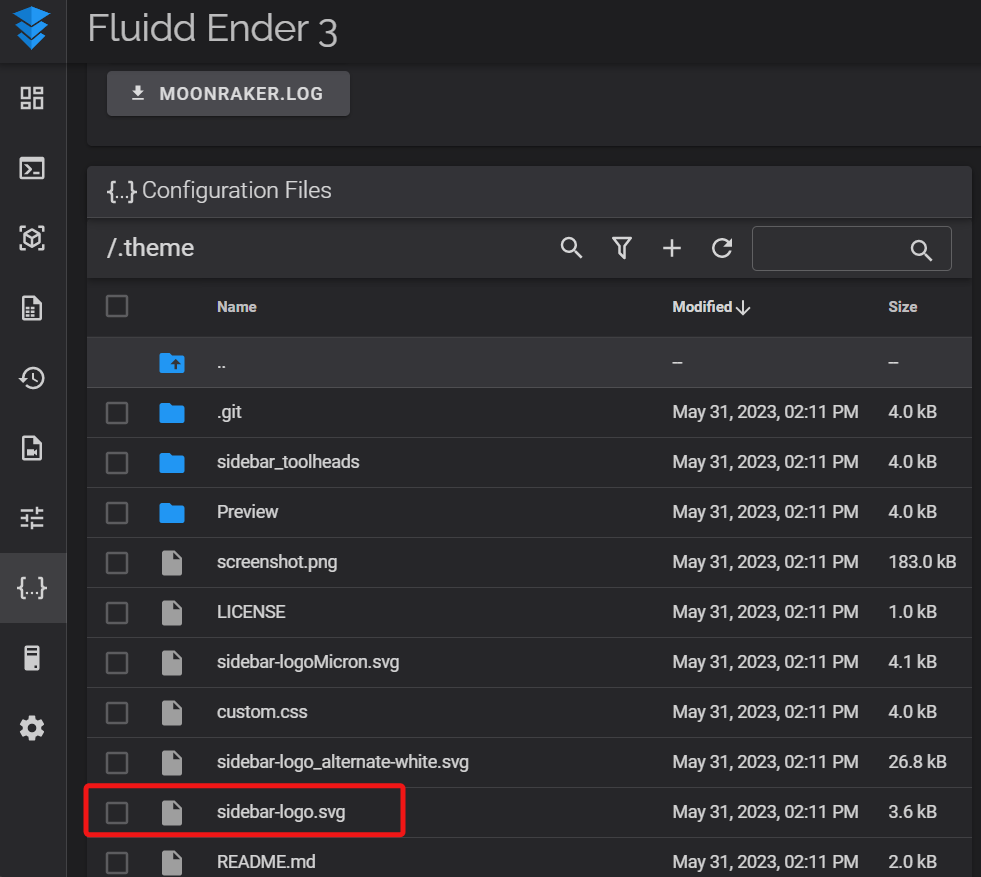
Open the folder and upload the images of your choice. You can upload images in .jpg, .png, .gif and .svg formats.
-
Based on what you’d like to customize, rename the images. For example, if you want to customize the sidebar background, rename an image of your choice to sidebar-background.png. It’s important to keep the extension type of your image in the name. Klipper won’t recognize the image otherwise.
-
Each image needs to have a particular file name. This is how Klipper knows which image should go where. Following are the images which you customize.
- sidebar-logo.svg|jpg|png|gif
- sidebar-background.svg|jpg|png|gif
- main-background.svg|jpg|png|gif
- favicon-16x16.png
- favicon-32x32.png
-
Once everything’s as per your liking, restart Klipper and reload your browser tab. You should now see the new images in your dashboard.
This option should be enough for most users. It gives you enough room to customize your Klipper dashboard while still keeping things simple.
But if you're still not happy and want to change the size of the text, the style of the font, or even the whole experience, there's one more thing you can do.
Custom CSS in Klipper
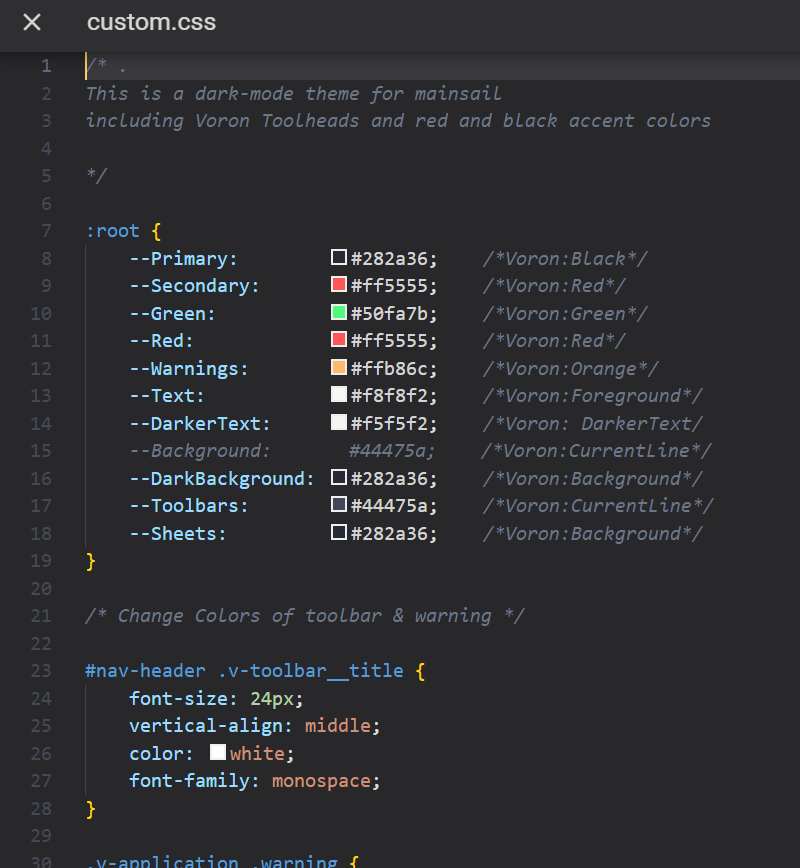 You may specify the look and feel of individual webpage components by writing your Cascading Style Sheets (CSS) in Klipper. Using CSS, you can change how a page looks in every way. It's a pretty advanced idea and not really something that can be explained in this piece.
You can use a short guide on Mainsail to learn how CSS works for Klipper. You can use the same instructions for Fluidd.
Final Thoughts
Klipper's themes are a fantastic method to set apart various 3D printers. You can use a different theme for your Prusa than you do for your Ender 3. With the Theming choices, you can also change how the Klipper interface looks to make yourself stand out.
Even though it's a small thing, everyone gets tired of the same look after a while. With these Klipper themes, you can break out of this rut and make sure that your interface always looks as new as your 3D printer.
Please leave a comment below if you liked the piece. Feel free to let us know if we forgot something or if you have any other questions.
You could also try out Obico. It's a fantastic piece of software we developed that can identify 3D printer spaghetti and give you remote access to your printer. Signing up is free, and you can start using your Klipper right away.
Have fun with 3D Printing!
