3D Printer Firmware - Klipper Vs. Marlin Firmware

![]()
Introduction
3D printers are a mere assembly of various stepper motors, controllers, and structural components. It is the 3D printer's firmware that ties everything together and brings your digital gcode file into the physical world.
Marlin was the first 3D printer firmware developed way back in 2011 for FDM 3D printers. Erik Van Der Zalm designed it for Ultimaker 3D printers which used 8-bit microcontrollers. Since 2011, Marlin has come a long way, and several 3D printers worldwide use some variant of the Marlin for their functioning.
But, in 2016, Kevin O'Connor released the Klipper firmware as an alternative to Marlin. Klipper promises high-speed 3D printing, better print quality, and several other features superior to Marlin. And it has grown tremendously since the first release and is quickly becoming the go-to firmware choice for many 3D printing hobbyists and manufacturers alike.
In this article, we'll compare Marlin and Klipper's firmware based on various criteria and understand the differences between these two. It should help you make an informed decision and choose the one that best matches your needs.
Let's get started.
How 3D printer firmware works
 3D Printer Firmware Explanation/Courtesy: Marlin
A 3D printer firmware is a bridge between your machine's software and hardware. It takes in the Gcode as the input and translates it into the physical actions of your 3D printer. It lets you access the minute features of your 3D printer and is partially responsible for the final quality of your 3D printed models.
The Marlin Firmware runs solely on your 3D printer's microcontroller, and it's designed to run on low-powered, 8-bit boards with limited processing power. With Marlin, the microcontroller computes the 3D printer's movements and is responsible for interfacing with the various hardware components.
This working of Marlin is taxing on the microcontroller, and with the limited memory of an 8-bit motherboard, there's little room left for any additional features. However, the recently released Marlin 2.0 works with 32-bit motherboards, giving you access to more processing power resulting in faster and better 3D printing performance.
In contrast, Klipper utilizes an additional processing unit (typically a Raspberry Pi) and the printer's microcontroller to deliver optimum printing performance. The Raspberry Pi has better processing capabilities and computes the 3D printer's movements according to the Gcode. It forwards these commands to the microcontroller, which is solely responsible for interfacing and transmitting the commands to the printer's hardware.
This configuration of two processors enables the Klipper firmware to implement higher-level features, which are impossible with low-end 8-bit microcontrollers. Advanced processing algorithms, higher stepping rates, the ability to add multiple machine controllers, and many other features are all possible due to the additional computing power of an external processing unit.
How easy is it to install?
Firmwares are technically installed on the motherboard's chip, and you require an external computer to configure and flash the software on the printer's microcontroller. Marlin and Klipper are relatively easy to install but have slightly different installation methods.
Marlin is available to download for free, and customized configurations are available for various 3D printers. You can download the Marlin firmware from its website and install it using an SD card or directly from your computer. It's relatively easier to install than Klipper, and you can find several installation guides for various printers.
Klipper, too, is available as an open-source and free-to-download firmware. But, it has a slightly different installation process and might not be friendly for novice 3D printer users. It's a two-step process involving the installation of the Klipper firmware itself and a dedicated Klipper web interface such as Mainsail OS or Fluidd.
Yet, the process is easy to understand with a bit of help, and you can refer to our guides for installing Klipper with Mainsail OS and Fluidd. You can install Klipper directly on Octoprintvia the OctoKlipper plugin, but the two don't go together well. You'd be better off installing Klipper with the two mentioned web interfaces.
Configuration
Firmware configuration is a crucial step in which you set the 3D printer's parameters within the firmware code. This step informs the firmware about the physical aspects of the 3D printer, thus customizing the software as per the printer's specifications.
Marlin has slightly involved configuration settings that might be daunting for a first-time 3D printer user. The printer's configurations are stored in two separate folders, and are different for each 3D printer. Editing these files is not a straightforward task, but luckily, plenty of guides are available online.
Marlin being a popular 3D printer firmware, you can easily find the configuration file for your particular printer. But, you'll need to reflash the entire firmware after changing the printer's configuration. This process is time-consuming and requires a code editor installed on your computer.
Klipper's configuration is relatively straightforward, and you can easily access it directly from its interface. Several configuration files are available on Klipper's website, which you can directly copy-paste and start 3D printing with Klipper. You can edit the configuration files now in its interface, and there's no need to reflash or erase anything.
Accessories and Add-Ons
Firmware add-ons help you to extract the most out of your machine and give you access to features that might be missing from the current version of your firmware.
For example, Octoprint is a popular add-on for Marlin firmware that helps you to monitor and control your 3D printer remotely. Octoprint is another open-source and free-to-use 3D printing host software with tons of other functionality. It's famous for its integration with several plugins, enabling you to execute various tasks.
You can customize your 3D printer's UI, attach an external monitoring display, access notifications on your Telegram app, and get a 3D map of your bed's level. Octoprint unlocks an entirely separate world of 3D printing, which might not be possible by merely using your machine with the Marlin firmware.
That said, Klipper, too, has its advantages in terms of functionality and ease of use. Mainsail OS and Fluidd are two of the most popular web interfaces which enable you to extract the most out of Klipper.
These two interfaces are solely developed for running Klipper firmware and make it easy for users to access Klipper's various functionalities. As both are web-UIs, you can easily control your 3D printer from any device. These also make editing configuration files a breeze which comes in handy if you're constantly changing your 3D printer's hardware.
Features
Marlin and Klipper use different hardware configurations and significantly differ in their features. Klipper utilizes the additional processing power of the Raspberry and gets an edge over the Marlin firmware. Let's look at some of the significant differences in features of both the firmware.
Marlin
Linear Advance
Marlin's linear advance approximates the filament pressure in the nozzle and adjusts the flow rate accordingly. It helps to reduce the oozing of the filament during travel moves, thereby reducing the stringing in the 3D print.
Model Predictive Temperature Control
This temperature control system relies on a model simulation to bring the printer's hot end and the print bed to the set temperatures. As opposed to the traditional PID control, this technique is quick, reliable, and precise and controls the actual hot end temperature instead of the sensor. It helps you to achieve faster heating times with high accuracy.
Klipper
Smooth Pressure Advance
This feature is a replica of the Marlin's Linear advance. Klipper's smooth pressure advance gives you the same functionality and helps to reduce filament stringing. But, it's much easier to calibrate and adjust the value pressure advance value in Klipper than in Marlin. You can set this value in real time without needing to reflash the firmware or edit any gcode files.
Precision Stepper Motor movement
Klipper computes all stepper motor movements on a separate processor such as a Raspberry Pi. It then transmits all of these commands to the printer's microcontroller, whose sole job is to execute these lines of commands. This delegation of tasks leads to precise stepper movements as the microcontroller doesn't need to calculate and control everything.
High Stepping rates
Klipper can deliver high stepping rates of 175K steps per second with even 8-bit microcontrollers. Technically, you might never need such an extreme stepping rate, but if you decide to add more stepper motors to your 3D printer, Klipper's got you covered. It also results in precise motor movements translating to higher quality 3D prints.
Multiple Controller support
Klipper supports multiple controllers on a single 3D printer. This feature allows you to add a separate controller for extruders, print beds, leveling devices, and many more. It's easy to set up and gives you more control over all aspects of your 3D printer.
Input Shaping
Input shaping is unique to Klipper, which aims to reduce the ringing/ghosting effects in your 3D prints. Ringing occurs due to the vibrations produced when printing at high speeds. It approximates the vibrations of the printer's movements and computes the pathways that will cancel out these vibrations. Klipper aims to balance the print quality at high speeds with this feature.
Choosing a 3D printer firmware
Marlin and Klipper are exceptional 3D printer firmware that excel at what they do. Choosing between the two comes down to your workflow and expectation from your 3D printing machine.
Marlin is excellent for its ease of setting up and minimal features. The latest Marlin 2.0 can run on 32-bit motherboards, giving you access to increased functionality of your 3D printer. And you can combine it with Octoprint to remotely access your 3D printer and a slew of other handy features.
Klipper, on the other hand, is on the rise and is quickly gaining interest in the 3D printing community. It delivers prints at high speeds and with better print quality. It's updated more frequently, and once you get familiar with its interface, it's a breeze to use. Klipper will be more suited for users who need to get the most out of the machines and a fast 3D printing experience.
Get the most out of Marlin and Klipper with Obico
Obico is the successor to the popular Spaghetti Detective application and builds upon the foundation of its predecessor. Obico is available on Marlin via Octoprint. You'll need to install the Obico plugin on your Octoprint instance, and you're good to go. It's also easy enough to set up on Klipper, and you can get started using Obico for Klipper with a few lines of easy code.
Let's take a quick look at some of the notable features of Obico.
Remote monitoring and Control
Obico lets you remotely monitor and control your 3D printer, and you're not restricted to being on the same network as your machine. You can access your printer over a mobile network from virtually anywhere in the world.
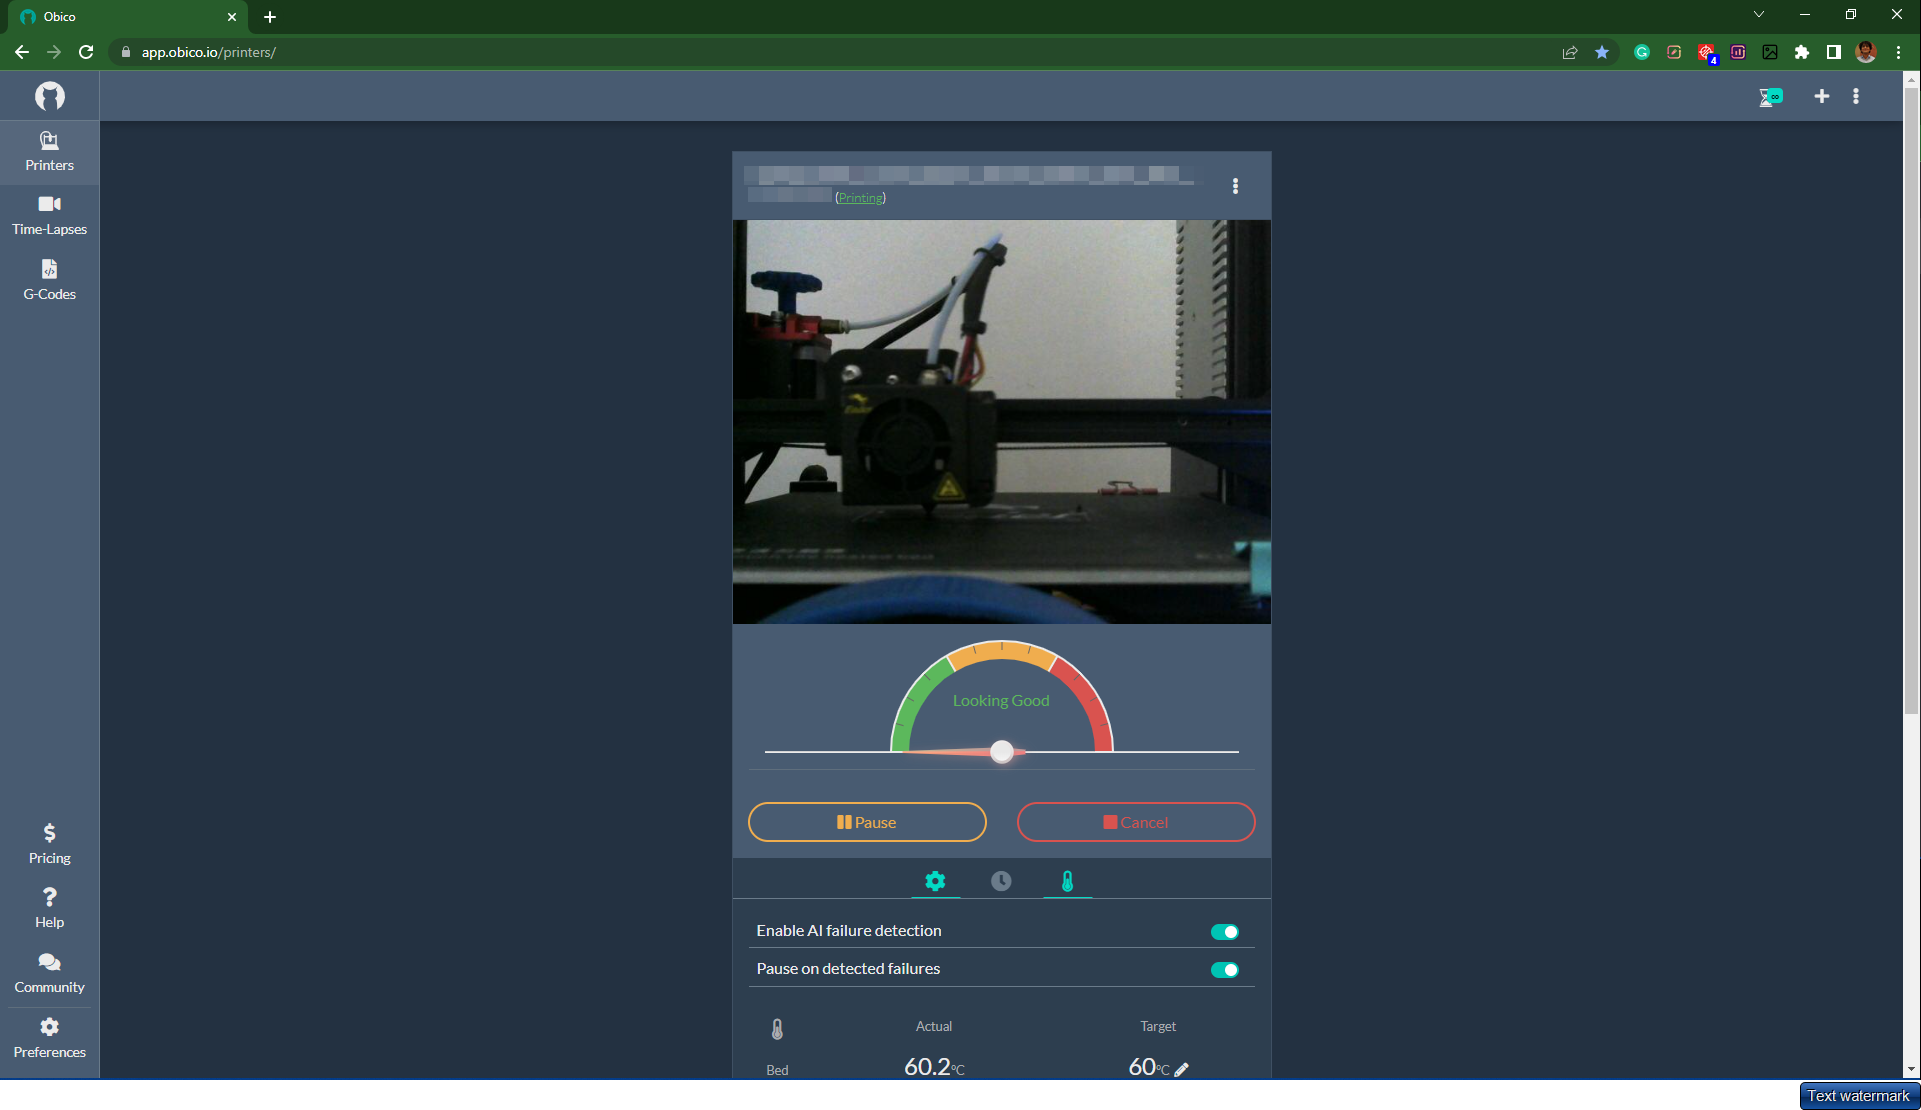
AI Detection
Obico uses machine learning to detect failed prints and instantly notifies you if anything goes wrong. You can remotely cancel your print or let Obico decide it for you. This feature gives you added peace of mind and saves your precious printing time and filament.
Print status Notifications
Obico can send status reports of your ongoing print job on your mail ID, telegram app, Slack, and text message. It removes the hassle of constantly checking your phone, and you can work on other tasks without worrying about your print's progress.
Multi-platform Support
Obico is available both on Android and iOS devices as a mobile application. You can also access it on your desktop via your browser without installing additional software. You're no longer limited to a single device and can access your printer's live feed, regardless of your platform.
If you have issues getting Obico installed for your 3D printer, check out the complete setup guide or join the Obico discord server to get help.
Let us know your experience of using the Klipper for Ender 3. If you find Obico useful, please give us a star on GitHub, or leave us a review on our mobile app in the iOS App Store or Google Play Store!