Optimizing Extrusion Rates: A Guide to Correcting Under Extrusion
Introduction
Tackling the Challenge of Under Extrusion in 3D Printing
Welcome to the world of 3D printing! In this amazing realm where we bring ideas to life layer by layer, there’s a common hiccup known as under extrusion that can sometimes throw a wrench in our creative works. But worry not! Understanding and fixing this issue is easier than you might think.
What is Under Extrusion?
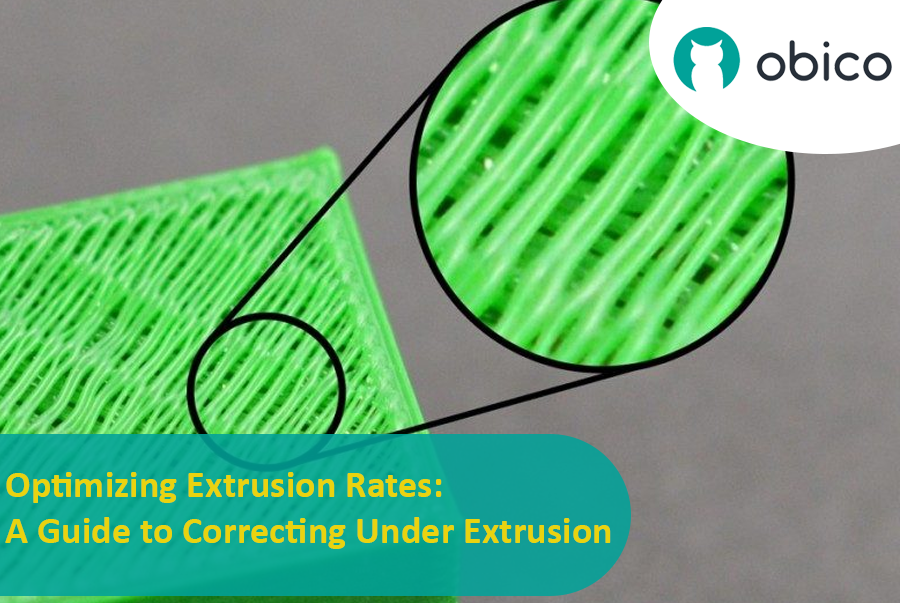
Under extrusion is like when a pen runs out of ink while writing. In 3D printing, it happens when the printer doesn't push out enough filament. This leads to prints that are missing layers or have very thin layers, and you might notice small holes or gaps in your print. It's like baking a cake but not having enough batter to fill the pan.
Why Does It Matter?
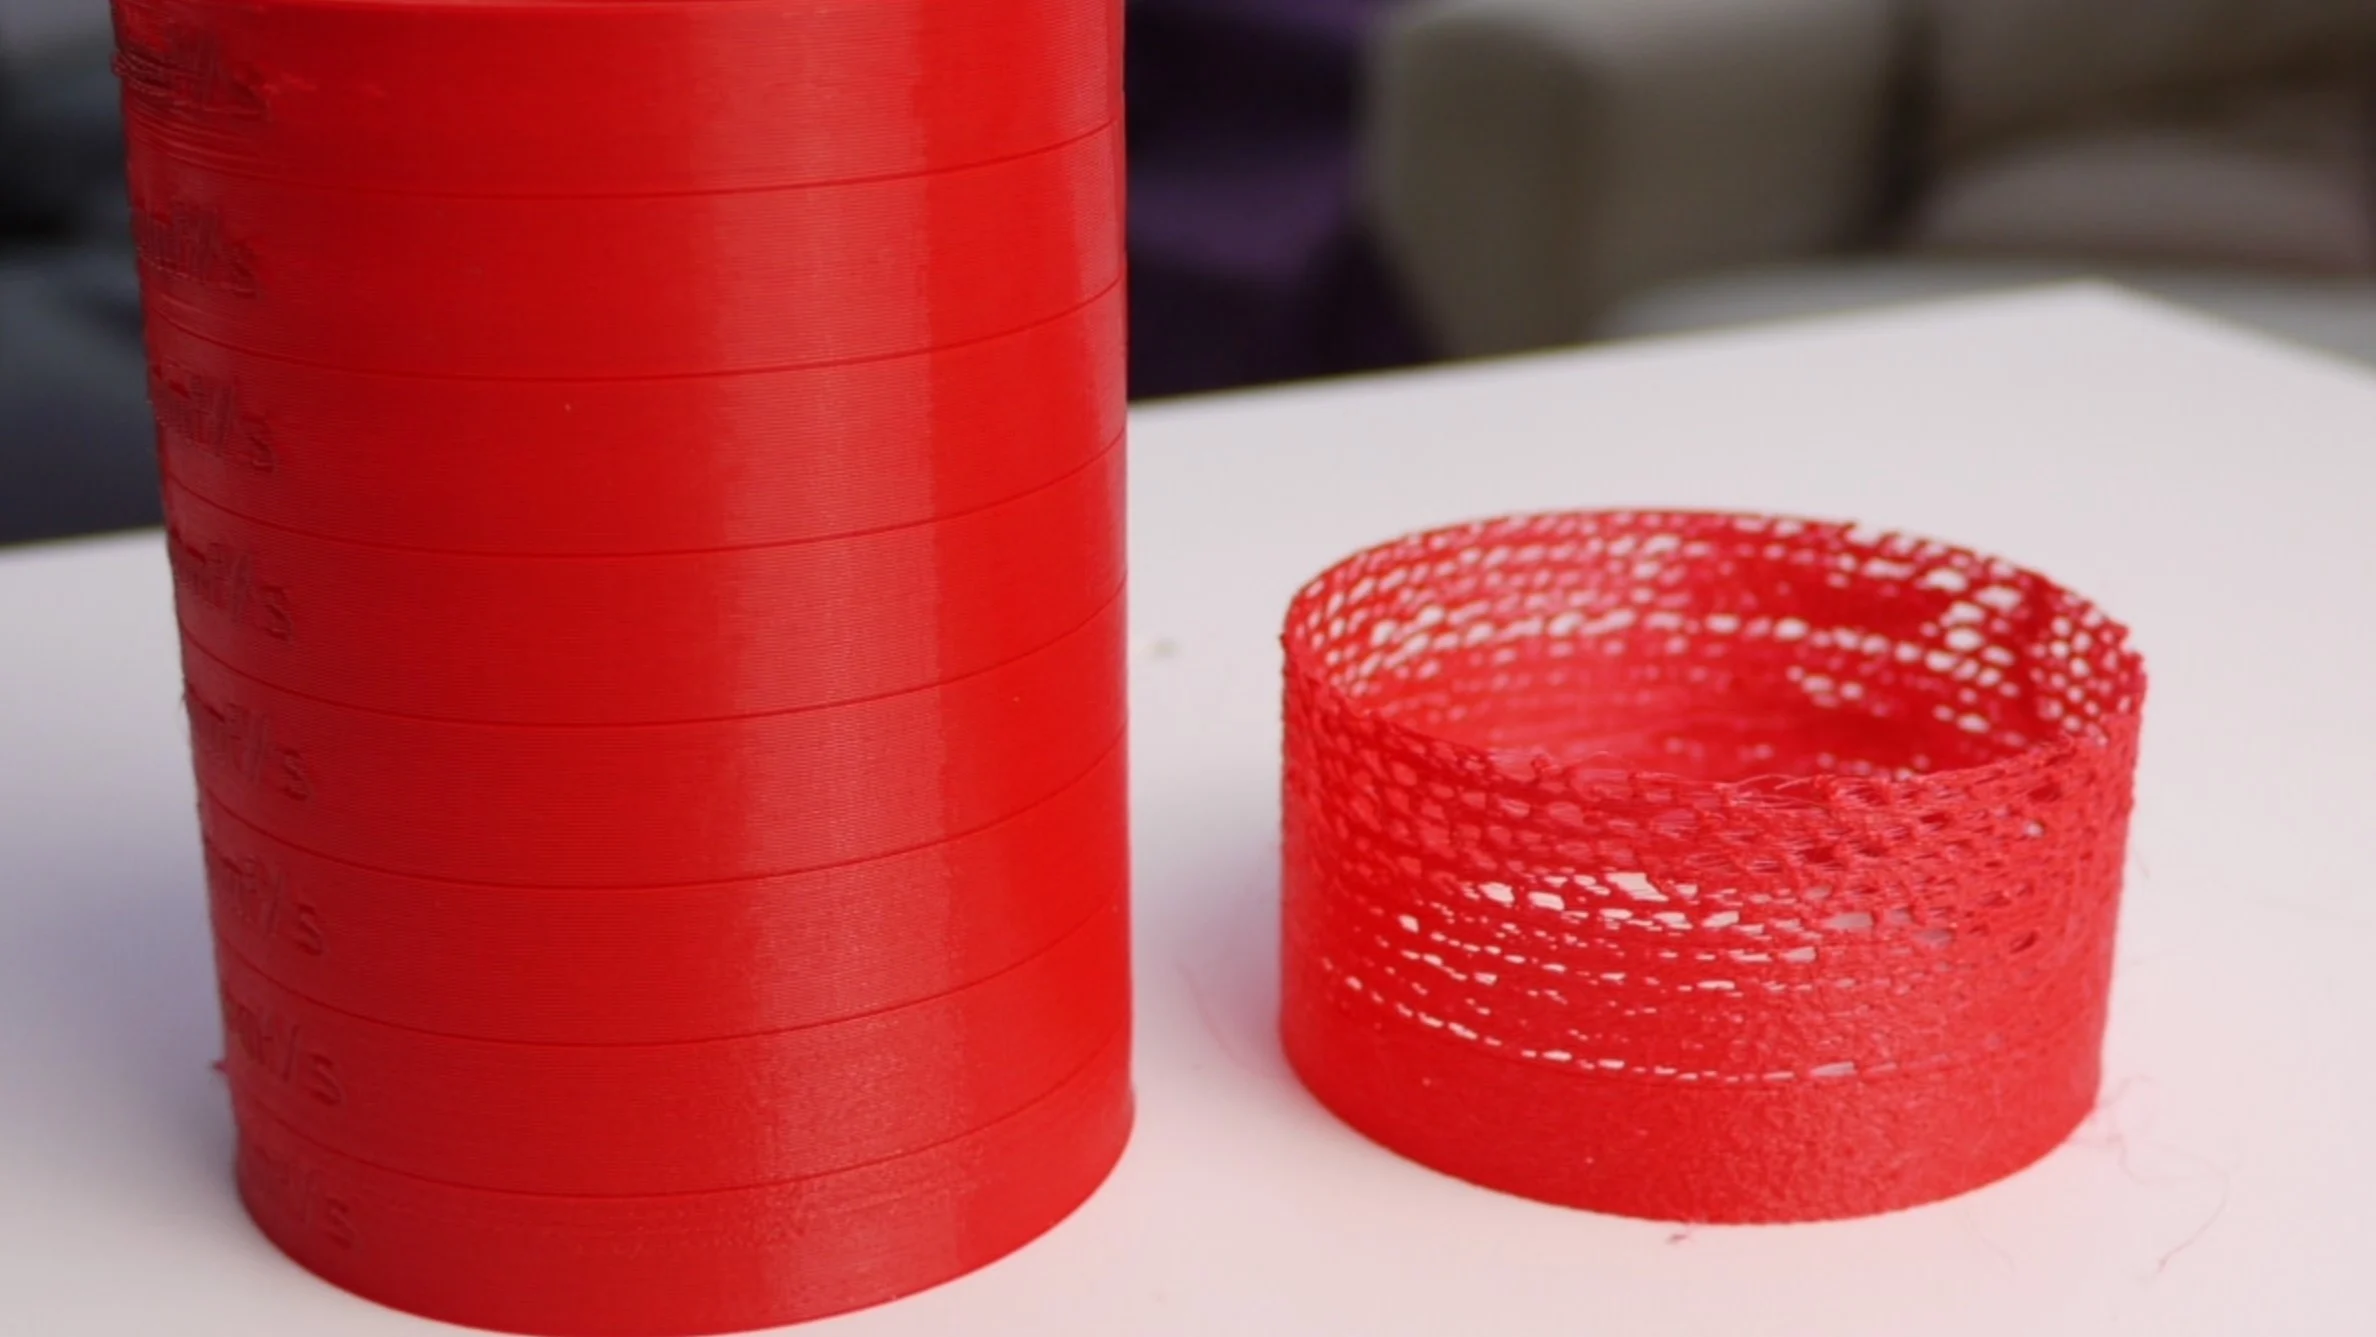
The quality and strength of your 3D printed object are hugely dependent on how well the filament is laid down. If under extrusion occurs, your print might not only look incomplete but also lack structural strength. It's similar to building a wall with some bricks missing; it won’t be as strong or look as good as it should. Understanding under extrusion is the first step in fixing it, and we’re here to guide you through this process in a way that’s easy and approachable. Let’s dive in and get those prints looking and feeling just right!
Understanding the Causes of Under Extrusion and the solutions
Material Factors
1. Filament Diameter and Consistency:
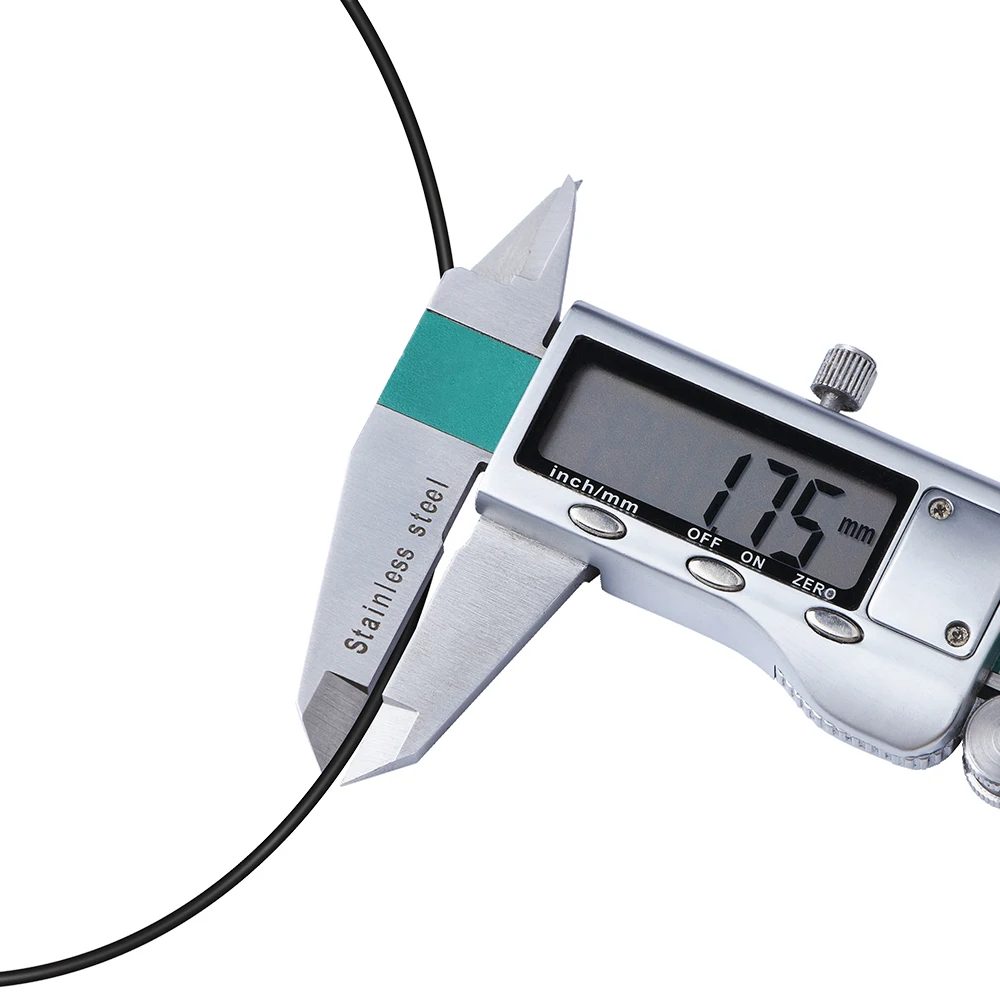
The diameter of your filament is crucial for successful 3D printing. If the filament is inconsistently thick or thin, your printer will have trouble extruding the correct amount. It’s important to use filament that maintains a consistent diameter, as variations can lead to uneven prints where some parts are less filled in than others.
2. Effects of Filament Hygroscopy and Storage Conditions:
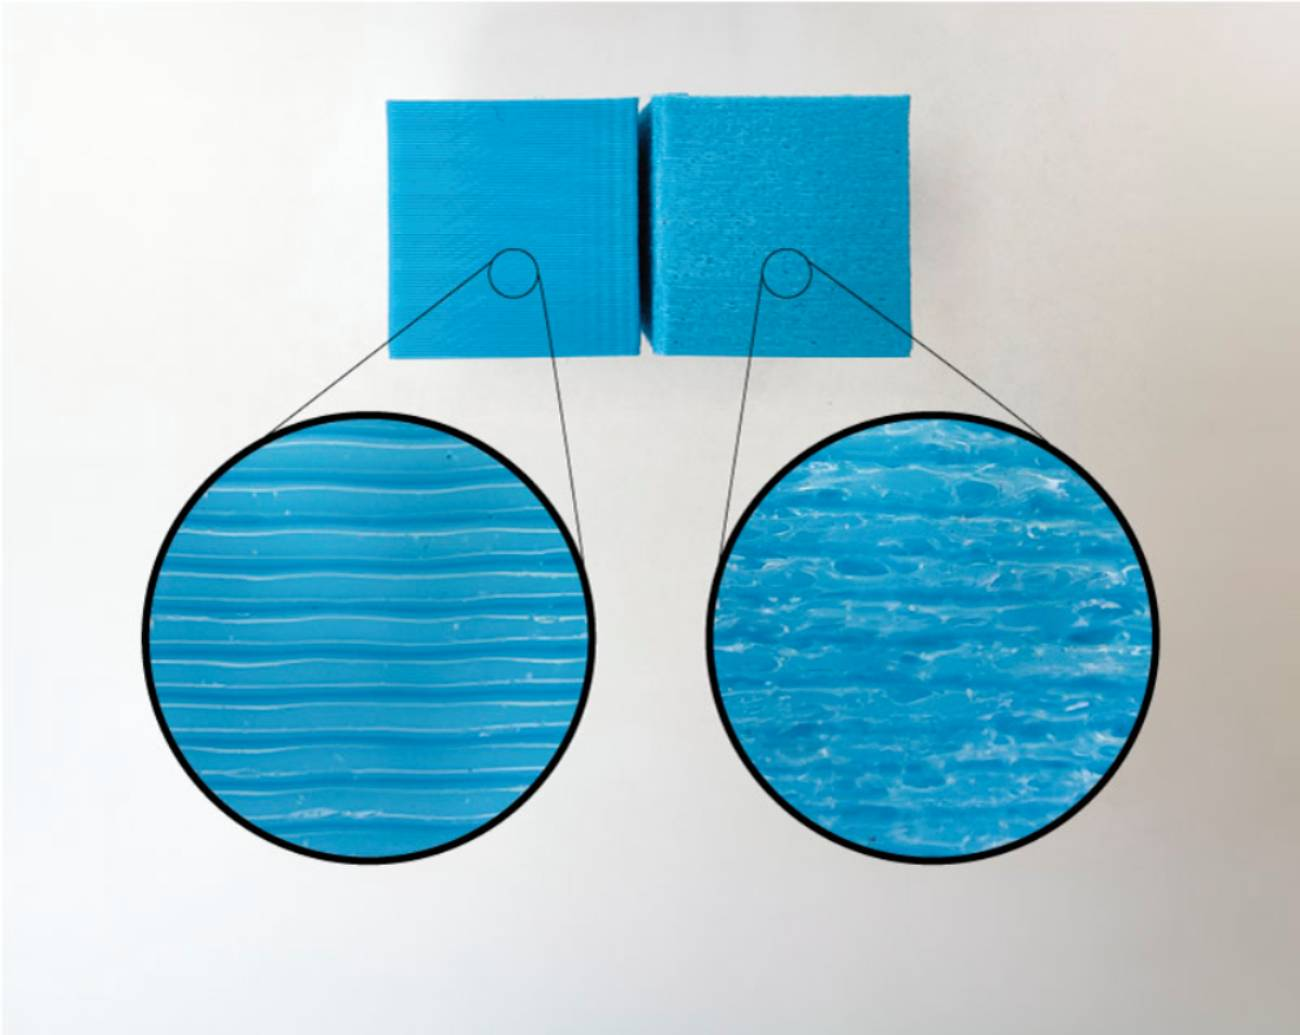
Filaments can absorb moisture from the environment, and this can significantly affect how they melt and extrude during printing. If your filament has absorbed too much moisture, it may lead to issues like under extrusion. Proper storage is key – keep your filament in a dry place, preferably in an airtight container with desiccant packets to absorb any moisture. This way, you ensure that the filament stays dry and ready for optimal printing performance.
Hardware Related Issues
In 3D printing, under extrusion can often be traced back to certain hardware issues. Let's dive into some of the key hardware components that might be affecting your print quality.
1. Nozzle and Hot End Complications:
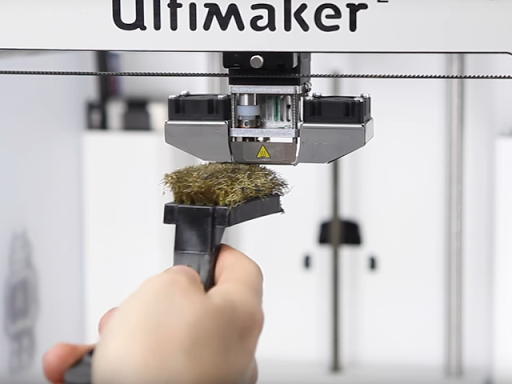
The nozzle and hot end of your 3D printer are where the real action happens, but they can also be sources of trouble. If your nozzle is clogged or the hot end isn't heating up properly, it can lead to under extrusion. Think of the nozzle like a faucet – if it's blocked or the water (in this case, the filament) isn’t hot enough, it won't flow well. Regularly cleaning the nozzle and ensuring the hot end reaches the correct temperature are vital steps in keeping your prints smooth and consistent.
2. Bowden Tube and Extruder Assembly Concerns:
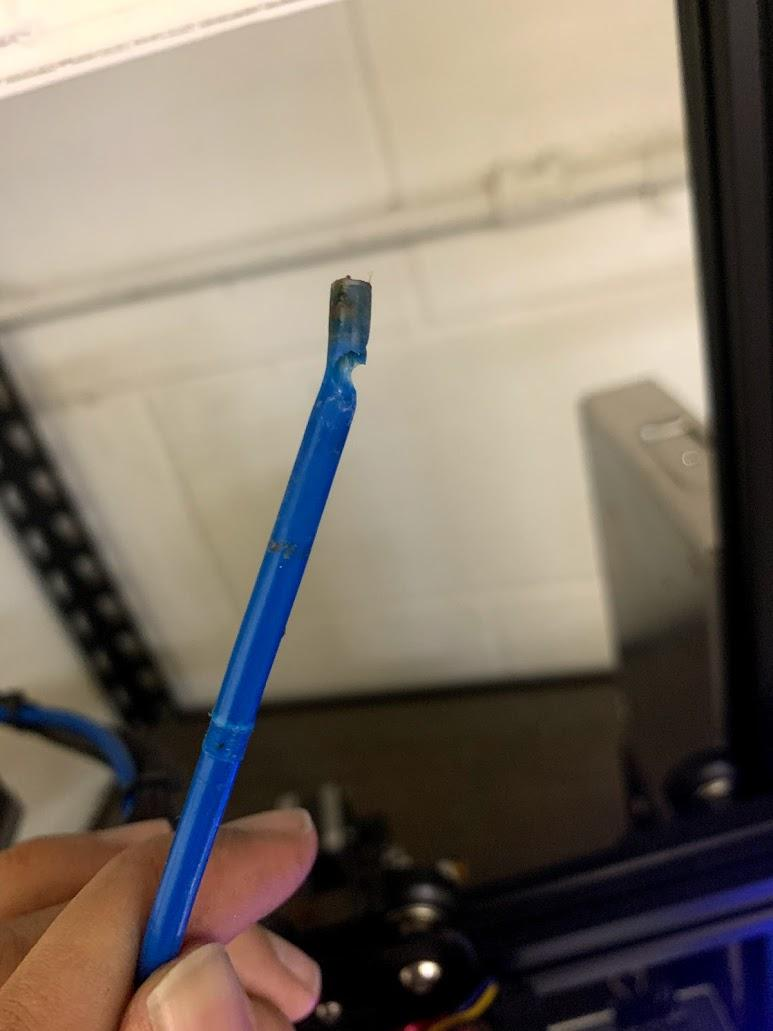
In some 3D printers, the filament is fed to the hot end through a Bowden tube. If this tube is damaged, clogged, or not seated correctly, it can cause feeding problems leading to under extrusion. Similarly, the extruder assembly needs to be in good condition to push the filament through smoothly. It’s important to check these components for wear and tear or any obstructions that could impede filament movement.
3. Importance of Effective Cooling Systems:
After the filament is extruded, cooling it down properly is key to maintaining its shape. If your printer’s cooling systems aren't working effectively, it can result in issues like warping or, in some cases, under extrusion. The cooling fans and heatsinks should be clean and functioning well to ensure they’re doing their job right. Proper cooling helps to solidify the filament quickly after it’s been extruded, contributing to the overall quality of your print. Also the heatsink cooling fan must work effectively, if it doesn’t it will cause the filament to melt before reaching the nozzle causing under extrusion or clogging.
4. Extruder Gears Wear and Alignment:
Checking for Wear and Debris Accumulation: Over time, the extruder gears can wear down or collect debris. This wear and tear can affect how they grip and move the filament. Regular inspection and cleaning can keep them in good shape.
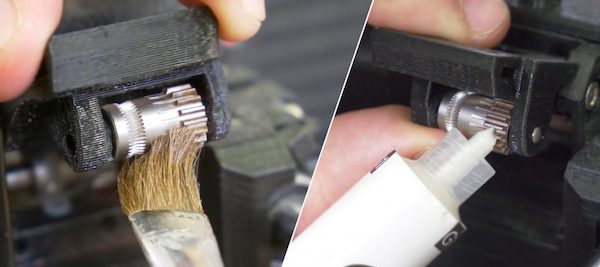
Ensuring Proper Alignment and Functionality: Misaligned gears can cause inconsistent filament feeding, leading to under extrusion. Make sure these gears are correctly aligned and functioning as they should be.
5. Extruder Tensioner Issues:
Identifying and Adjusting Tensioner Problems: The extruder tensioner plays a crucial role in feeding the filament. If the tension is too loose or too tight, it can lead to feeding issues. Check the tension and adjust it to ensure it’s neither too tight nor too loose.
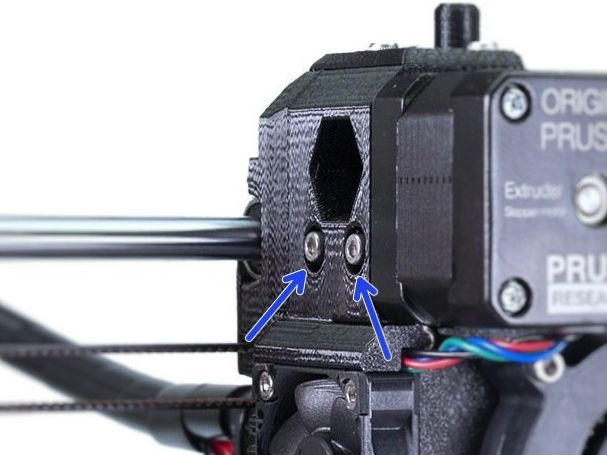
Balancing Tension for Consistent Filament Feed: Finding the right balance in tension is key. It should be enough to feed the filament consistently without slipping or grinding.
6. Insufficient Hotend Cooling:
Assessing Cooling Fans and Heatsinks: The cooling system, especially around the hotend, is essential for proper filament extrusion. Make sure the fans and heatsinks are not clogged with dust and are working efficiently.
Slicer Settings and Calibration
Navigating through slicer settings and calibration can feel a bit technical, but it's crucial for nailing that perfect print. Let’s break down what you need to know about slicer settings and calibration to tackle under extrusion.
1. Incorrect E-Steps Calibration:
Understanding the Role of E-Steps in Extrusion: E-Steps, or Extruder Steps per millimeter, tell your printer how much filament to push through for each print move. If these aren't set correctly, your printer might push out too much or too little filament, leading to under extrusion.
Procedures for Accurate E-Steps Calibration: Calibrating your E-Steps involves a bit of measuring and math. You'll measure a specific length of filament, tell your printer to extrude a certain amount, and then see how much it actually extrudes. From there, you can adjust the E-Steps setting in your printer's firmware to ensure accurate extrusion (we will explain this in more details in this article).
2. First Layer Calibration Too Close:
Impact on Filament Extrusion and Adhesion: If your first layer is too close to the build plate, it can squish the filament too much. This not only affects the look and adhesion of the first layer but can also lead to under extrusion as the printer struggles to push out filament against the build plate.
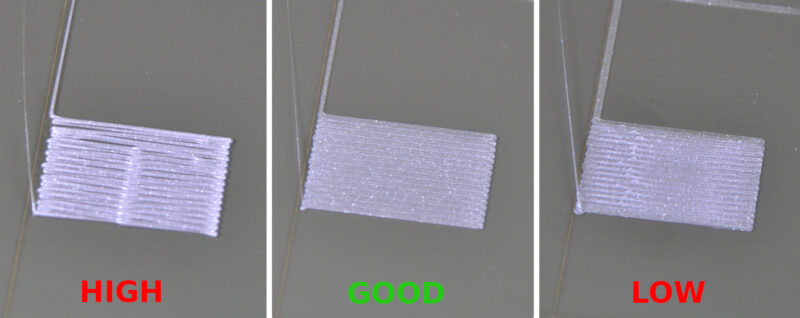
Adjusting First Layer Height and Z-Offset: Fine-tuning the height of the first layer and the Z-Offset (the distance between your nozzle and the build plate) can make a world of difference. You want the first layer to be close enough for good adhesion but not so close that it hinders filament flow.
3. Retraction Settings:
Optimal Retraction Distance and Speed: Retraction is all about pulling the filament back a bit when the nozzle moves between printing areas. The trick is to find the sweet spot in distance and speed that prevents oozing without causing under extrusion. It's a balancing act – too much retraction can pull too much filament away, leading to under extrusion.
Balancing Retraction to Prevent Oozing and Under Extrusion: Adjusting retraction settings helps avoid those stringy bits (oozing) while making sure there's enough filament for a consistent print. It's about finding the perfect middle ground.
4. Nozzle Temperature Settings:
Finding the Ideal Temperature for Different Filaments: Different filaments melt at different temperatures. PLA might like it cooler, while ABS needs more heat. It’s essential to set the right temperature for the filament you’re using to ensure smooth melting and extrusion.
Effects of Temperature Variations on Extrusion: If the temperature is too low, the filament won’t melt properly, leading to under extrusion. Too high, and you might see issues like stringing. Just like baking, the right temperature is key to a great result.
5. Flow Rate Adjustments:
Setting Correct Flow Rate for Consistent Extrusion: Flow rate controls how much filament is extruded. It’s important to adjust this setting to ensure your printer is extruding just the right amount of filament for each layer.
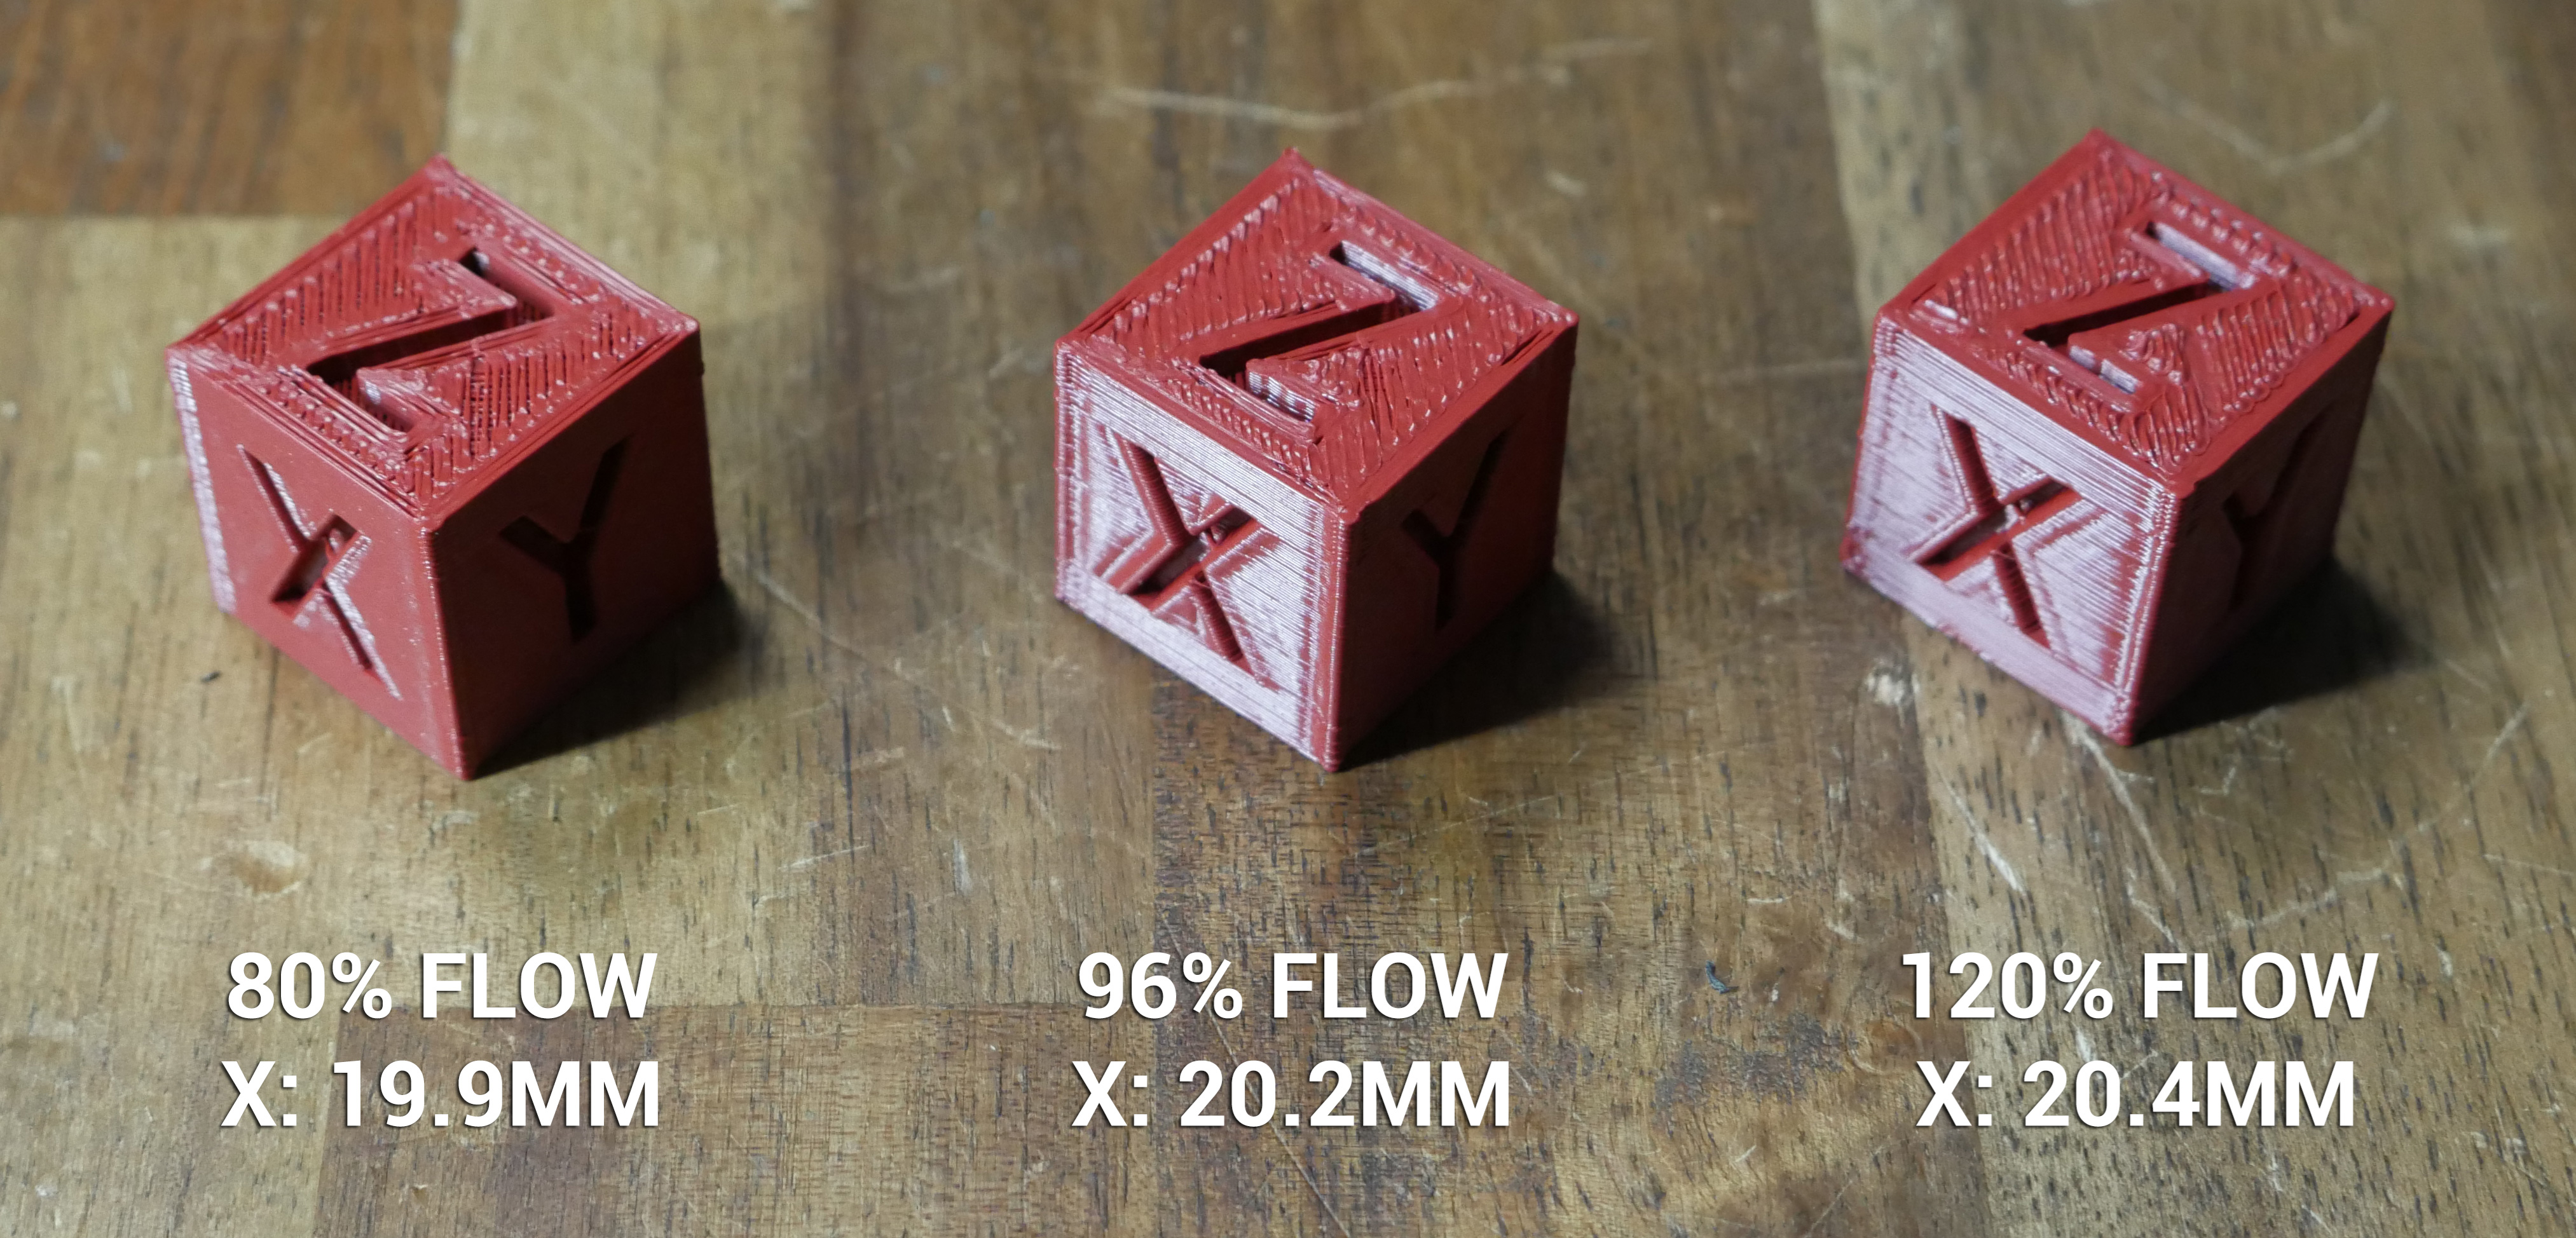
Troubleshooting Flow Rate Issues: If you notice inconsistencies in your prints, tweaking the flow rate might be the answer. It's a bit like adjusting the water flow in a shower – too much and it's overwhelming, too little and it's unsatisfying.
6. Layer Height and Line Width Settings:
Role in Print Resolution and Extrusion: The layer height and line width are like the brushstrokes in a painting. They determine the detail and smoothness of your print. The right settings here can mean the difference between a rough and a smooth finish.
Adjusting for Different Print Needs: Different projects need different approaches. A prototype might need thicker layers for speed, while a detailed model requires finer layers. It's about matching the settings to your specific printing goals.
7. Printing Speed Considerations:
Balancing Speed with Quality and Extrusion: It’s tempting to crank up the speed to get prints done faster, but patience pays off. Faster speeds can lead to under extrusion and less detail. Finding a balanced speed is key to maintaining quality.
Preventive Maintenance and Best Practices:
Emphasizing Regular Maintenance: Regular maintenance is like taking your car for service – it keeps everything running smoothly. Regularly check and clean your printer to avoid issues like under extrusion.
Using High-Quality Filaments: Quality materials are the foundation of good prints. Using high-quality filaments ensures consistency and reliability in your prints.
Keeping Firmware and Software Updated: Keeping up with the latest firmware and software updates is like updating your phone – it ensures you have the latest features and fixes for the best performance.
Calibrating Extruder E-Steps with Pronterface Software
Importance of Accurate Extruder Steps per mm
The extruder's E-steps, or steps per millimeter, determine how much filament is pushed through the extruder. Accurate E-steps are crucial because they ensure that the exact amount of filament required for each layer is extruded. If the E-steps are off, your printer could extrude too much or too little material, leading to under or over-extrusion.
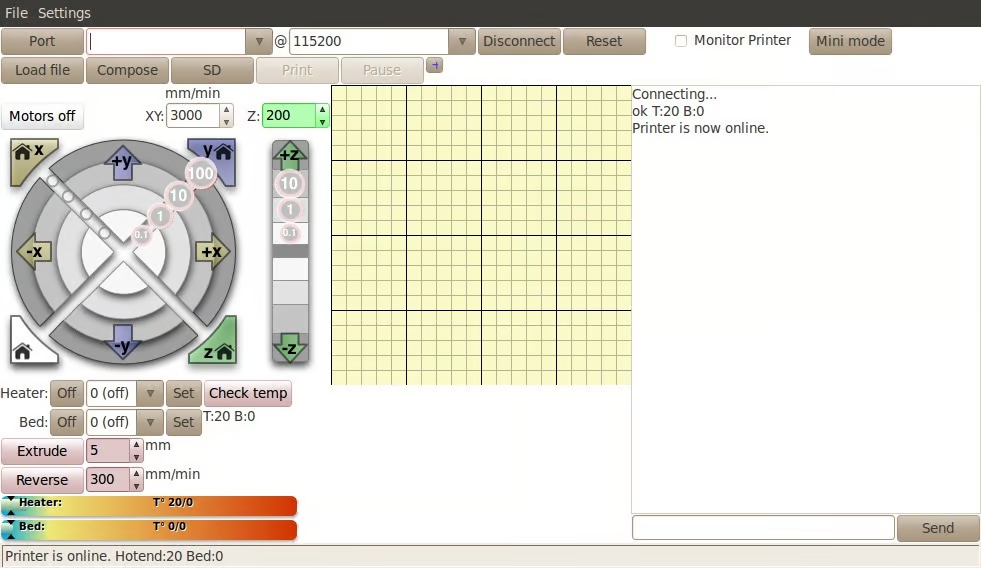
Connecting Your Printer to Pronterface
Before calibrating E-steps, you need to connect your printer to Pronterface, a versatile interface for interacting with your printer's firmware.
-
Download Pronterface: First, download Pronterface from Pronterface's official website
-
Install and Launch Pronterface: After installation, open the software.
-
Connect the Printer: Use a USB cable to connect your 3D printer to your computer. Ensure the printer is powered on.
-
Select the Correct Port and Baud Rate in Pronterface:
- In Pronterface, look for the port and baud rate settings, typically located at the top right.
- Select the port to which your printer is connected. If unsure, check your printer's documentation or try different available ports.
- Set the baud rate as recommended by your printer’s manufacturer (common rates are 115200 or 250000).
-
Establish Connection:
- Click the ‘Connect’ button in Pronterface. You should see messages in the console indicating a successful connection.
-
Check Current E-steps:
- To find out the current E-steps setting, send the G-code
M503in Pronterface. This command displays the current settings. - Look for a line in the output that starts with “E” (e.g., E93.00). This value is your current E-steps per mm.
- To find out the current E-steps setting, send the G-code
Step-by-Step Guide to Calibrating E-Steps
- Preheat the Extruder: Use Pronterface to preheat your extruder to the filament’s printing temperature.
- Measure and Mark the Filament: Measure 120mm from where the filament enters the extruder and mark it.
- Reset Extruder Position: Send the G-code
G92 E0in Pronterface to reset the extruder position. - Extrude Filament: Use the command
G1 E100 F100to extrude 100mm of filament. - Measure Remaining Filament: After extrusion, measure the distance from the entry point to your mark. If it's not 20mm, calculate the new E-steps using
[New E-steps] = [Current E-steps] * 100 / [Actual extruded length]. - Update E-steps: Enter M92 E[New E-steps] in Pronterface to update the E-steps. Save the new setting with
M500. - You can send the G-code
M503to show the current E-steps after update and make sure it is correct.
Testing and Adjustments
- Conduct a Test Print: After calibration, do a test print to evaluate the changes.
- Fine-Tune as Necessary: If under-extrusion is still present, repeat the calibration with finer adjustments.
- Save Final Settings: Make sure to save the final settings in your printer’s firmware.
Regular calibration of the E-steps is key to maintaining optimal print quality and ensuring your 3D prints are accurate and reliable.
FAQs: Understanding and Resolving Under Extrusion in 3D Printing
-
What is under extrusion in 3D printing?
- Under extrusion occurs when your 3D printer fails to supply the correct amount of filament. This can lead to incomplete prints with gaps, thin layers, or weak structures.
-
How can I tell if my printer is experiencing under extrusion?
- Look for signs like gaps in layers, poor surface quality, weak or brittle sections, and the overall lack of filament in your printed object.
-
What causes under extrusion?
- Common causes include incorrect filament diameter, clogged nozzles, improper slicer settings (like temperature and flow rate), and hardware issues like worn-out gears or misaligned Bowden tubes.
-
How do I fix under extrusion?
- Start by cleaning the nozzle, ensuring the filament diameter matches your printer settings, recalibrating the extruder's E-steps, and adjusting slicer settings like temperature and flow rate.
-
Does print speed affect under extrusion?
- Yes, printing too fast can lead to under extrusion as the printer may not feed filament quickly enough. Adjusting the print speed can help resolve this issue.
-
Can the type of filament cause under extrusion?
- Absolutely. Different filaments have different properties and may require specific temperatures and handling. Always use the recommended settings for your specific filament type.
-
How important is filament storage in preventing under extrusion?
- Very important. Filament can absorb moisture from the air, which can affect how it melts and extrudes. Store filament in a dry, airtight container with desiccant to keep it in good condition.
-
What maintenance steps can I take to prevent under extrusion?
- Regularly clean and inspect your printer, particularly the nozzle, extruder gears, and Bowden tube. Also, keep your printer's firmware and software up to date.
-
Can improper first layer settings cause under extrusion?
- Yes, if the first layer is too close to the build plate, it can hinder the flow of filament. Adjusting the first layer height and Z-offset can help.
-
Should I adjust the retraction settings to fix under extrusion?
- Yes, if retraction settings are too aggressive, they can contribute to under extrusion. Experiment with retraction distance and speed for optimal results.
Conclusion
To wrap it up, under extrusion in 3D printing can be a bit of a puzzle, but with the right approach, it’s totally solvable. Just remember to keep an eye on your filament quality, make sure your printer's hardware is in top shape, and tweak those slicer settings as needed. Regular checks and maintenance go a long way in keeping these issues at bay. Happy printing, and here's to smooth, flawless 3D prints!
