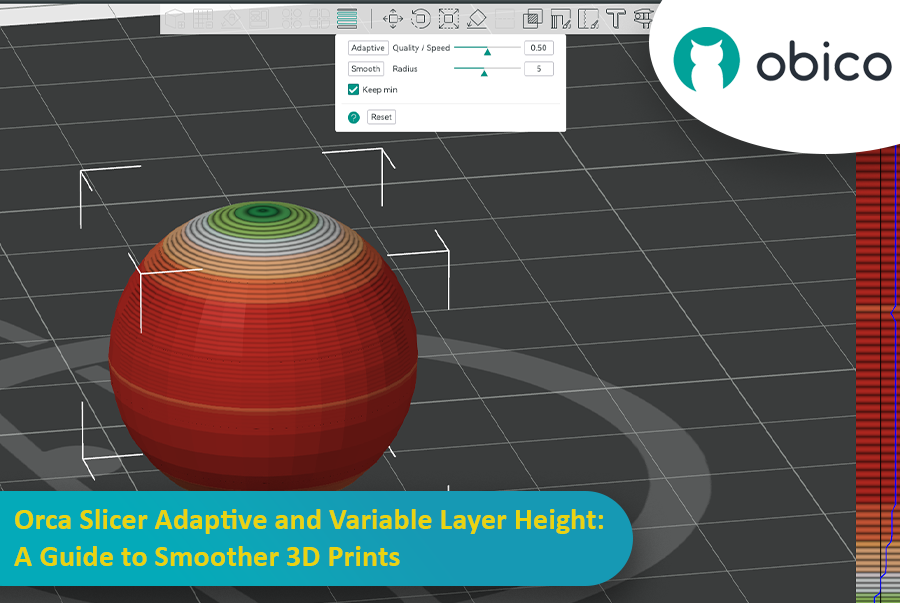
Orca Slicer Adaptive and Variable Layer Height: A Guide to Smoother 3D Prints
As a 3D printing enthusiast, you’ve probably faced the quality vs. speed dilemma. We’ve all been there—you’re printing a beautiful model with curves and slopes, but when it’s done, the surface is full of those telltale “stepped” layers.
That’s where adaptive layer height comes to the rescue like a superhero and saves the day by balancing speed and precision. Orca Slicer has an amazing tool to fine-tune your layer heights and get smoother prints in less time.
This guide will cover everything you need to know to master adaptive layer height and get better 3D prints.
Getting Started with Orca Slicer
Before we dive into the details of adaptive and variable layer height, it’s good to get familiar with Orca Slicer in general. It is built on top of Bambu Studio, which itself is a fork of the popular PrusaSlicer. It has many unique features and improvements for users who want more control over their 3D prints. Whether you want more calibration tools, more printer profiles, or more slicing customization, Orca Slicer has got you covered.
For a full introduction to Orca Slicer, including how to download, install, and set it up for the first time, check out OrcaSlicer: An Introduction and How to Get Started. This guide covers everything from downloading the software to fine-tuning your printer settings with Orca Slicer’s unique features. It also has many linked resources and guides to help you master every aspect of the slicer.
For download and installation instructions, visit Orca Slicer Download, which has a step-by-step installation guide.
Why Variable Layer Height Matters
Let’s get to the point. Normally, when you slice a model, you set a uniform layer height—0.2 mm, for example—and the printer applies that height across the entire model. This works fine for simple models, but when your model has curves, slopes, or delicate features, the result is rough and "stepped." Adaptive layer height fixes that by adjusting the layer thickness based on your model’s needs. So instead of thick layers everywhere, Orca Slicer uses thinner layers where detail matters most and thicker layers where it doesn’t.
Imagine Printing a Sphere:
Take a simple sphere, for example. If you use a fixed layer height of 0.2 mm, you’ll see a big “ladder effect” around the top and bottom of the sphere, as the fixed height can’t smooth out the small curved surfaces. These areas will have visible ridges between each printed layer.
Here’s how adaptive layer height can fix that:
Uniform Layer Height Example
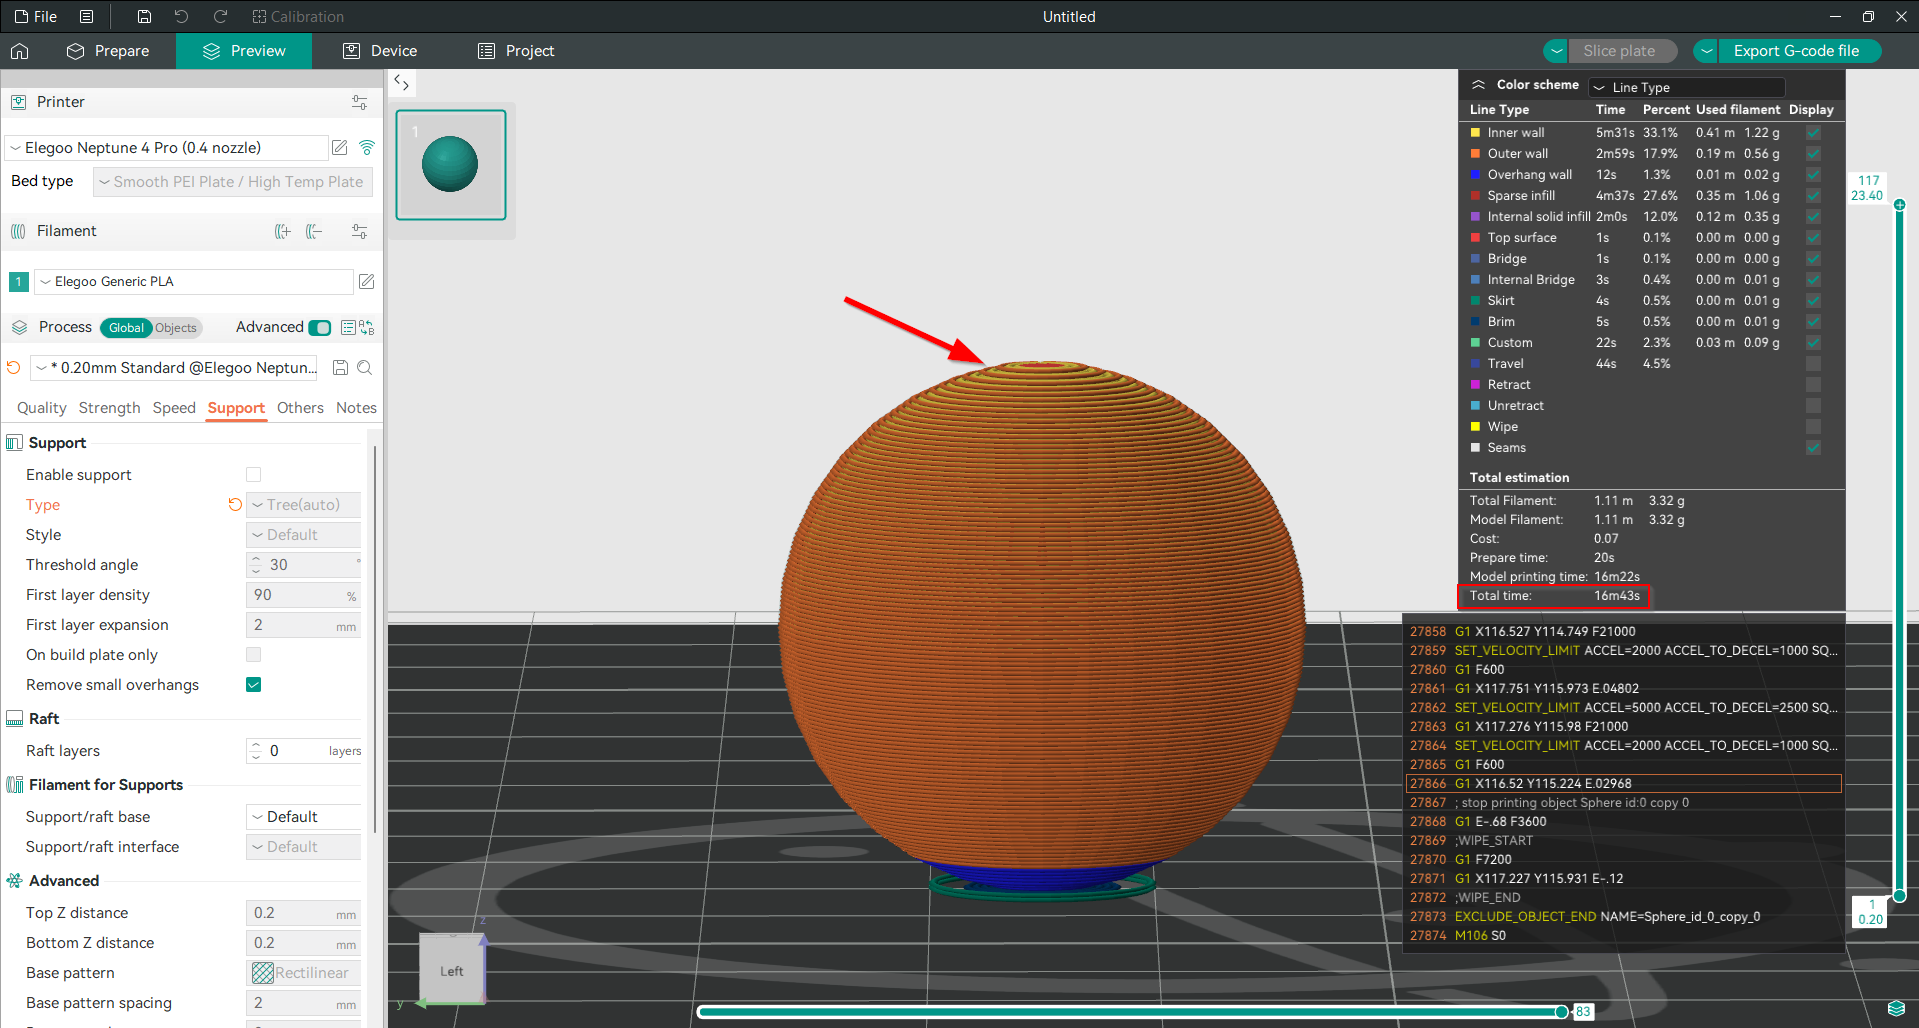
In the first image below, we’ve sliced the sphere with a uniform layer height of 0.2 mm across the entire model. You can see the “stepping” effect on the top and bottom of the sphere because those areas have small curved surfaces and the individual layer lines are more visible. The total print time is 16 minutes and 43 seconds.
Switching to Adaptive Layer Height
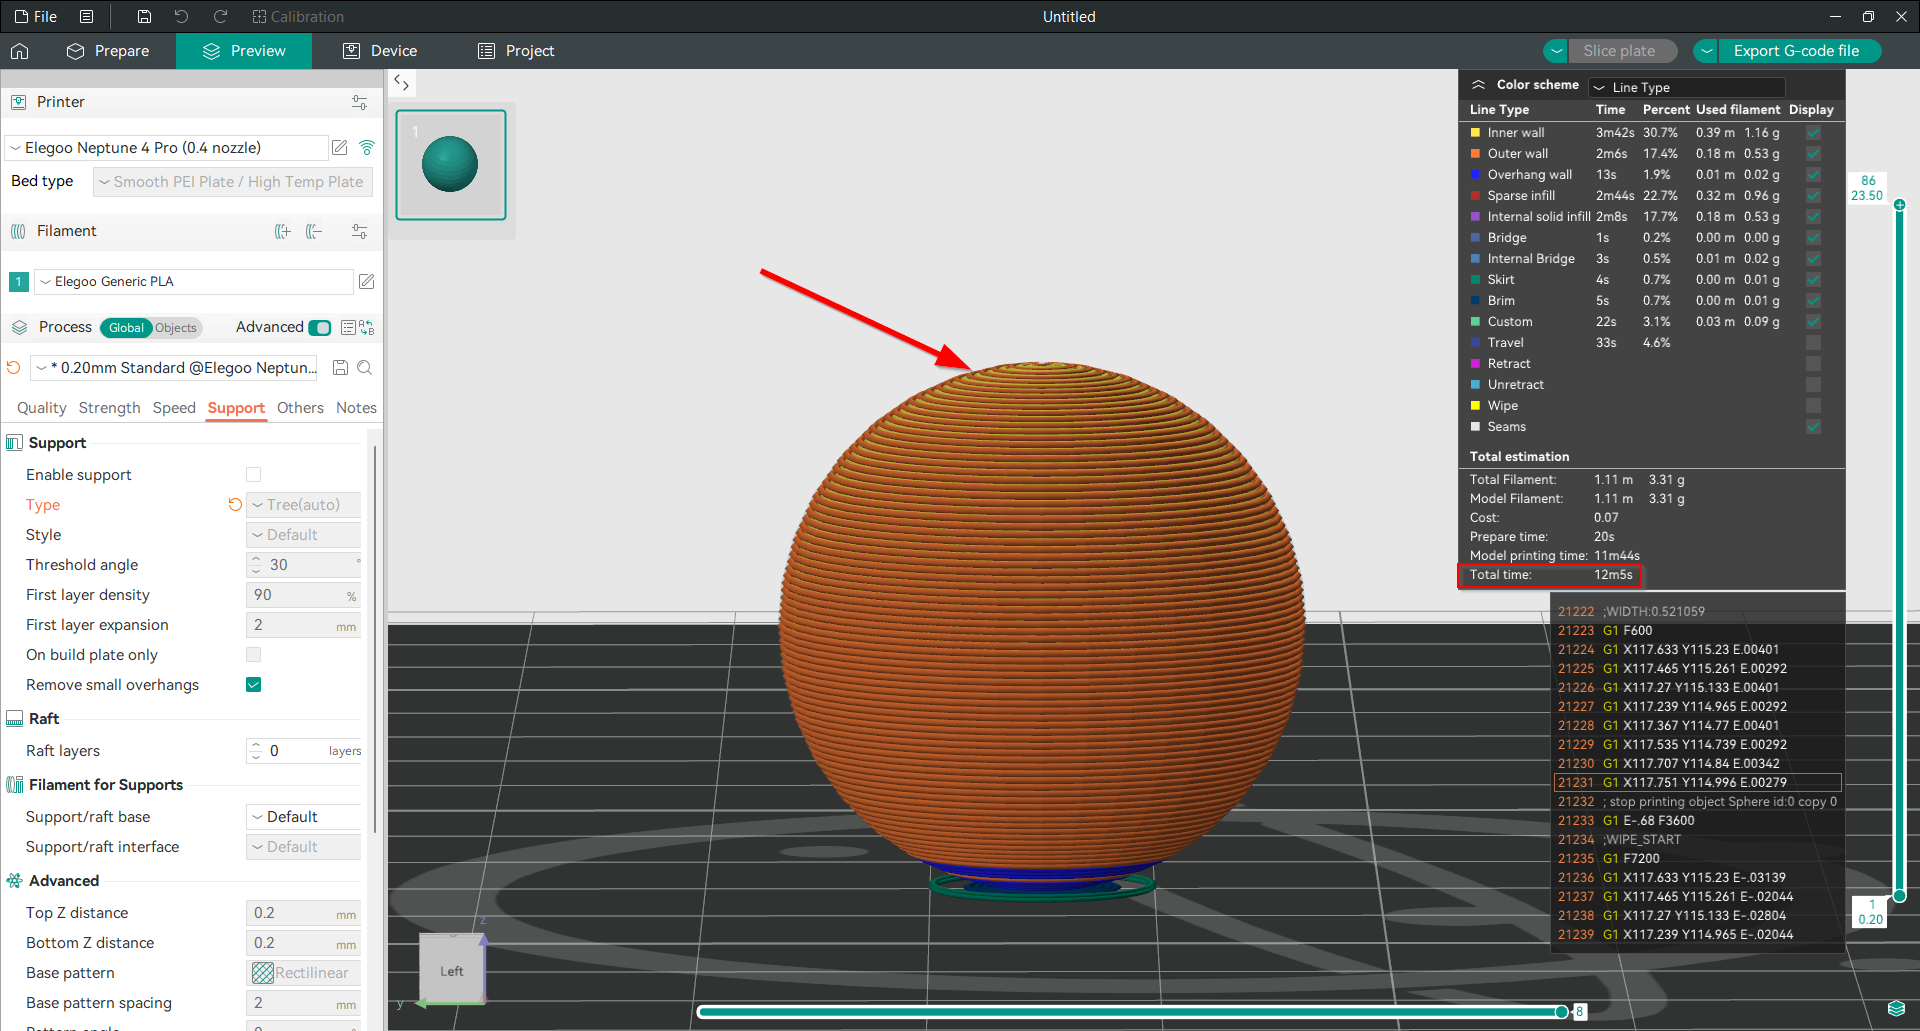
Now let’s turn on adaptive layer height and see what happens. In the second image below, you’ll notice the “ladder effect” is almost gone. The surface is smoother, especially around the curved areas of the sphere. But that’s not all—by using adaptive layer height, we’ve also saved 27.73% of the print time, reducing it to 12 minutes and 5 seconds, while still maintaining high print quality.
How Does Adaptive Layer Height Work?
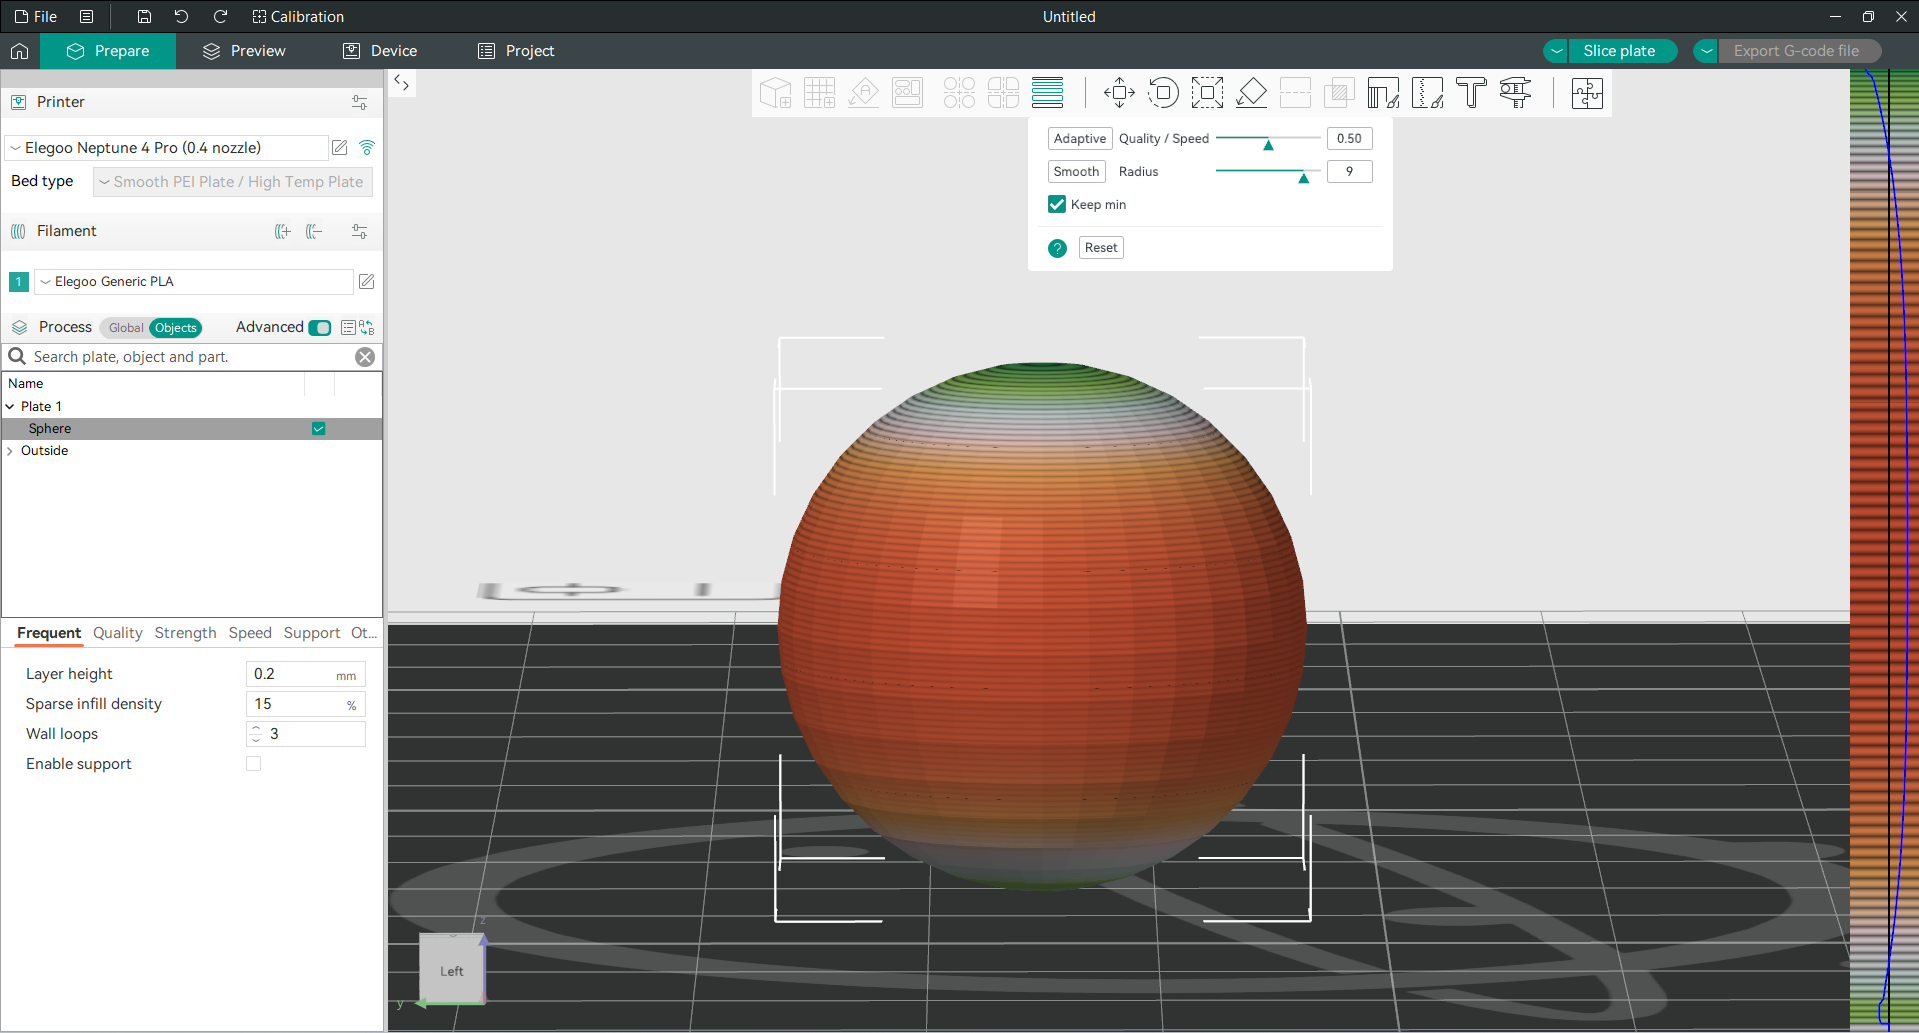
In the next image, the variable layer height panel (on the right) shows how the slicer has adjusted the layer height dynamically across the model. The slicer has reduced the layer height in areas where fine details and smoothness are needed, like the curved surfaces, and increased the layer height in less detailed areas to save time.
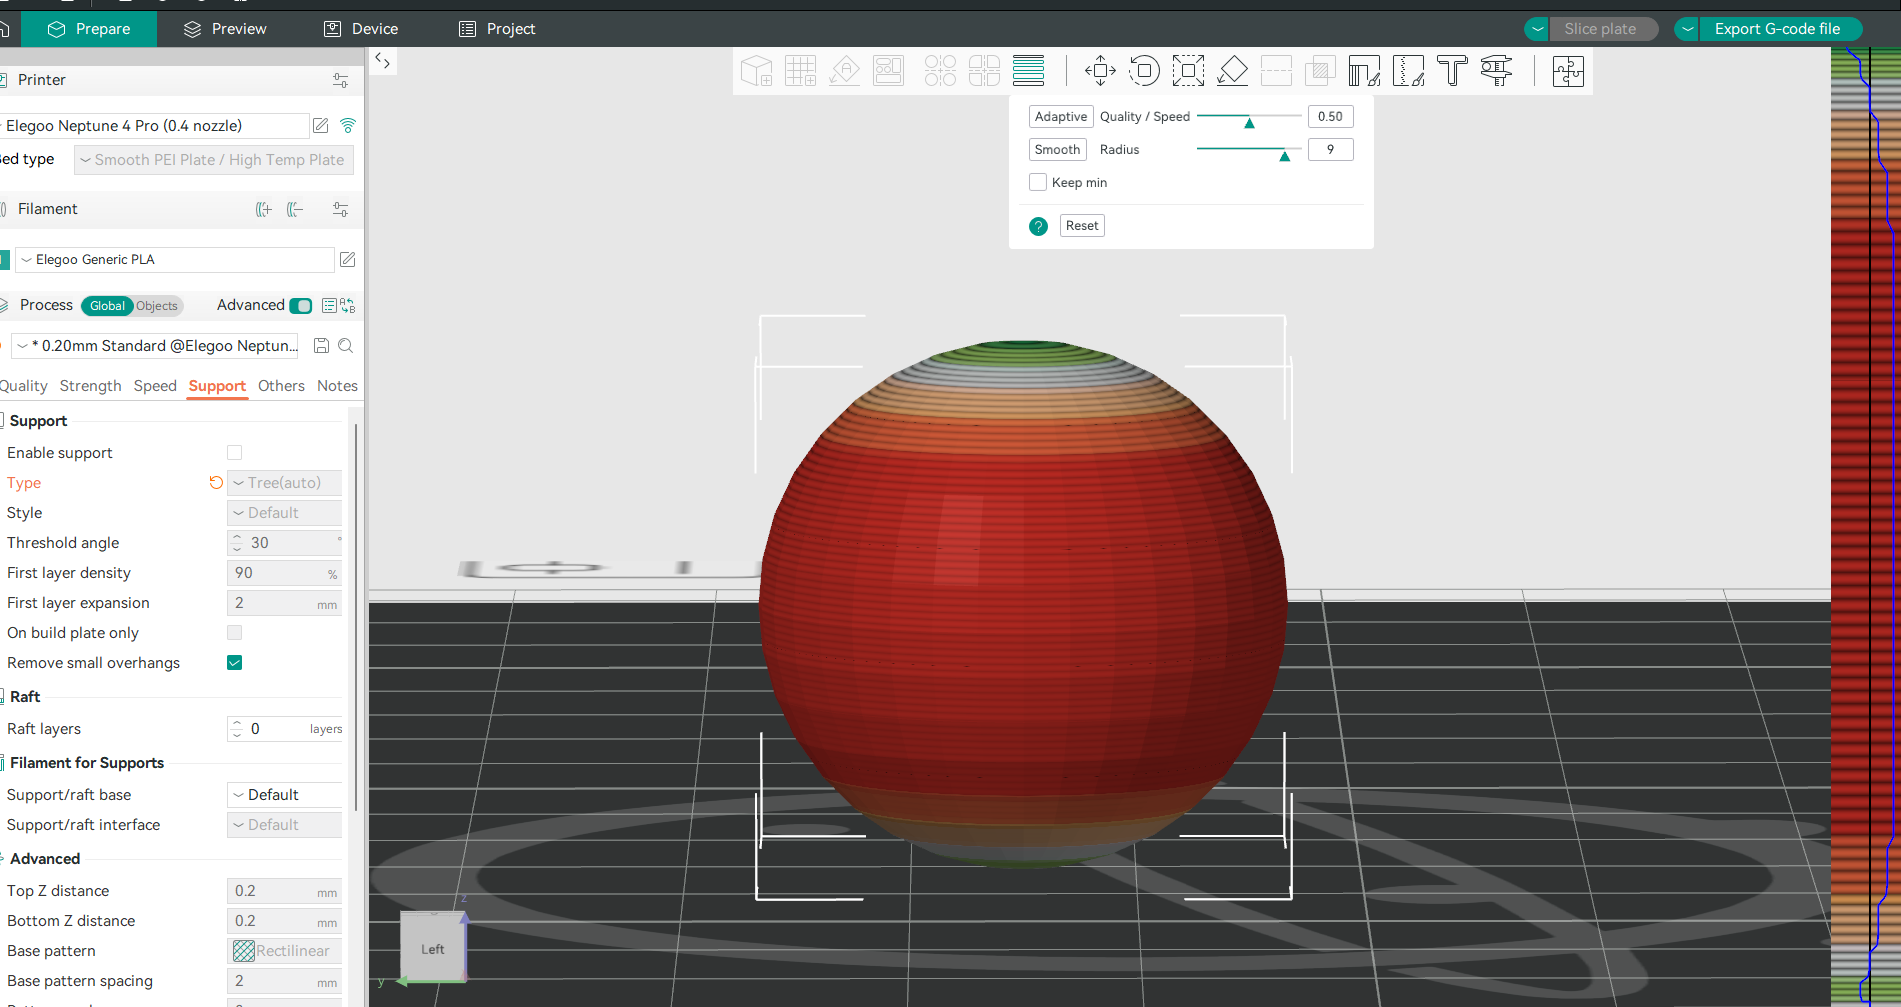
Green zones: Represent the thinnest layers, around 0.08mm, for high accuracy where it matters most.
Red zones: Represent the thickest layers, up to 0.32mm, in less detailed areas to save time.
This smart layer height distribution gives you the best of both worlds: smooth surfaces where you need them and faster print times on simpler parts. It’s a win-win for print quality and efficiency—saving you time and filament without sacrificing precision.
Getting Started with Orca Slicer’s Adaptive Layer Height
Ready to dive in? Let’s walk through how to set it up.
-
Select Your Model:
Open your 3D model in Orca Slicer’s 3D view. Once you select it, you’ll see the variable layer height tool in the top toolbar. Click on it, and the magic begins!
-
Visualizing the Layers:
When you turn on the variable layer height tool, a real-time preview will appear. This shows you the contour lines that represent the layers. It will be in gray, which means all the models have a uniform layer height that you have specified. You’ll also see a new panel on the right—this is where the magic happens.
Automating Your Layer Heights
Orca Slicer makes adaptive layer heights a breeze. For beginners or anyone looking to optimize quickly, the automatic mode is your best friend. Here’s how to use it:
Quality/Speed Slider
The main feature here is the slider that lets you balance quality and speed. Move it to “Quality” if you want the most detail possible, and the slicer will apply thinner layers to your model’s tricky bits and angles. Move it to "Speed,” and it will sacrifice some detail for faster print times by applying thicker layers to the big flat bits.
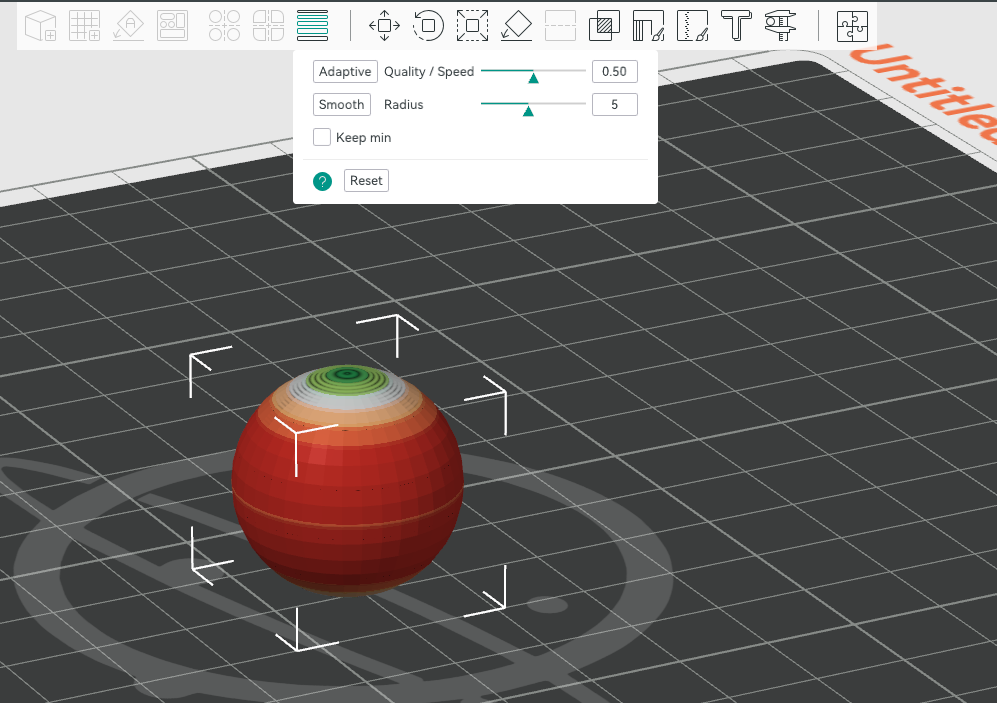
Apply Adaptive Layering
Once you’re happy with the balance, hit the Apply button. Watch as Orca Slicer redraws the contour lines to reflect your choices—fewer layers where speed matters and more where precision is key.
Once applied, you’ll see the model preview is now color-coded, showing adaptive layer height is on. Also, a graph in the variable layer height panel (on the right) will show the different layer heights used, with the same colors representing the thickness variations throughout the model.
Manual Control: Sculpting Your Layers
Sometimes the automatic setting isn’t enough for perfectionists (and let’s be honest, 3D printing is all about perfecting those tiny details). That’s where Orca Slicer’s manual controls come in.
With the adaptive layer height tool still active, hover over the variable layer height panel (on the right), and it will highlight different parts of your model in yellow. You can now adjust the layer height for specific parts of your model. It’s like being an artist, sculpting finer detail exactly where you need it.
- Left-click: Adds detail by making the layers thinner in that area.
- Right-click: Removes detail by increasing the layer height for faster printing.
- Shift + Left-click: Resets the selected area to the base layer height.
- Mouse Wheel: Adjusts the size of the area you’re editing for precision (the yellow zone).
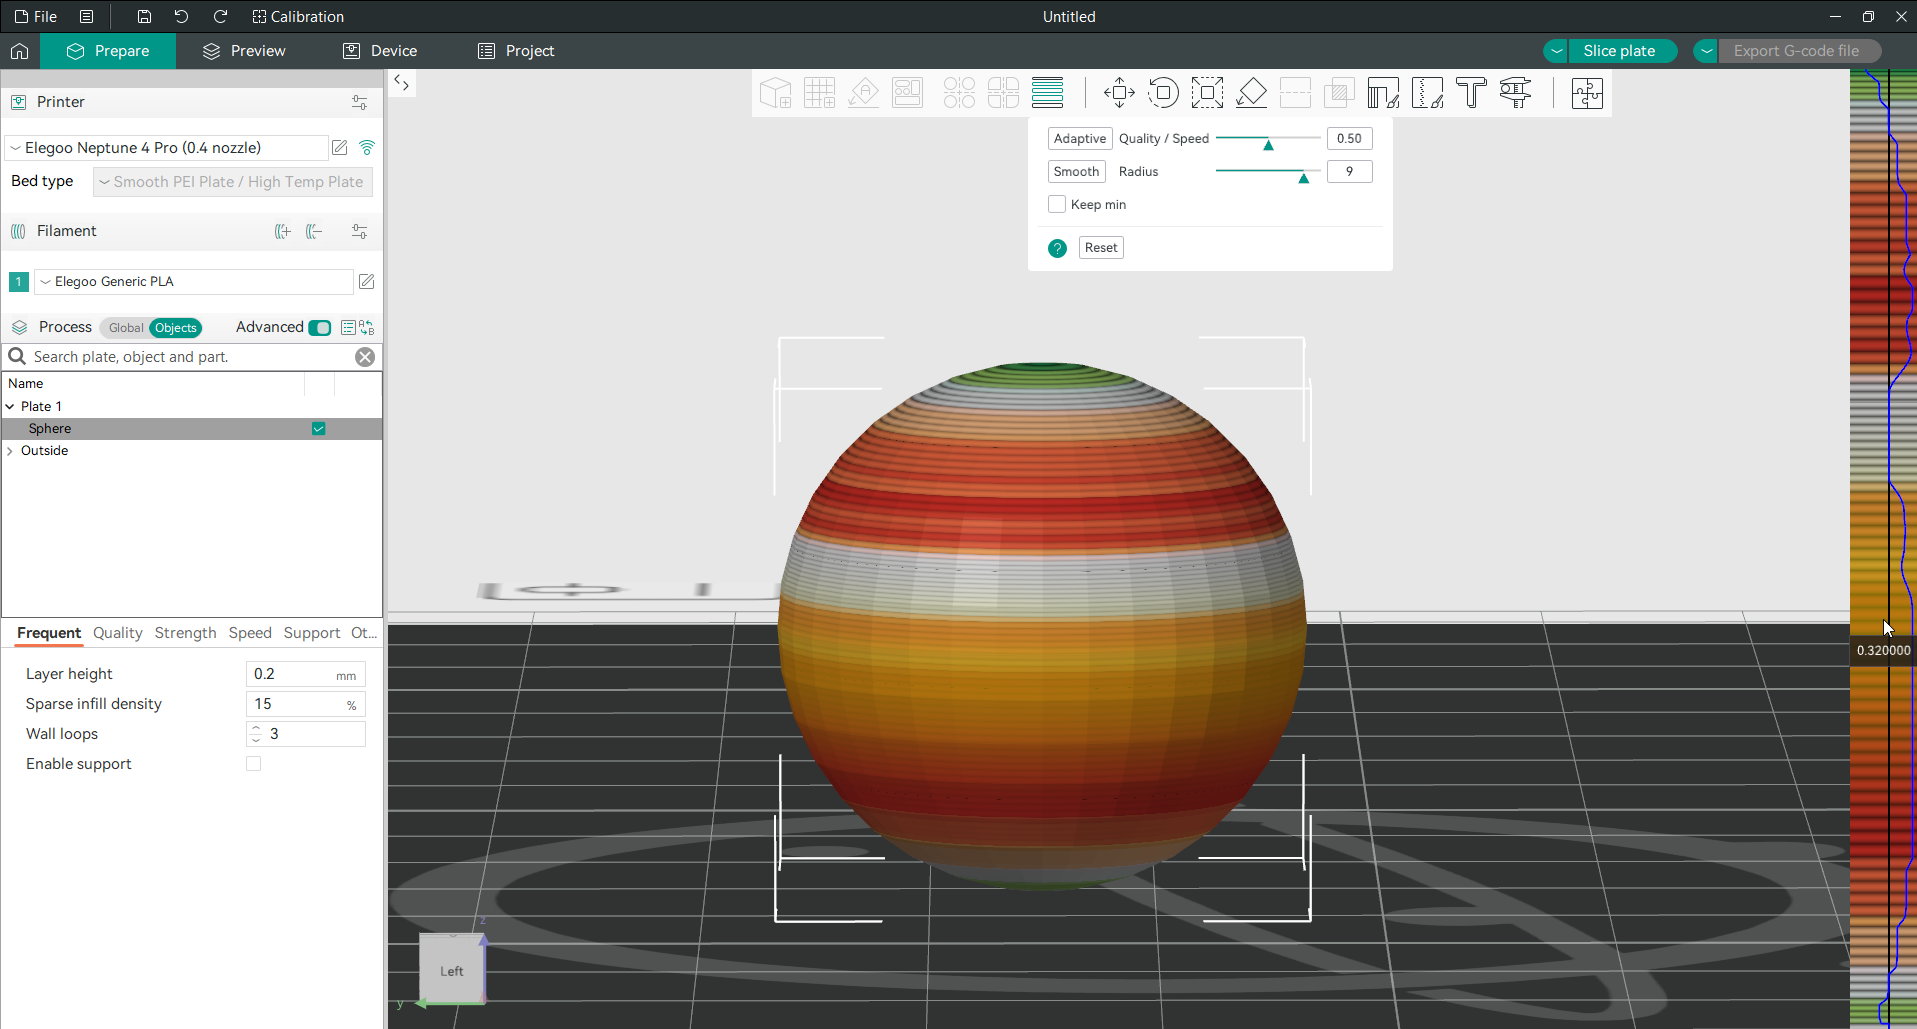
Smoothing It All Out
One of the best features in Orca Slicer’s adaptive layer height toolbox is the Smooth function. No one wants sharp, abrupt transitions between layer heights that leave ugly lines on your print. Click the Smooth button, and Orca Slicer will smooth out the transitions between the different layer heights so your model’s surface is even and polished.
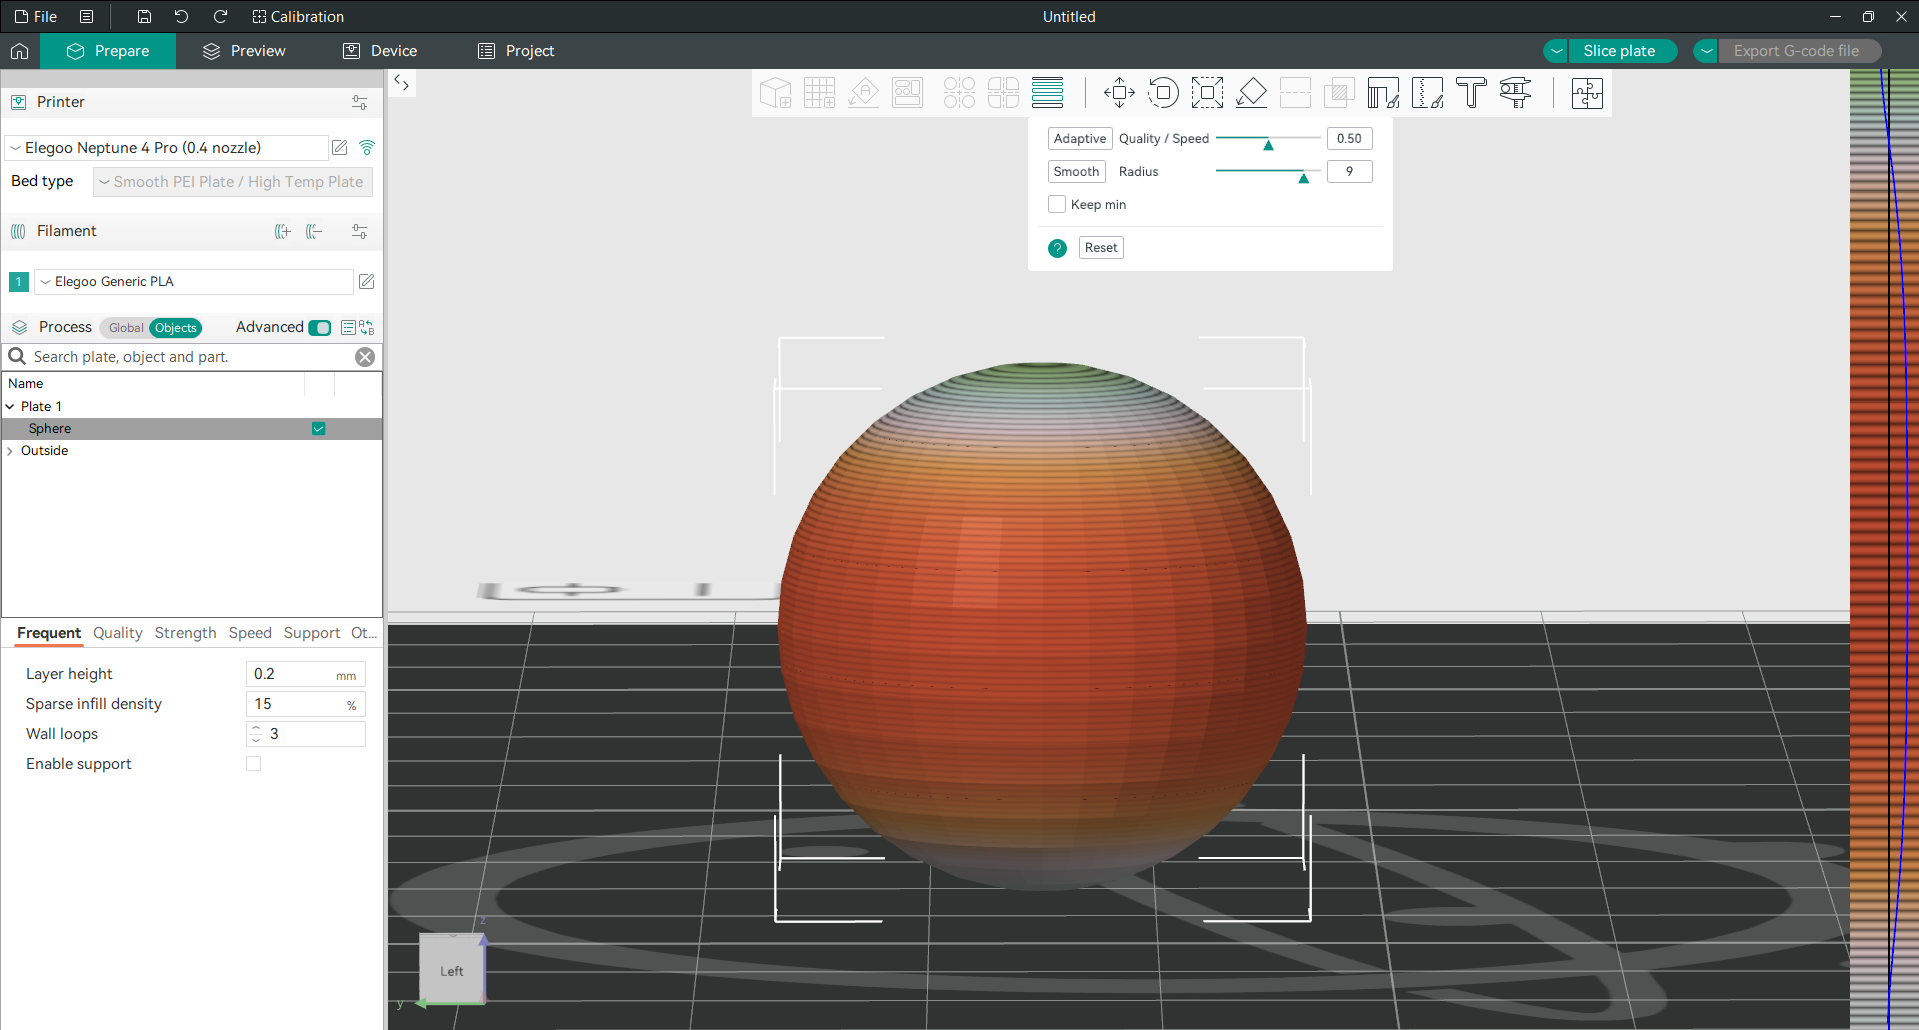
You can also control the amount of smoothing with the Gaussian filter radius. The larger the radius, the smoother the transition curve. And if you want even more control, you can click the smooth button multiple times to get the effect just right.
But what if you want to keep some areas extra sharp?
Keep Min: Precision Without Sacrifice
If you’re smoothing things out, you might worry about losing those ultra-fine details in your model. That’s where Keep Min comes in. When you enable this option, Orca Slicer ensures that the smallest layer heights you’ve set (typically represented in green) remain untouched when smoothing the curve.
Finding the Right Profile for Your Print
Now that you know how adaptive layer height works, the question is: how do you choose the right settings for your model? A good rule of thumb is to start with a layer height profile that matches most of the print. For example, if you’re using a 0.4mm nozzle, a layer height of 0.15mm works well for most prints.
However, adaptive layer height allows you to stretch those limits. You could use a 0.2mm profile for faster prints, but still benefit from thinner layers on complex curves.
Things to Watch Out For: Prime Tower and Supports
Before you go with adaptive layer heights, there are a couple of things to be aware of. If you’re printing with multiple colors or materials, you’ll need to make sure all objects on your plate use the same adaptive layer height settings. Otherwise, the Prime Tower won’t work. This is because the prime tower has to match the height of the object layers, and different heights will throw this off.
Also, organic tree supports aren’t supported with variable layer height yet. If your model requires those types of supports, you’ll have to stick with a uniform layer height—for now at least.
FAQs
-
What is adaptive layer height in Orca Slicer?
Adaptive layer height is a feature that adjusts the layer height automatically depending on your model’s complexity. It uses thinner layers for detailed areas and thicker layers for flat sections so you get smoother prints and save time.
-
How does adaptive layer height improve print quality?
By applying thinner layers to complex areas like curves and thicker layers to simple areas, adaptive layer height reduces visible layer lines (the "ladder effect") so you get smoother surfaces without sacrificing print speed.
-
When should I use adaptive layer height?
Adaptive layer height is good for models with detailed parts, curves, or slopes where precision matters. For simple flat models, a uniform layer height might be enough.
-
How do I turn on adaptive layer height in Orca Slicer?
Load your model in Orca Slicer and select the “Variable Layer Height” tool from the top toolbar. Use the “Quality/Speed” slider to balance detail and print time.
-
How does the Quality/Speed slider work?
This slider lets you balance print quality and speed. Move it to “Quality” for thinner layers and more detail, move it to “Speed” for thicker layers and faster print.
-
Will using adaptive layer height slow down my print?
No, it will actually speed it up. Thinner layers are applied where needed, thicker layers on simpler parts, so you get high quality and faster print.
-
Can I use adaptive layer height with all models?
Yes, adaptive layer height works with most models, especially complex geometry. But for simple shapes, a uniform layer height might be enough.
-
Are there any limitations to using adaptive layer height?
Yes, when using multiple colors or materials, all objects on the plate must have the same layer height settings or the Prime Tower won’t work. And organic tree supports are not yet compatible with variable layer height.
-
What are the benefits of smoothing transitions between layer heights?
The smoothing feature removes harsh jumps between layer heights and gives you a smoother surface on your print, especially on curved areas.
Related Links
- OrcaSlicer: 3D Printer Calibration Features Deep Dive
- Temperature Tower Test in Orca Slicer: A Comprehensive Guide
- Flow Rate Calibration in OrcaSlicer: A Comprehensive Guide
- Pressure Advance Calibration in Orca Slicer: A Comprehensive Guide
- Tolerance Test in OrcaSlicer: A Comprehensive Guide
- Maximum Volumetric Speed Test in Orca Slicer: A Comprehensive Guide
- Speed Test in OrcaSlicer (VFA): A Comprehensive Guide
- Retraction Test in OrcaSlicer: A Comprehensive Guide
- How to Connect OrcaSlicer to Obico
- Orca Slicer vs PrusaSlicer vs Cura: Comparing the Most Popular Slicers
- OrcaSlicer Printer Profile Setup Guide
- Guide to the Orca Slicer Device Tab
- Orca Slicer Seam Settings: How to Use Them
Final Thoughts
Orca Slicer’s adaptive layer height isn’t just a feature; it’s a game changer. It’s the best of both worlds: precision and speed. By adjusting layer height across your model, you’re no longer forced to choose between quality and speed. Whether you’re an artist perfecting sculptures or an engineer fine-tuning prototypes, adaptive layer height gives you the power to take your prints to the next level.
As you keep playing with this feature, you’ll see each print get smoother, faster, and more efficient. So, keep playing, keep experimenting, and most importantly, keep printing! With adaptive layer height at your disposal, your 3D prints can only get better from here.
