OrcaSlicer: 3D Printer Calibration Features Deep Dive
Try JusPrin, the first GenAI 3D printing tool built on OrcaSlicer.
📢 We've published a comprehensive, step-by-step calibration guide!
This article provides a good overview of OrcaSlicer's calibration features, but for the most detailed and up-to-date calibration instructions, check out our Mastering Your Prints: The Comprehensive OrcaSlicer Calibration Guide which includes detailed procedures, troubleshooting tips, and best practices for all calibration tests.
If you've been 3D printing for a while, you've likely heard about the importance of calibrating your printer. Print calibration improves your print quality, gives you consistent results, and also increases your overall productivity.
On the internet, you'll find several resources that help you calibrate your 3D prints. Michael from Teaching Tech has an entire library of tools to fine-tune your 3D prints. Thingiverse and Printables have an array of calibration prints as well.
However, OrcaSlicer brings all these tools in a single place. It gives you an easy way to access and use these calibration prints without downloading or anything. The slicer settings are already set, and all you need to do is hit Print!
In this article, we'll dive deep into OrcaSlicer's calibration Menu. We'll take a look at the various options it has and how you can use its calibration prints to fine-tune your 3D printing results.
Let's calibrate and create!
Why do you need to calibrate your 3D printer?
Calibrating your 3D printer is critical to achieving consistent and high-quality prints. Without proper calibration, you may encounter a myriad of issues, from poor layer adhesion and dimensional inaccuracies to unwanted artifacts and material wastage. Calibration ensures that your printer's hardware and software settings are harmoniously aligned, optimizing the machine's performance. Whether you're a hobbyist or a professional, taking the time to calibrate your 3D printer ensures that your creations meet your expectations, reduces the likelihood of print failures, and maximizes the efficiency of your materials. In essence, calibration is the key to unlocking the full potential of your 3D printing endeavors.
While calibration used to require tons of manual configuration across multiple software sources or websites, OrcaSlicer has made calibration a breeze. In this article, we'll walk you through the various calibration features built into OrcaSlicer. If you aren't already using OrcaSlicer, or would like to learn more about it, check out our guide on getting started with OrcaSlicer.
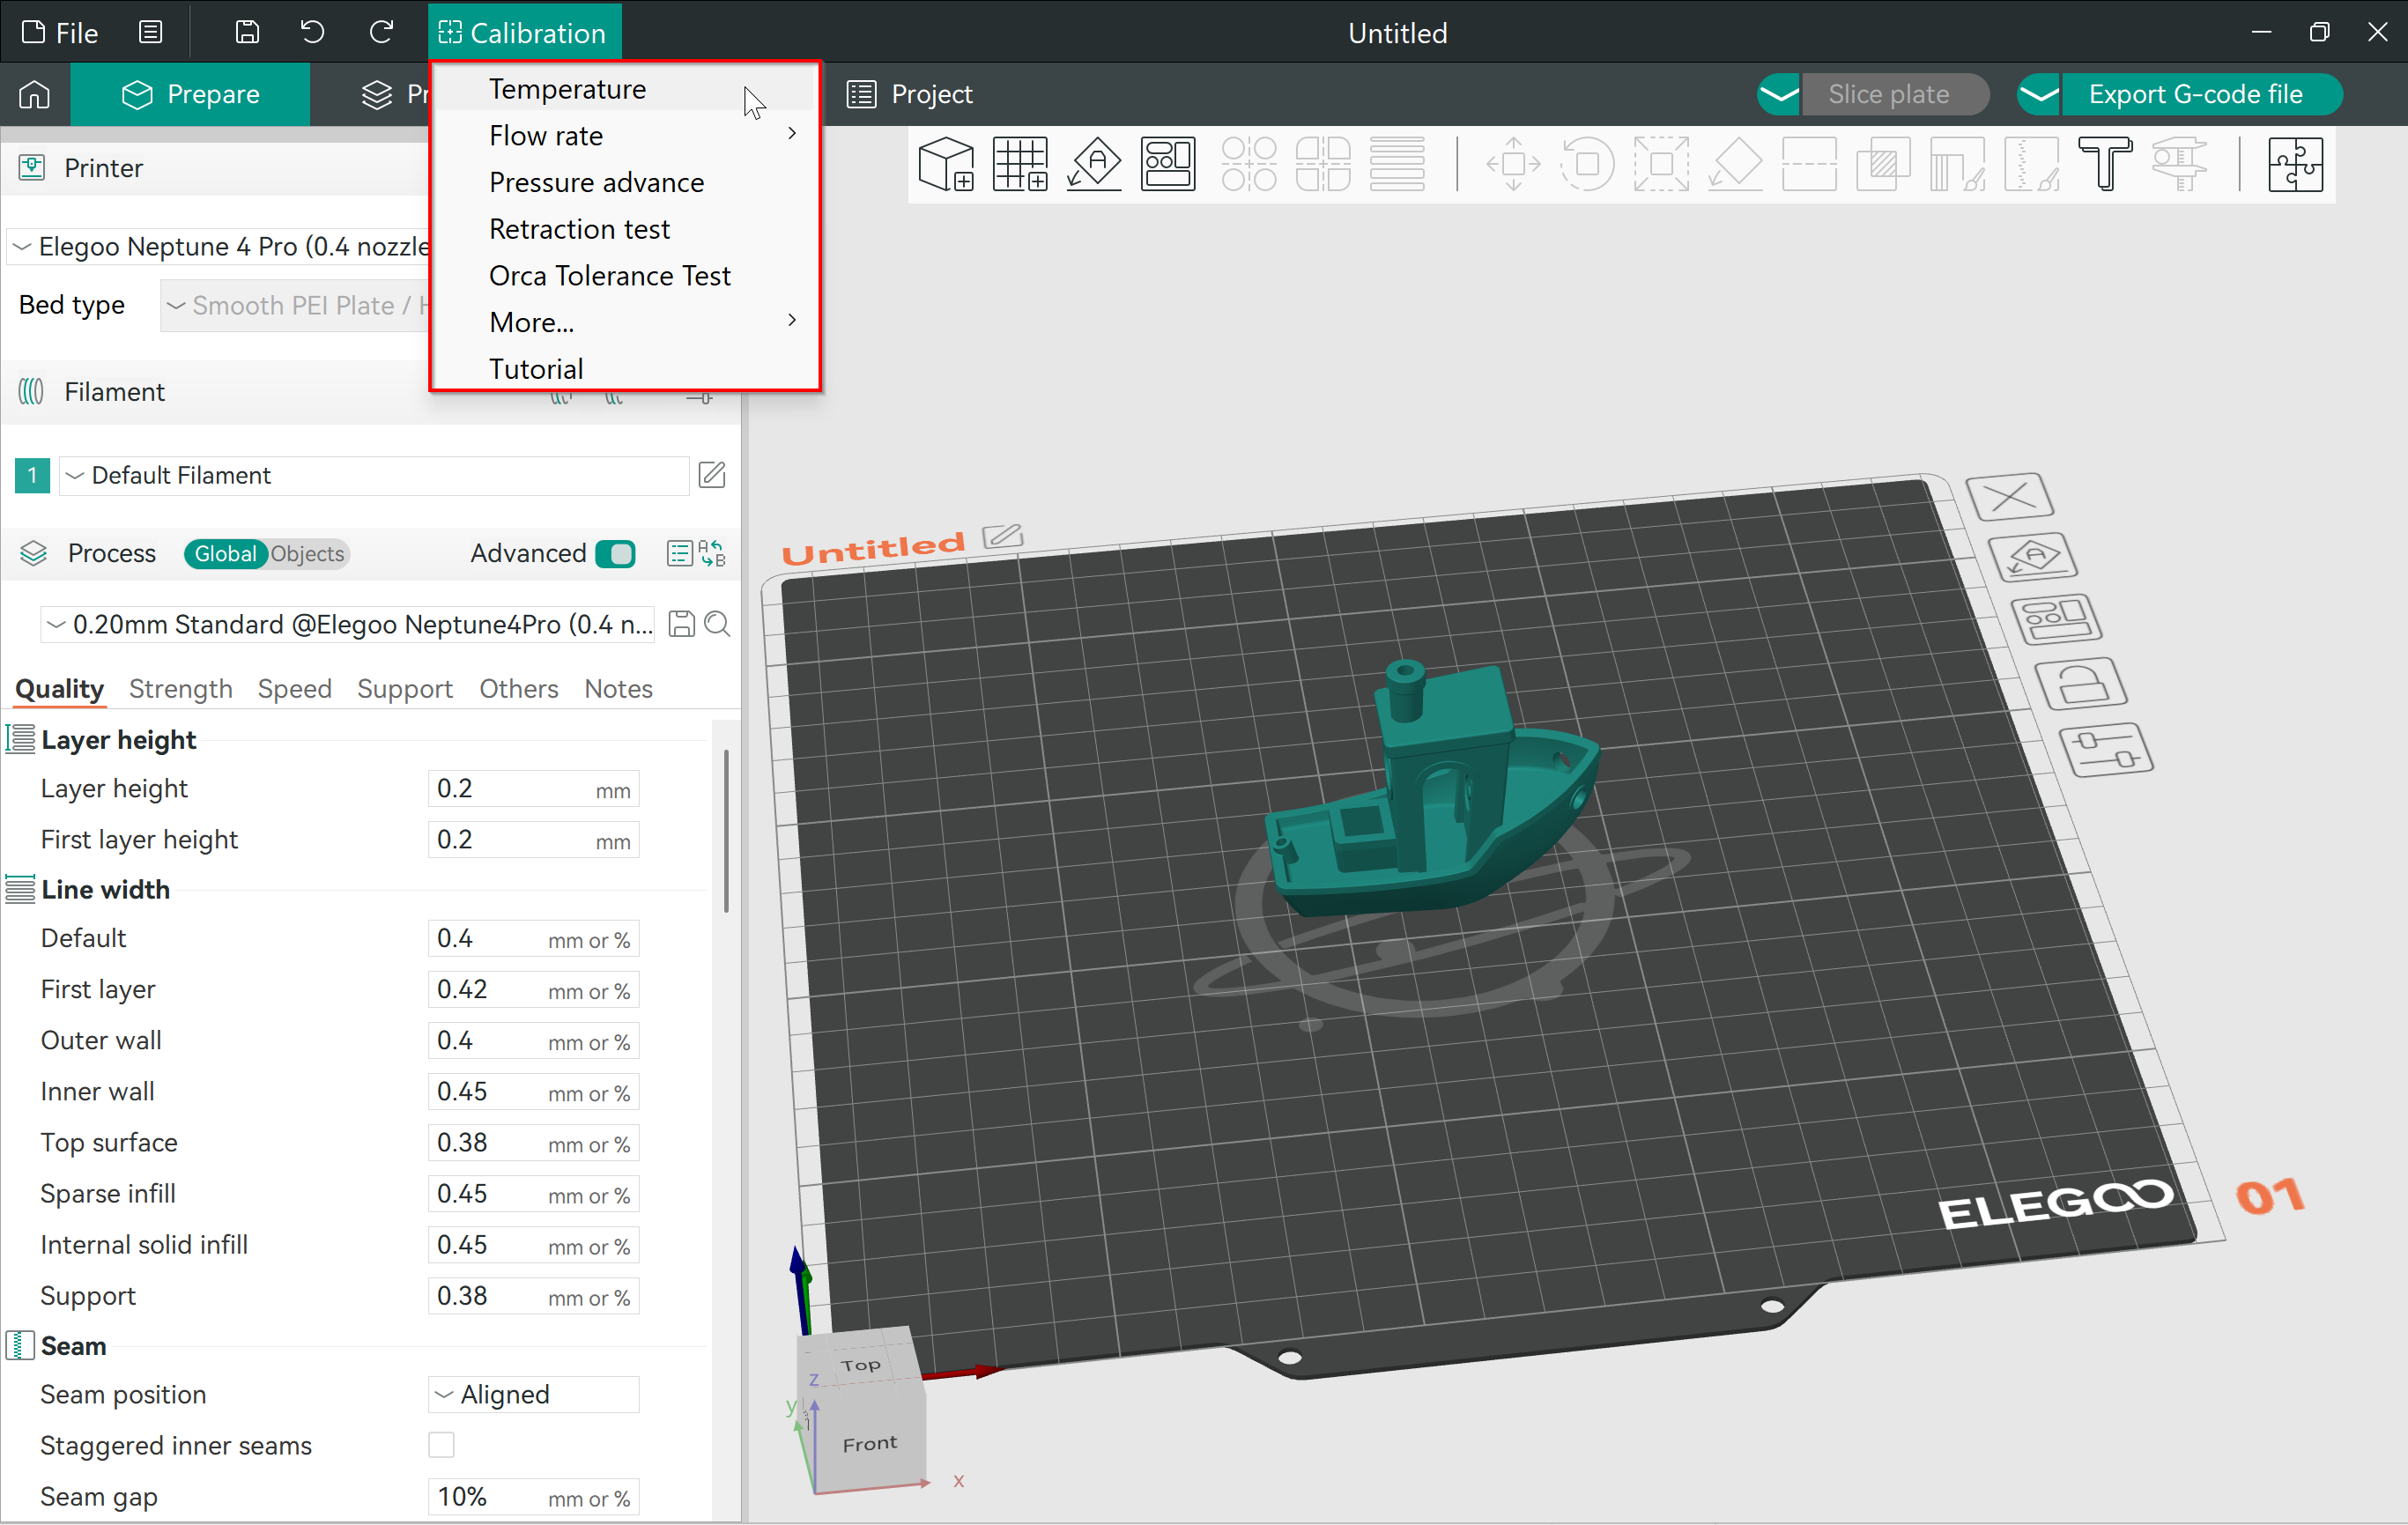
The OrcaSlicer Calibration Menu
The OrcaSlicer calibration menu is an awesome feature that is built directly into the slicer. We'll walk through all of the calibration options currently available below including:
- Temperature Tower
- Flow Rate
- Pressure Advance
- Tolerance Test
- Max (Volumetric) Flow Rate
- Vertical Fine Artifacts
- Retraction Test
Temperature Tower
What is It?
The temperature tower is a great print to determine the ideal printing temperature for your material. The right print temperature will help you get the best print quality, give your parts good strength, and reduce any unwanted stringing or under-extrusion issues.
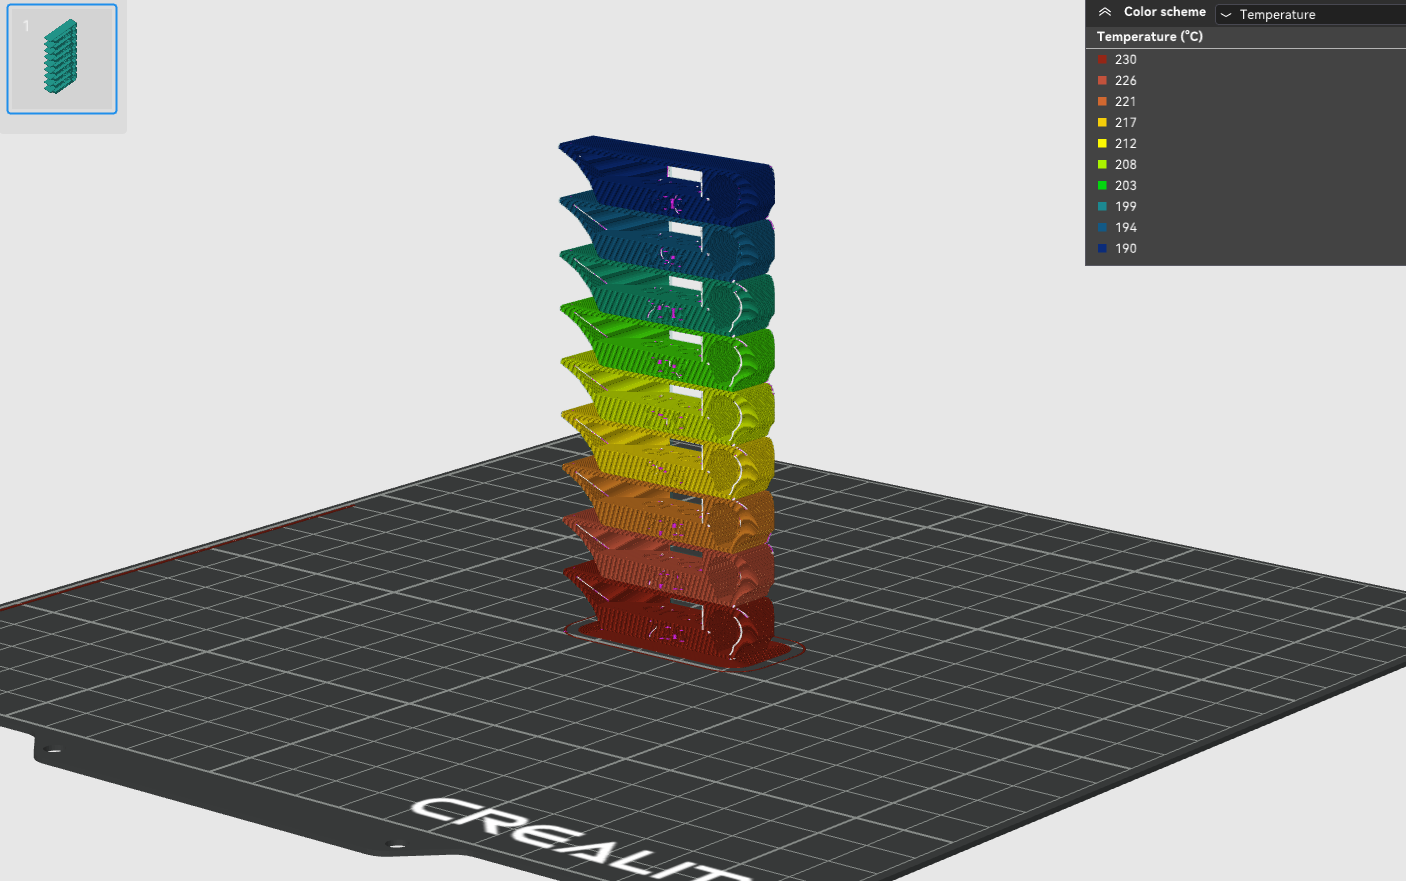
OrcaSlicer uses a remix of the Smart compact temperature calibration tower by gaaZolee in its calibration menu. The tower has 5C temperature steps, and you can set the start and end temperature using the OrcaSlicer settings.
How to Run It?
- Select "Temperature" from the Calibration Menu.
- Enter your desired start and end temperatures or simply leave the default temperatures
- Print the temperature tower. Orca Slicer will automatically change the temperature throughout the print so you can determine the temperature your filament prints best.
While your waiting for your temperature tower to finish printing, Check out Obico, the all in one Smart 3D printing software. Monitor and control your 3D printer from anywhere on any device and get added peace of mind with Obico's AI failure detection system that watches your print for you and alerts you if anything goes wrong.

Link your printer to Obico for free and get unlimited webcam streaming, 3D printer status notifications, 3D printer remote access and more!
How to Analyze Results?
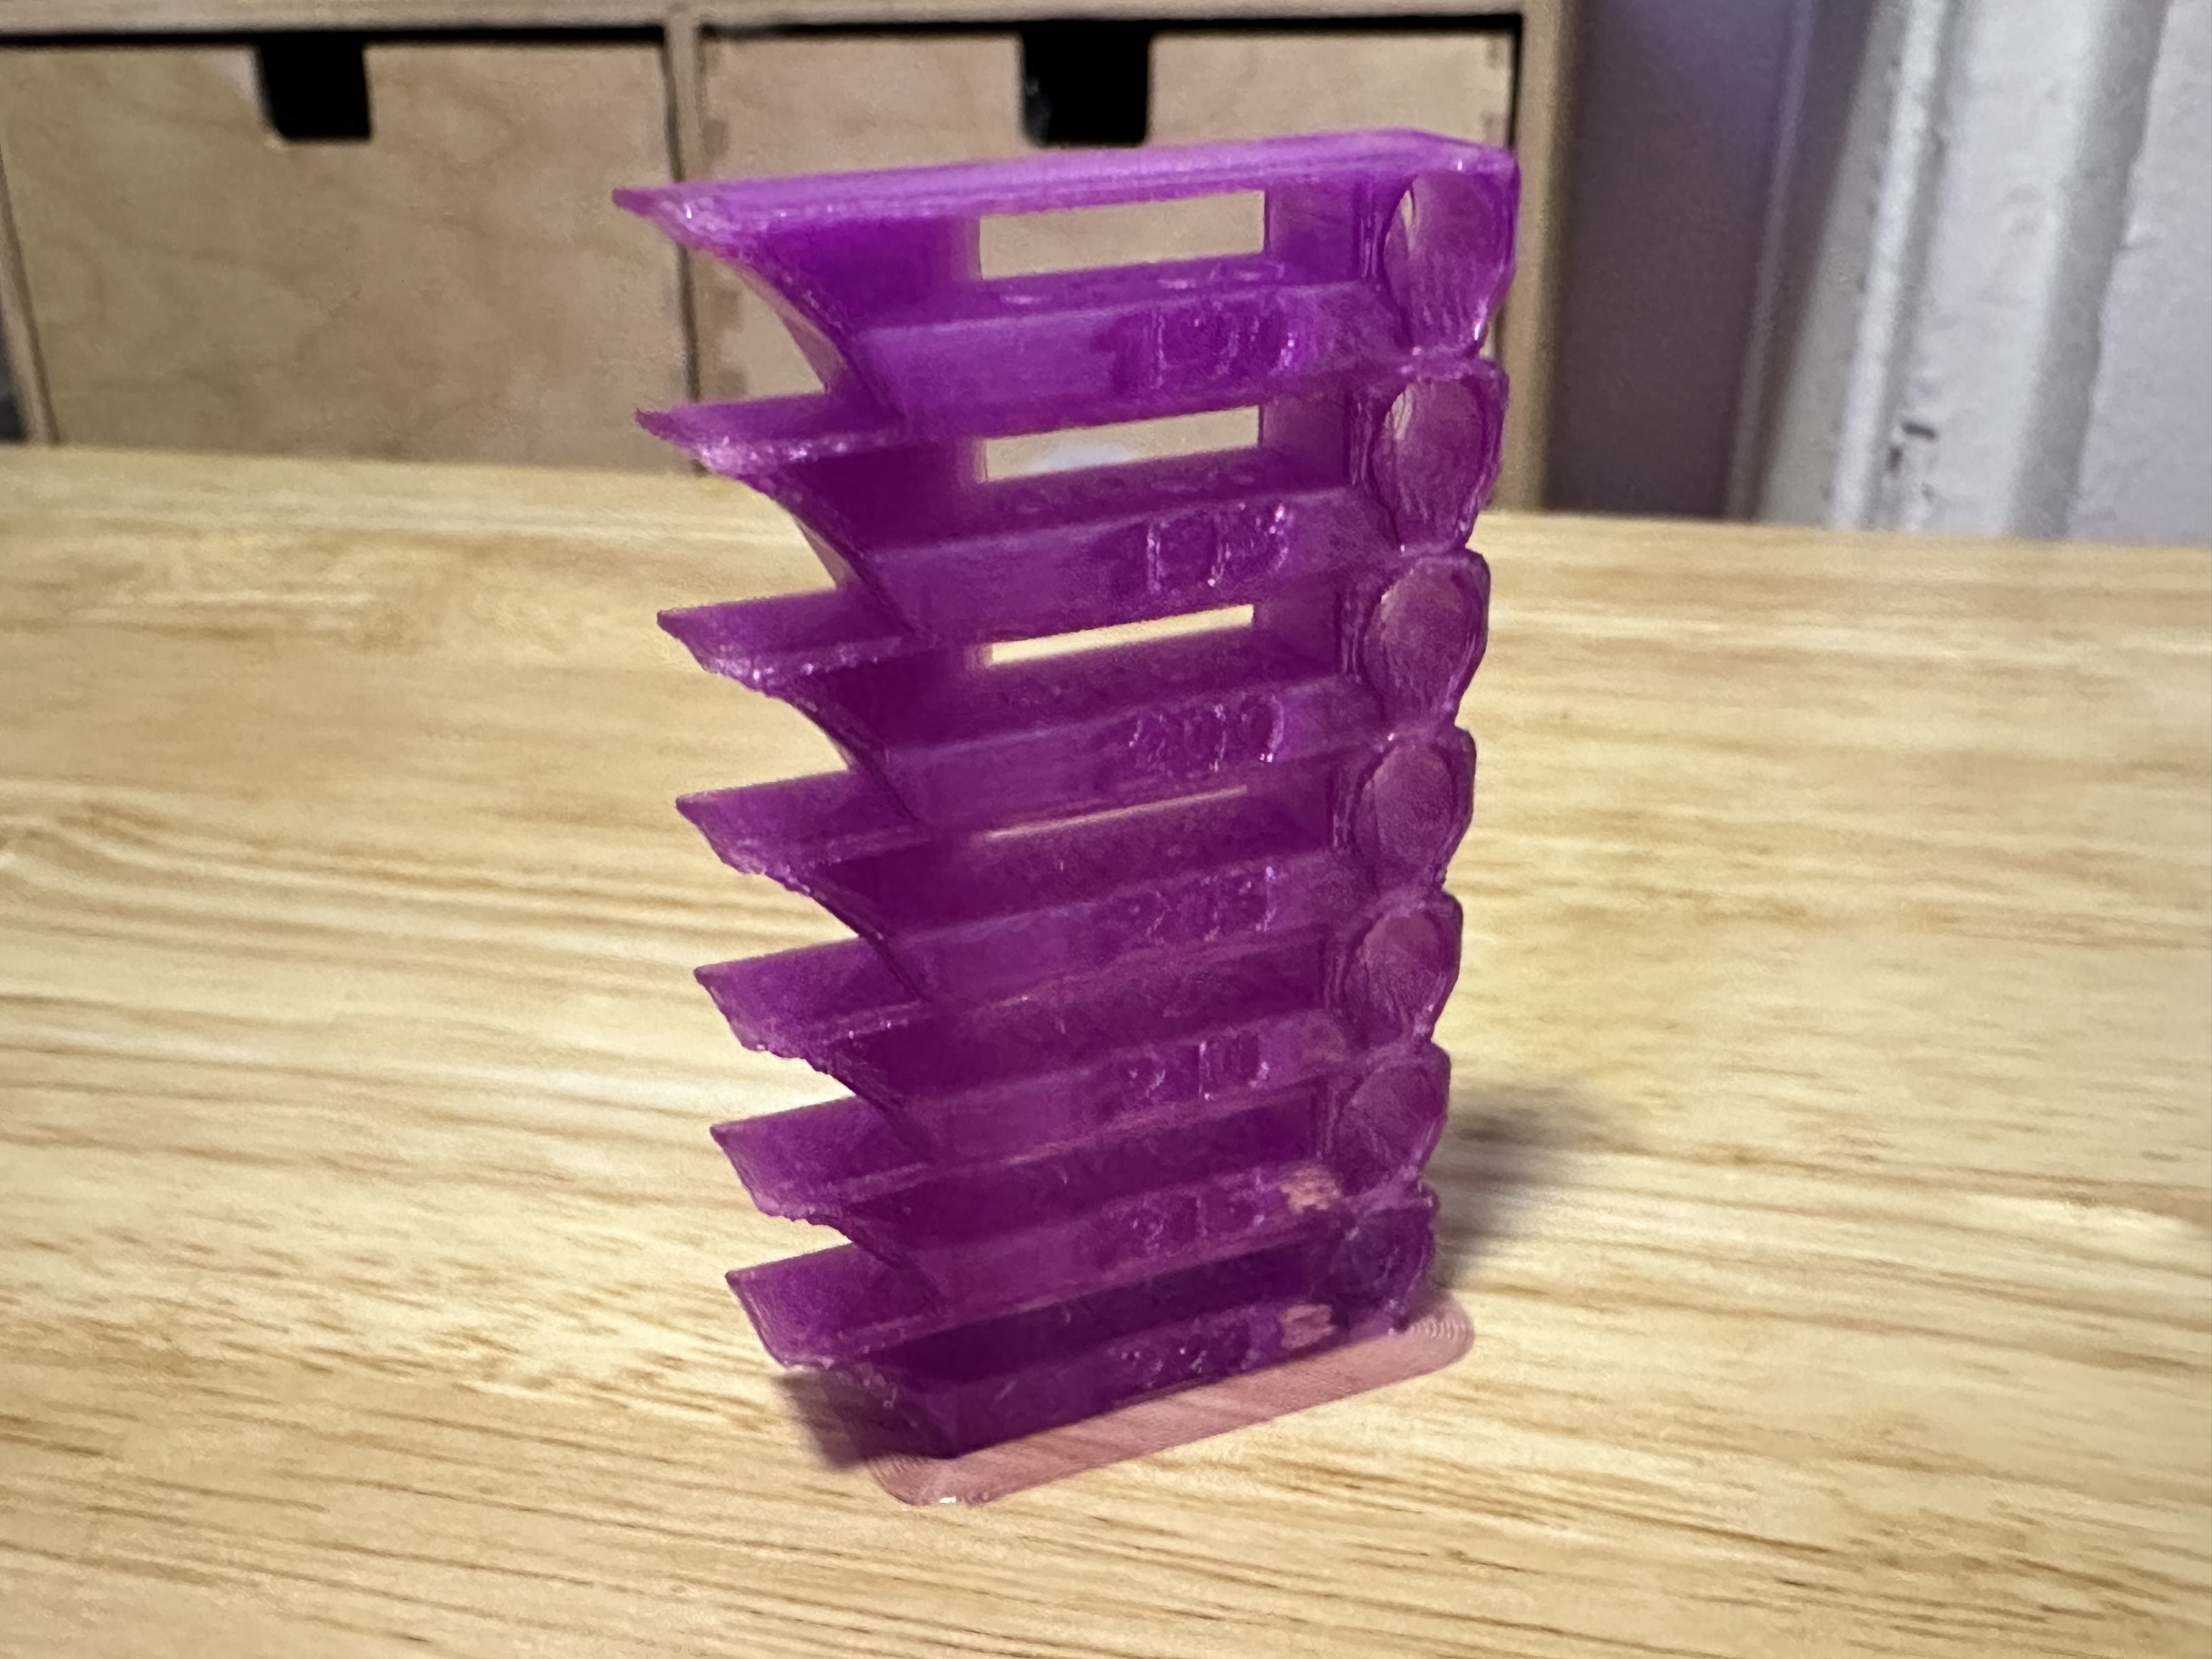
Once the tower is done printing, you'll notice some temperature steps have better print quality than others. The optimal temperature is the one with minimal print issues. Check for the surface finish, bridging, stringing, layer adhesion, and strength (try physically breaking the piece).
For a more detailed guide and deeper insights, you can explore our comprehensive article here: Temperature Tower Test.
Flow Rate
What is It?
Flow Rate controls the extrusion flow of the filament that comes out of the nozzle. As each material melts differently, you need to have just the right amount of material coming out of the nozzle to get a good-quality print.
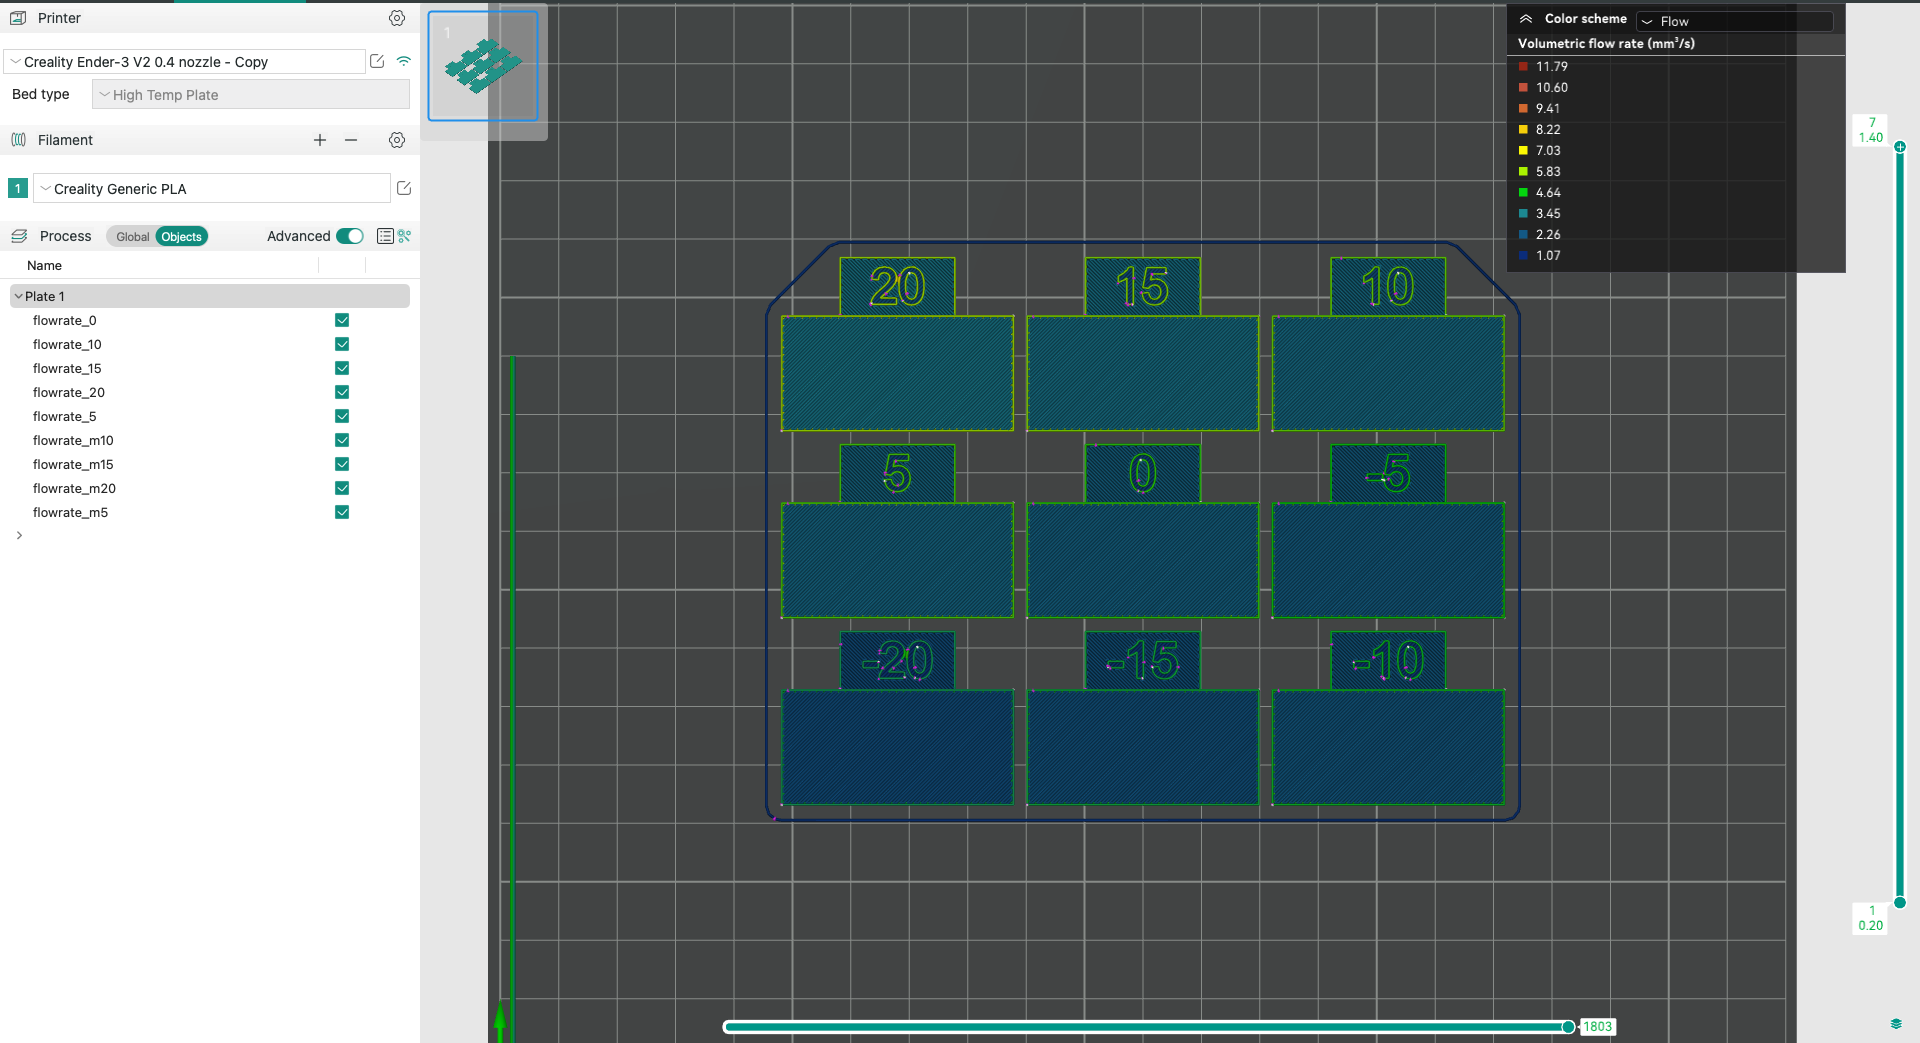
If the flow rate is too high, it'll lead to over-extrusion, causing issues like thick lines and loss of details. Whereas, if the flow rate is too low, it'll result in under-extrusion issues with holes and gaps in your prints.
How to Run it:
The flow rate is denoted by the Flow Ratio in OrcaSlicer. By default, it is set to near 100% or 1. The steps to run the flow rate test in OrcaSlicer are as follows -
- Select the Printer and filament Type and input the process you'd like to use for the test.
- Go to the calibration menu, select Flow Rate, and Choose Pass 1.
- A new project consisting of nine blocks will be created. Each block will have a different flow rate modifier. You can check this by selecting each object individually and checking their flow ratio.
- Slice and print the project.
- Now check for the one 3D Print that's come out the best. The top surface should be as smooth as possible. If you have two that are close to one another, choose the one with a higher flow rate.
- Use the formula - FlowRatio_old*(100 + modifier)/100 and update the flow ratio in your filament profile settings.
For instance, the original flow ratio was 0.98, and you got good results with the +5 block. calculate the new flow ratio value as 0.98x(100+5)/100 = 1.029.
- Repeat steps from 1-4, except perform calibration using the Pass 2. This will create a new project with ten more blocks, and the flow rate modifiers will change from -9 to 0.
- Repeat the 5th and 6th step. If the previous flow rate was 1.029, and you got good results with block -6, calculate the new value using - 1.029x(100-6)/100 = 0.96726.
- That's it. Update this value in the filament settings and save the profile. Use this flow ratio value for future prints with the same filament.
If you're looking for a thorough explanation and additional tips, check out our in-depth article on this topic: Flow Rate Calibration.
Pressure Advance
What is it?
Pressure Advance is designed to compensate for the side effects of instant speed changes that occur during fast print speeds. It reduces stringing, gives your prints sharp corners, and delivers a high print quality even at speeds above 100 mm/s. Take a deep dive on pressure advance for Klipper in our detailed guide.
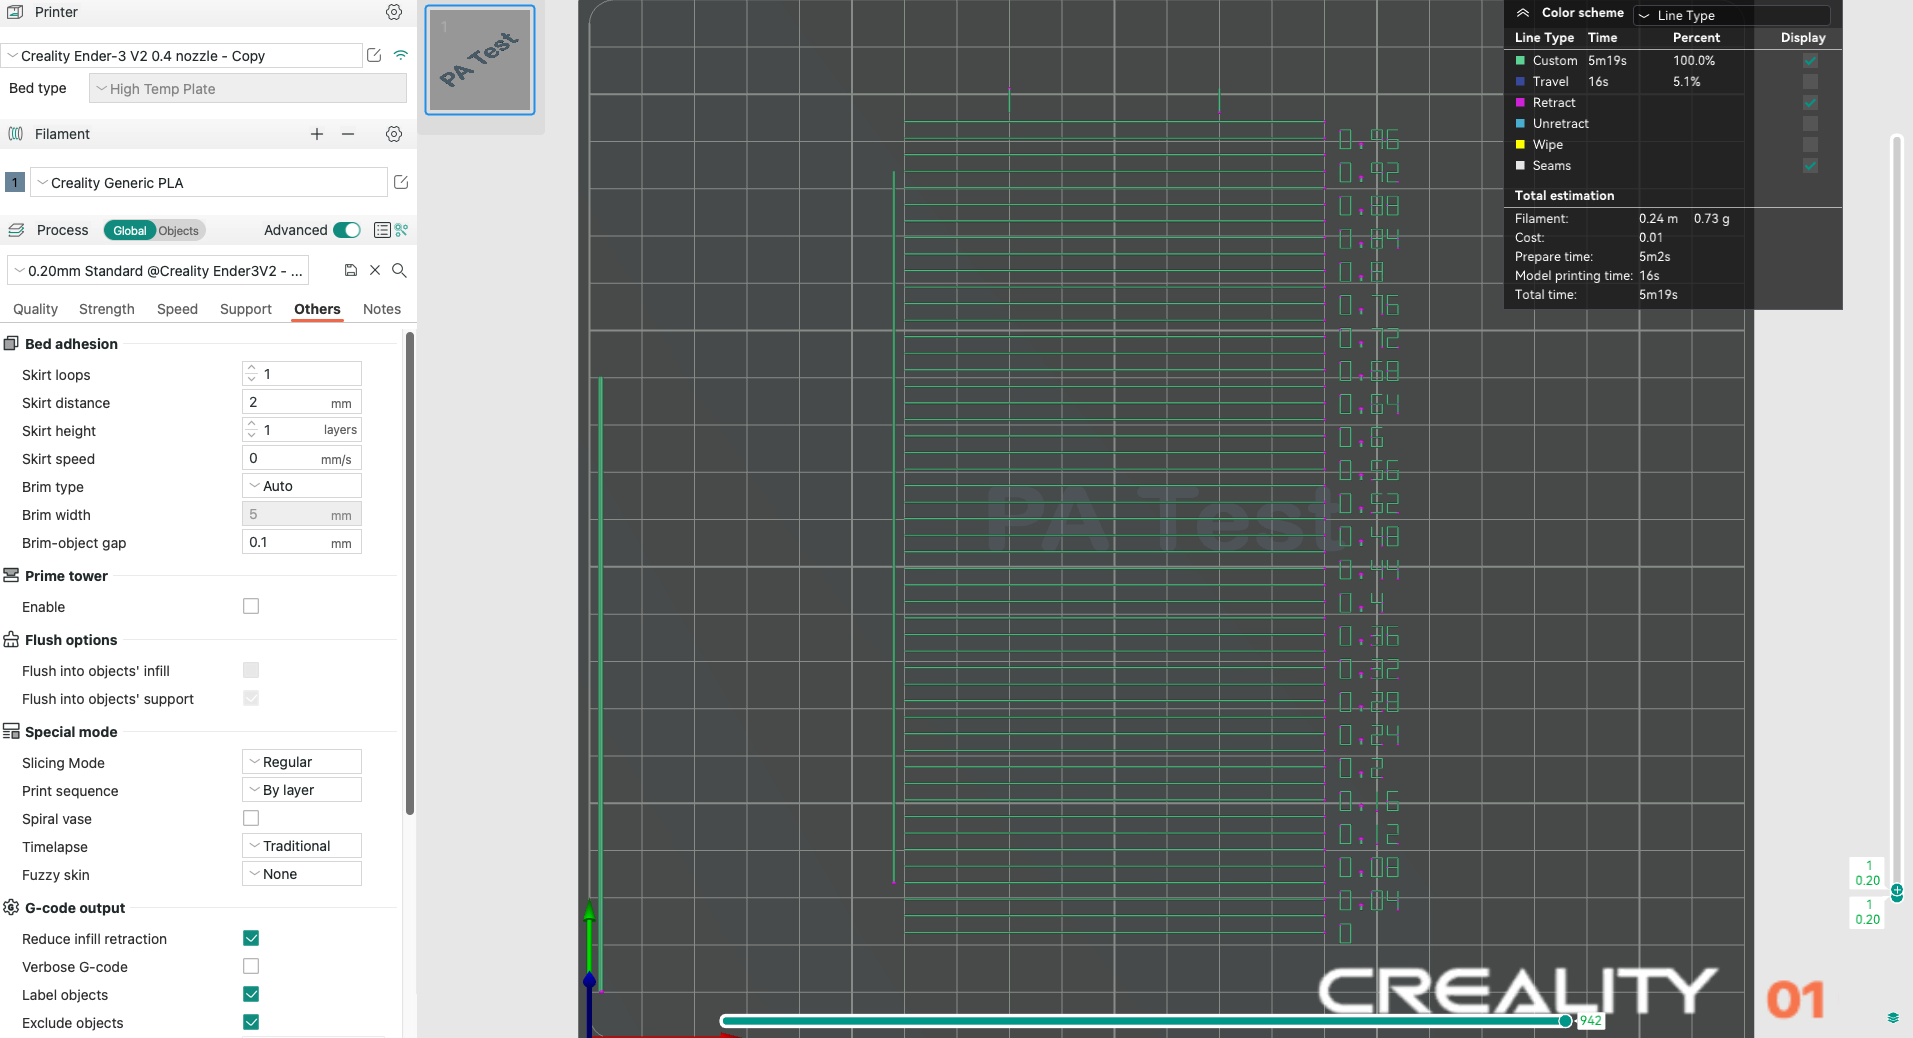
Line Method
What is It? The line method is a quick and straightforward test. However, its accuracy highly depends on your first layer quality. It is recommended to turn on the bed mesh leveling for this test.
Steps:
- Select the printer, filament, and process you would like to use for the test.
- Print the project and check the result. You will want to find the line that has the best combination of being a precise angle and the filament not seperatingYou can select the value of the most even line and update your PA value in the filament settings.
- In this test, a PA value of 0.016 appears to be optimal.
Pattern Method
What is It? The pattern method is adapted from Andrew Ellis' pattern method generator, which was itself derived from the Marlin pattern method developed by Sineos. Instructions for using and reading the pattern method are provided in Ellis' Print Tuning Guide, with only a few Orca Slicer differences to note.
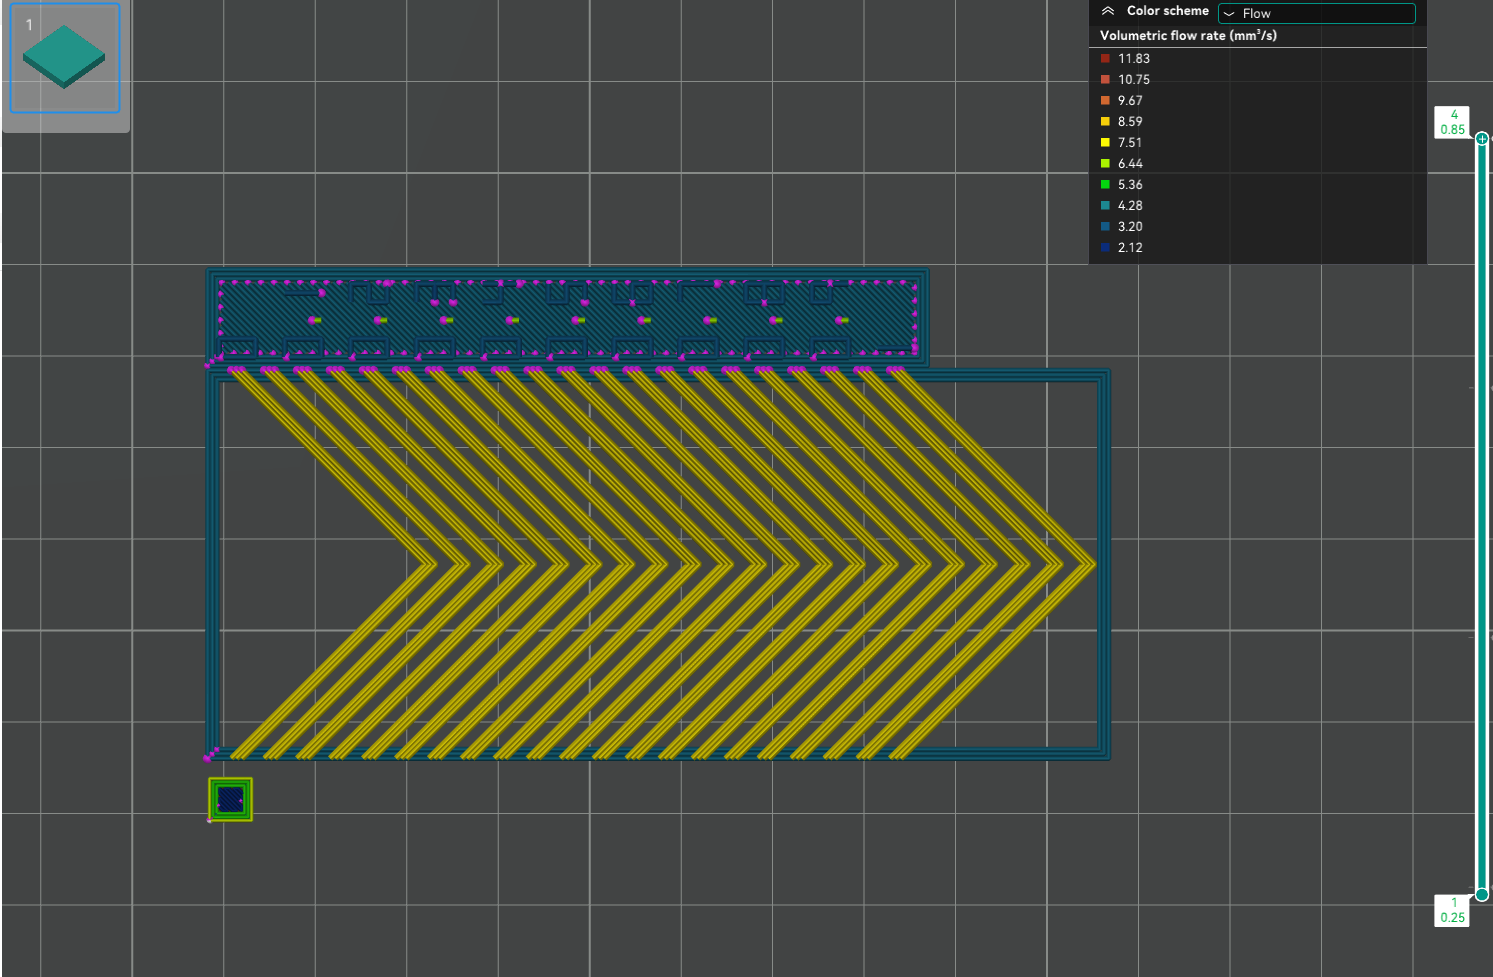
Steps:
-
When you initiate the test, you'll only see a small rectangular prism on the plate. This object serves several purposes:
-
The test pattern itself is added in as custom G-Code at each layer. The rectangular prism gives us the layers in which to insert that G-Code. This means that you'll see the full test pattern when you move to the Preview pane.
-
The prism acts as a handle, enabling you to move the test pattern wherever you'd like on the plate by moving the prism.
- The filament selected for the prism is also used for the test pattern. You can make specific printer, filament, and print profile adjustments in Orca Slicer by adjusting the settings in the Prepare pane. When you initiate the calibration test, Ellis' default settings are applied.
-
Tower Method
What is It? The tower method may take a bit more time to complete, but it does not rely on the quality of the first layer. The PA value for this test will be increased by 0.002 for every 1 mm increase in height (NOTE: 0.02 for Bowden).
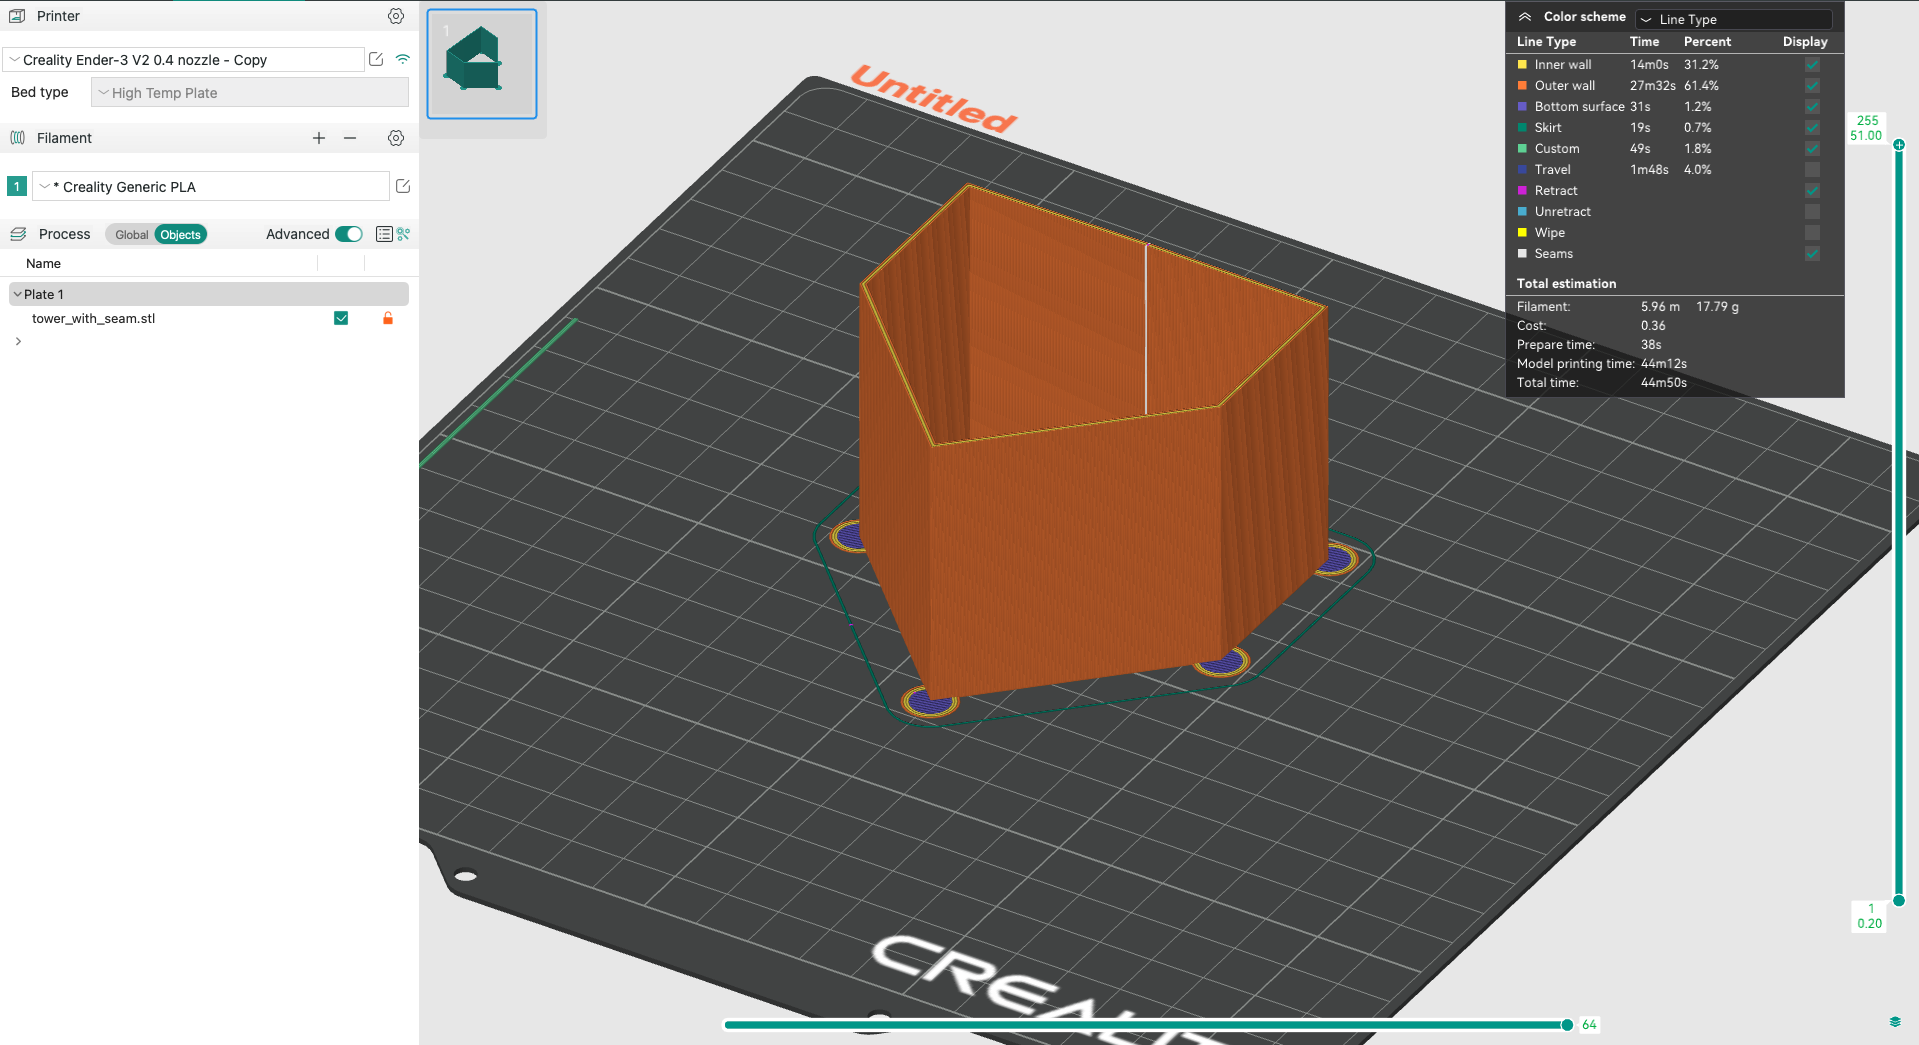
Run the test:
- Select the printer, filament, and process you would like to use for the test.
- Select "Pressure Advance" from the Calibration Menu, choose "DDE" (direct drive extruder) or Bowden, and choose "PA Tower".
- Print the test part.
Analyze the Results
Examine each corner of the print and use a set of calipers or a ruler to determine the height that yields the best results. Look for the height that has the most precise corners.
For an in-depth breakdown and expert advice on pressure advance calibration, we have an extensive guide available. You can read the full article by following this link: Pressure advance calibration.
OrcaSlicer Tolerance Test
What is It? This test helps you determine the printer's ability to reproduce fine details and tight tolerances. Tolerance in 3D printing is vital for precision and accuracy. It ensures parts fit seamlessly which is very important when printing anything that requires assembly.
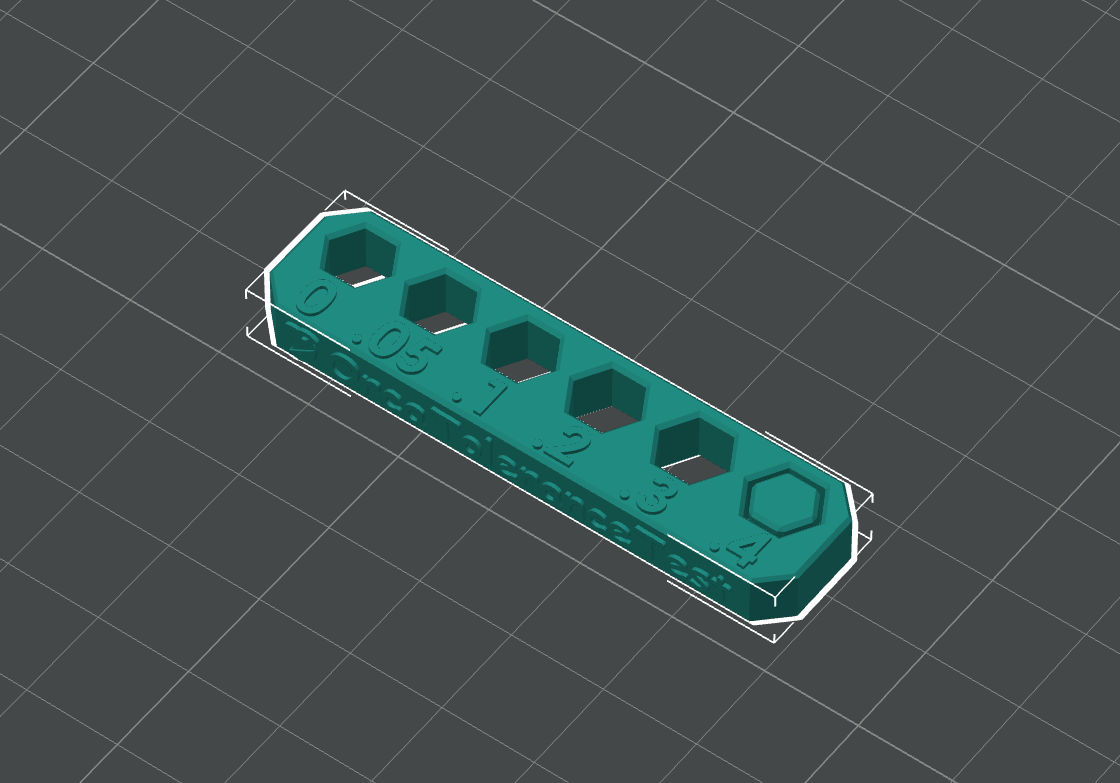
Steps:
- Select the printer, filament, and process you'd like to use for the test.
- Print the tolerance test model provided in OrcaSlicer.
Analyze the Results
After printing, measure the gaps between the various sections of the model to determine the printer's tolerance capabilities.
To gain a deeper understanding and access more detailed information on tolerance testing, please refer to our comprehensive guide. Follow this link to read the full article: Tolerance Test.
Max (Volumetric) FlowRate
What is It? The Max FlowRate test helps you determine the maximum flow rate at which your printer can operate without experiencing issues like under-extrusion. This is important for determining how fast you can print. To learn more about how volumetric flow rate is related to speed, check out Andrew Ellis's comprehensive print tuning guide
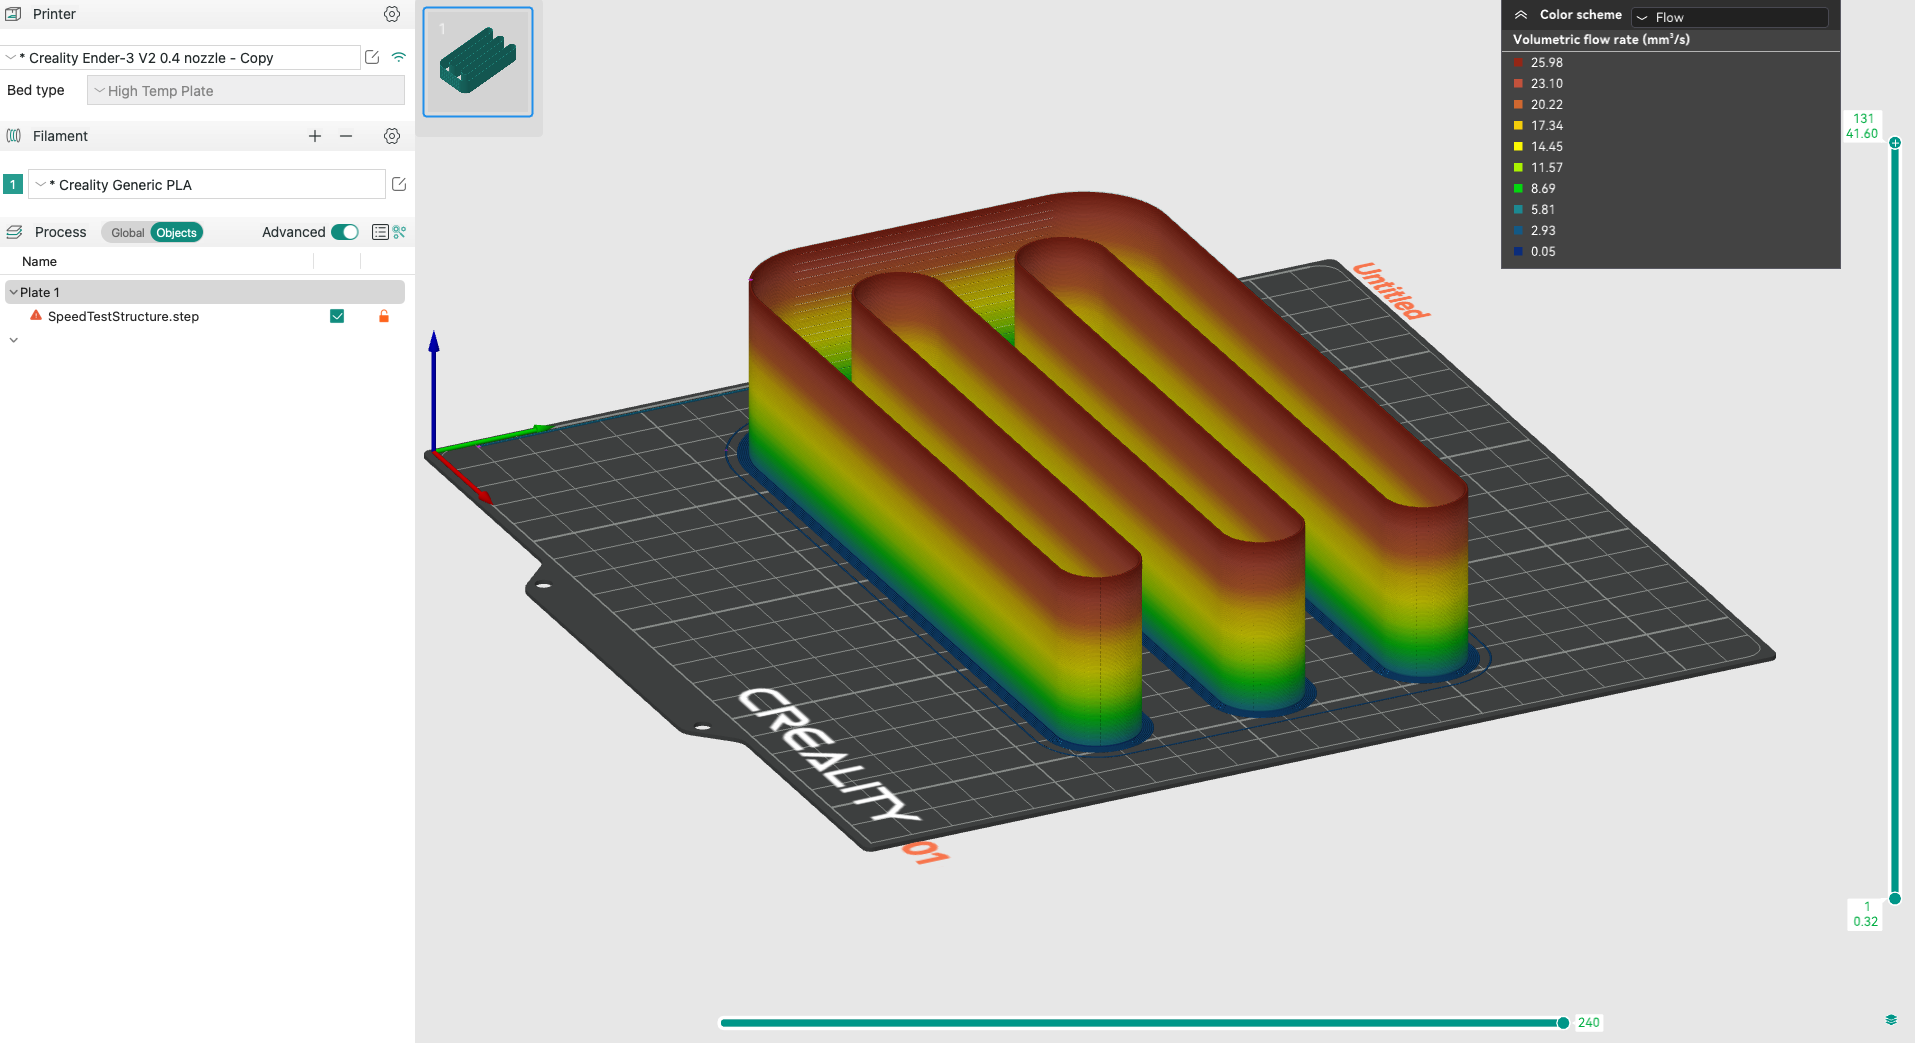
Steps:
- In OrcaSlicer, select the filament and nozzle size you're using. The max flow rate test is under the "more" section of the "Calibration" menu
- Print the Max FlowRate test model:
- Examine the print for signs of under-extrusion or other print quality issues. The flow rate at which these issues first appear is your maximum flow rate.
For more in-depth data and step-by-step instructions, visit our full article here: Maximum Volumetric Speed Test.
Vertical Fine Artifacts (VFA)
What is It? VFA test helps identify any vertical artifacts in your prints. These artifacts can be caused by various factors, including mechanical issues with the printer or incorrect slicer settings.
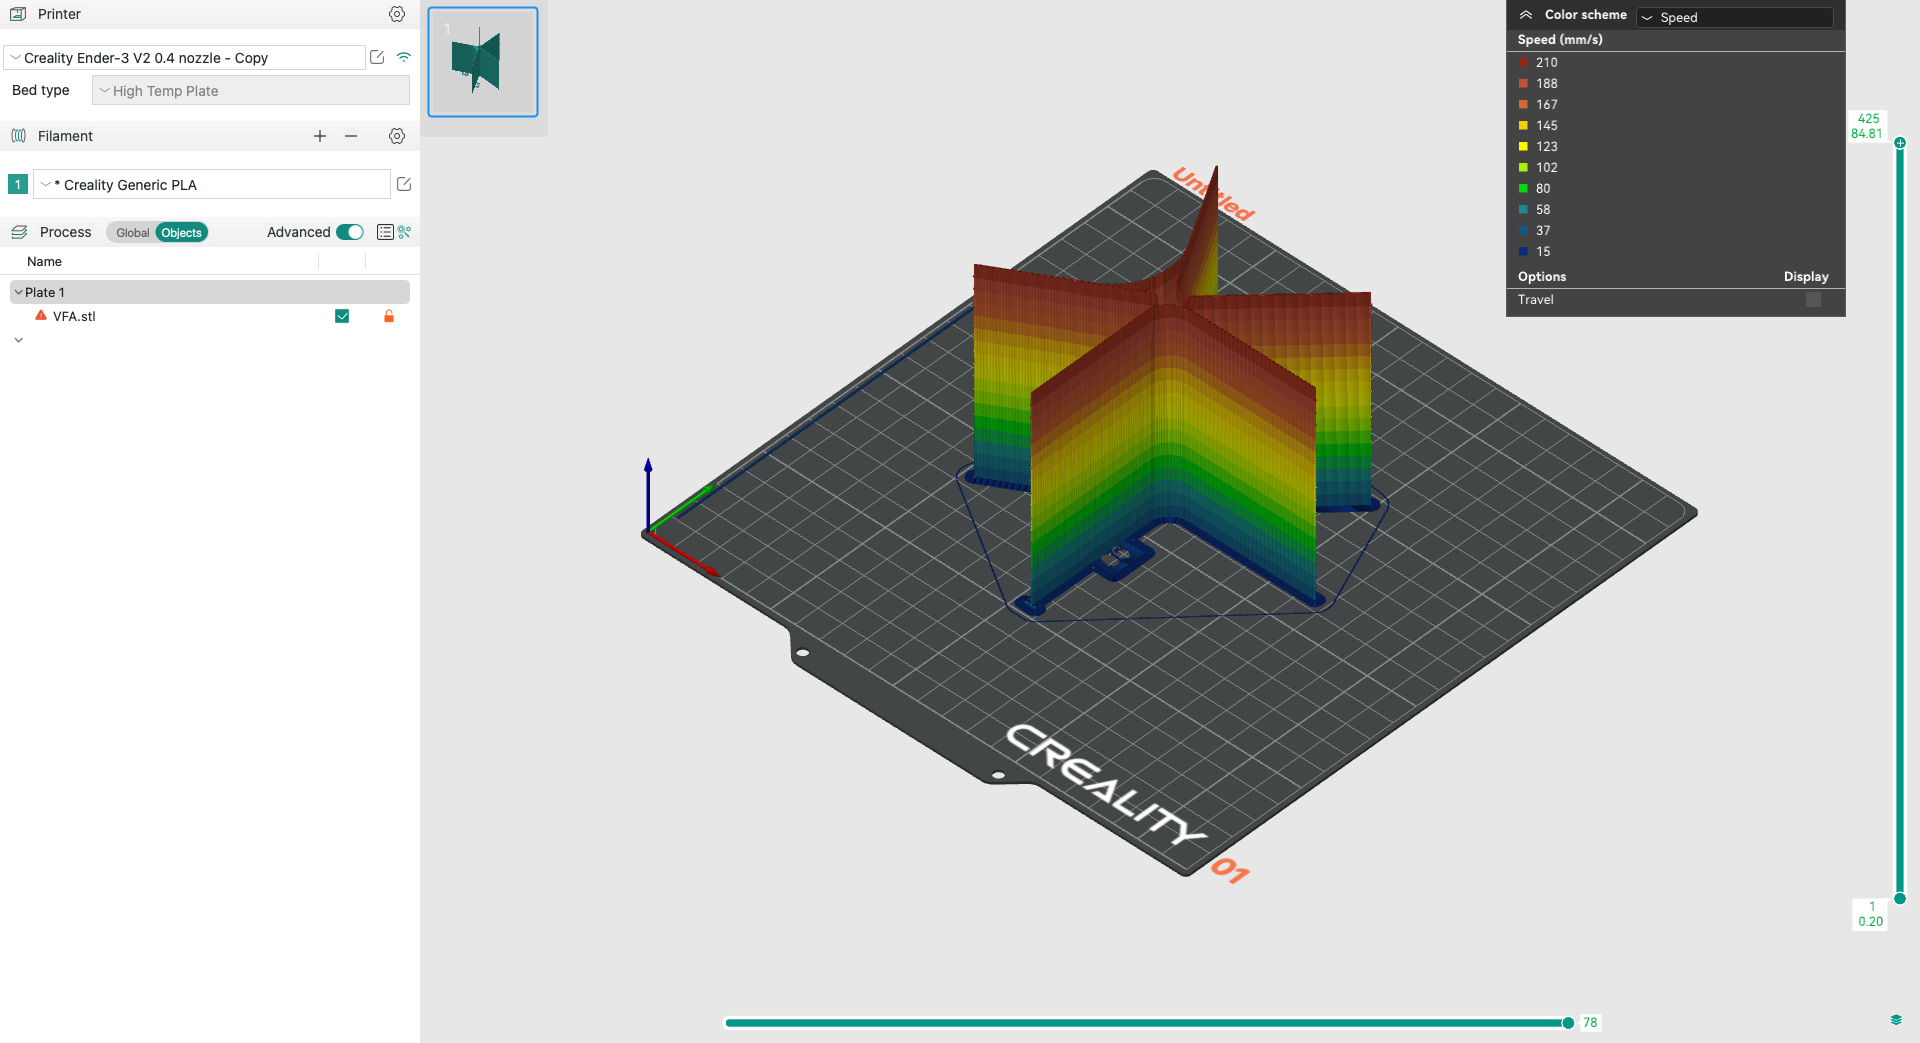
Steps:
- Select the VFA test model in OrcaSlicer.
- Adjust the start and end speed settings: The lower speed should be relatively slow and the end speed should be a value that pushes the upper limits of what you think the machine is capable of. We suggest being conservative as you can always re-do the test with higher values. We'll go with the default 40 mm/s start speed and 200 mm/s end speed.
- Choose the step value: We'll use the default of 10 mm/s.
- Print the vertical fine artifacts test model.
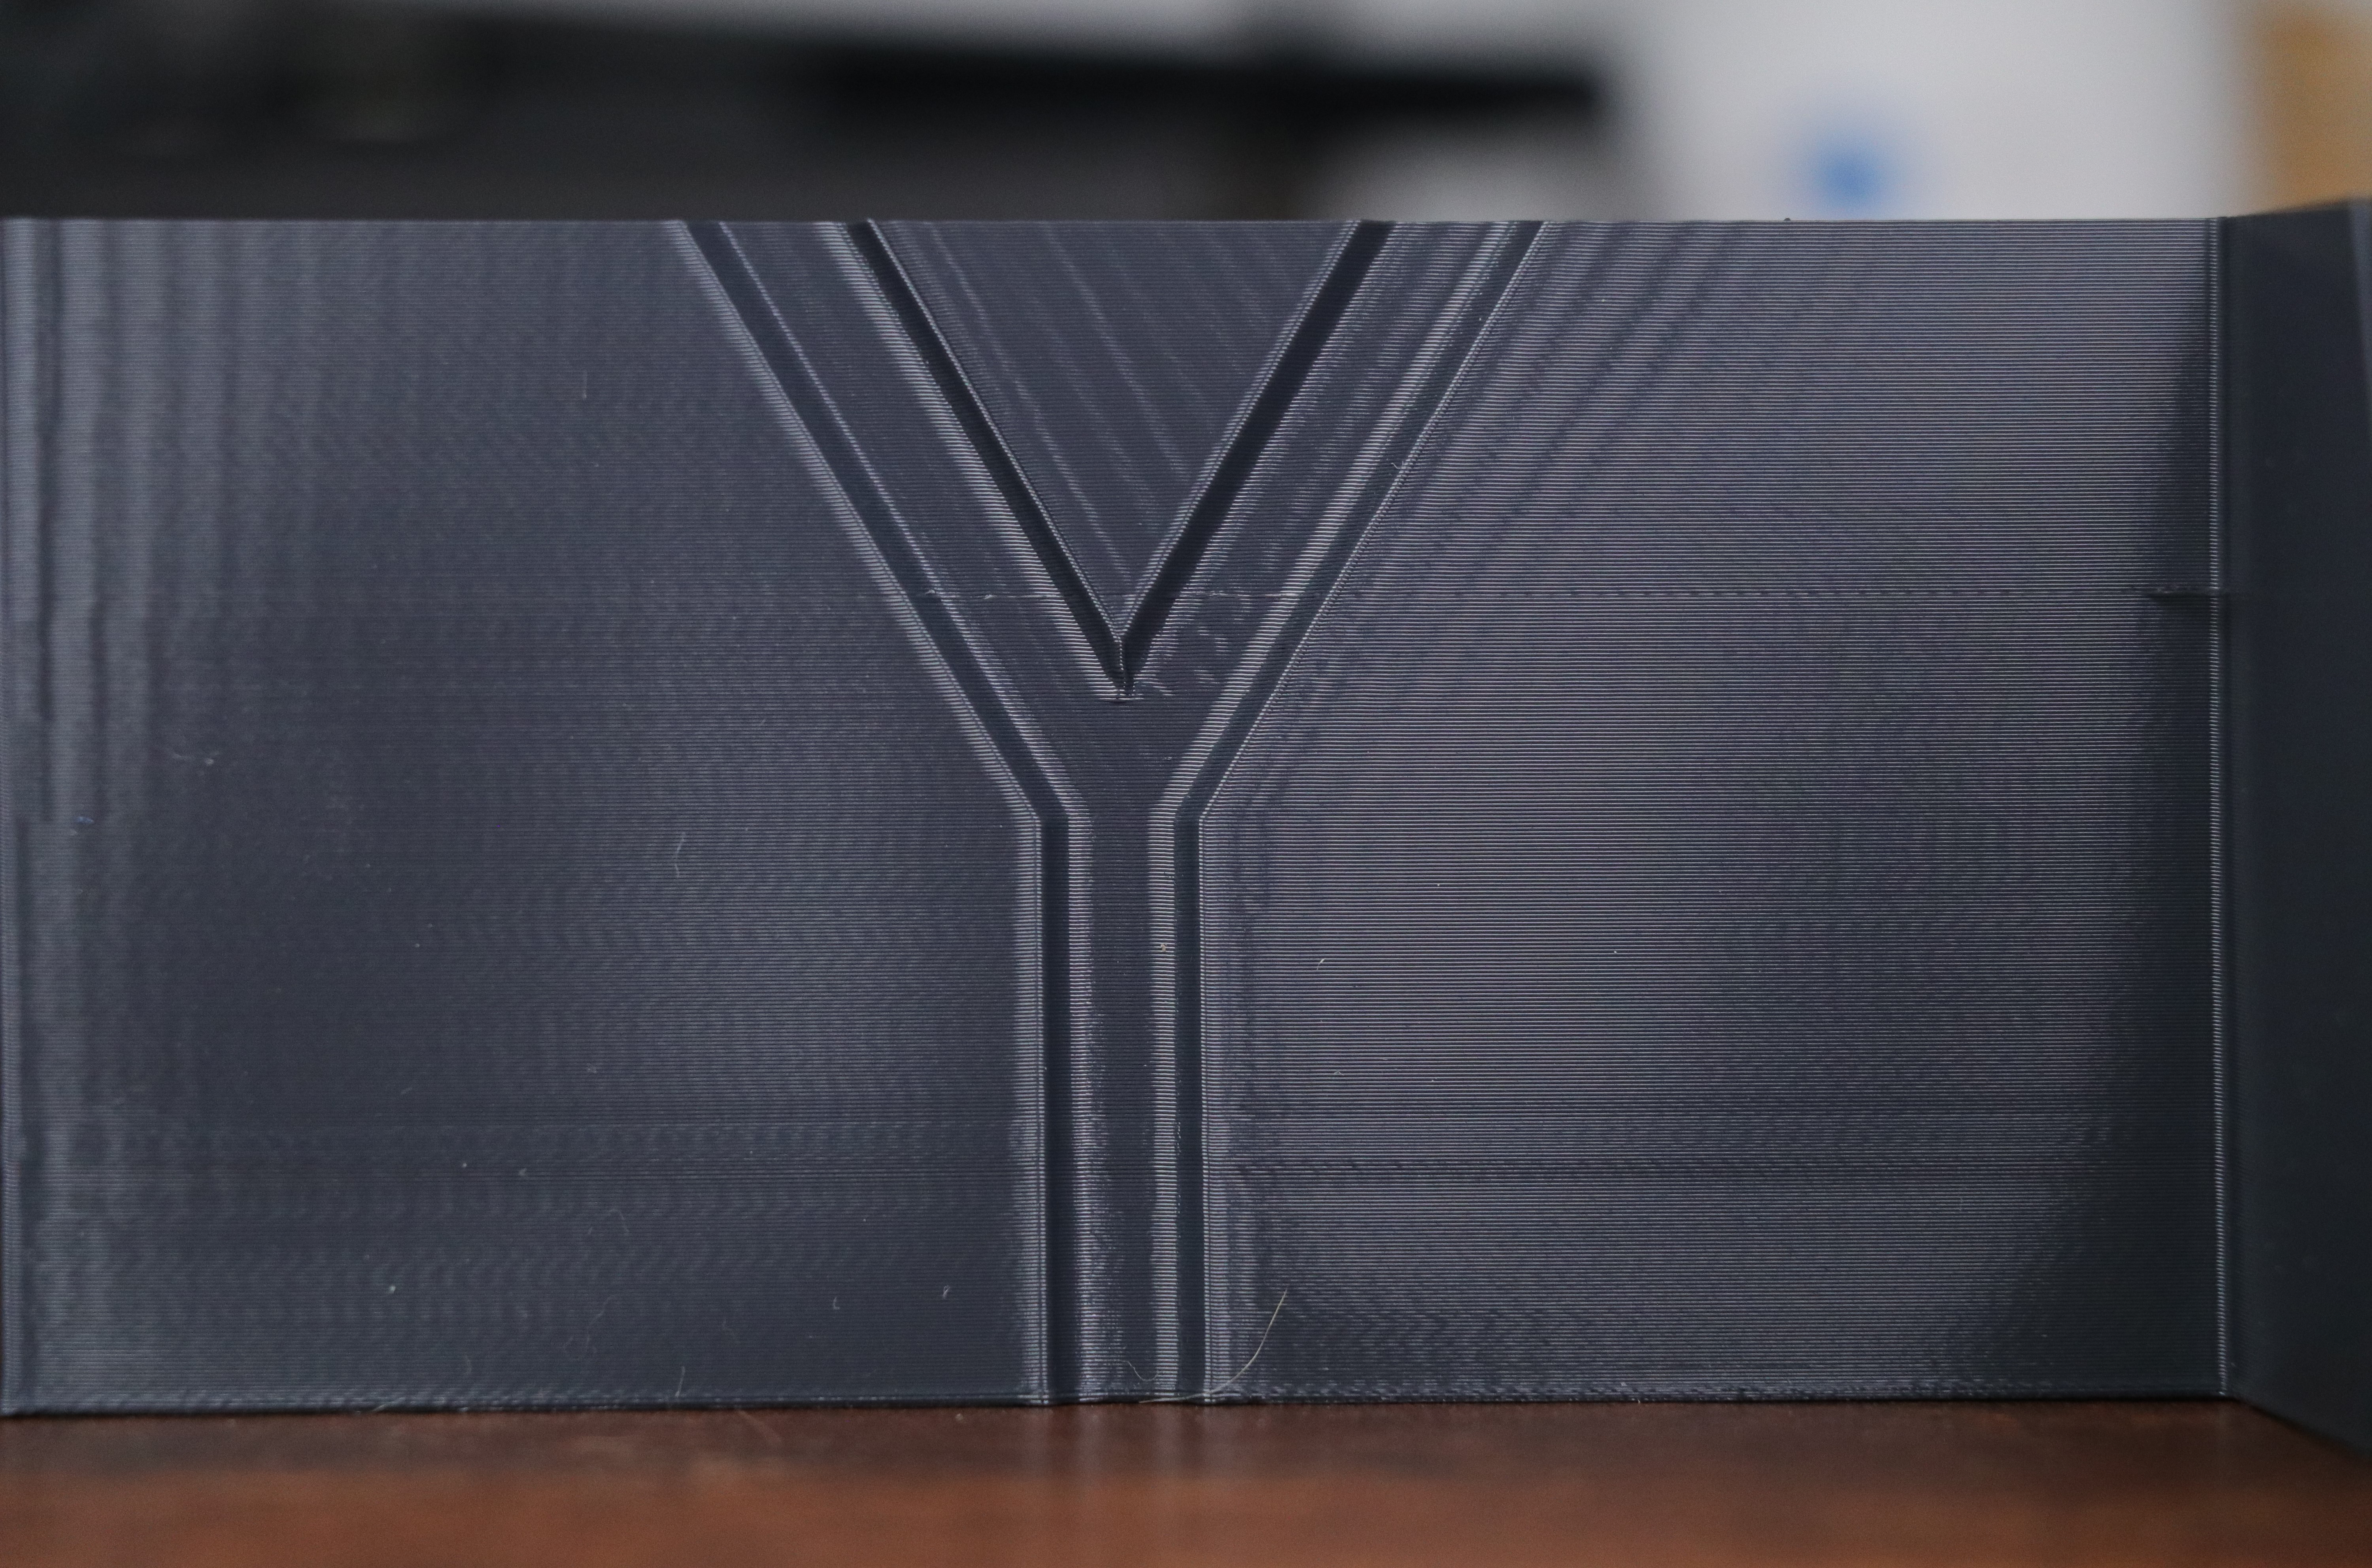
How to analyze the results?
- Examine the vertical walls of the print for any fine artifacts or inconsistencies. Remember, we started at 40 mm/s and went up to 200 mm/s in 10 mm/s increments.
- Choose the value that is the smoothest and most consistent as your max printing speed. If you are using Klipper firmware and you want to make your 3D printer go faster without sacrificing quality, try tuning input shaper.
If you require further information, our detailed guide is available here: Speed Test in OrcaSlicer (VFA).
Retraction Test
What is it?
Retraction is how much the printer physically pulls back the fillament from the nozzle when the nozzle moves from one area to another area. The retraction value is typically the distance in millimeters that the filament is pulled back. Slicers usually provide options for retraction distance and retraction speed.
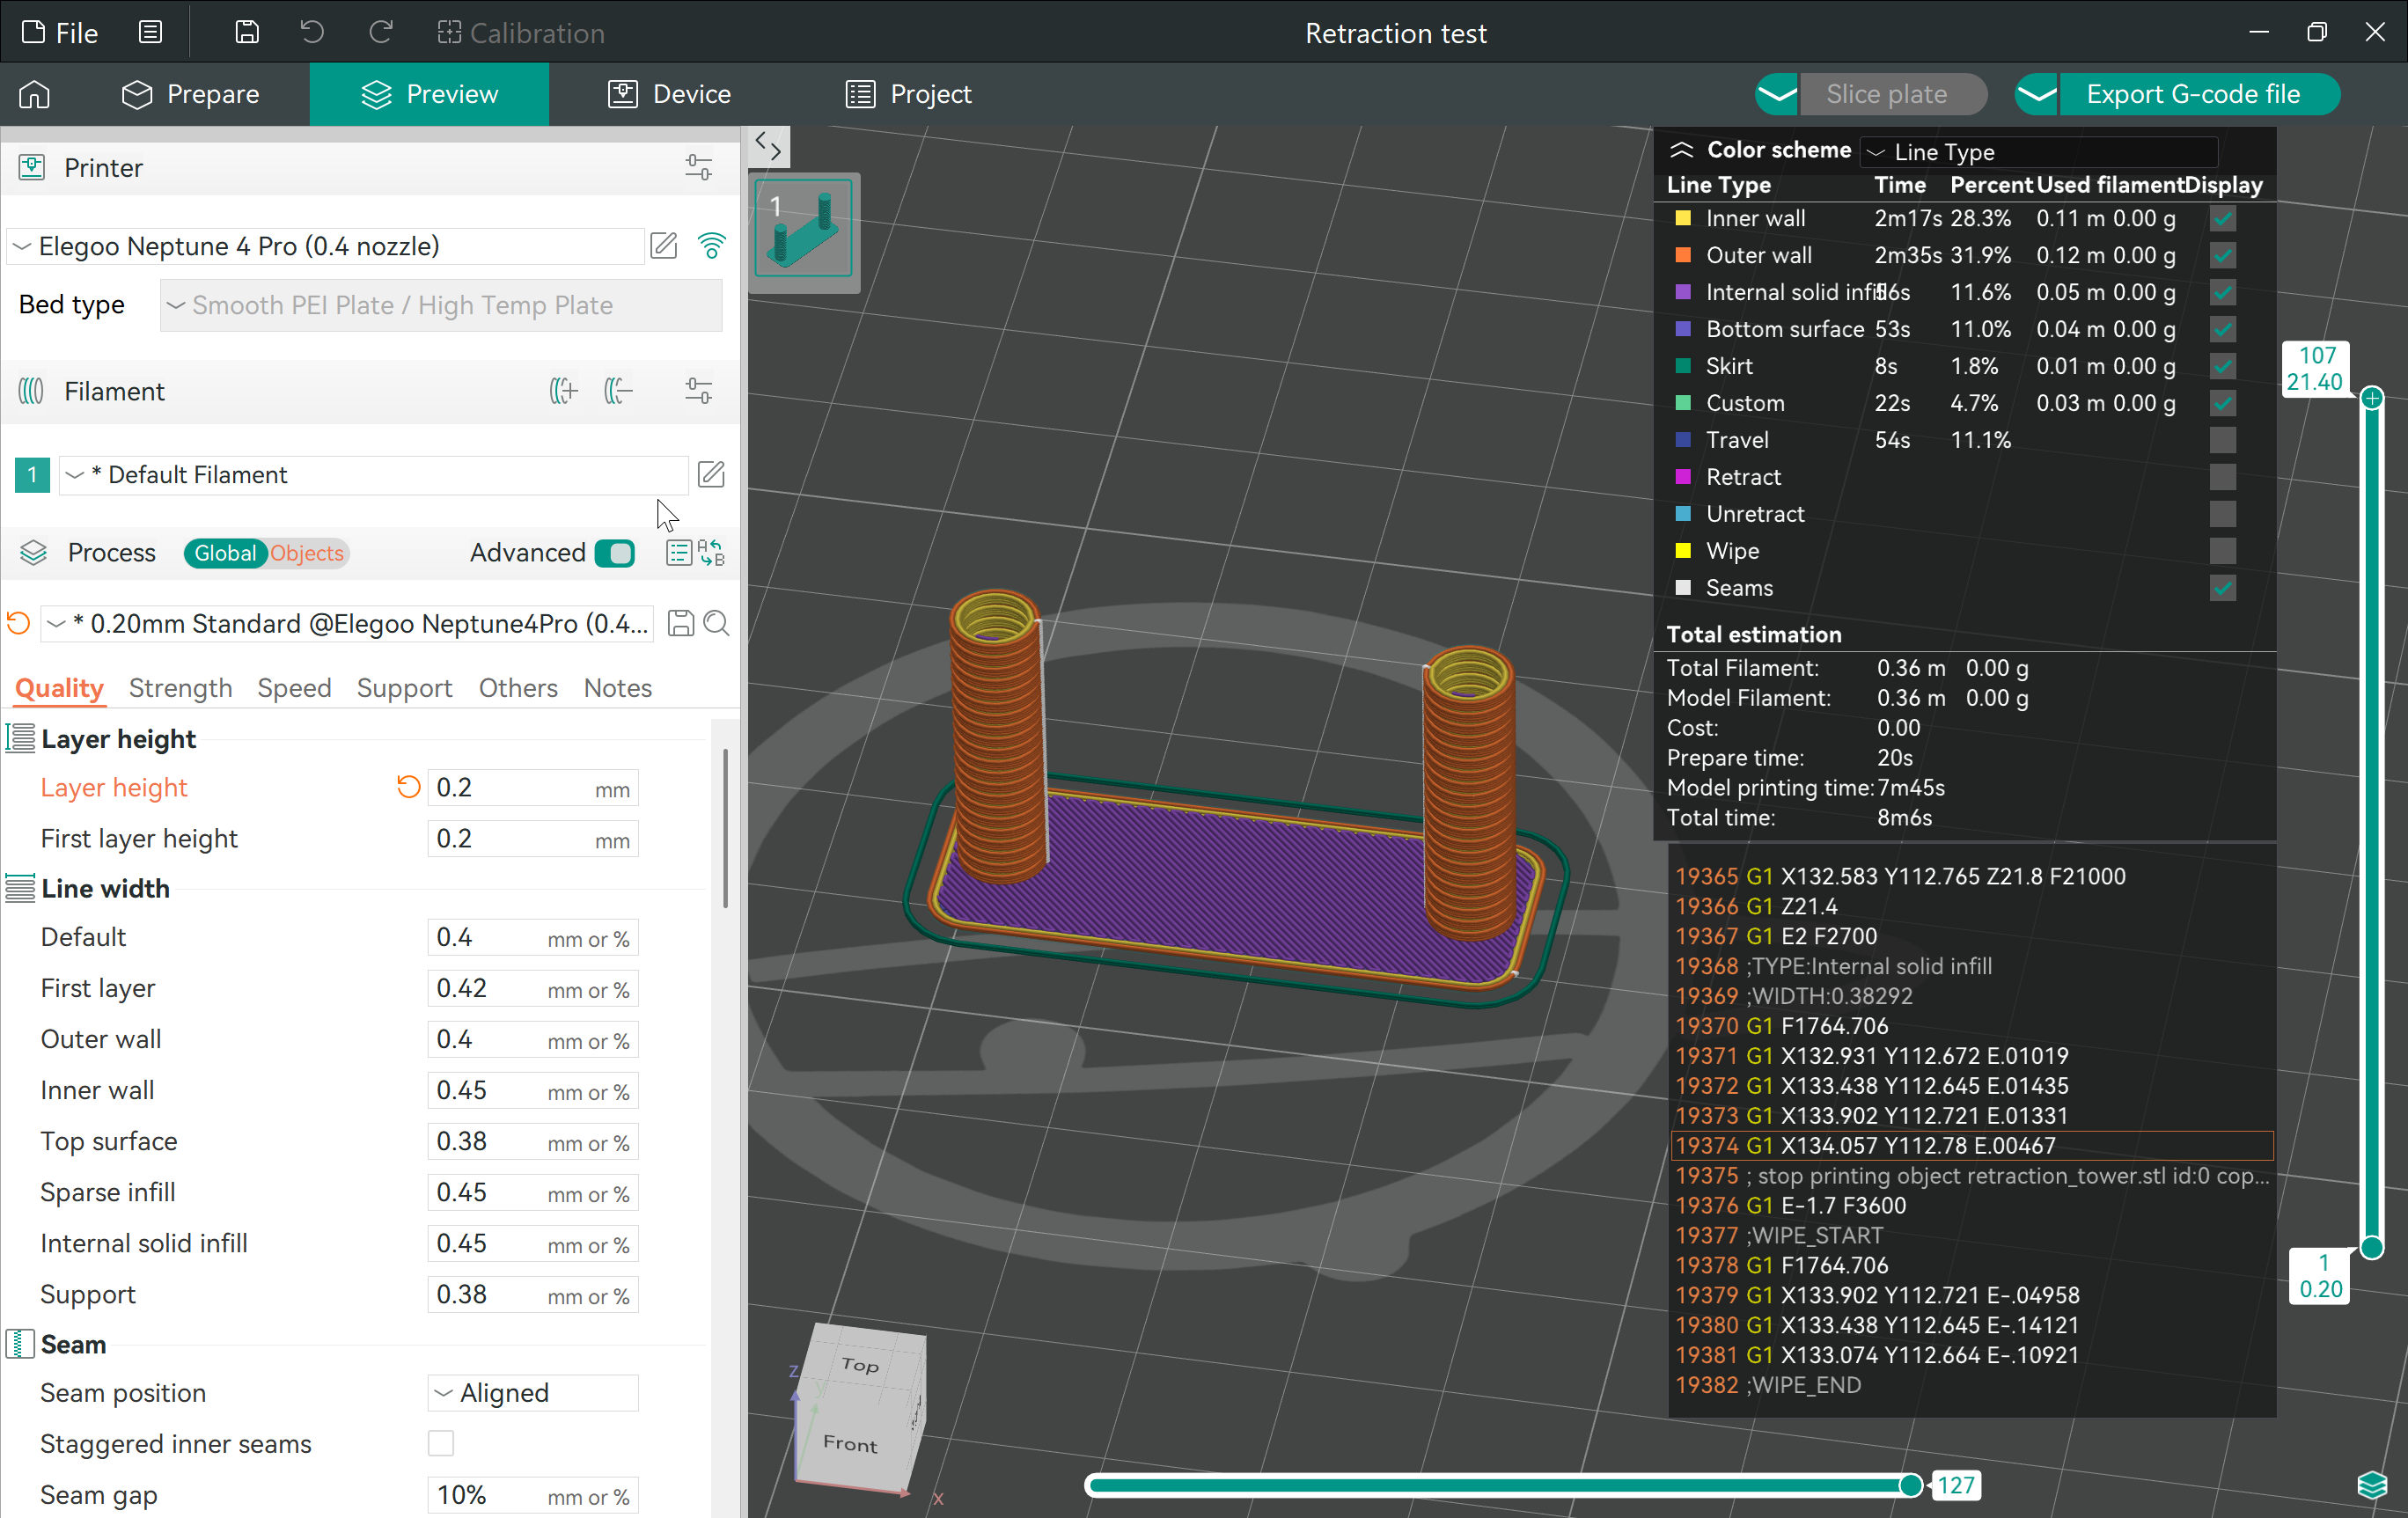
When should you do a retraction test?
Generally, you only really need to tune it if you are having issues with filament stringing while printing. Before tuning retraction, it's a good idea to make sure your temperature is tuned and your filament is dry.
Steps:
- Select "Retraction test" in the Orca Slicer Calibration menu.
- Choose the start and end retraction: Use the default values or check the retraction you currently have set in your 3D slicer software as a reference, and enter values above and below the currently set value for retraction distance. Leave the default interval of 0.2mm.
- Print the retraction test model.
How to analyze the results?
Look at the model and find the height that has the least amount of stringing between the two posts of the tower using a set of calipers or a ruler. Remember the interval is 0.2mm every 1mm of the model.
Once you find the optimal retraction distance, set this value for the filament you are using in OrcaSlicer.
For more comprehensive insights and detailed steps, our article here provides everything you need to know: Retraction Test.
Next Steps
Now that your 3D printer is well-calibrated, install Obico for OctoPrint or Obico for Klipper to improve your 3D printing experience with full 3D printer remote access with Obico's mobile and web app, AI failure detection and more!
Obico is an open-source smart 3D printing software that is fully compatible with OctoPrint and Klipper. Get started with Obico for free to instanly get access to:
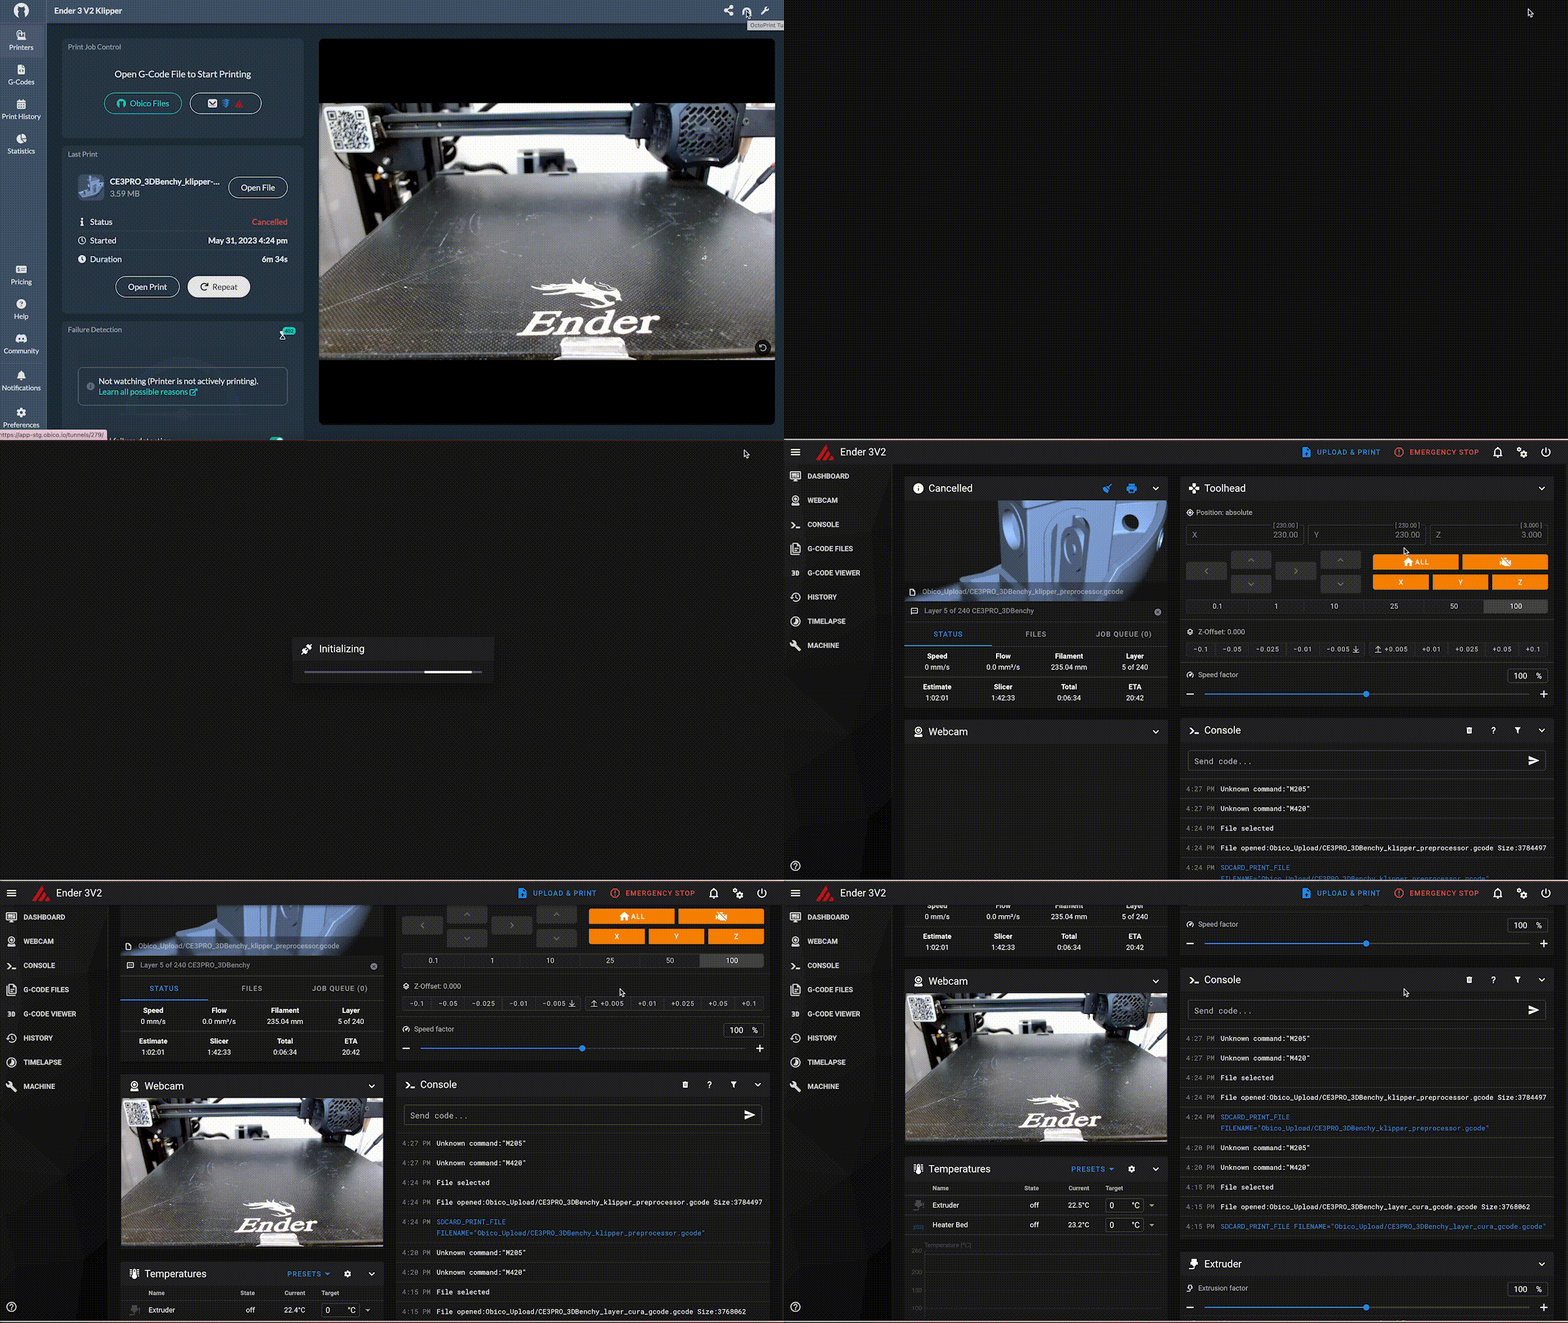
Integration with OctoPrint, Mainsail and Fluidd:
Obico works well with popular interfaces like Mainsail and Fluidd, providing a straightforward way to control your 3D printer. This integration allows for remote access to these interfaces, enabling you to manage your printing tasks from different locations.
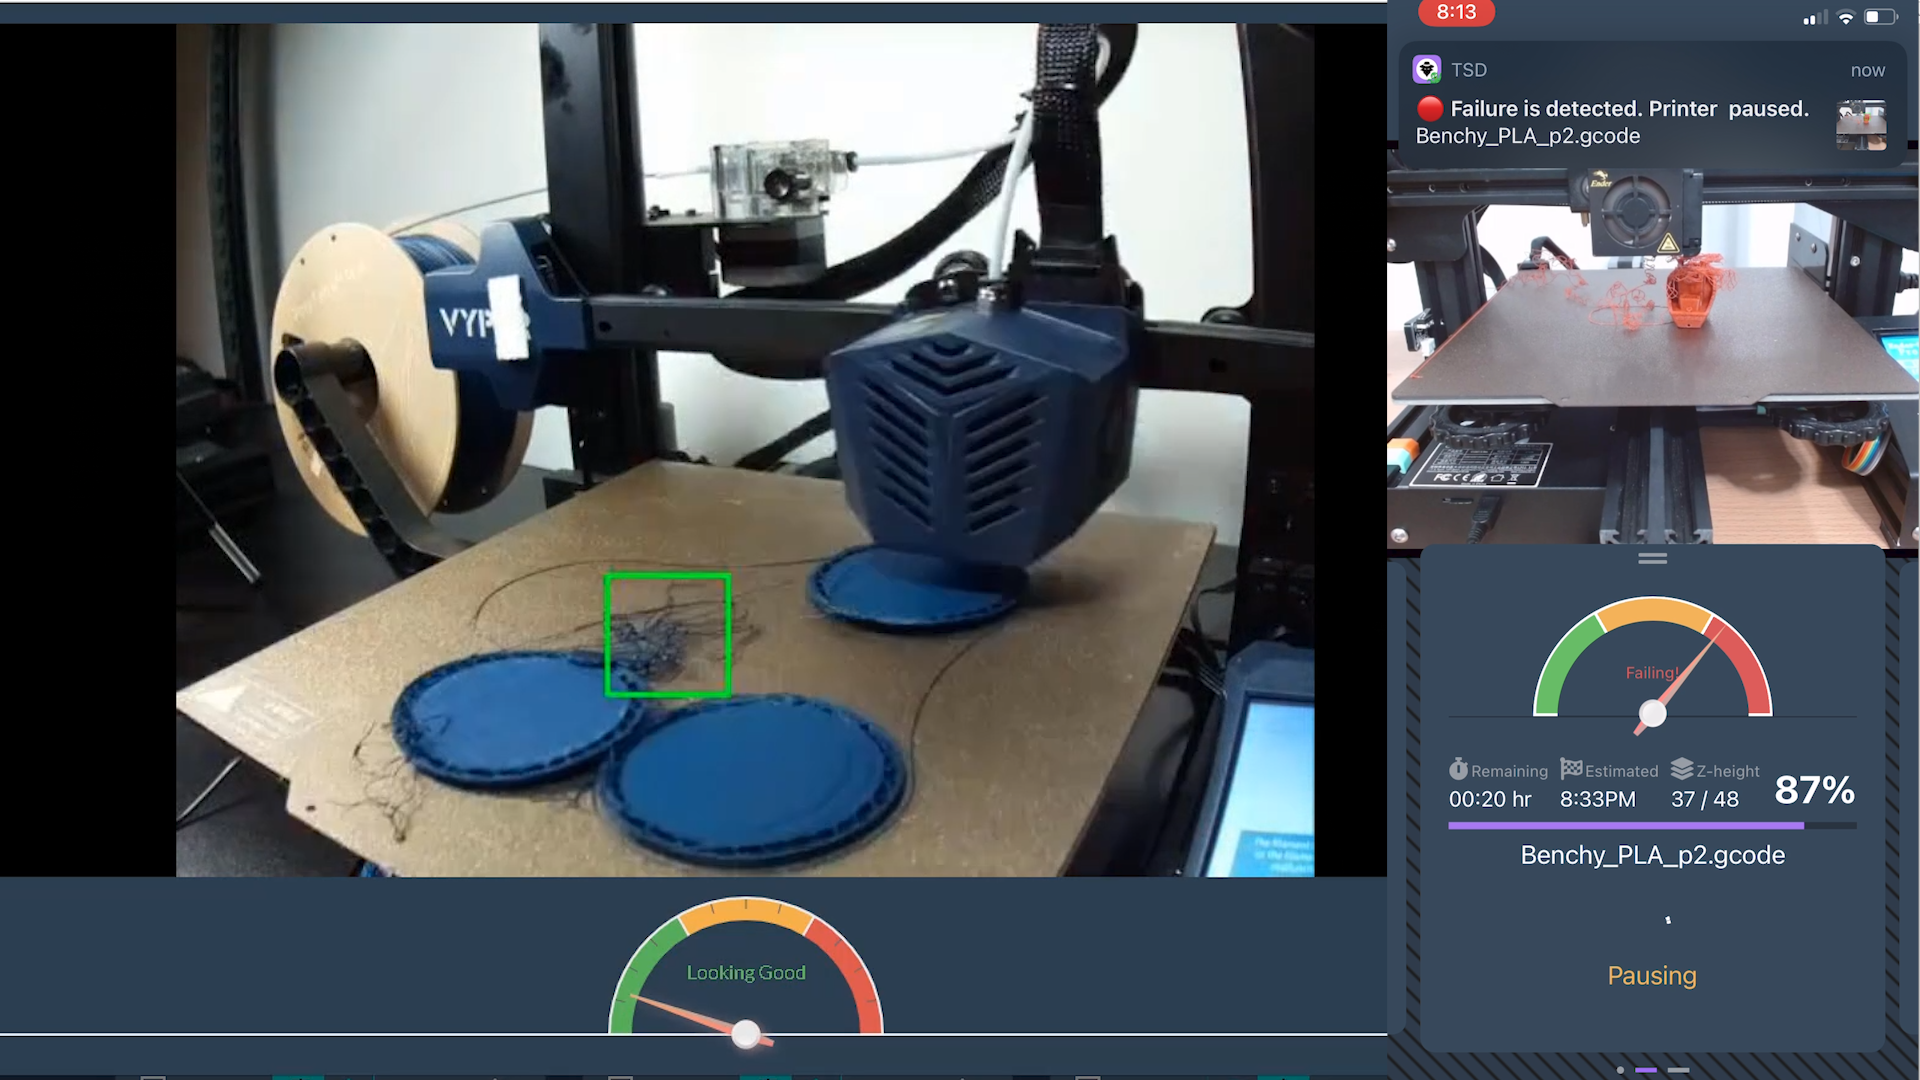
AI-Powered Failure Detection:
Obico was the first software to include an AI system that monitors your printer, alerting you to any potential issues or failures. Get added peace of midn preventing print errors and reduce wasted materials.
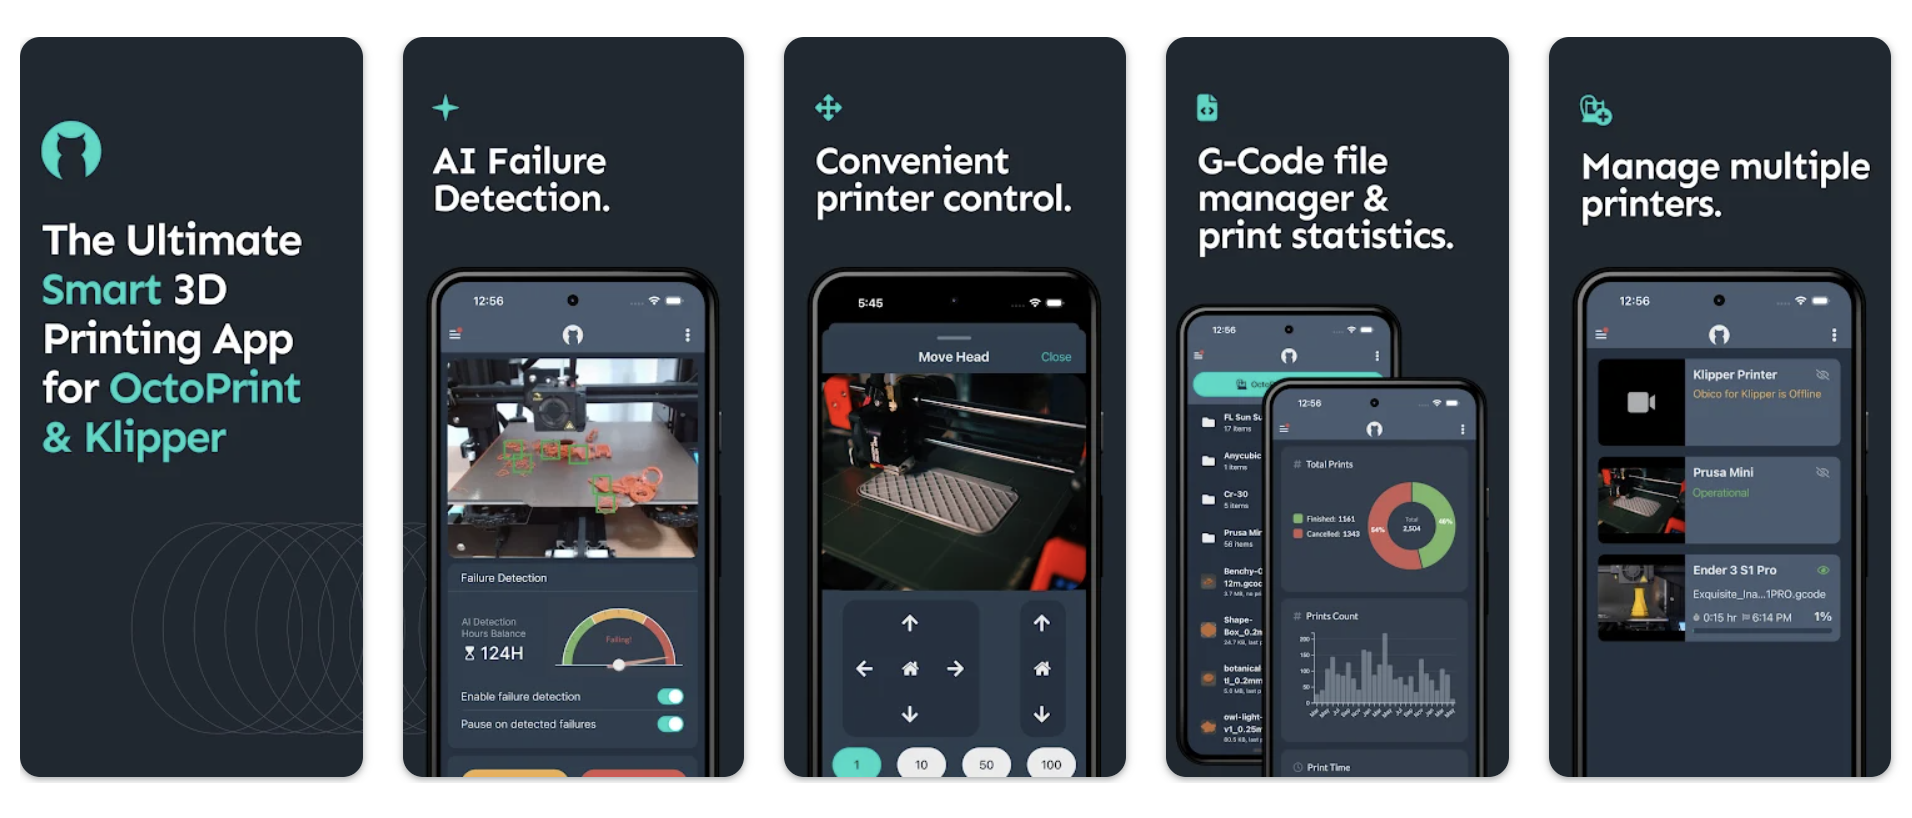
Mobile Apps:
Obico's mobile applications for iOS and Android keep you connected to your printer. Through these apps, you can start, pause, and keep an eye on your prints remotely, offering convenience and flexibility in how you manage your printing projects. The obico app also includes a bunch of other features including print history and statistics, remote g-code storage, printer livestream sharing and more!
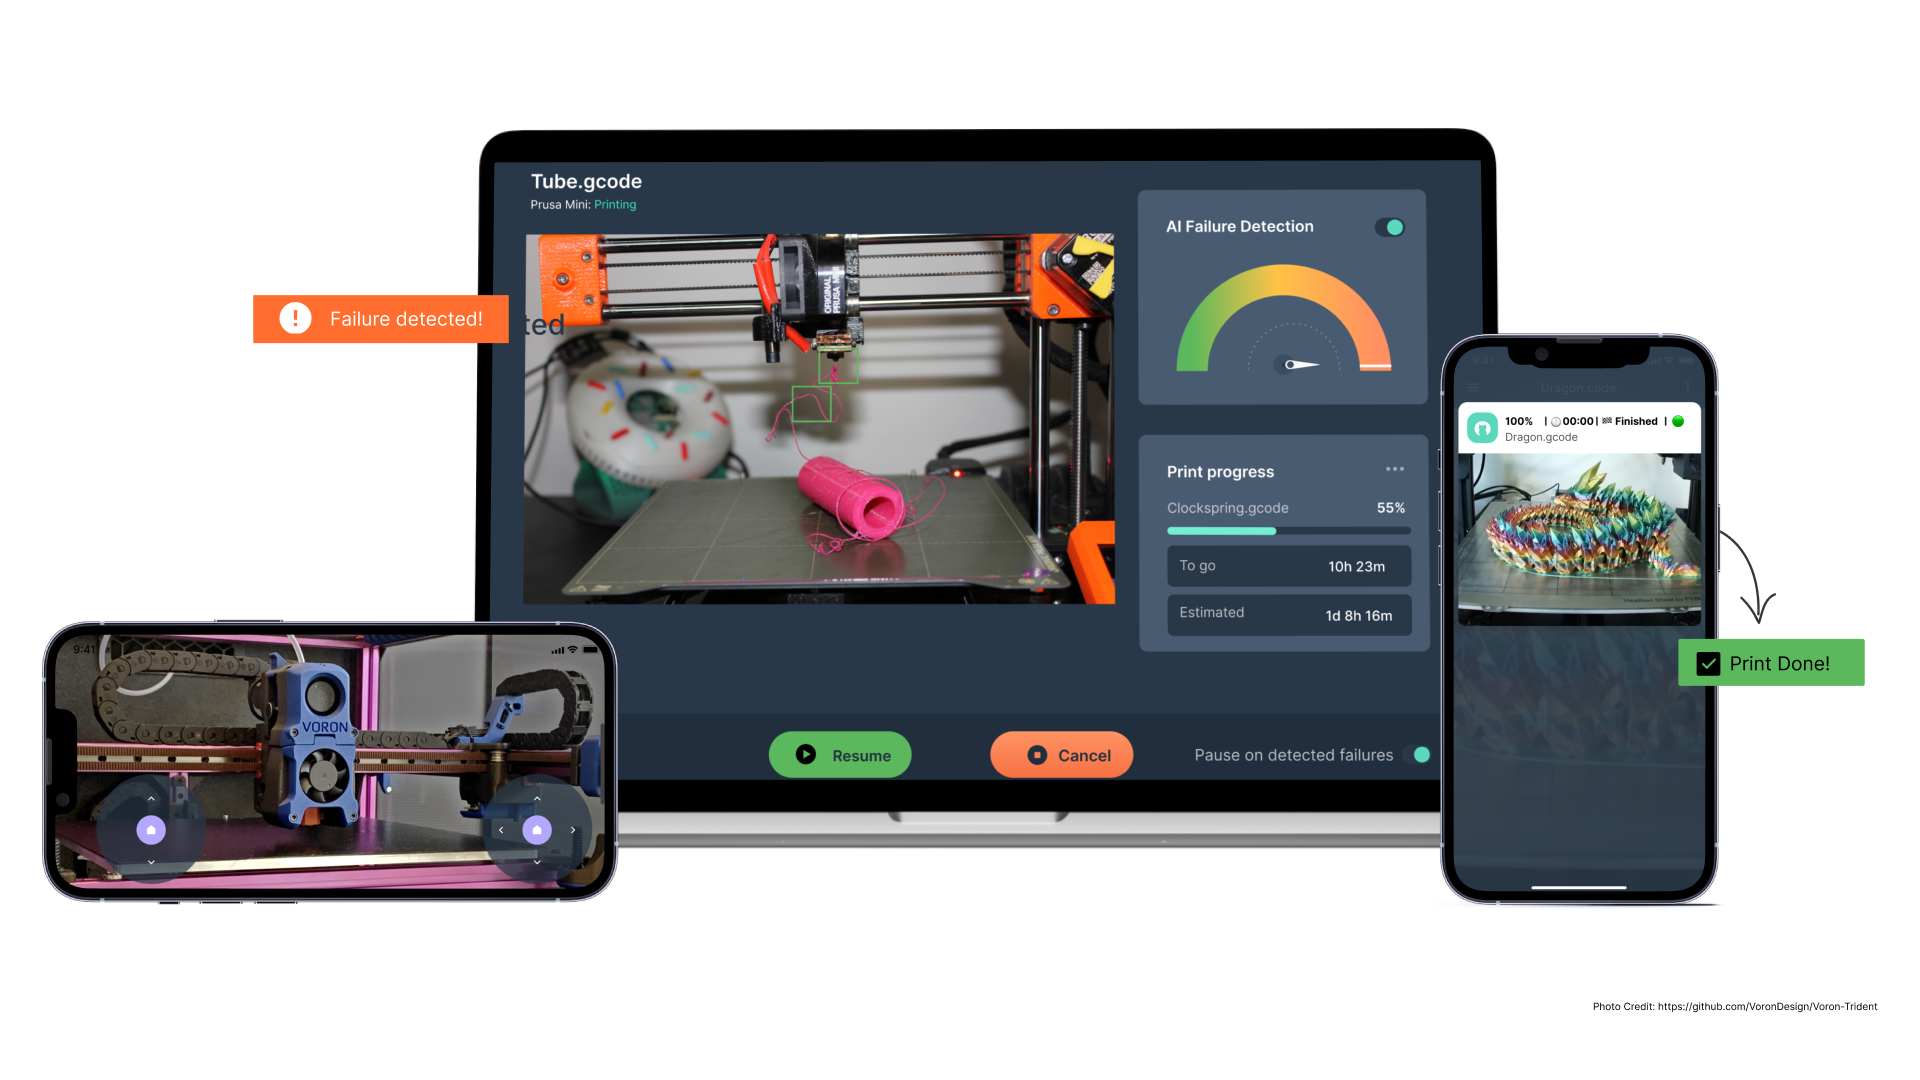
Real-Time Notifications:
The software keeps you updated with notifications about your printer's status and job progress. These updates can be received on various devices, ensuring you're always informed about your ongoing prints.
Link your printer to Obico in just a few clicks for free to get started!
Conclusion
Calibrating your 3D printer can feel like a chore, especially when you're itching to just start printing. But getting it right is key to those flawless prints we all love. That's where OrcaSlicer comes in, making the calibration process way easier and a lot less intimidating. It's packed with user-friendly tools that guide you step-by-step, so you can fine-tune your printer without feeling overwhelmed. Whether you're a seasoned printing veteran or just diving into the world of 3D printing, OrcaSlicer's intuitive setup helps you nail down the perfect settings.
It's all about getting consistent, high-quality prints, and OrcaSlicer does a great job at making sure you spend more time printing and less time tweaking. Plus, with its clear instructions and feedback, you'll be a calibration pro in no time, ensuring your printer is always ready to roll out impressive prints.
Also available in: Deutsch | Español | Français | Italiano | Nederlands | Polski | Português | Русский
