A Guide to the OrcaSlicer Device Tab
Source: macrovector via Freepik
The OrcaSlicer’s Device Tab makes the software an all-in-one application for your 3D printing workflow. You can slice the file in OrcaSlicer, send it to your 3D printer, and access the printer’s interface through a single tab in OrcaSlicer.
If you're new to OrcaSlicer or need a refresher on its basic functions and setup, we recommend starting with our guide, "Getting Started with OrcaSlicer". This introductory guide provides a comprehensive overview that will help you efficiently get your 3D printer up and running with OrcaSlicer.
In this short article, we'll outline the process of using the device tab in OrcaSlicer with your 3D printer. We’ll cover the usage of Klipper, Octoprint, and Obico interfaces in OrcaSlicer and how you stand to benefit from this feature.
Let’s make a splash with OrcaSlicer!
What is the Device Tab in OrcaSlicer?
The Device Tab in OrcaSlicer allows you to access and manage your 3D printers directly from the OrcaSlicer interface. It supports around 11 network protocols, from PrusaLink, Klipper, Octoprint, Obico, Repetier, and Flashforge.
Using the device tab, you can access the control interface for your 3D printer in a single software program and reduce the back-and-forth of switching between the slicer and browser window.
Benefits of Device Tab
Centralized Control
OrcaSlicer supports a wide variety of 3D printers with different firmware. If you’re using OrcaSlicer for all your different 3D printers, the device tab gives you a central point of access for all the machines. You can manage all the printers from a single interface without switching between different software applications.
Enhanced Monitoring
You can see live updates on print status, monitor temperatures, and receive error notifications in the OrcaSlicer. This ensures you can promptly address any issues that arise during your print jobs.
User-Friendly Interface
The device tab in OrcaSlicer integrates your printer’s interface seamlessly. The setup is straightforward, and once done, the entire workflow is incredibly user-friendly. Whether you're a hobbyist or a professional, you'll quickly feel at ease managing your 3D printers with OrcaSlicer.
Remote Access
With platforms like Obico, you can manage and monitor your 3D printer remotely, adding flexibility and convenience. This is especially useful if you need to oversee prints while away from your printer's location.
Adding Klipper Interface in OrcaSlicer��
Klipper is a 3D printer firmware that is fine-tuned to deliver high performance and extensive configuration options. Integrating Klipper with OrcaSlicer can significantly enhance the control and efficiency of your 3D printing setup.
Steps to Add Klipper Interface:
- Install Klipper: Ensure Klipper is installed, configured, and running on your 3D printer.
- Open OrcaSlicer: Launch OrcaSlicer on your computer.
- Choose a 3D printer: Select your 3D printer from the Printer Section’s dropdown menu.
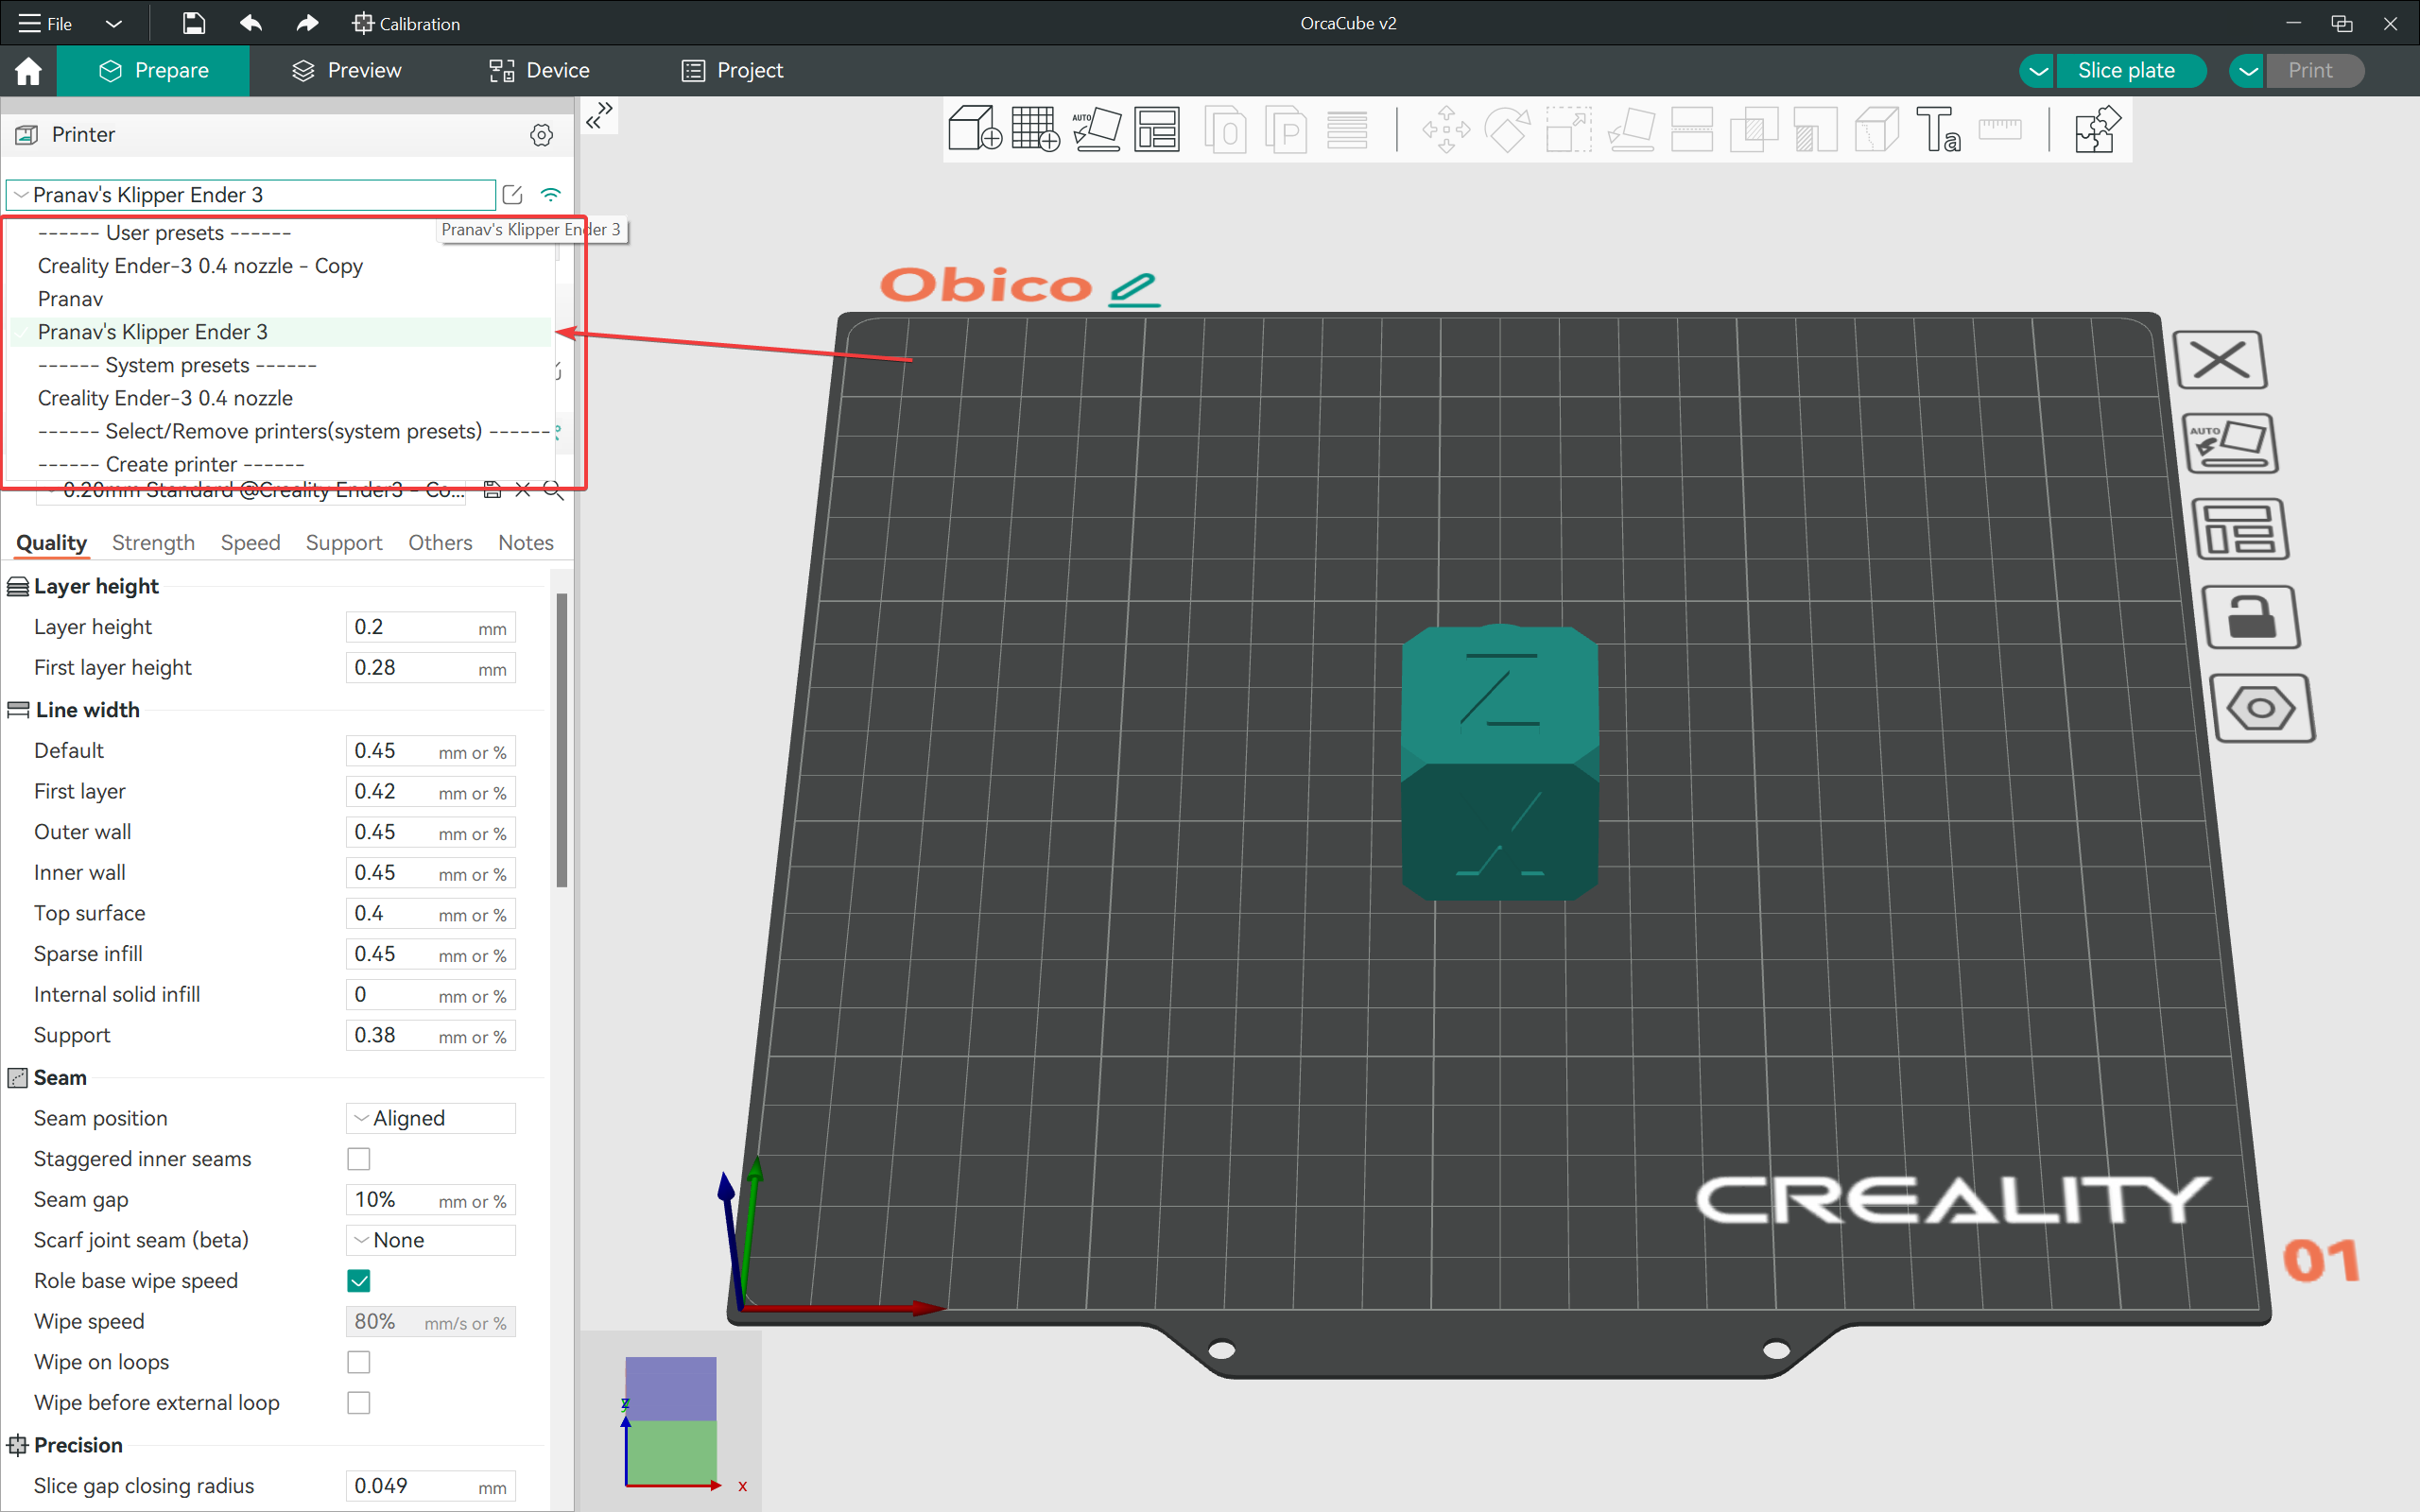
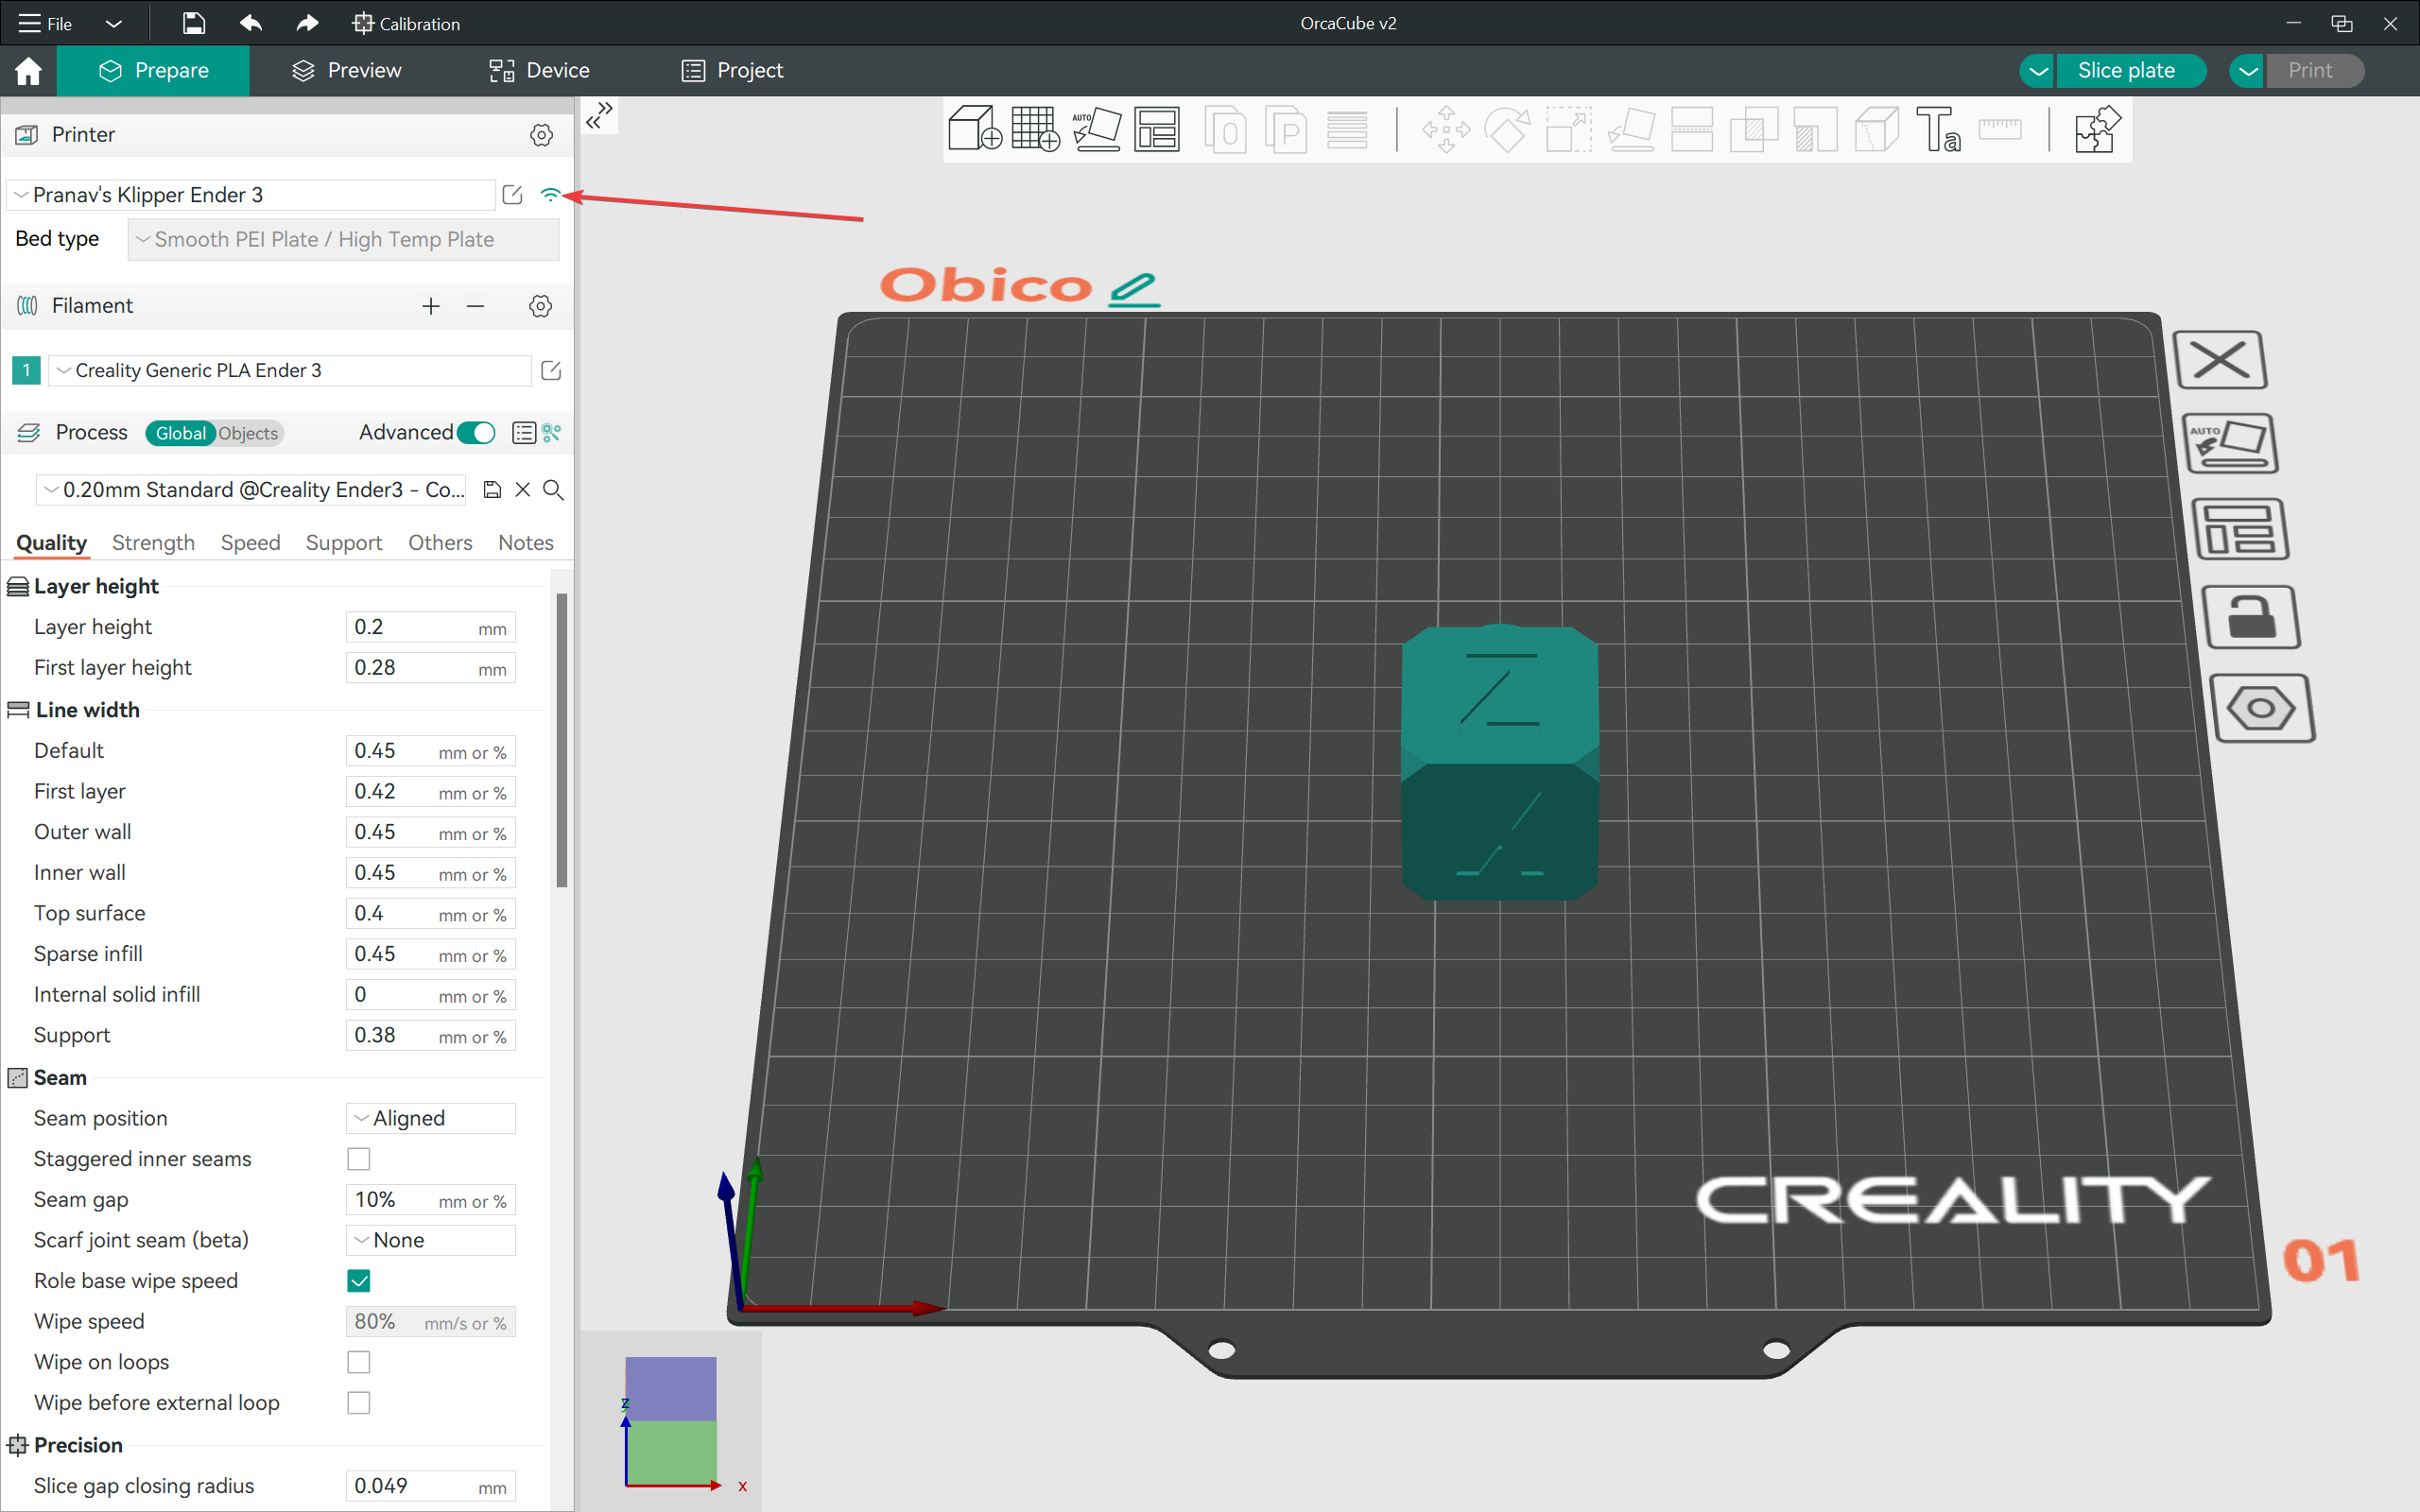
- Open Printer Network Settings: Click on the WiFi symbol next to your 3D printer name.
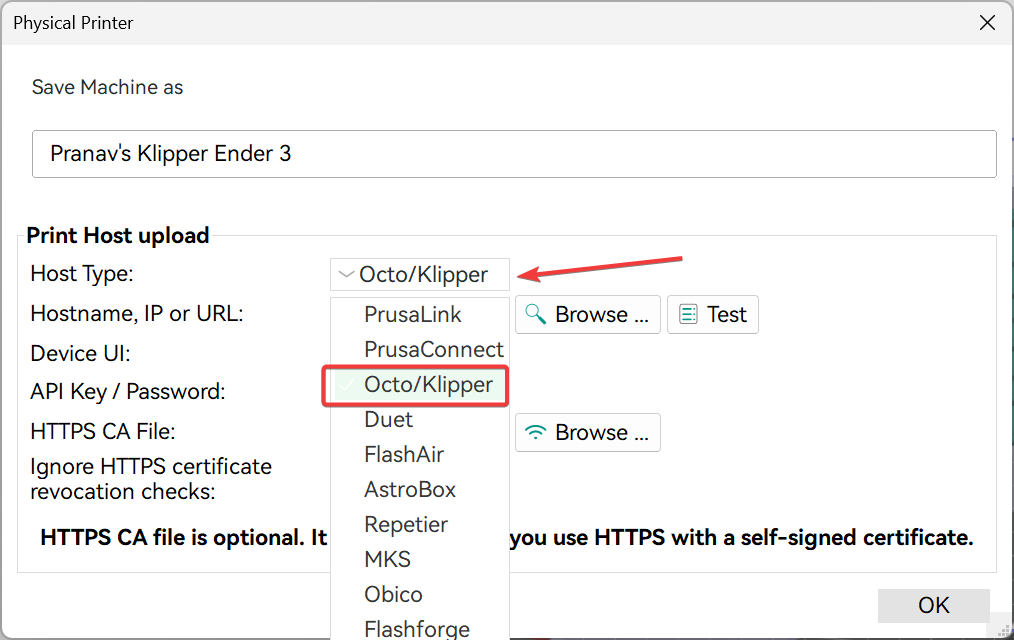
- Select the Host Type: Open the dropdown menu for the Host Type and Select the option Octo/Klipper.
- Connect OrcaSlicer to your 3D printer: Input the IP address of your networked 3D printer in the IP section. Click on the Test option to verify the connection. Click on OK once the connection is verified.

-
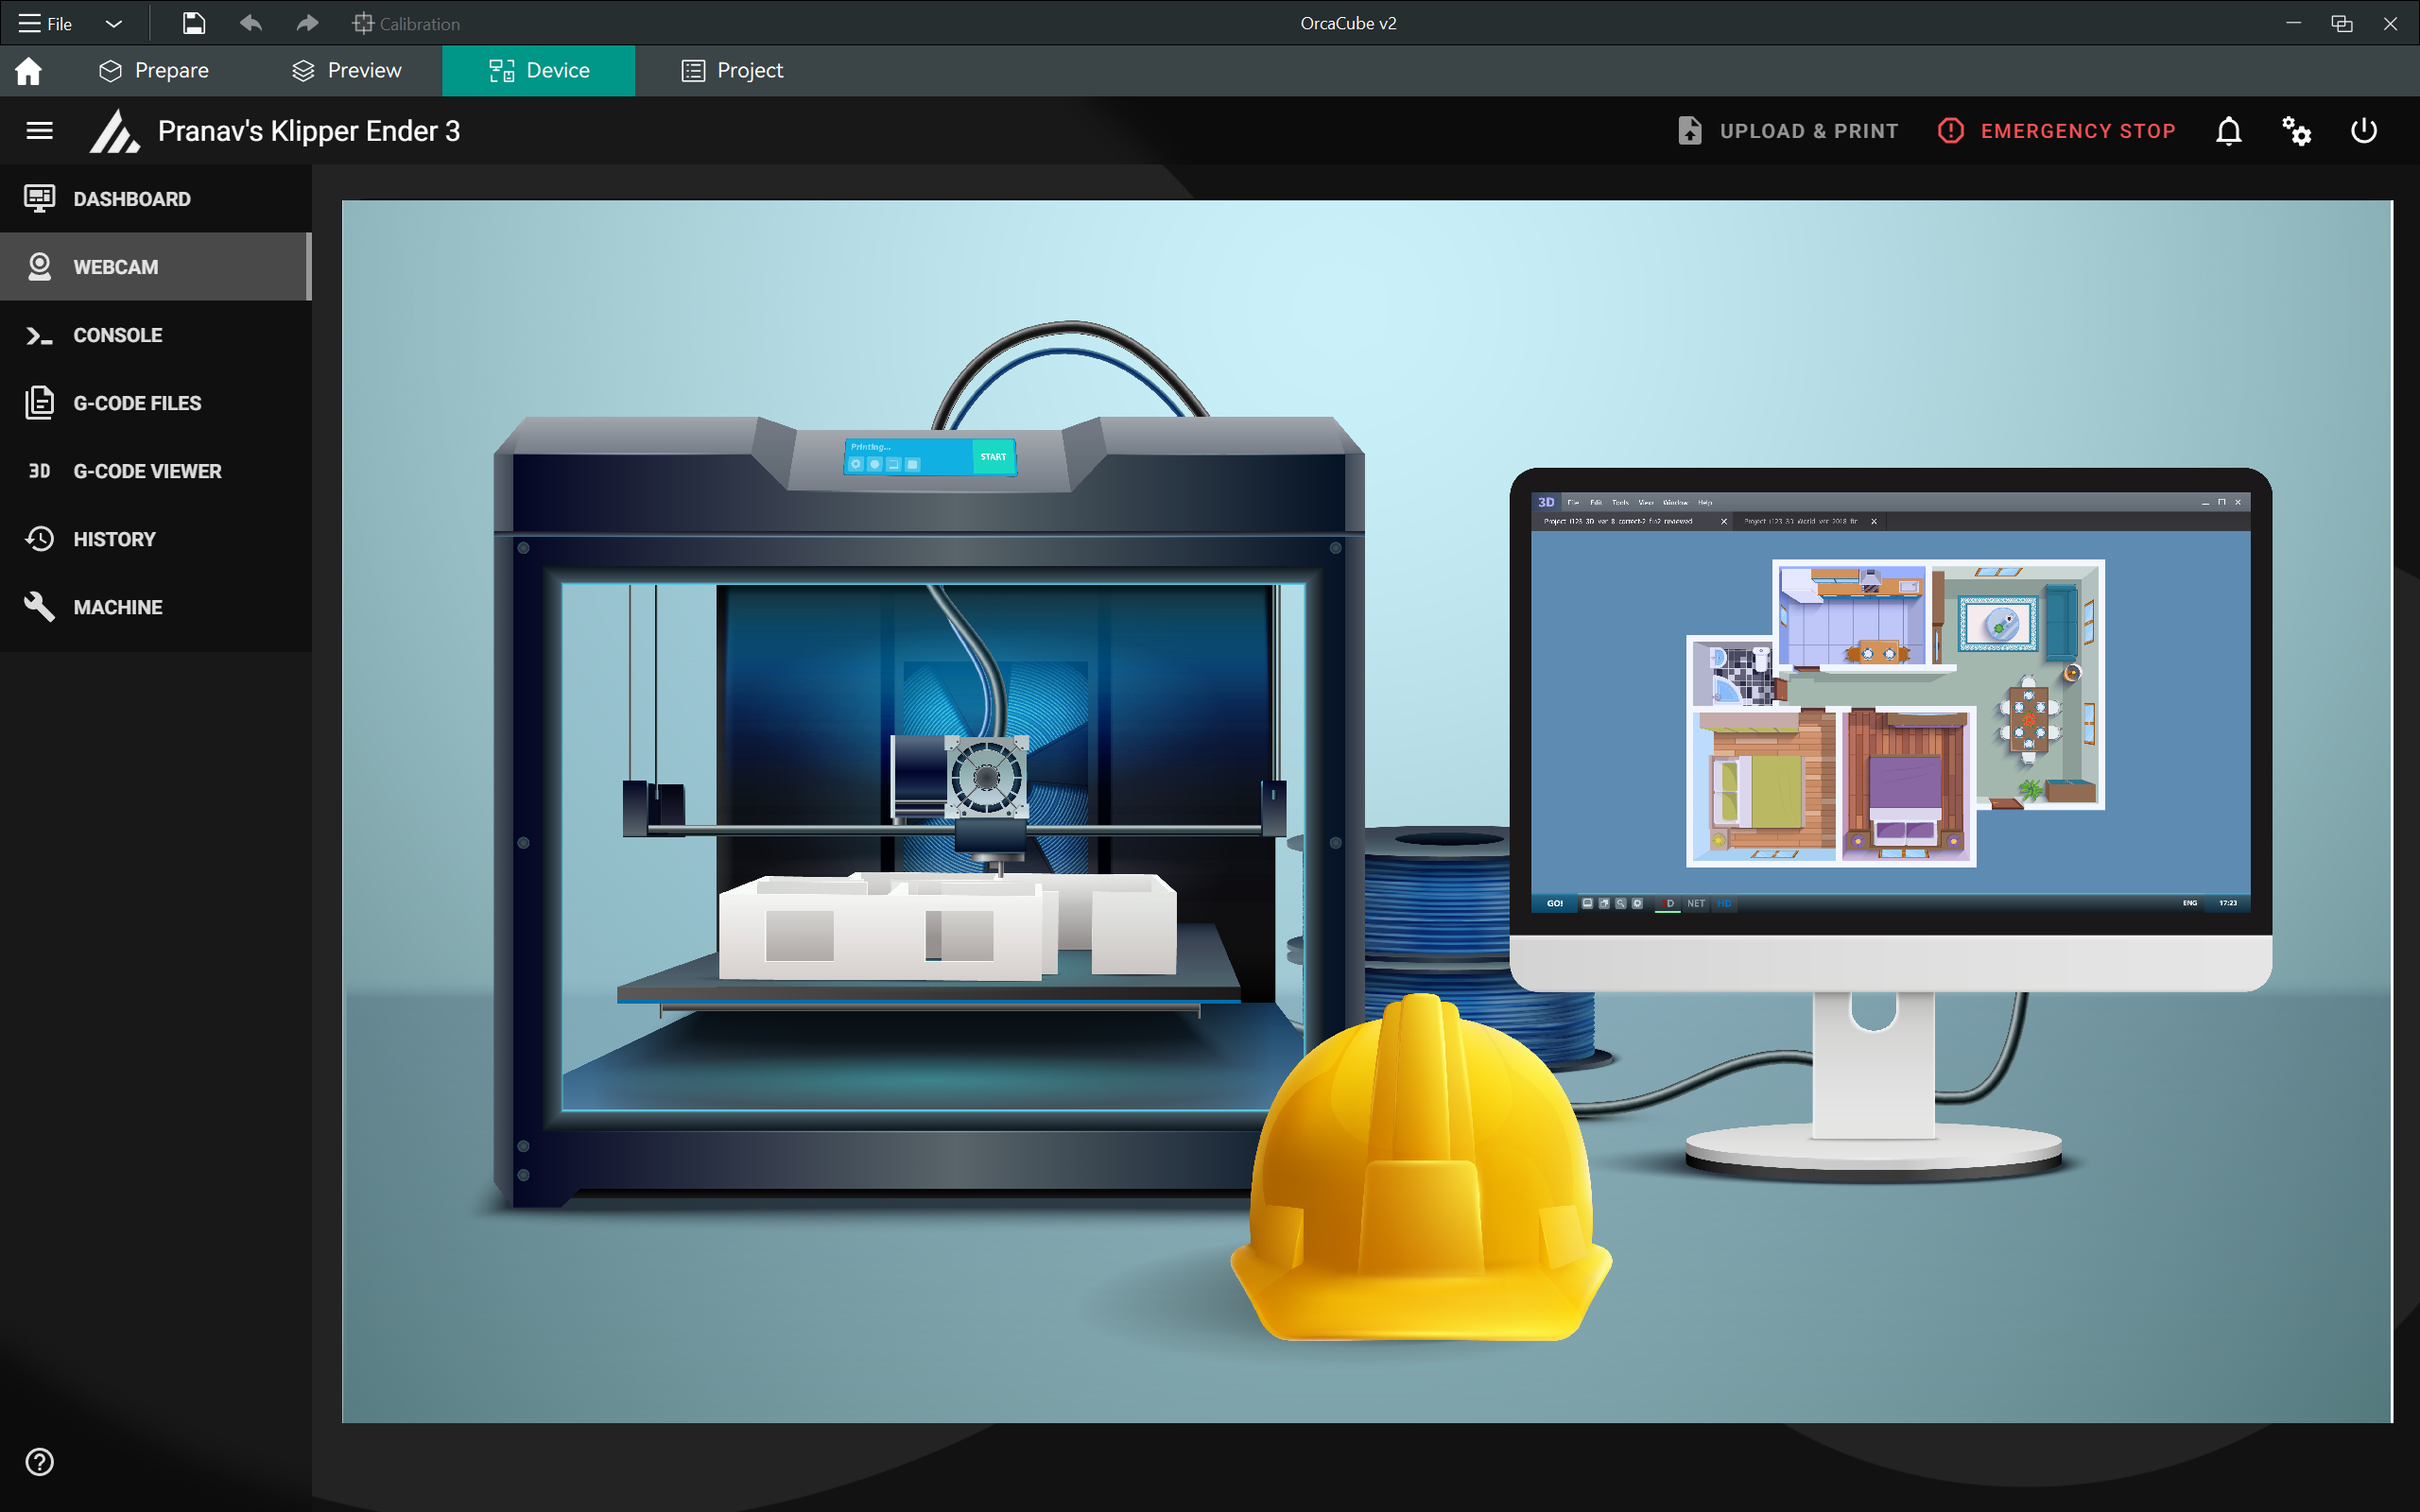
Navigate to Device Tab: Click on the Device Tab in the OrcaSlicer interface. You should now see the Klipper interface for your 3D printer in this section. You can right click in this window and click Refresh if the interface is stuck or taking too long to load.
Adding OctoPrint in OrcaSlicer
Octoprint is one of the most popular open-source 3D printer management software. It provides excellent remote monitoring and control capabilities. The Octoprint Plugins are a standout feature and extend the abilities of your 3D printer. Integrating OctoPrint with OrcaSlicer allows for seamless management of your 3D printer.
Steps to Add OctoPrint Interface:
- Install Octoprint: Ensure Octoprint is installed, configured, and running on your 3D printer.
- Open OrcaSlicer: Launch OrcaSlicer on your computer.
- Choose a 3D printer: Select your 3D printer from the Printer Section’s dropdown menu.
- Open Printer Network Settings: Click on the WiFi symbol next to your 3D printer name.
- Select the Host Type: Open the dropdown menu for the Host Type and Select the option as Octo/Klipper.
- Connect OrcaSlicer to your 3D printer: Input the IP address of your Octoprint 3D printer in the IP section. Click on the Test option to verify the connection. Click on OK once the connection is verified.
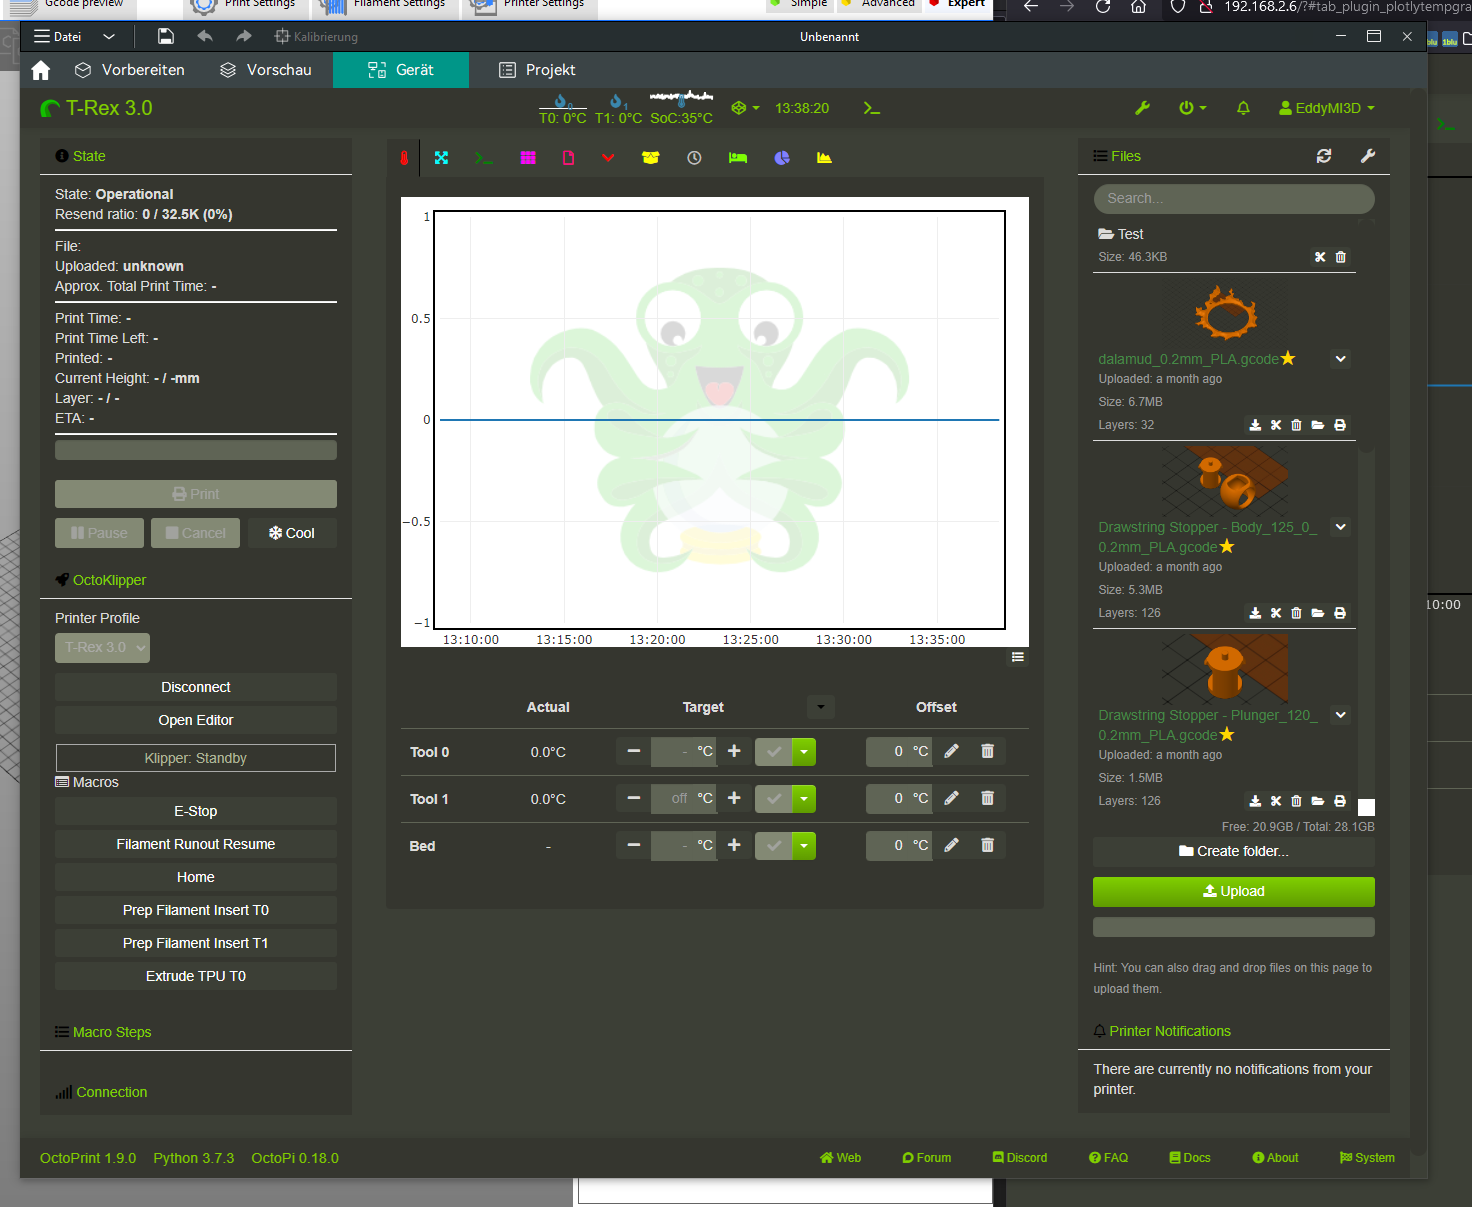
- Navigate to Device Tab: Click on the Device Tab in the OrcaSlicer interface. You should now see the Octoprint interface for your 3D printer in this section. You can right click in this window and click Refresh if the interface is stuck or taking too long to load.
Source: Ewald_Ikemann via Octoprint Community
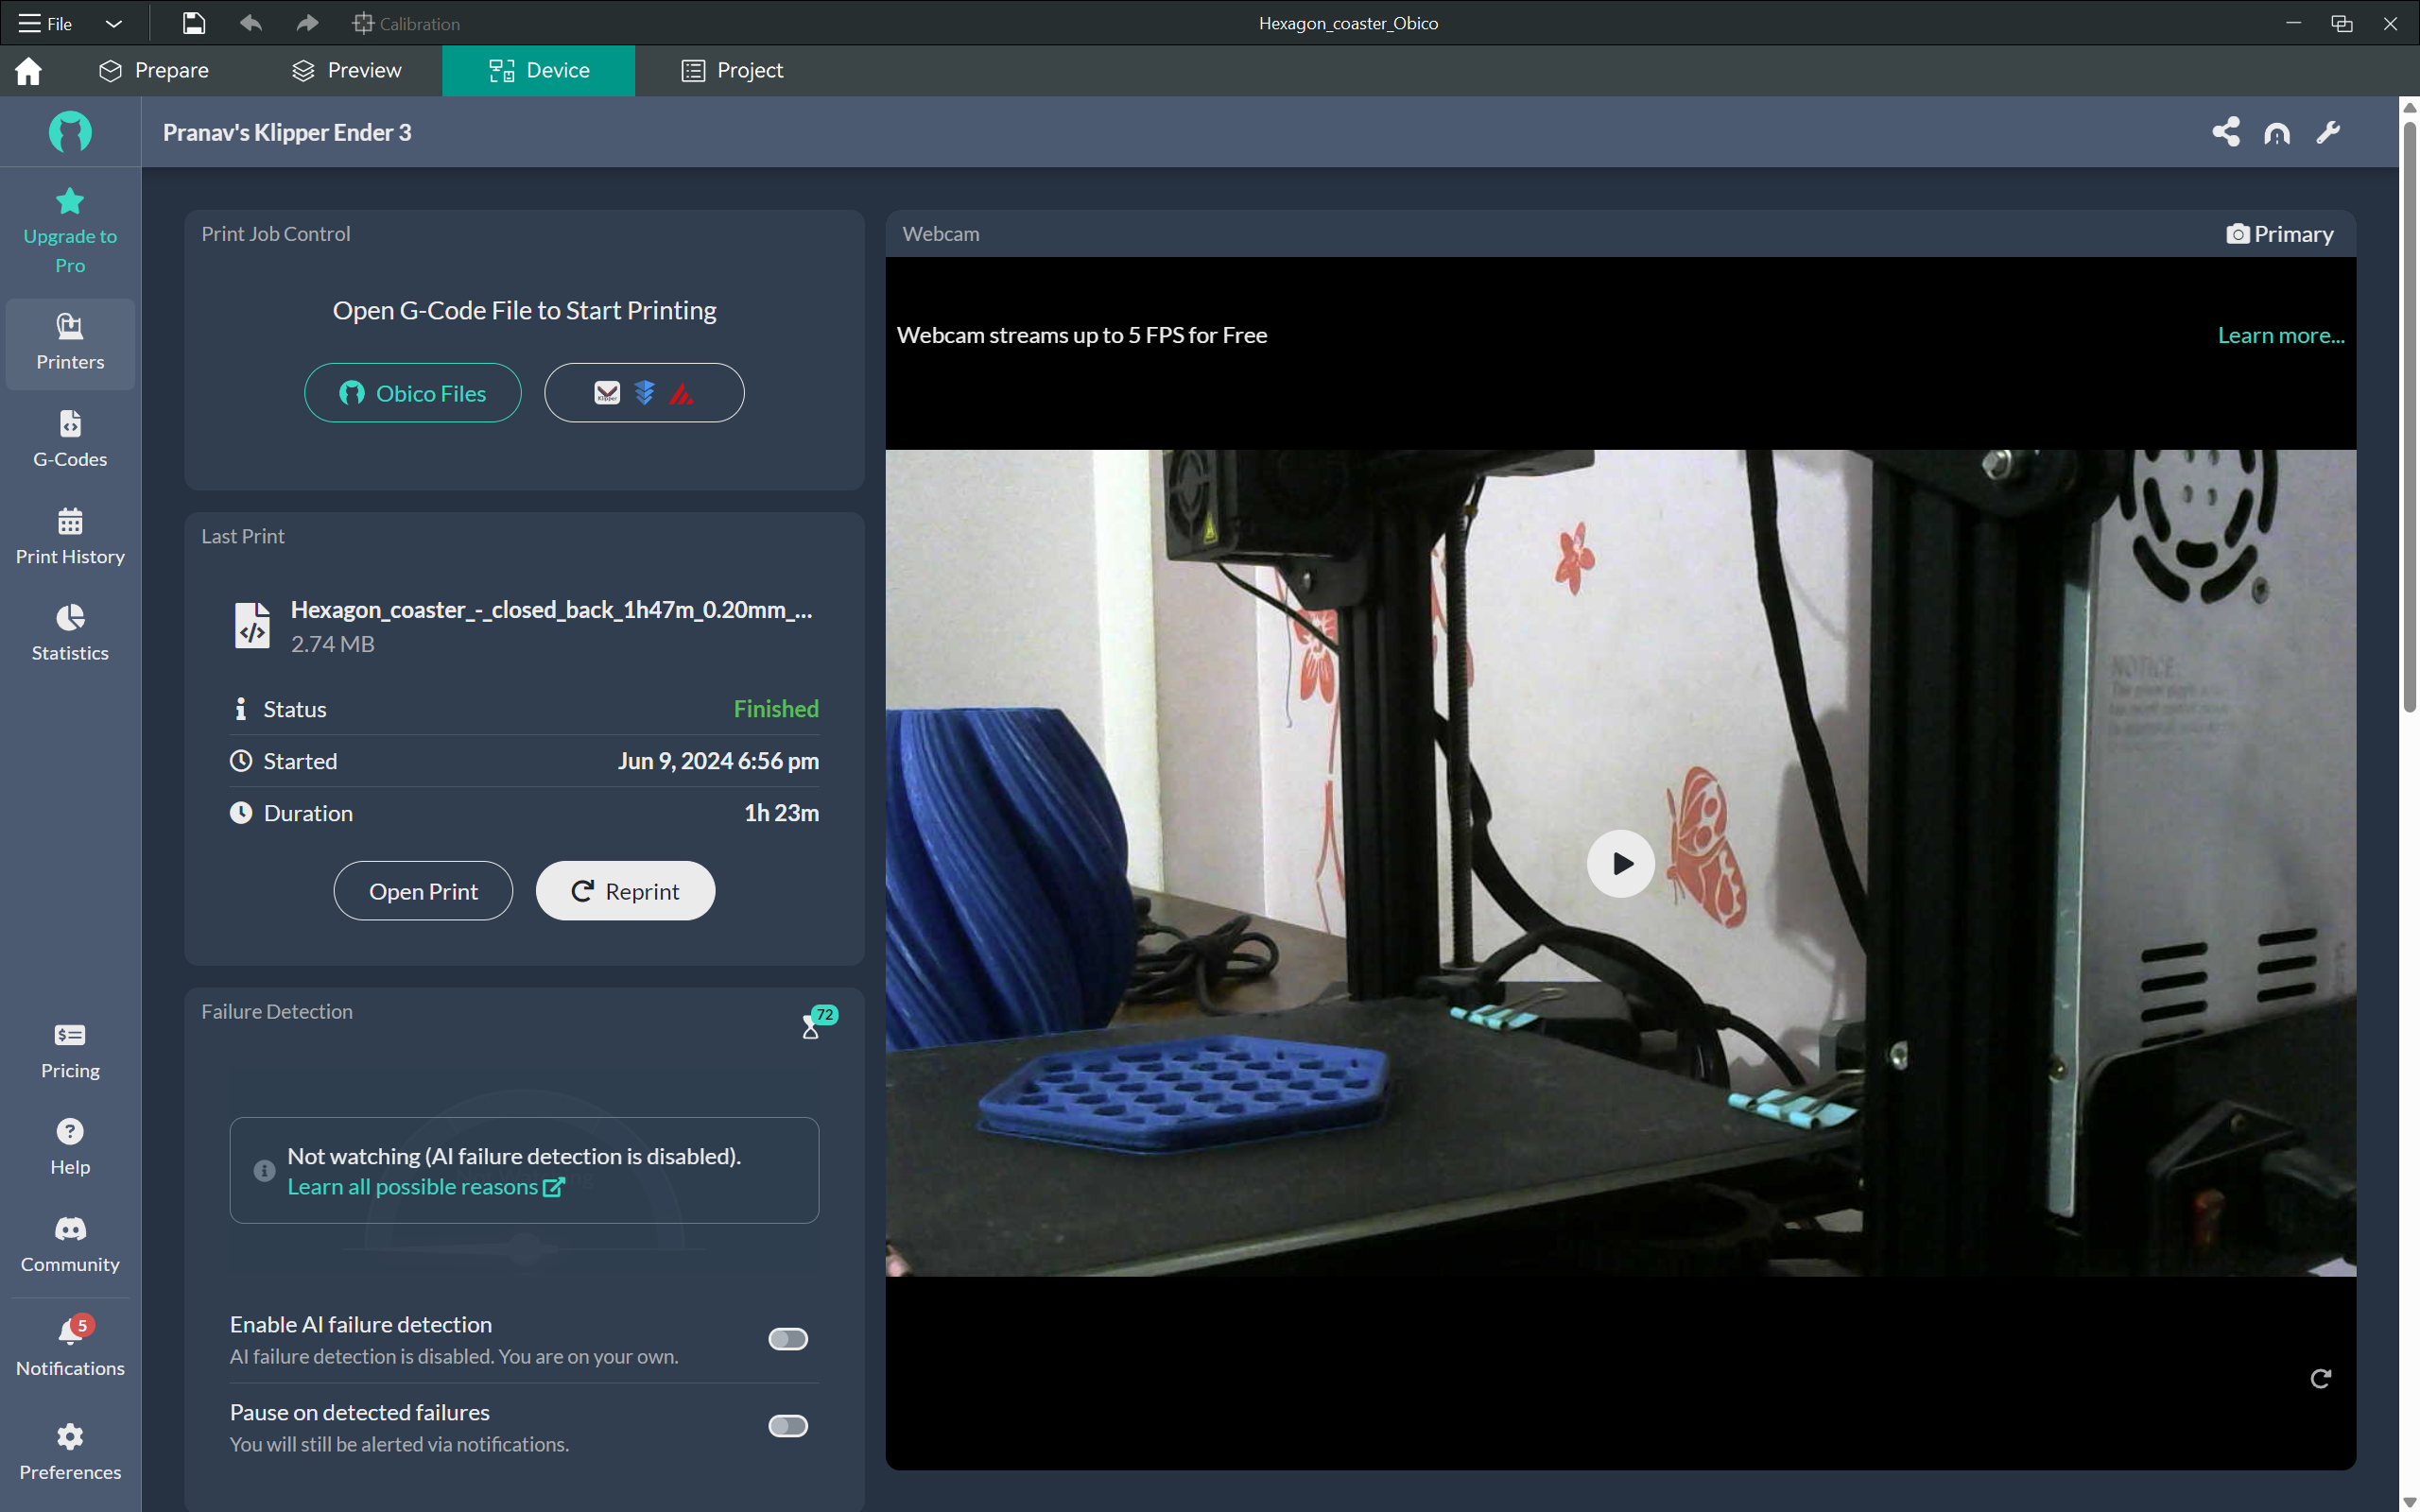
Adding Obico to OrcaSlicer
Obico is an excellent cloud-based platform that allows you to manage your 3D printer remotely from virtually anywhere. You get AI-based print failure detection, timelapse recording, G-code file storage, and several other features with Obico. Using Obico with OrcaSlicer will let you monitor and access your printers from all over the globe.
Steps to Add Obico Interface:
- Create an Obico Account: Sign up for an Obico account and install Obico for your 3D printer if you do not already have one.
- Open OrcaSlicer: Launch OrcaSlicer on your computer.
- Choose a 3D printer: Select your 3D printer from the Printer Section’s dropdown menu.
- Open Printer Network Settings: Click on the WiFi symbol next to your 3D printer name.
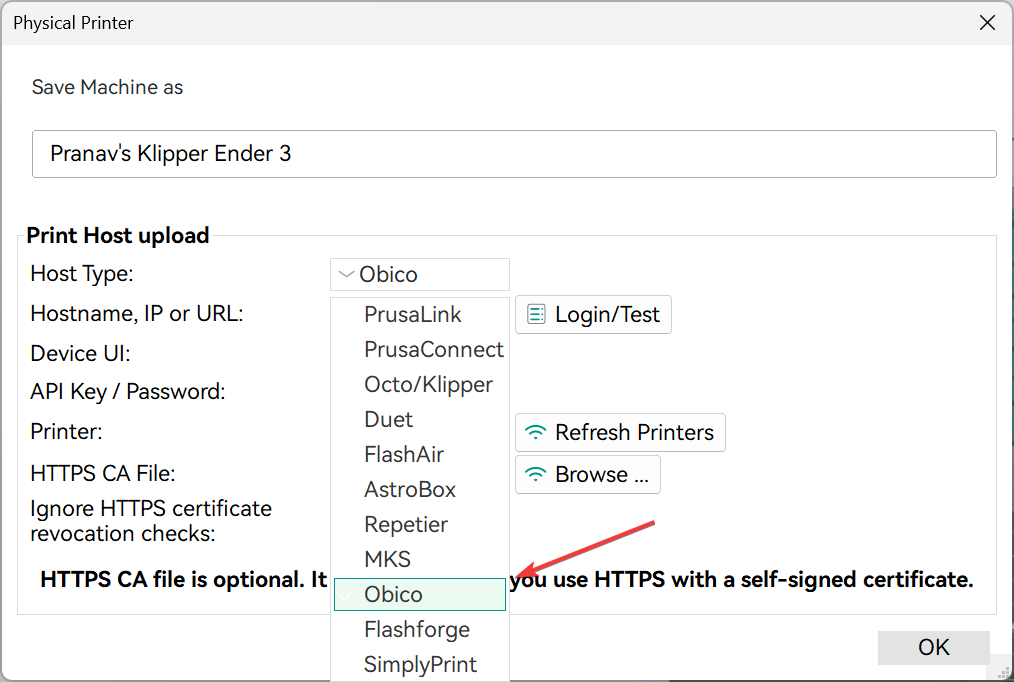
- Select the Host Type: Open the dropdown menu for the Host Type and Select the option as Obico. Make sure the hostname is
https://app.obico.io, and Click the "Test" button.
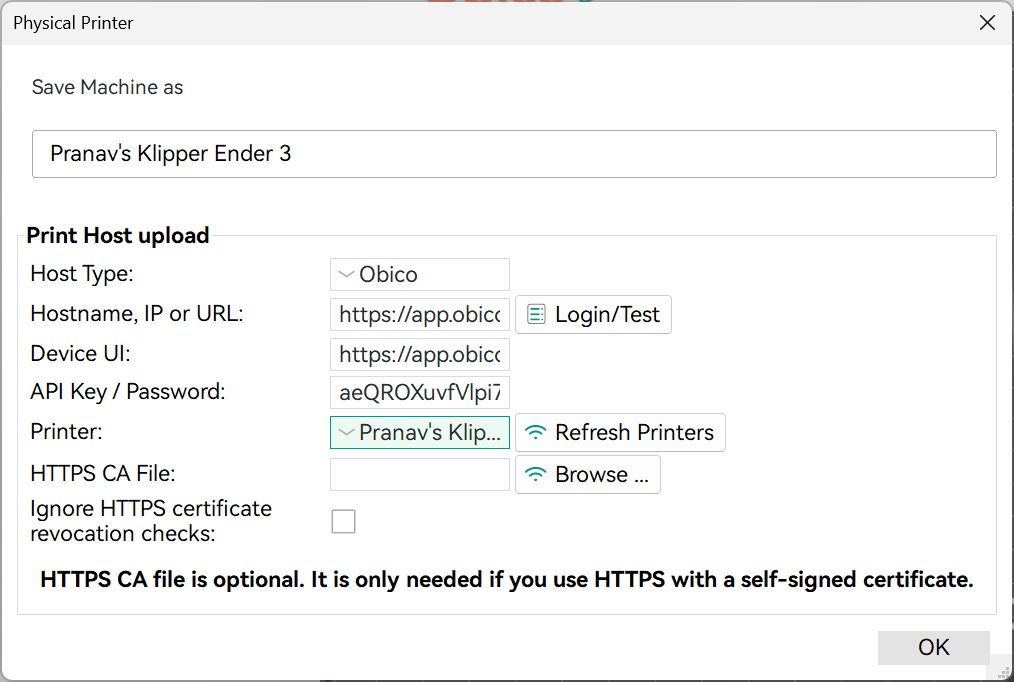
- Connect your Obico Account: Login by entering your Obico account credentials to connect OrcaSlicer to Obico. Then Click "Authorize" and check the API field is automatically filled. Also, ensure the Device UI is automatically filled.

- Select your 3D printer: Click on Refresh Printers and select your machine in the “Printer” field.
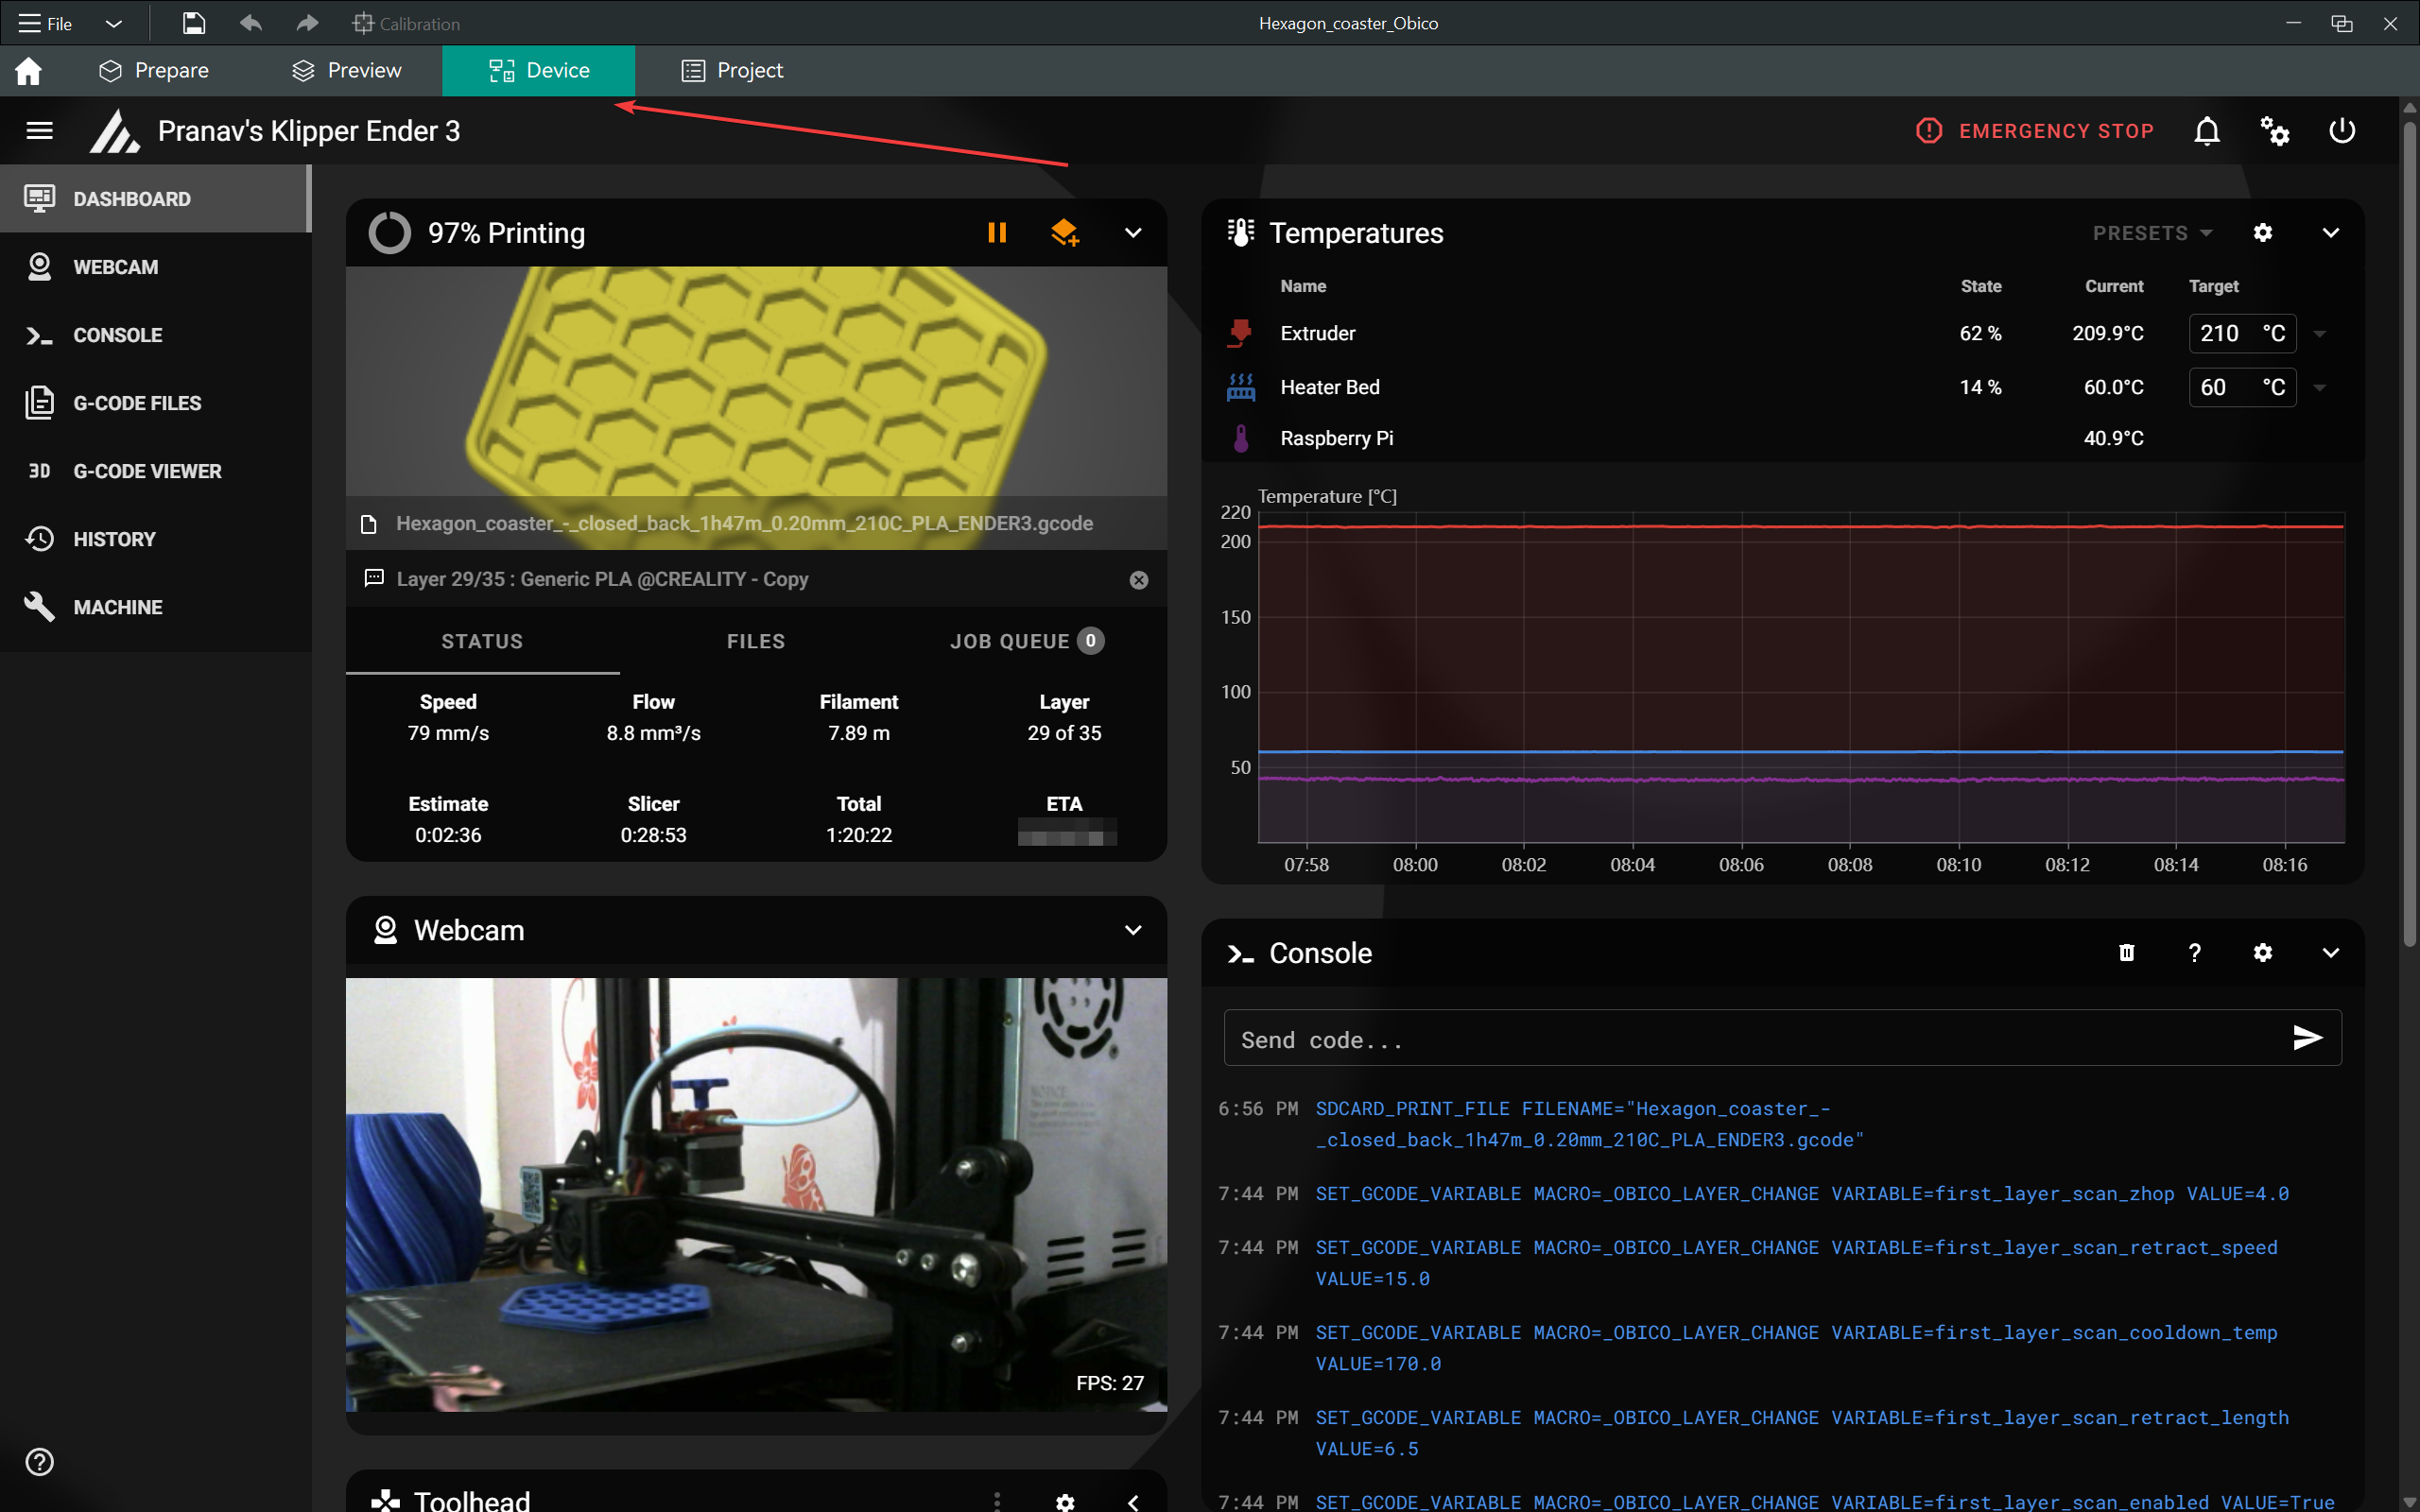
- Navigate to Device Tab: Click “OK” and open the Device Tab in OrcaSlicer. You should now see the Obico interface for your 3D printer in this section.
Conclusion
Integrating your 3D printer interfaces with OrcaSlicer can greatly enhance your 3D printing experience. Whether you’re using Klipper, Octoprint, or Obico, the Device Tab in OrcaSlicer offers a streamlined and efficient way to manage your printing tasks.
It gives you a centralized point of access for your 3D printer(s), and with Obico, you can remotely control your 3D printer directly from OrcaSlicer. Simply follow the steps outlined above, and you can easily setup your printer interfaces and enjoy the benefits of a more integrated and powerful 3D printing workflow.