Prusa Slicer VS Cura
Prusa Slicer and Cura are the top-performing 3D printing slicers, each with its strength. Both PrusaSlicer and Cura are efficient open-source slicers and have a great printer profile setup.
Where’s the difference? –In everything, PrusaSlicer and Cura are original slicers, unlike Bambu Studio and other slicers that are forks. Their slicing engine, project handling, and features are original and different from one another. PrusaSlicer is essentially a fork of an earlier slicer called Slic3r, but Prusa Research has completely changed the slicer, making it unrecognizable and far better.
Now, let’s dive straight into PrusaSlicer VS Cura and understand the key differences that can help you define your choice.

System Requirements
PrusaSlicer
PrusaSlicer uses multi-thread computations, which require a processor with multiple cores. This isn’t a significant requirement since most processors can handle these operations, but for printer labs and professionals printing in bulk, higher processing speeds are required.
PrusaSlicer requires at least 4GB of RAM and OpenGL graphic support.
It supports Linux, Windows and Mac, and you can even run it on a Chromebook.
Ultimaker Cura
Cura by Ultimaker has straightforward requirements in terms of processing speeds. It requires at least an Intel Core 2 (released in 2006) or an Apple M1 chip for Macs (released in 2020). For most Windows users, this is not a problem, and the M1 is more than capable of running multi-thread slicing operations.
It requires an OpenGL 2 compatible graphics card and OpenGL 4.1 for 3D viewing.
The basic requirements for RAM are 4 GB and a free space of 1.3 GB. The recommended system requirements for Cura are 8 GB RAM and an i3 or above processor.
Cura VS PrusaSlicer: Slicing Engine
What really affects your 3D printing experience is the way the slicer handles prints and the algorithm behind slicing a large print.
Support Generation
Supports allow overhangs in 3D-prints and are soft structures intended to be discarded after the print. Cura offers two main types of 3D-printing supports: the traditional grid and tree support.
Cura allows more control over support. You can change support density, overhand angle and distance of support from the model. These settings require little trial and error, and most users tend to leave it on automatic support.
Prusa also provides grid support but has its take on tree supports. Prusa’s organic support is smoother and has rounded corners. Prusa support is easier to separate, and it has better auto-detection in some printable shapes for support generation. With Cura, you get the benefit of saving material in support generation, which can save costs and be handy when the filament is running low.
Geometry Processing
Cura serves a much larger printing community and focuses on broad compatibility. It can handle large STL files with complex meshes. Cura can sometimes overlook minor model issues like tiny gaps, and its geometry processing is not particularly good with thin walls.
In some designs, Cura has merged thin-walled geometry as a ‘fix’. Cura leans towards broad compatibility, which can lead to minor issues like edge case precision.
PrusaSlicer notifies you when there’s an error in the geometry. It is aggressive with spotting errors and offers a quick-fix button, which works in most cases. Prusa preserves details and handles small-diameter features well. As the mesh narrows and thin features increase, the geometry handling becomes more time-consuming.
Prusa requires clean model files to identify thin details for accurate prints.
Layer Slicing
Cura uses adaptive layer slicing. It can adjust thickness dynamically and has an automatic layer height variation based on curvature. The advantage of dynamic line width adjustment is better material flow and precision.
If you enter manual adjustment and tweak horizontal expansion, Cura can be buggy with some curve paths, oversimplifying them otherwise, it’s consistent.
Cura uses an Arachne slicing engine, compared to Prusa’s Slic3r-based engine. Prusa has variable layer height control, which allows layer thickness adjustment across the model.
Prusa can use finer layers in detailed areas and go over structures and body sections with thicker, quicker layers.
Dynamic line width adjustment can change the width of the extruded element. This can reduce over-extrusion chances in top and external print layers. Prusa, on the other hand, uses fixed extrusion width.
Acceleration
Acceleration controls the speed of printhead movement. Cura uses printer firmware settings to control printhead acceleration. It uses default settings and allows control over jerk settings, as well as per-feature (walls, infills) acceleration control.
PrusaSlicer uses its slicer defaults to control the acceleration. It can also tune acceleration profiles based on the printer.
Retraction Control
Cura has great retraction settings like distance and speed. It has an option called “z-seam alignment,” which allows you to hide or position seams on your model. Cura sometimes needs manual tuning for materials like PETG.
Prusa matches Cura’s capabilities but has an additional seam painting feature that you can use to mark where the seams go on the model manually. Prusa also has material-specific retraction control for Prusa Printers.

G-code
Prusa’s G-code output is lean and efficient. Most of the code is optimized for Prusa machines; you can find these sequences in the code itself.
Cura generates the most customizable G-code with its plug-in library. The G-code allows you to inject commands later, and the wide compatibility offers plug-and-play support for most printers. You can add commands like bed-leveling and filament swaps, which are only useful to advanced users.
PrusaSlicer VS Cura: Features
Regarding features, 3D printing slicers tend to check all boxes, but in practicality, some slicers outperform others in specific features. Below is a list of feature comparisons where Cura and Prusa exclusively excel.
Combing Mode
Combing reduces plastic stringing by keeping the nozzle within the print area and avoiding open, non-printed areas. This lowers surface defects during travel.
Cura has a combing mode with different options, like “all,” “within infill.” and “not in skin”. These settings avoid top and bottom layers and make combing flexible according to print importance.
Prusa has a simple combing mode that keeps the nozzle within print boundaries. It results in faster print times but more chances of stringing.
Randomize Infill Start
Randomizing the infill start during printing can reduce seam visibility. Prusa has a dedicated “Randomize Starting Point” button that hides patterns. Cura does not have any such feature.
Coasting
Coasting is important for print quality. It stops plastic extrusion just before a layer or a line ends, using the residue to finish the end of a line. Cura has a dedicated ‘Coasting’ setting under its experimental features, giving you more control over filament flow.
Plug-in Support
Even though both slicers are open-source, you’ll only truly experience this with Cura. The plug-in support allows the community to change settings and tweak calibration and auto-orientation. This makes Ultimaker’s Cura more functional and modular than PrusaSlicer, which has no support for plug-in systems.
Ironing
Ironing is a Cura-exclusive feature that can smooth the top layer of a print by traveling the nozzle over the surface with minimal extrusion.
Variable Layer Height
PrusaSlicer’s layer height adjustment cannot be found on Cura. Many people switch to Prusa for its variable layer height and visual previews.
Better Organic Support
Cura’s tree support is great, but Prusa has a feature of its own–organic support. After printing, Prusa’s organic supports are much easier to remove. They are also more efficient with smoother model integration and faster generation.
User Interface Comparison

Cura UI
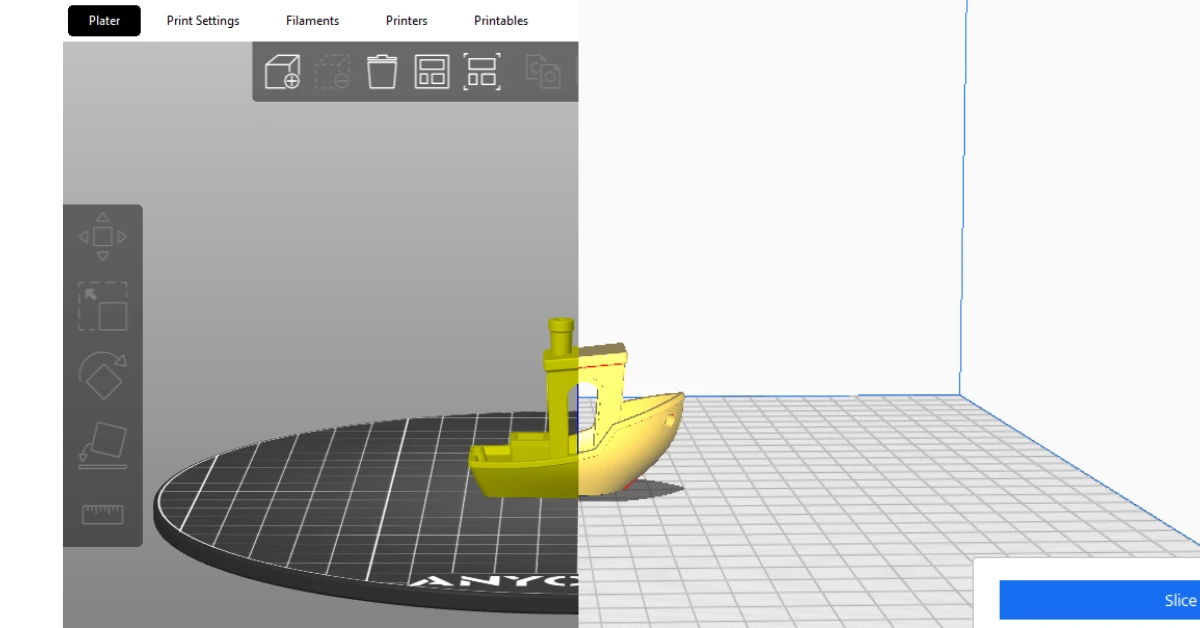
Cura has a single-window arrangement with the 3D model viewer at the center and a toolbar on the left. Most of the print settings are tucked away in drop-down menus at the top.
Each profile unlocks or hides some features depending on the experience level of most users. For instance, mesh fixes, experimental, and special modes are only available when you select an expert profile.
Cura also gives users control over setting up their custom profiles, which hide settings that are not often used.
PrusaSlicer UI
Prusa has a 3D viewer on the left and all your print settings on the right. The interface is similar to Bambu Studio.
It has a well-organized menu with easy navigation and settings, making the learning curve smaller.
PrusaSlicer shows you many settings as soon as you open the slicer. There's part manipulation, orientation, text embossing, and instances button on top, and all the print-related settings are in the sidebar.
You can adjust the layer height, change seam settings, and adjust the print around walls in these settings.
Which Slicer Is Better For Multi-Printer Setup
There’s no one-word answer to which slicing software performs better in a multi-printer setup, but Prusa has an advantage between PrusaSlicer and Cura.
PrusaSlicer has a distinct printer profile selection, making it effortlessly easy to swap printer profiles. It also has easy nozzle swapping and filament change settings, making it more efficient for workflow.
Obico Cloud For Multiple Printer Management
Obico has an online cloud server that seamlessly manages multiple print files and printer profiles. It supports over-the-network prints and remote monitoring of all your printers.
You can learn more about reliable cloud hosting and AI failure detection here.
