QIDI Plus4 - Klipper Remote Access and AI
The QIDI Plus4 is not just a 3D printer; it’s a game changer for those who want precision, reliability, and advanced features. Whether you are a hobbyist or a professional, the QIDI Plus4 has features that will take your entire printing experience to the next level. Pre-installed with Klipper firmware, equipped with a heated chamber, and packed with intelligent monitoring capabilities, this amazing 3D printer ensures that your prints are accurate, consistent, and efficient.
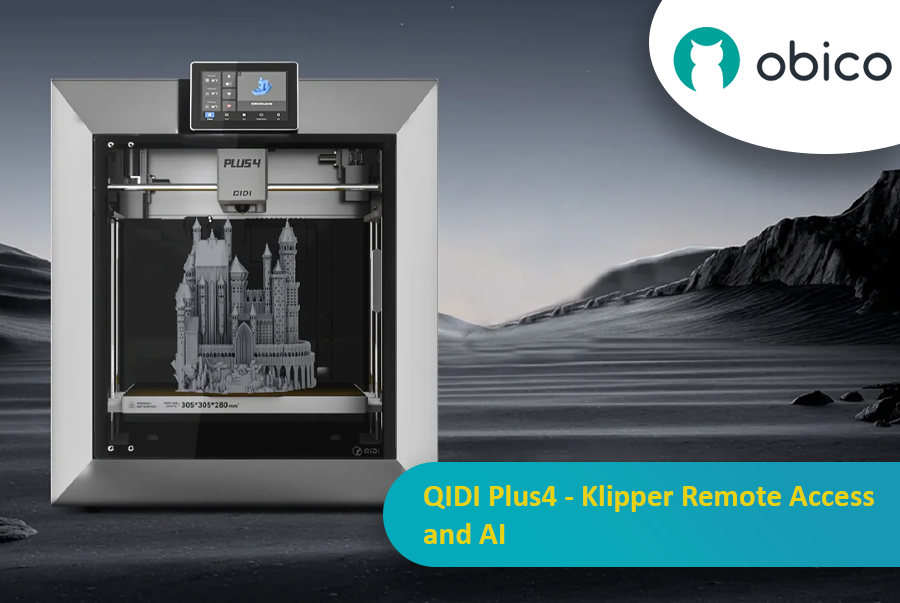
In this article, we will go in-depth on the QIDI Plus4 features and guide you through setting up remote access and AI monitoring with Obico.
Let’s get started!
A 3D Printing Game Changer
The QIDI Plus4 redefines what a desktop 3D printer can do. At the core of its design is precision and ease of use for a wide range of applications. The build volume is 305 × 305 × 280 mm, big enough for large prints or multiple parts in one print. This makes this printer perfect for creators who need flexibility in their designs, from engineering prototypes to artistic models.
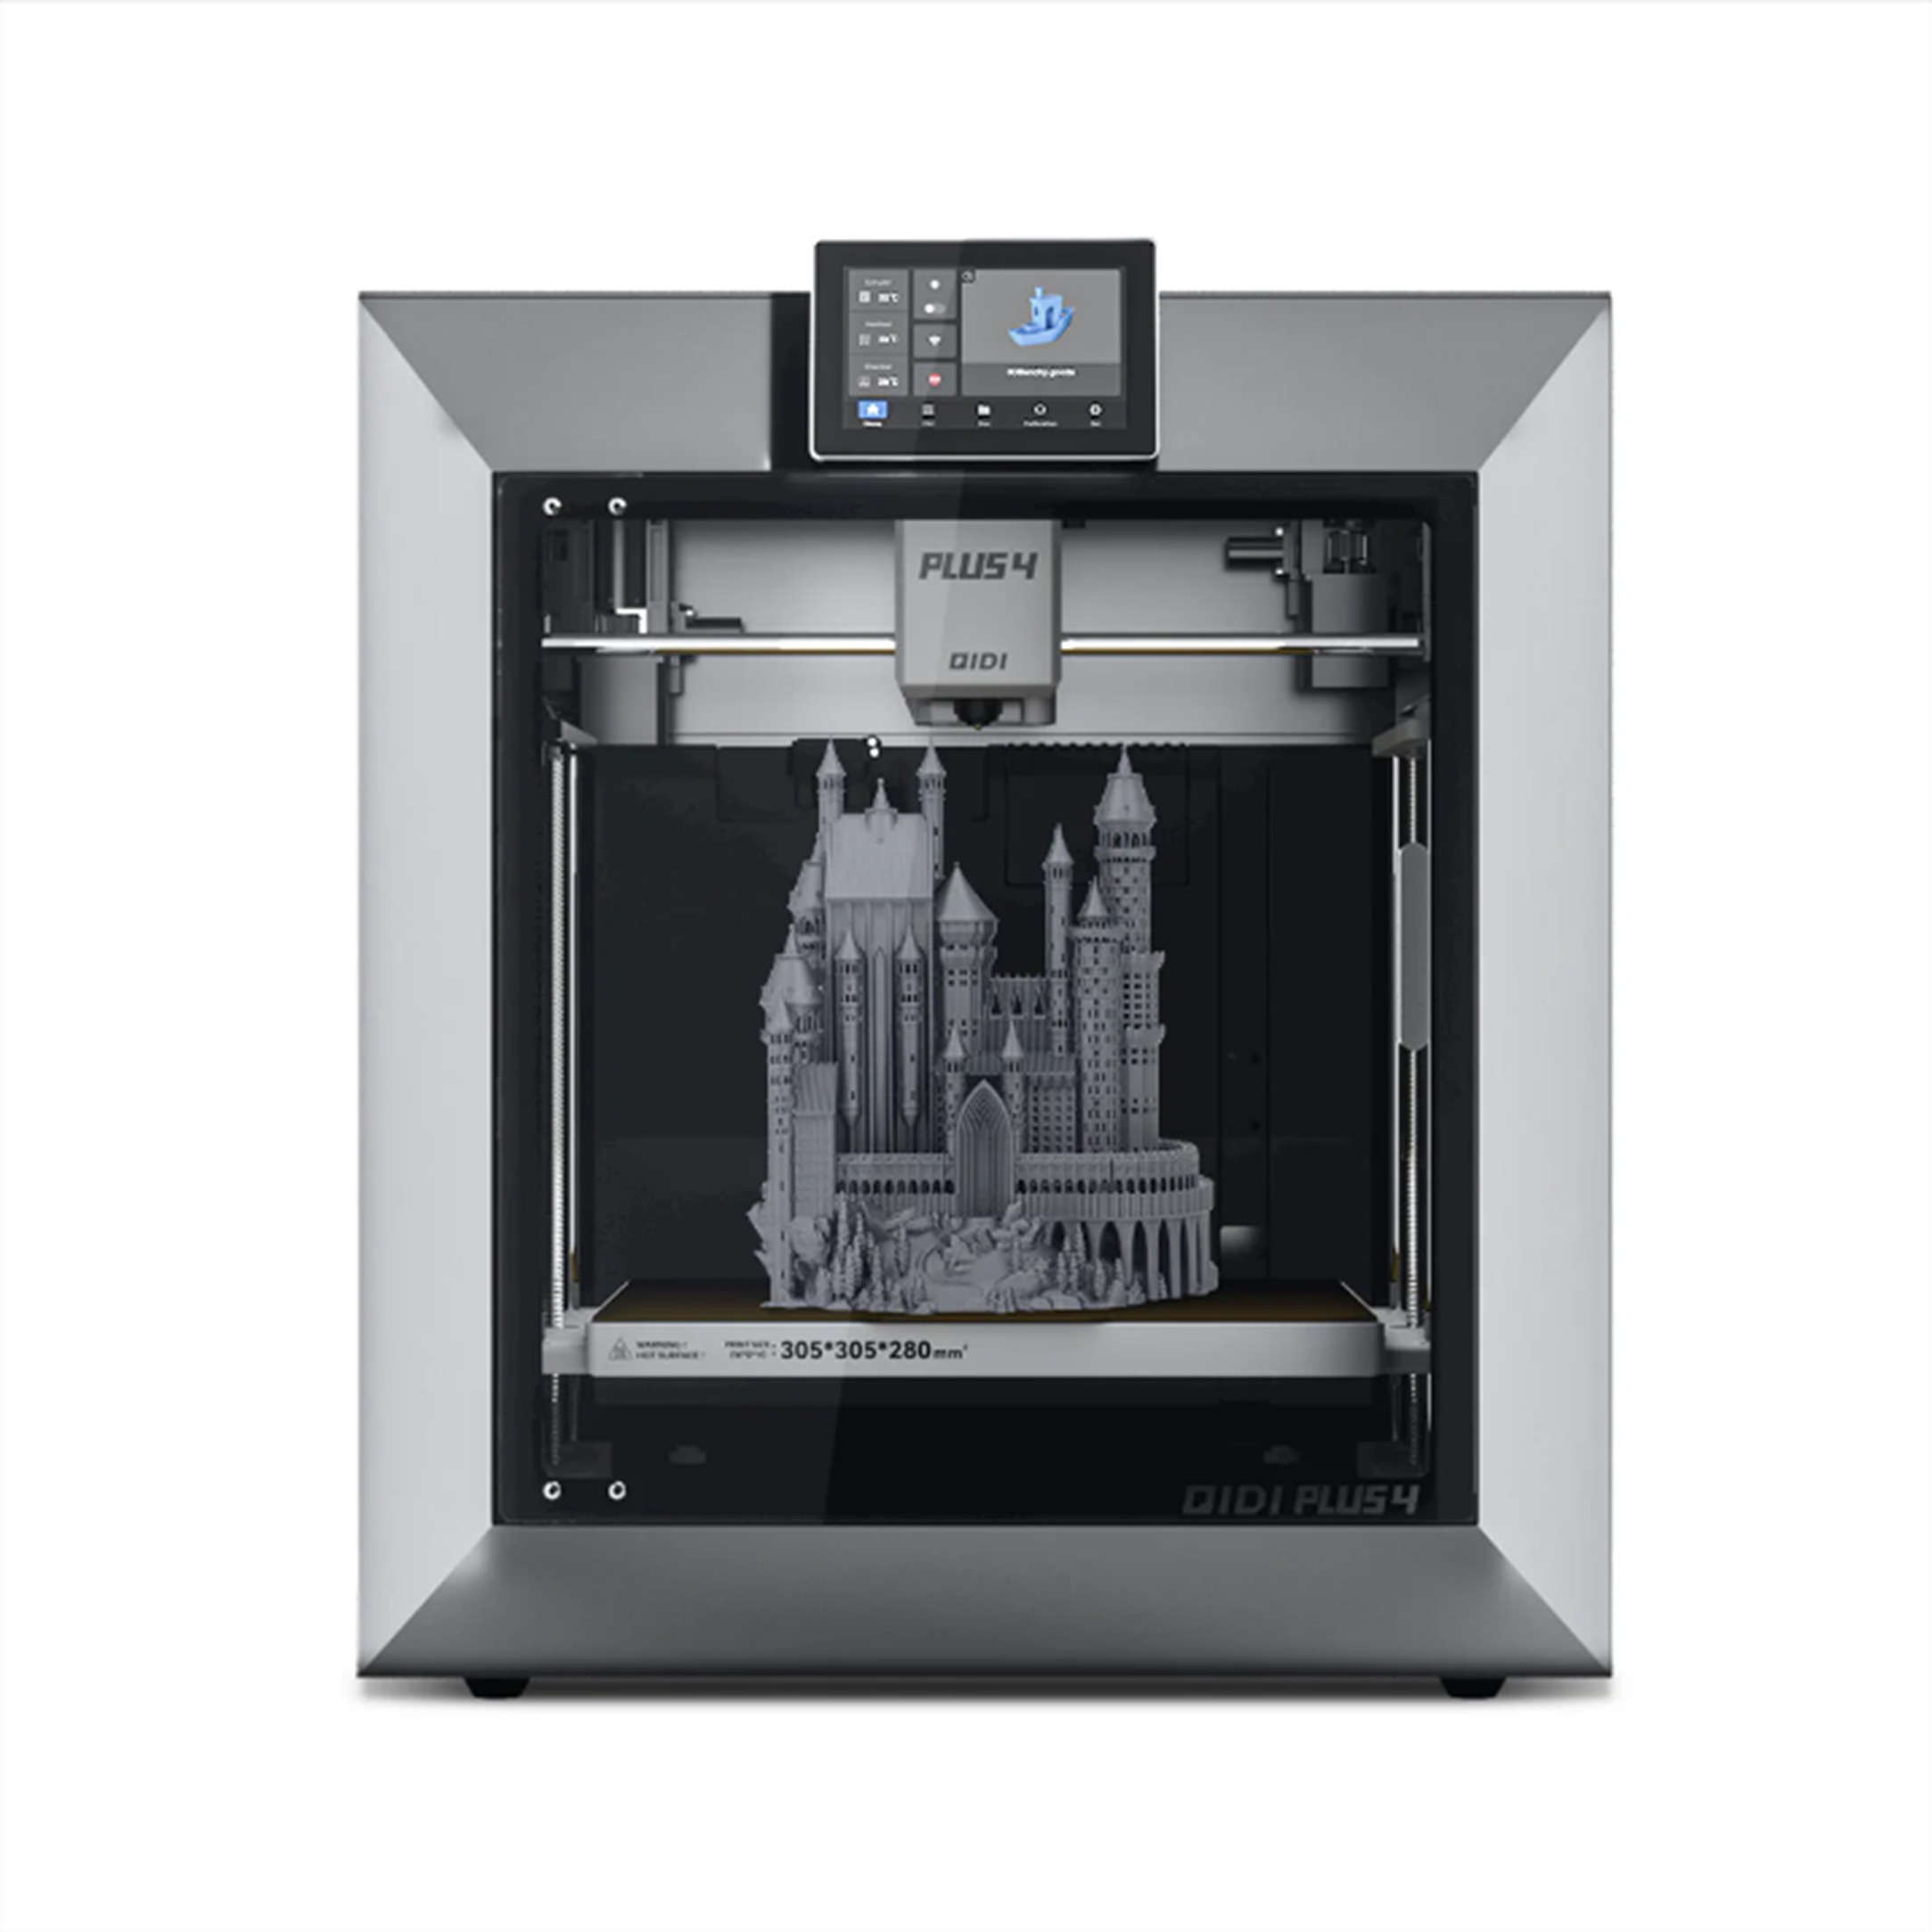
Source: qidi3d.com
The hardware is highlighted by dual independent motors and 10mm precision shafts, which eliminate ghosting and ringing. This results in smoother and more detailed surfaces. The 6mm aluminum print bed can reach up to 100°C. The printer is also combined with the second-generation bimetal hotend that can reach 370°C, making the QIDI Plus4 perfect for high-performance materials like PPS-CF and Nex-PAHT-CF25. These materials are hard to print with, but the QIDI Plus4 makes it look easy.
The active heated chamber can keep the internal temperature up to 65°C. This is a big plus for materials like ABS and nylon, which are sensitive to temperature changes. If you are printing functional or industrial-grade parts, this feature will help you.
Smart Features That Make a Difference
Ease of use is a top priority with the QIDI Plus4. Its 5-inch HD touchscreen makes it easy to navigate settings and manage prints. Also, the printer has a 1080p camera built in, which helps see your prints even when you are not in the same room.
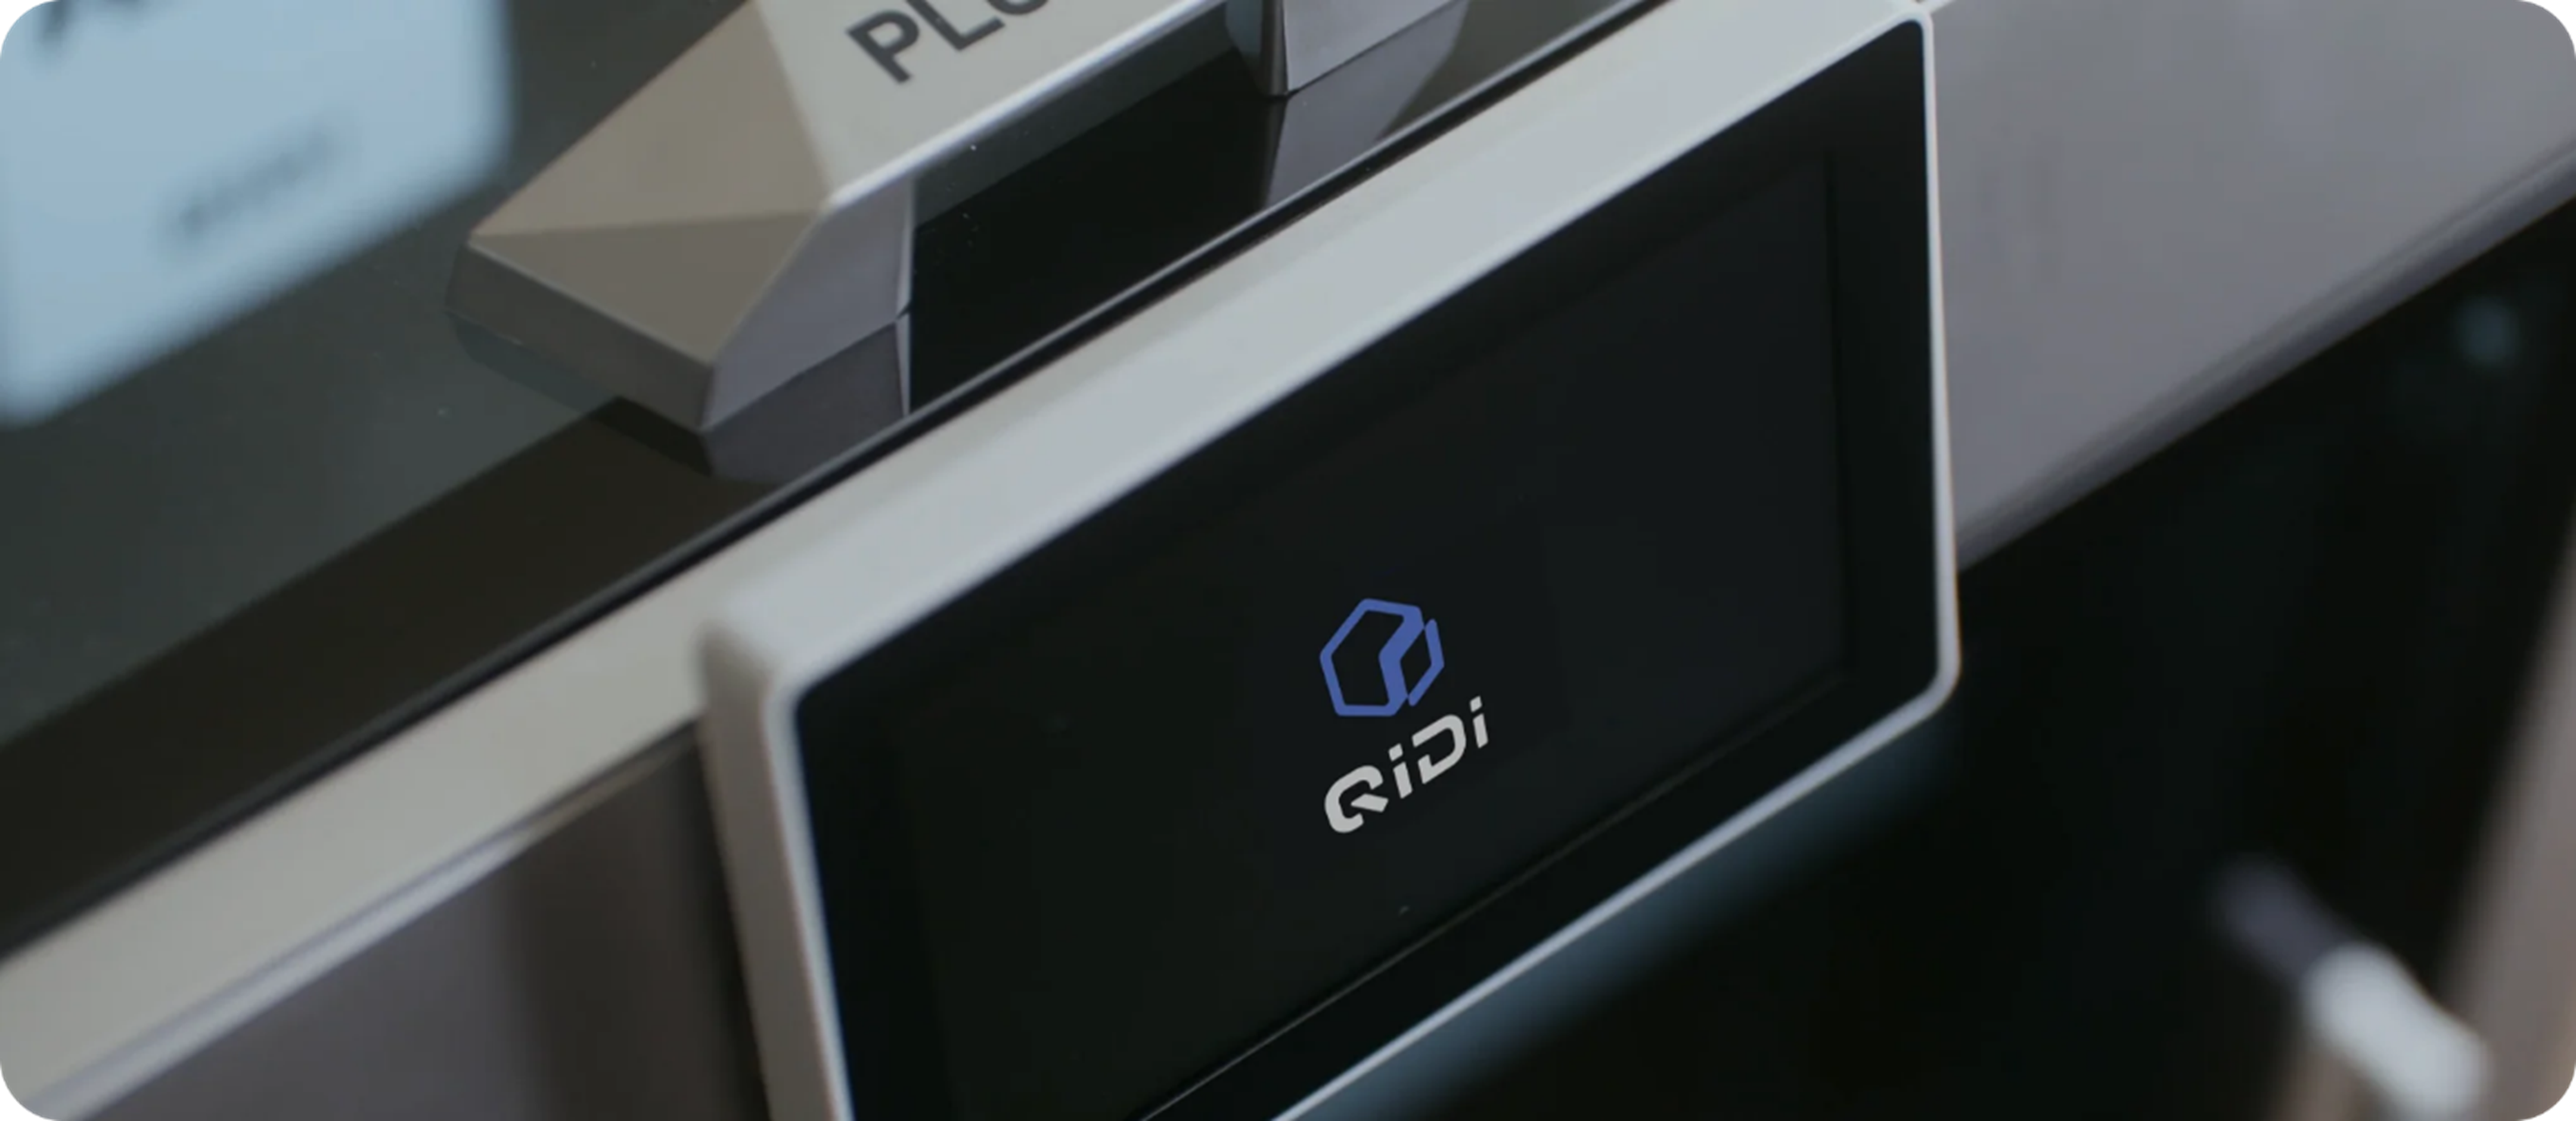
Source: qidi3d.com
Filament management is another area where QIDI Plus4 shines. It has advanced sensors for filament runout and tangles, so your prints won’t be interrupted by unexpected issues. Also, the printer is compatible with the upcoming QIDI Box, a multi-filament automatic feeding system to be released in early 2025. This will allow for seamless multicolor prints and more creative possibilities.
Klipper Firmware: The Powerhouse Behind the Printer
QIDI Plus4 comes with the latest version of Klipper v.12 pre-installed. Klipper offloads complex calculations to an external processor, so the printer can print faster and more precisely than traditional firmware. Klipper is open source; you can add plugins or modify settings to suit your needs.

What really sets QIDI Plus4 apart is the compatibility with Obico, a platform that uses Klipper to allow remote access and AI monitoring. With Obico, you can see print progress in real-time, get alerted for potential issues, and even detect print failure with AI. Klipper and Obico turn the QIDI Plus4 into a smart and connected device that gives you more convenience and reliability.
Why Remote Access and AI Monitoring Matter
In this modern world, time is money, and being able to remotely manage your 3D printer can save you time and effort. Imagine being able to start a print from your office or check on a complex print while running errands. Remote access eliminates the need to be physically present; you can optimize your workflow and use your time more efficiently.
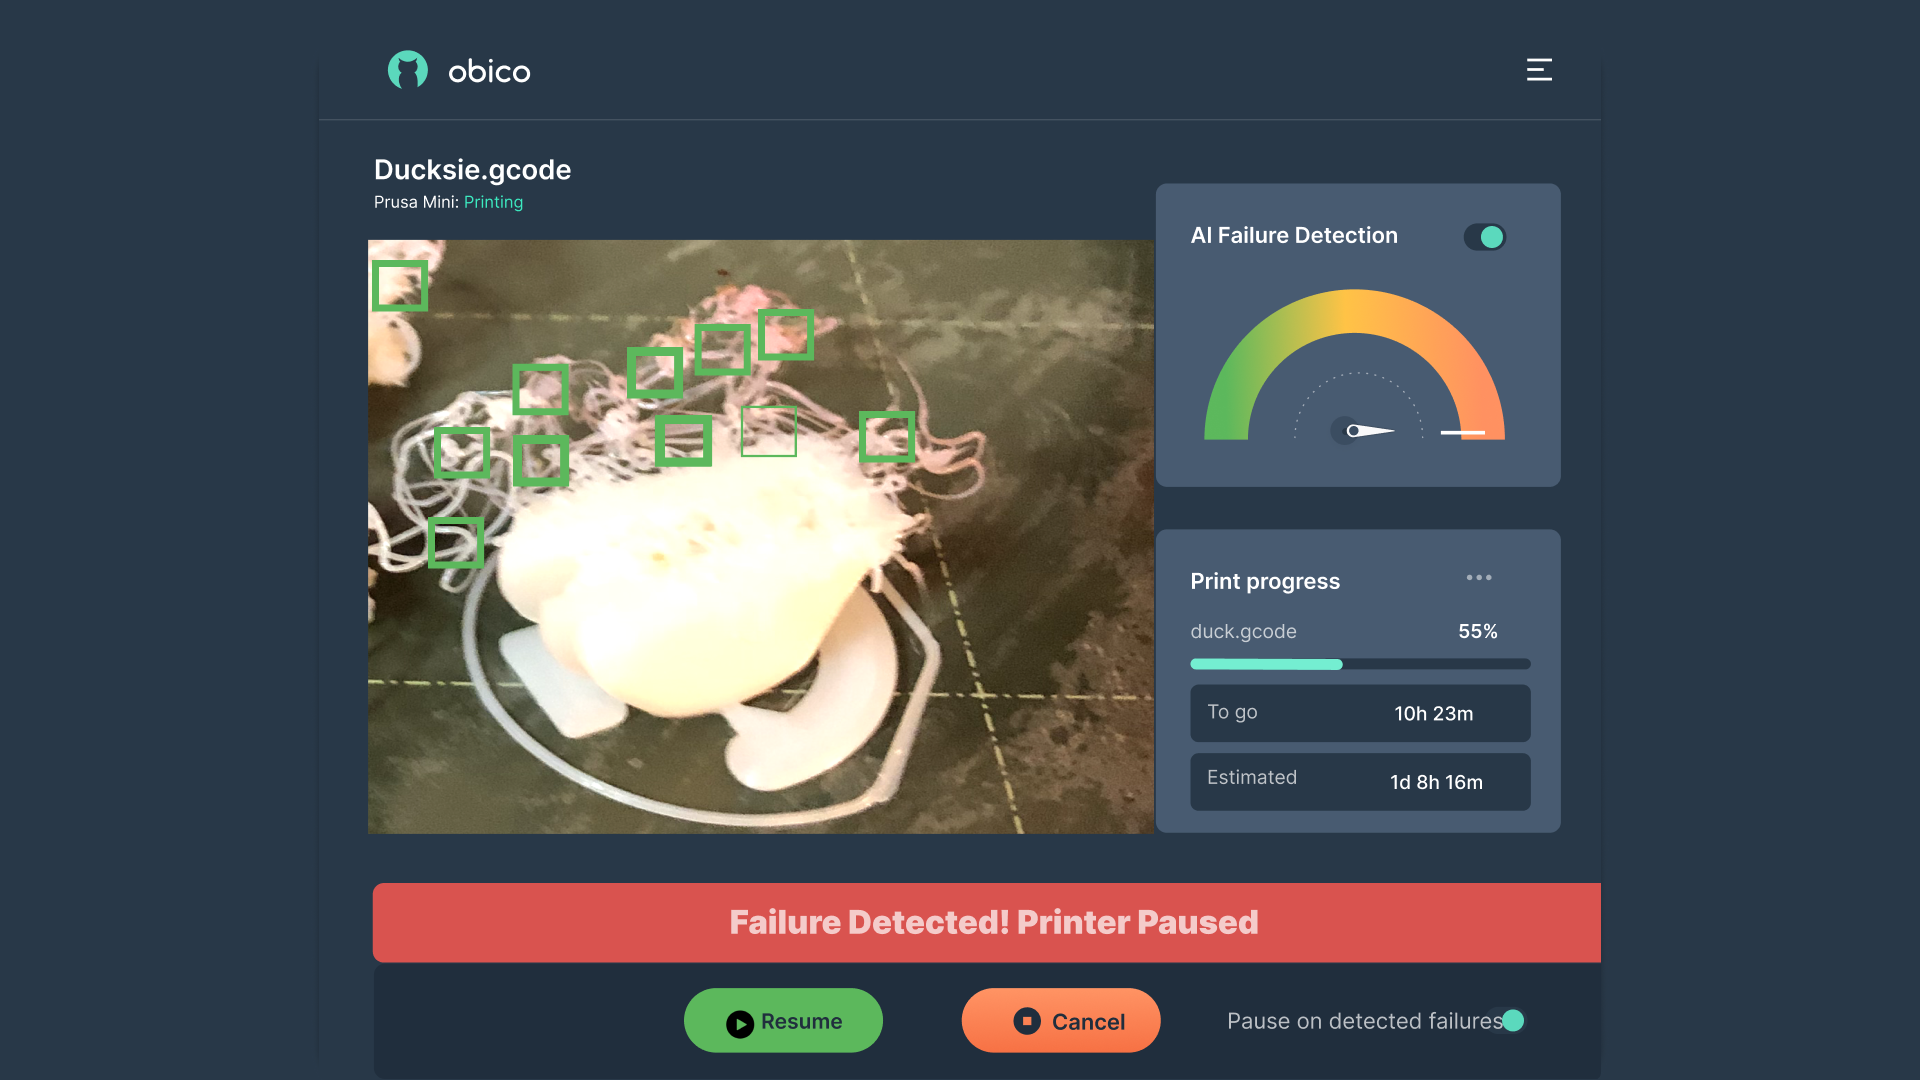
AI monitoring takes it to the next level. With Obico, you can get notified if something goes wrong with your print. The AI can detect issues like "spaghetti" failures or poor first layers so you can intervene before the print is ruined. This saves material and reduces frustration, especially when printing large or long prints. For businesses, this can increase productivity and reduce costs, making QIDI Plus4 with Obico a worthwhile investment.
Setting Up Remote Access and AI Monitoring
Now that you’re familiar with the printer’s features, let’s dive into the setup process for enabling remote access and AI monitoring. This guide will walk you through using PuTTY, a free and widely used SSH client, to communicate with your printer and install Obico on your QIDI Plus4.
You may run into this error during the installation process:
SSLError(SSLCertVerificationError(1, '[SSL: CERTIFICATE_VERIFY_FAILED] certificate verify failed: certificate is not yet valid')
This is because most (probably all) QiDi printers have the system time set wrong. To fix this, run this command:
sudo date -s '2024-12-05'
Please replace the 2024-12-05 part with the current date.
Step 1: Download and Install PuTTY
To begin, download PuTTY from its official website and install it on your computer.
PuTTY is essential for establishing a secure connection to your printer’s internal computer. Once installed, launch PuTTY and prepare to connect to your printer.
Step 2: Access the Printer via SSH
On the QIDI Plus4’s touchscreen, navigate to the network settings to find the printer’s IP address. Open PuTTY and enter this IP address in the Host Name field. Make sure the Port is set to 22 and the connection type is SSH. Click Open to establish a connection.
When prompted, enter the printer’s login credentials:
- Username:
mks - Password:
makerbase
Once logged in, you’ll have access to the printer’s internal system.
Step 3: Install Obico for Klipper
After logging in via PuTTY, run the following command to launch the KIAUH (Klipper Installation and Update Helper):
The QIDI Plus4 comes with KIAUH pre-installed.
./kiauh/kiauh.sh
From the KIAUH menu, select the option to install additional services (this is usually done by pressing 1 and then pressing the Enter key).
Then choose Obico for Klipper from the list (by pressing 9 and then pressing the Enter key).
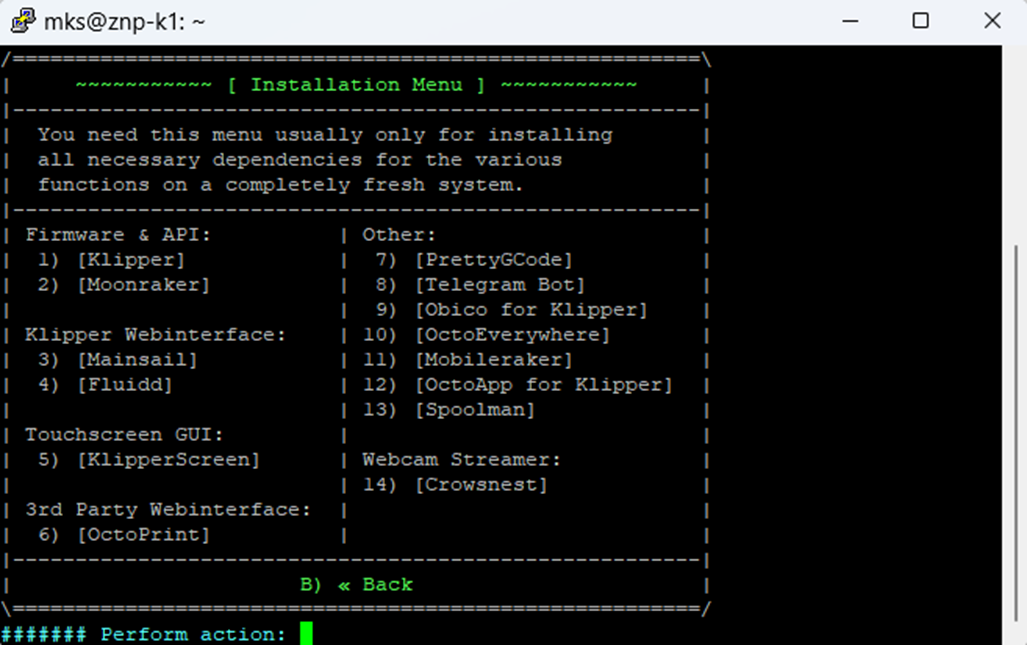
Follow the on-screen prompts to complete the installation. You will be asked for entering Obico server URL. If you’re using the Obico Cloud, leave the URL as the default (https://app.obico.io). If you’re running a self-hosted server, specify its IP address and port (e.g., http://192.168.0.5:3334).
The installation script will run, and once it completes, you will see the following message:
Obico not linked to the server!
###### Link to your Obico Server account now? (Y/n):
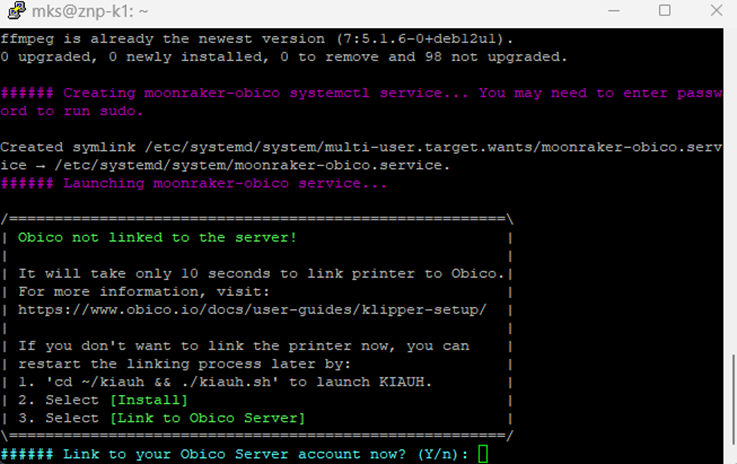
Choose Y and press Enter. Now you can follow the additional steps below, and just take note of the One-time Passcode. You may need it for the manual linking.
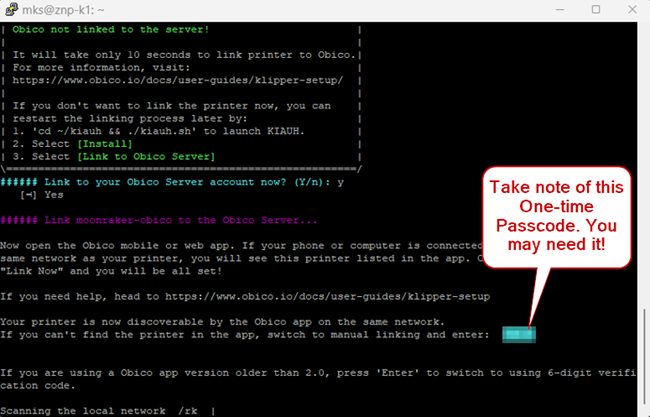
By following these steps, you enable Obico for Klipper to communicate effectively with your QIDI Plus4 3D printer.
And to start using Obico, follow these additional steps:
Step 1: Sign up for an Obico Account
If you haven't already, you'll need to create an Obico account to get started. You can do this through the Obico mobile app or the web app. Here's how:
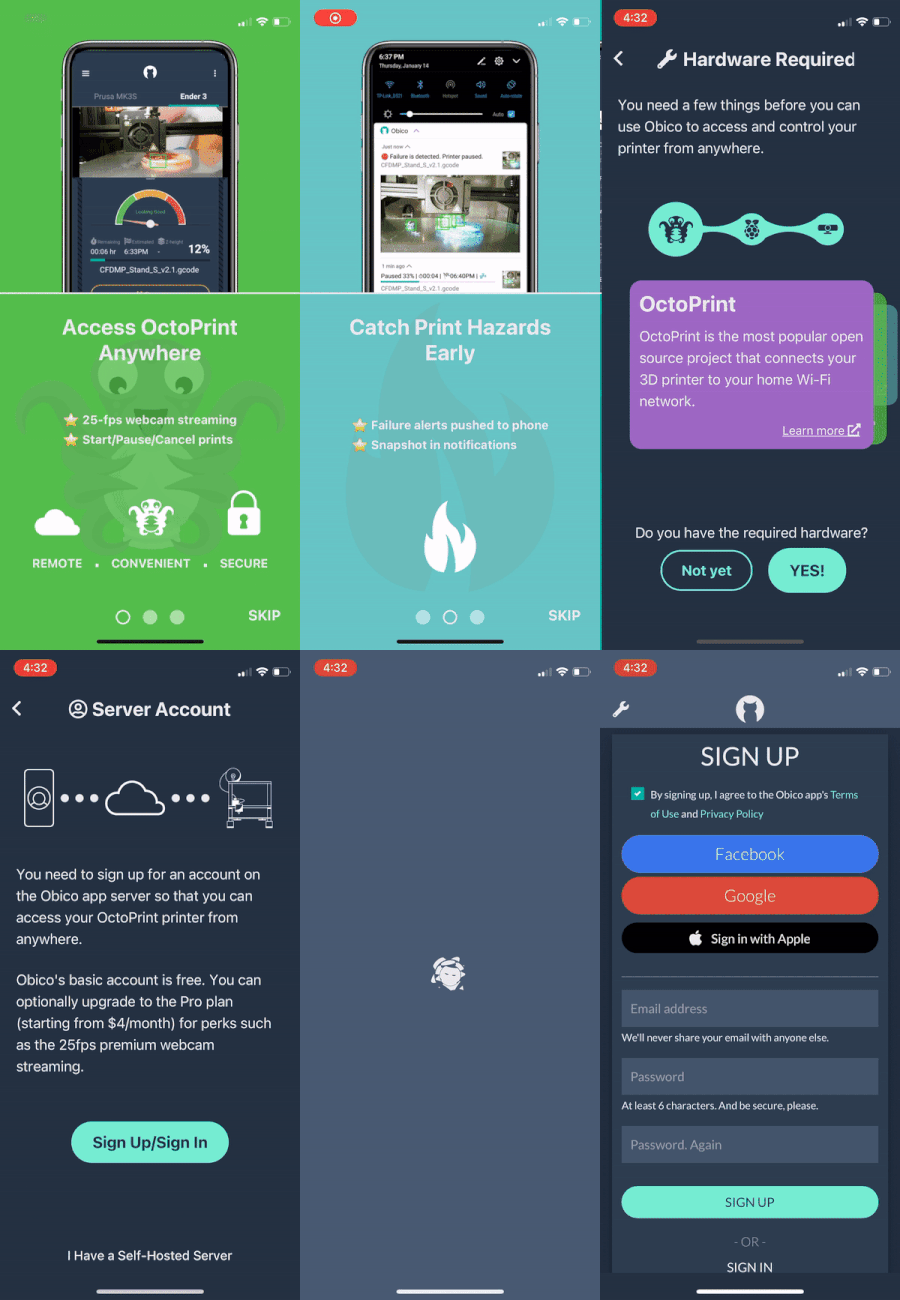
- 📱 Mobile App: If you’re using the mobile app, open it and follow the on-screen prompts to sign up for an Obico account.
- 🌐 Web App: If you prefer to use the web app, open a web browser and go to the Obico Website. Click on the “Sign Up” option and follow the registration process.
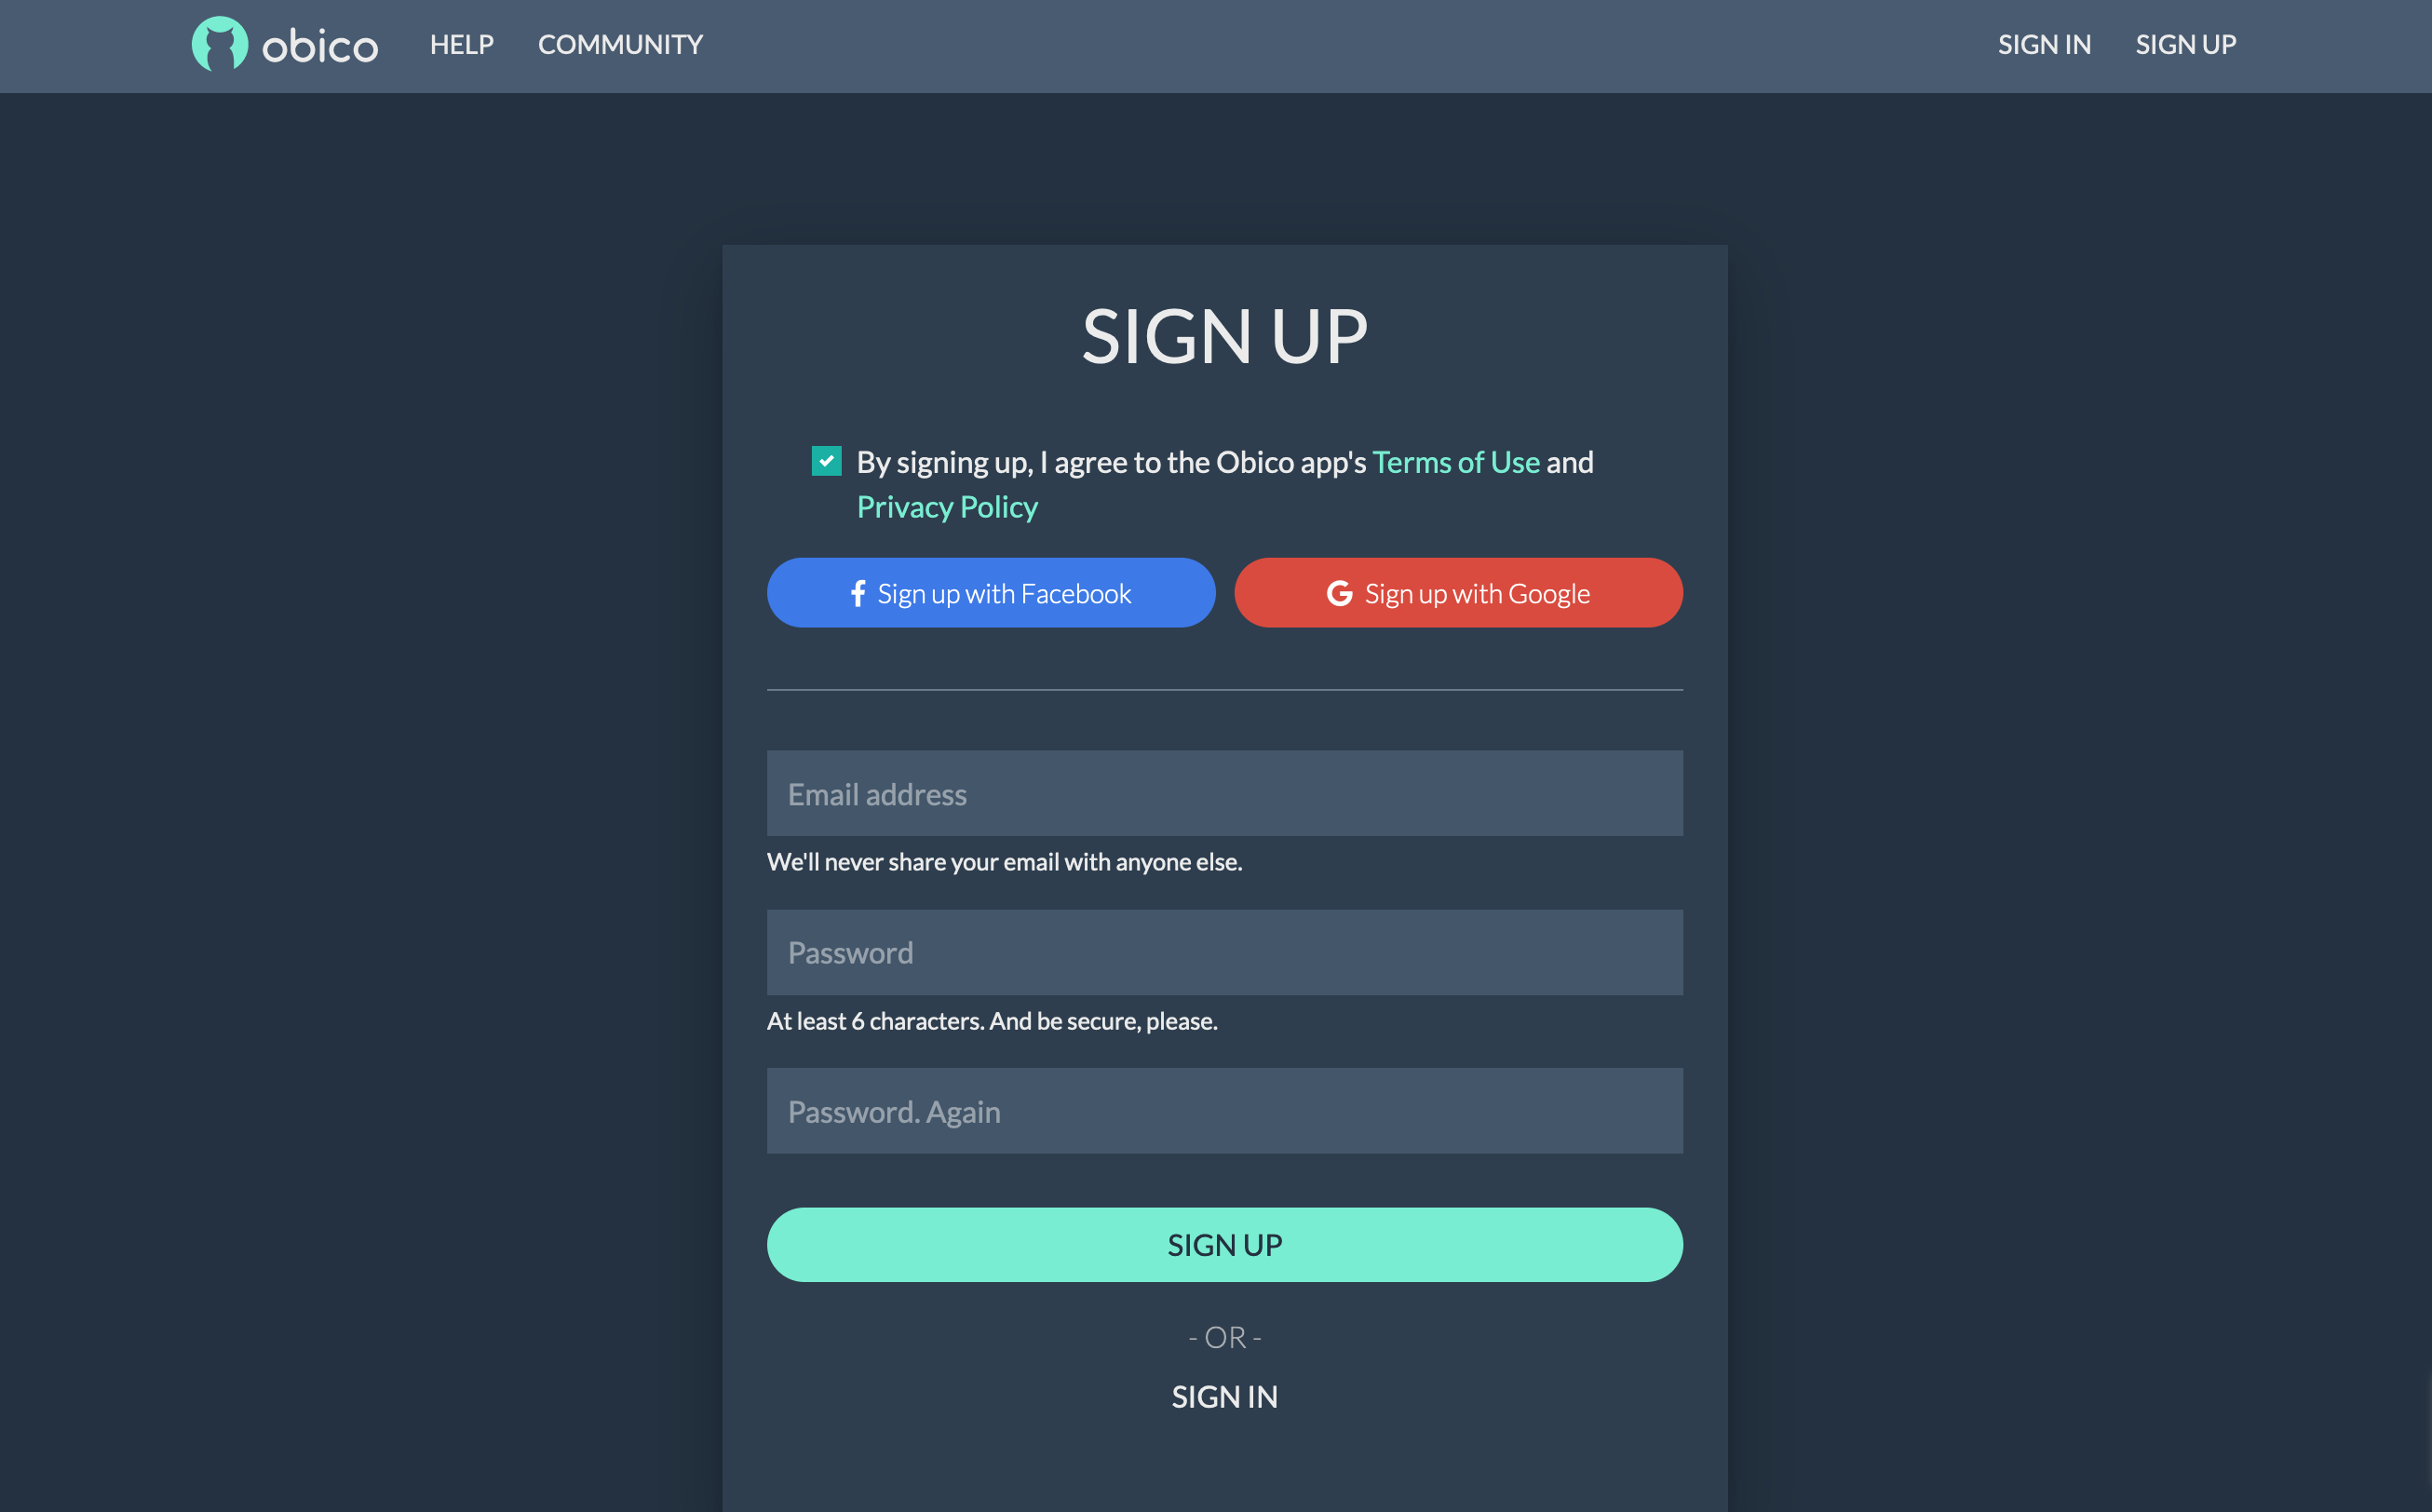
You can sign up with your email, Google, or Facebook account.
Step 2: Link Your Printer to Obico
To connect your 3D printer to Obico and unlock its remote access and AI-powered features, follow these steps:
-
Visit the Obico Website: Access the Obico website here (or your own Obico server if you have one).
-
Sign In: Login to your Obico account using the credentials you just created.
Once logged in, navigate to the Printers page on the Obico platform.
Step 3: Select "Klipper" and Connect Your Printer
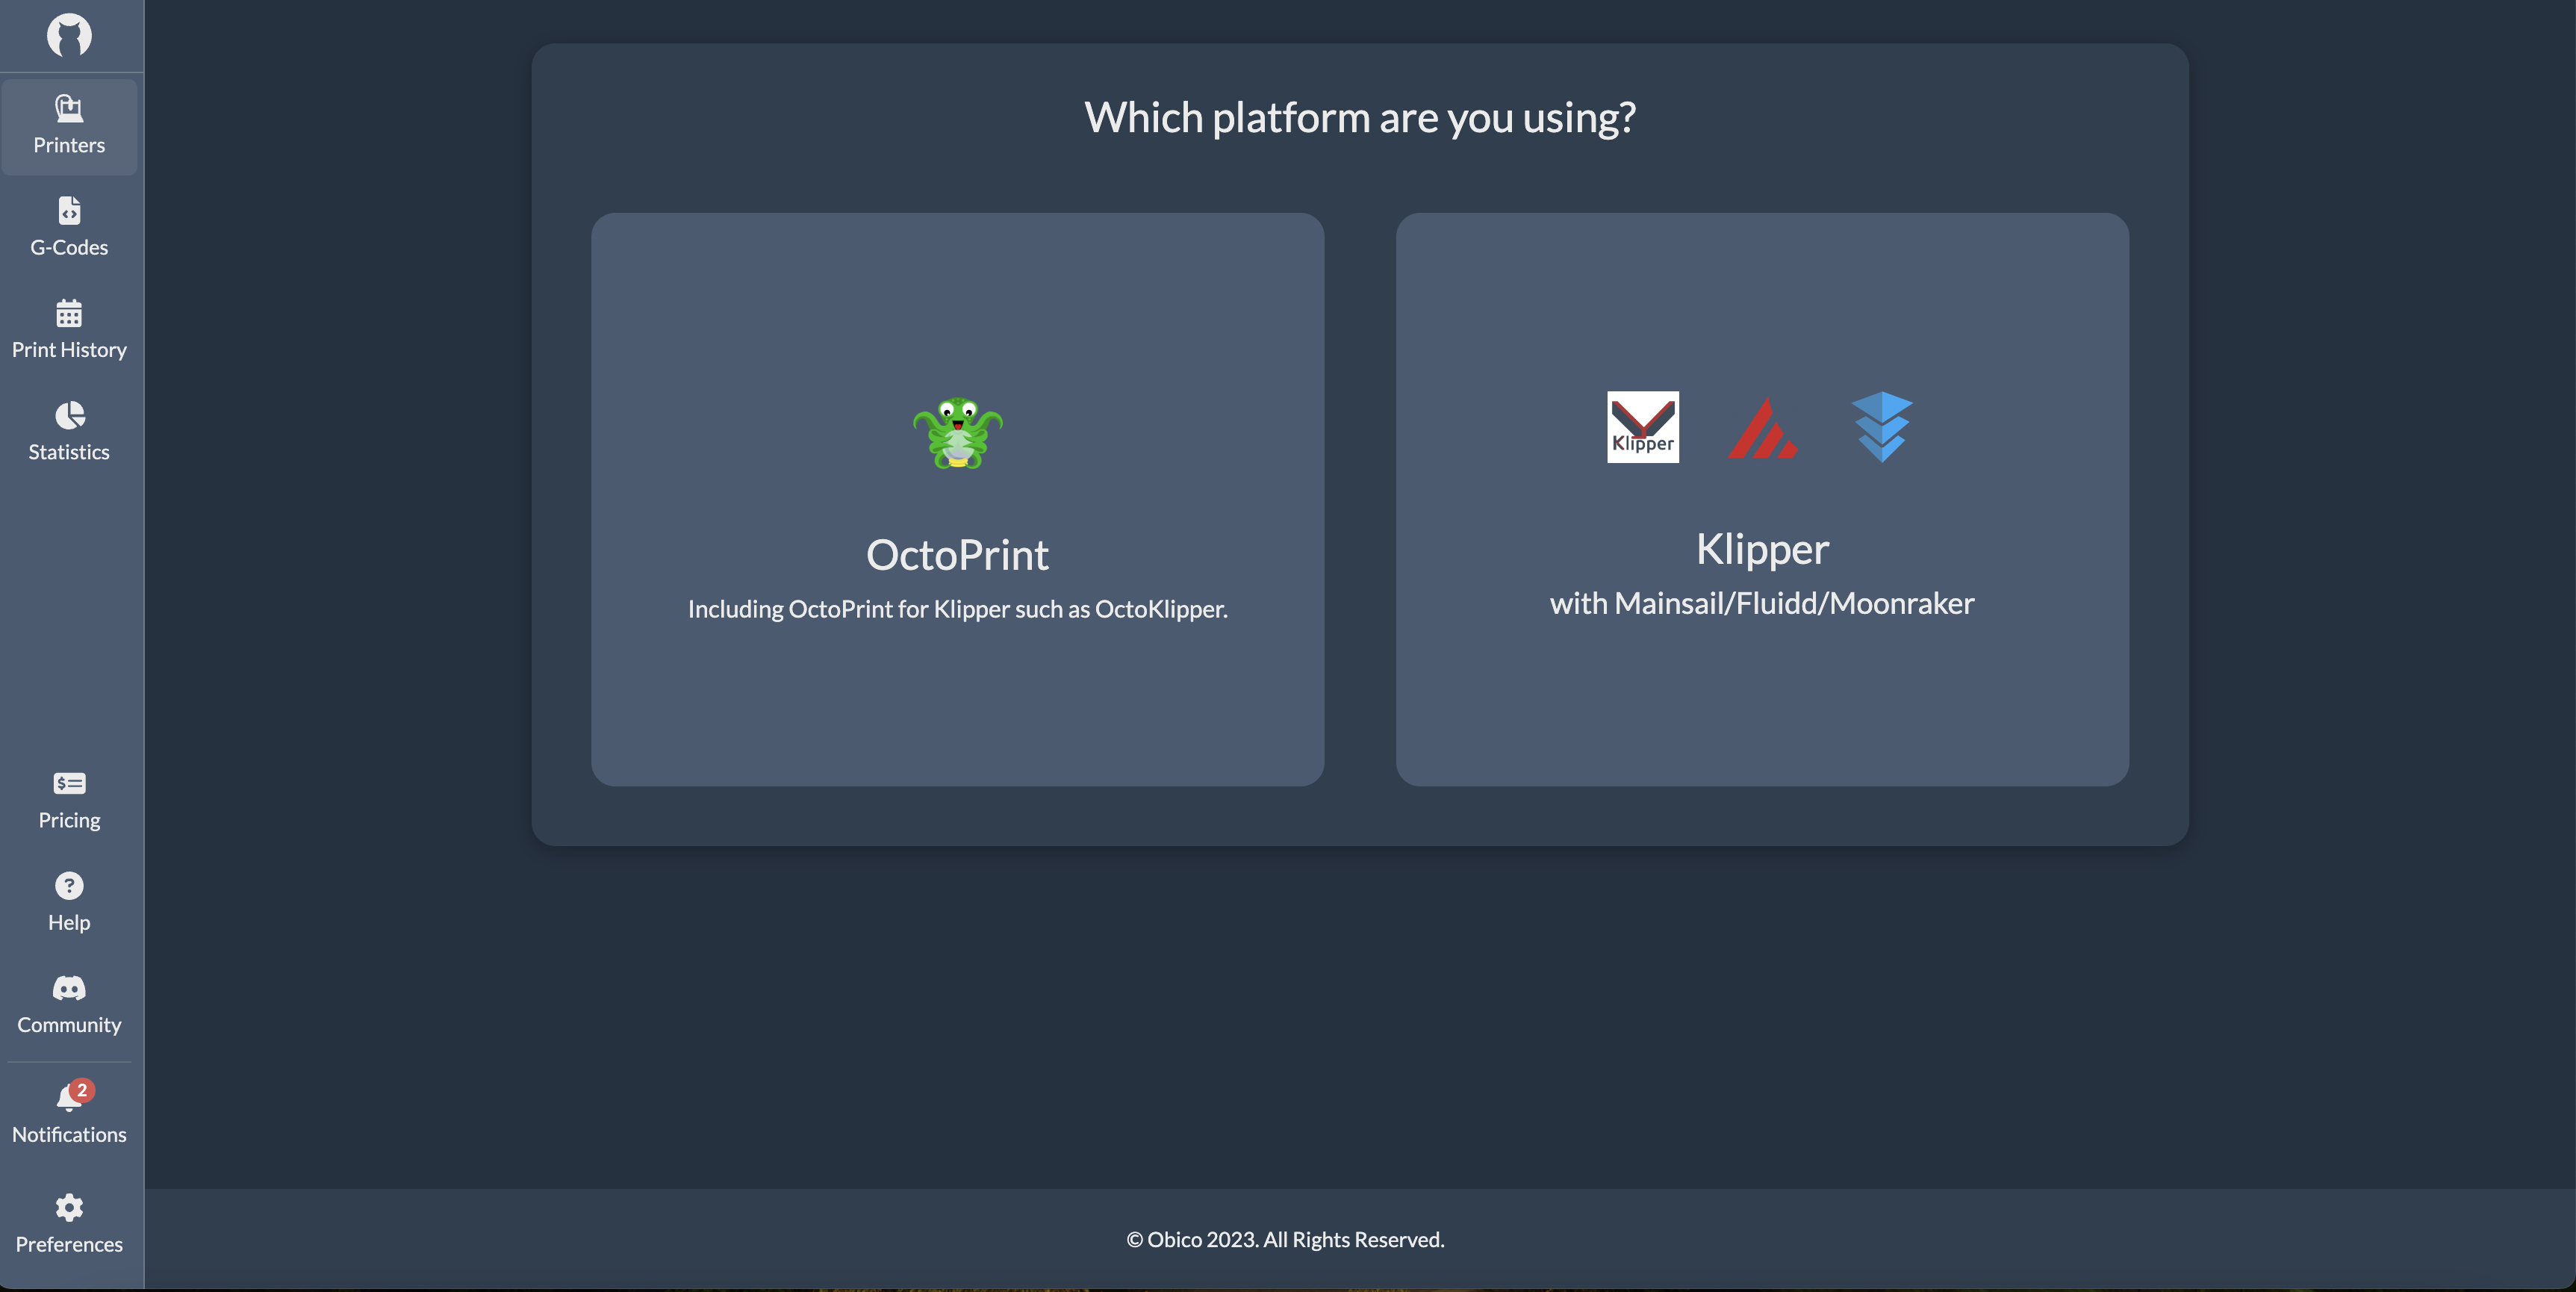
- Select "Klipper": Click "Link New Printer," and when prompted to choose your printer platform, select "Klipper" and then click “Next”.
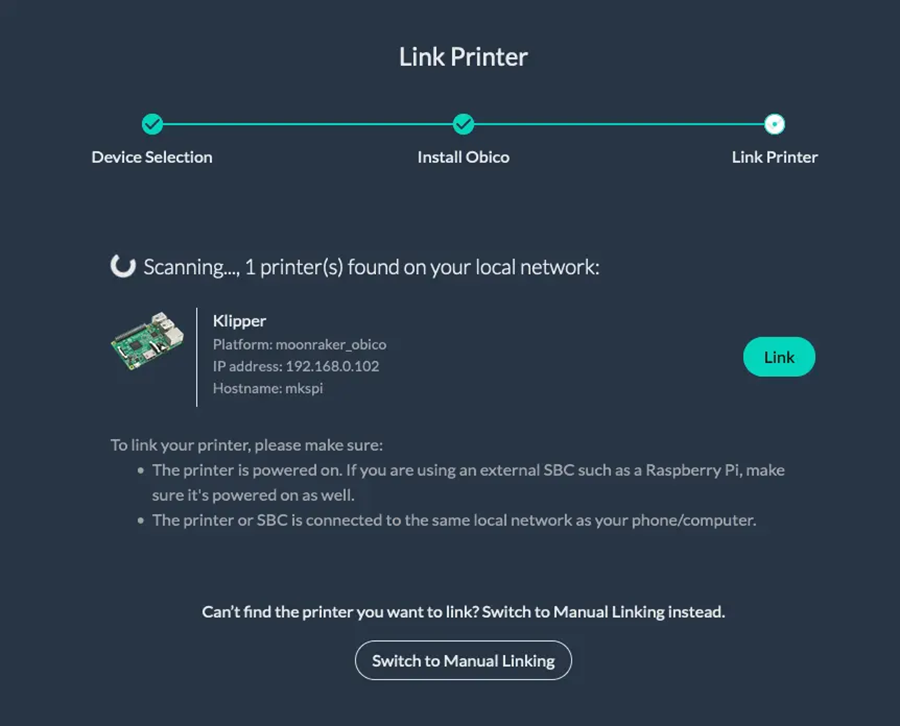
- Automatic Recognition: At this point, the Obico app should automatically detect your printer if it's on the same local network. If it is recognized, you can simply click the "Link" button in the Obico app to establish the connection between Obico and your printer.
Step 4: Give Your Printer a Custom Name (Optional)
You have the option to provide a custom name for your 3D printer if you prefer.
Step 5: Explore Your Printer Feed
With the setup complete, you can now enjoy the benefits of real-time monitoring, failure detection, and remote control of your 3D printer through the Obico platform.
By following these steps, you'll have successfully set up Obico for Klipper on your Makerbase-based 3D printer, granting you remote access and AI-powered features to enhance your 3D printing experience.
Note: In case your printer isn't automatically recognized on the Obico website, you can manually link it by following these steps:
- Switch to Manual Setup: Within the Obico app, select "Switch to manual setup instead."
- Enter the One-time Passcode: Input the One-time Passcode you obtained earlier into the provided field.
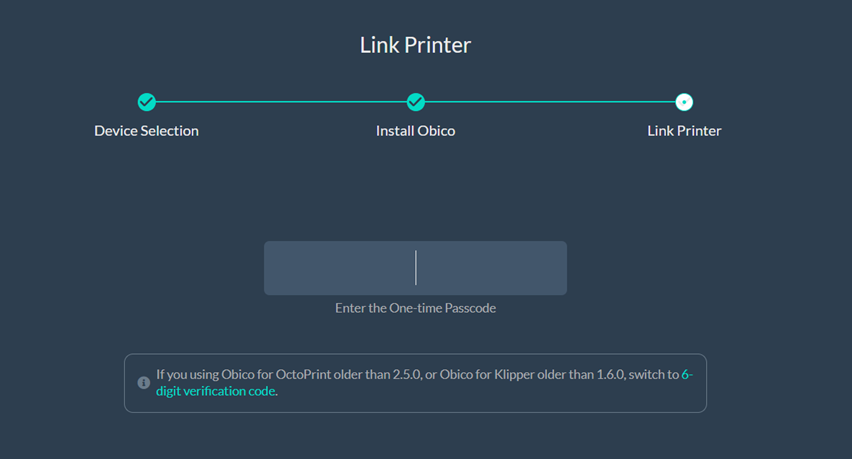
These steps ensure that, even if auto-discovery doesn't work, you can still establish the connection between Obico and your QIDI Plus4 3D printer.
Troubleshooting "Buster-backports Release no longer has a Release file" Error
If you encounter the following error while running the ./install.sh command to install Obico on your Makerbase 3D printer, follow these steps to resolve it:
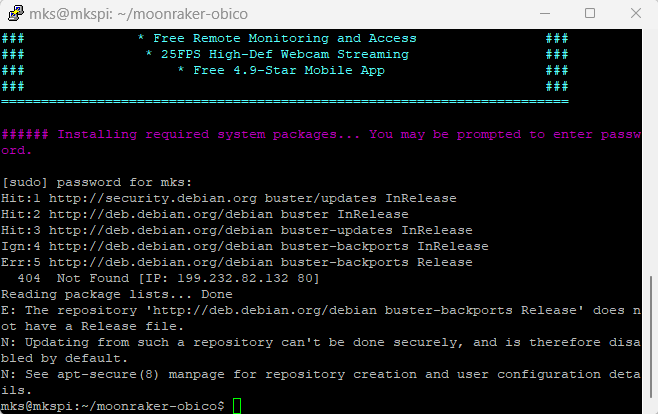
###### Installing required system packages... You may be prompted to enter password.
[sudo] password for mks:
Hit:1 http://security.debian.org buster/updates InRelease
Hit:2 http://deb.debian.org/debian buster InRelease
Hit:3 http://deb.debian.org/debian buster-updates InRelease
Ign:4 http://deb.debian.org/debian buster-backports InRelease
Err:5 http://deb.debian.org/debian buster-backports Release
404 Not Found [IP: 199.232.82.132 80]
Reading package lists... Done
E: The repository 'http://deb.debian.org/debian buster-backports Release' does not have a Release file.
N: Updating from such a repository can't be done securely, and is therefore disabled by default.
N: See apt-secure(8) manpage for repository creation and user configuration details.
mks@mkspi:~/moonraker-obico$
Just follow our easy step-by-step guide for simply solving this error so that you can continue your installing process. Just click here!
What Obico for Klipper Brings to Your QIDI Plus4 Experience
Here, we'll explore the array of features and benefits that Obico for Klipper brings to the table, enhancing your QIDI Plus4 3D printing experience.
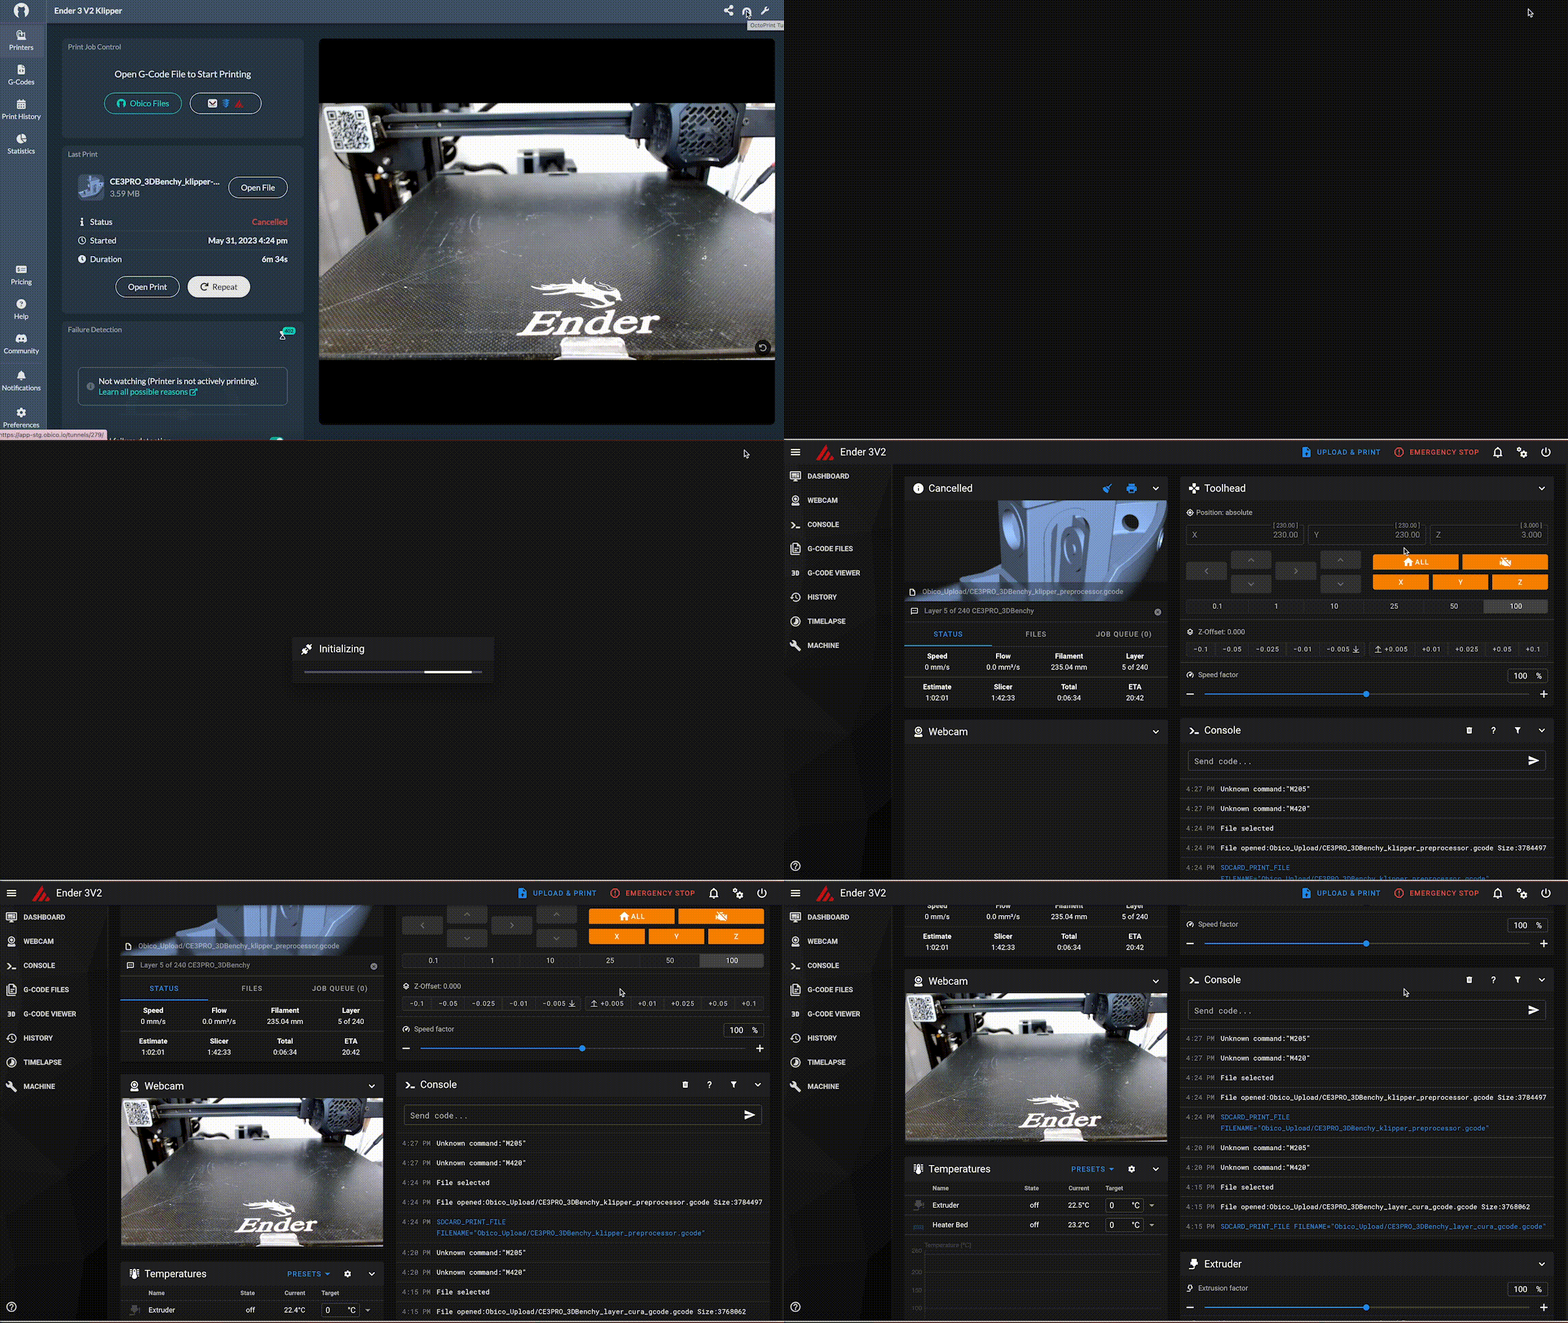
Remote Access via Mainsail/Fluidd
Obico for Klipper allows you to take advantage of the features of both Mainsail and Fluidd interfaces for your QIDI Plus4 printer. This means you can remotely access and control your printer with ease, whether you're nearby or far away. Each interface comes with its own set of handy features, enhancing your ability to monitor and adjust your prints. This setup offers great convenience, letting you benefit from the strengths of Mainsail and Fluidd to manage your printing tasks effectively from any location.
AI-Powered Failure Detection
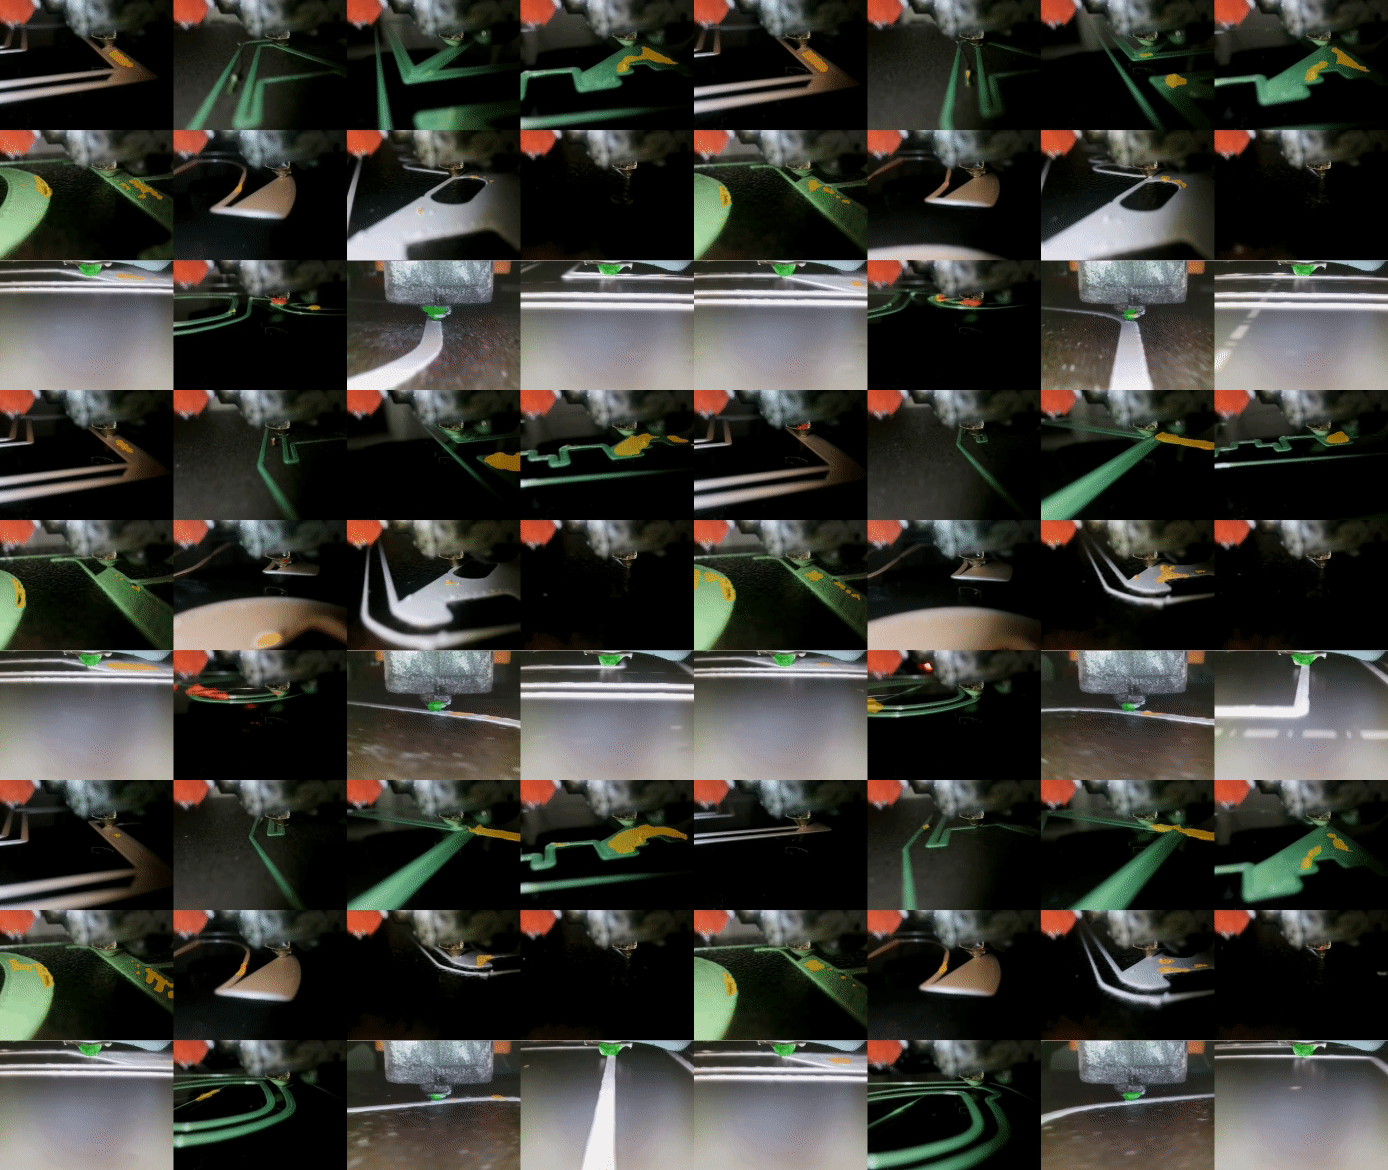
Obico enhances your printing experience with its AI failure detection capability. It offers two primary systems for AI detection. The first is a general system that monitors the entire printed part, while the second, Nozzle Ninja, focuses specifically on the critical first layer of the print. Both systems leverage advanced AI algorithms and large datasets to predict and detect failures, ensuring high-quality prints and minimizing waste.
Mobile App for Enhanced Accessibility
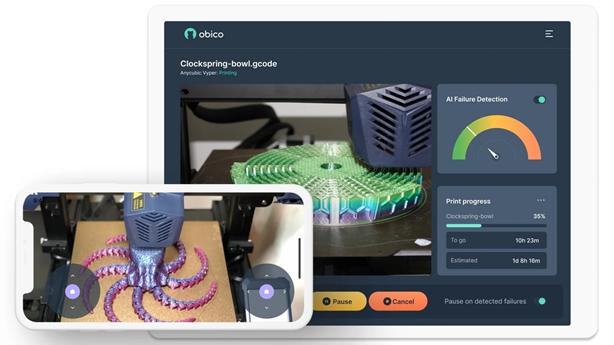
Obico's user-friendly mobile app, available for both iOS and Android, offers enhanced accessibility to manage your QIDI Plus4 printer. This app allows you to control your printer, adjust settings, and monitor print progress directly from your smartphone or tablet, making 3D printing more adaptable to your lifestyle.
Comprehensive Notifications System
Stay constantly informed about the status of your prints with Obico's comprehensive notification system. Whether you prefer push notifications on your mobile device or email alerts, Obico keeps you updated on every aspect of your 3D printing projects.
Discord Integration for Community Engagement
For those who use Discord, Obico's integration with this platform is particularly useful. It allows you to receive updates and notifications about your printing activities directly on your Discord server, enabling you to stay connected with your 3D printing community and share insights about your projects.
The QIDI Plus4 in Action
Once set up, you can control your QIDI Plus4 remotely and enjoy the benefits of AI monitoring. Use the Obico app to start, pause, or stop prints from your phone and get real-time notifications of print progress and issues. The built-in 1080p camera gives you clear visuals so you can monitor prints from anywhere.
With its advanced hardware and smart features, the QIDI Plus4 can handle a wide range of materials and applications. Whether you’re printing functional parts, prototypes, or artistic models, this printer delivers consistent, high-quality results.
FAQs
Q1. What sets the QIDI Plus4 apart from others?
Answer: The QIDI Plus4 has advanced features like a heated build chamber (65°C), a 2nd-gen bimetal hotend (up to 370°C), and Klipper firmware pre-installed. It has a large build volume (305 × 305 × 280 mm), supports high-performance materials like ABS, Nylon, PPS-CF, and Nex-PAHT-CF25, making it perfect for beginners and pros. It is also compatible with Obico for remote access and AI monitoring.
Q2. How does the QIDI Plus4 use Klipper firmware to enhance printing?
Answer: Klipper firmware moves complex calculations from the mainboard to an external processor, enabling faster print speeds and higher precision. Klipper on QIDI Plus4 is pre-installed and integrates seamlessly with Obico, offering remote monitoring, AI failure detection, and better overall printer performance.
Q3. What materials can I print with QIDI Plus4, and how does it handle high-performance filaments?
Answer: QIDI Plus4 supports a wide range of materials, including PLA, ABS, PETG, Nylon, and advanced composites like PPS-CF and Nex-PAHT-CF25. Its 370°C nozzle, heated bed (up to 100°C), and actively heated chamber (65°C) ensure excellent layer adhesion and minimal warping, even for challenging filaments.
Q4. How to set up Obico for remote access and AI monitoring on QIDI Plus4?
Answer: To set up Obico:
- Use PuTTY to log into the printer via SSH.
- Launch KIAUH (pre-installed) using the command
./kiauh/kiauh.sh. - Select "Install Additional Services" and choose Obico for Klipper.
- During installation, configure the Obico server URL (https://app.obico.io for cloud users or your server’s IP address for self-hosted setups).
- Provide the required details for Moonraker (host: 127.0.0.1, port: 7125, config path: /home/mks/klipper_config/moonraker.conf, log directory: /home/mks/klipper_logs).
- Link your printer to your Obico account via the app or website.
Q5. What are the benefits of remote access and AI monitoring?
Answer: With Obico, you can monitor prints in real time, get alerts for potential issues or failures, and control your printer from your phone or computer. The AI failure detection ensures early intervention, saves time and materials, and reduces frustration.
Q6. What should I do if I encounter errors during installation, such as SSL certificate verification issues?
Answer: If you encounter SSL errors like SSLError(SSLCertVerificationError: certificate verify failed), it’s likely due to the printer’s system time being incorrect. To fix this, update the system date by running the command:
sudo date -s 'YYYY-MM-DD'
Replace 'YYYY-MM-DD' with the current date. After correcting the date, rerun the installation script to proceed.
Final Thoughts
The QIDI Plus4 is more than just a 3D printer; it’s a smart connected machine that lets you do more with less. Its industrial-grade hardware, wide material compatibility, and seamless integration with Klipper and Obico make it the perfect choice for anyone looking to level up their 3D printing experience. By giving you remote access and AI monitoring, the QIDI Plus4 lets you print with confidence knowing your prints are always in control.
Ready to level up your 3D printing? Get your ideas printed with the QIDI Plus4.
What will you create first? Let us know!
