Sovol SV06 Series - Klipper Remote Access and AI
Introduction: Welcoming You to the Sovol SV06 Series
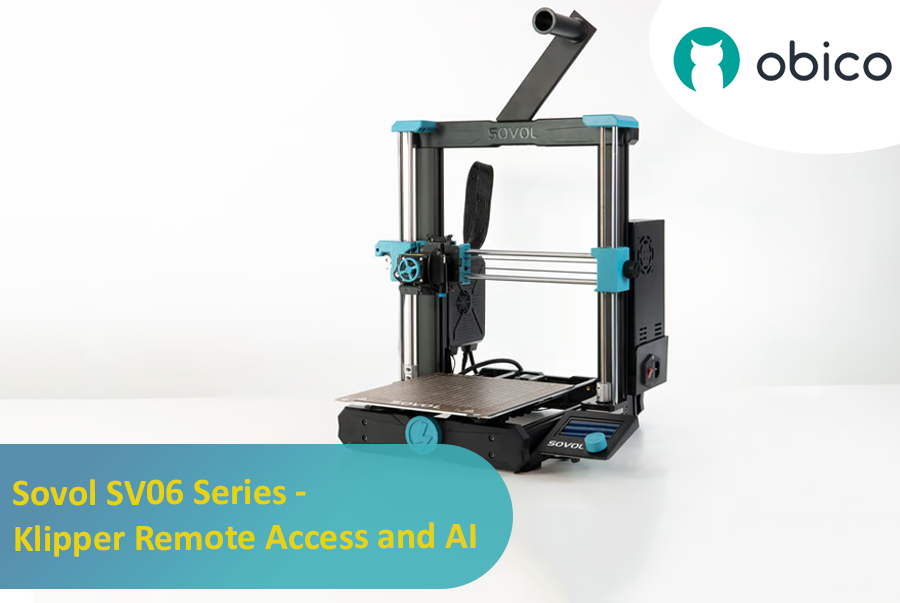
Hey there! Let's jump into the world of the Sovol SV06. This printer is getting a lot of buzz for being budget-friendly while still offering some pretty cool features. If you're thinking about getting into 3D printing without spending a ton, the Sovol SV06 is a solid choice. It gives you a lot for its price, similar to more expensive printers like the Prusa MK3S+, but at a fraction of the cost. With neat features like dual Z-axis motors, automatic bed leveling, and the ability to reach up to 300 °C, it really stands out in the budget printer crowd.
Deep Dive into the Sovol SV06
Let's take a closer look at what the Sovol SV06 has to offer. It’s built tough and stable, designed to handle regular printing without a hitch. Plus, it has a neat ribbon cable system that keeps things tidy. In terms of size, it's got a decent build volume of 220 x 220 x 250 mm, perfect for various projects. And it can handle all sorts of filaments thanks to its all-metal hot end and direct extruder. The printer's user interface is straightforward, with a simple LCD screen and a rotary encoder, making it easy to use, especially if you're just starting out.
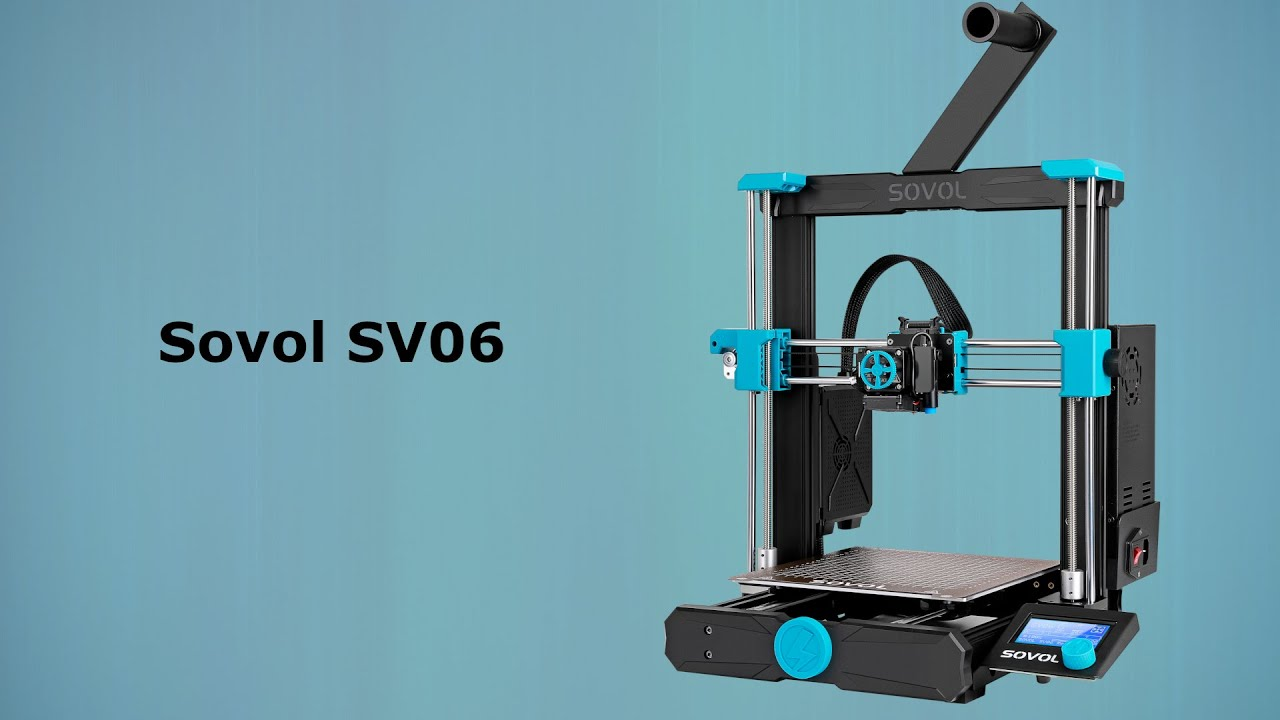
If you're curious to learn more about the printer's specs or if you're considering purchasing it, feel free to check out the official website using this link. You'll find everything you need to know and the option to buy it there.
Introducing the Sovol SV06 Plus
Now, get ready for the newest member of the Sovol family - the Sovol SV06 Plus. It's like the original SV06 but bigger and packed with even more features. The SV06 Plus boasts a larger build volume of 300 x 300 x 340 mm, allowing for more ambitious and larger projects. It also steps up with a color touchscreen for an even more user-friendly experience and includes a much-requested filament sensor. With these enhancements, the SV06 Plus is poised to offer even more value and versatility in 3D printing.
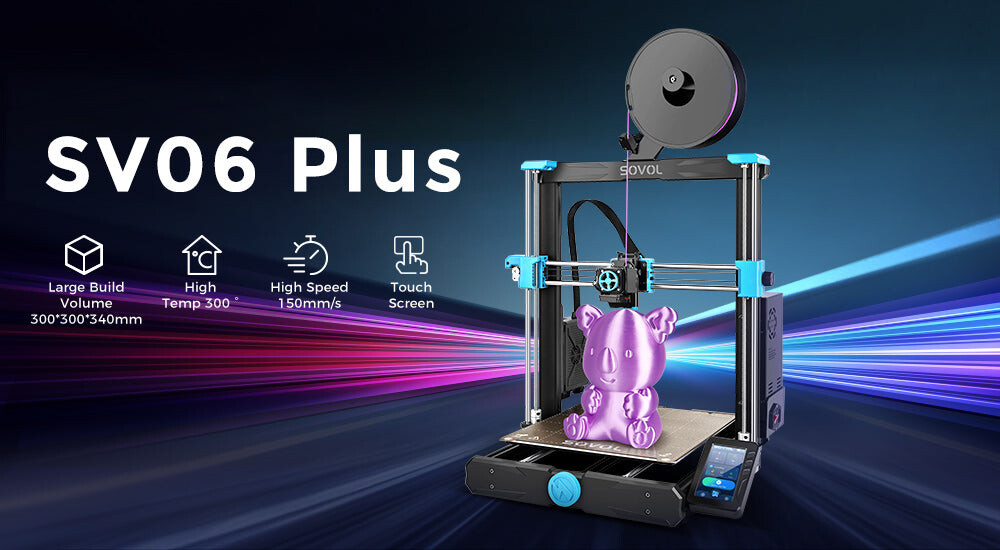
If you want to dive deeper into the details of the Sovol SV06 Plus or are thinking about getting one for yourself, why not head over to the official website? Just follow this link,and you'll find all the specs, features, and info you need. Plus, if you decide it's the right fit for you, you can make your purchase right there.
Boosting the Sovol SV06 with Klipper and Obico
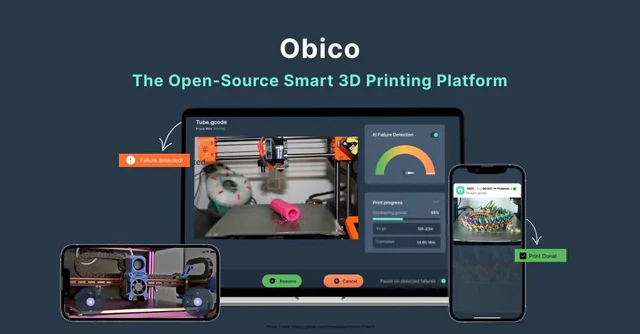
The SV06 series printer usually comes with standard Marlin firmware, but here's where it gets exciting: you can upgrade it to Klipper firmware. And if you've already upgraded or got yourself the Sovol Klipper Screen (available at Sovol3D), you're all set for some cool enhancements. Klipper lets your printer do things faster and more smoothly. When you combine Klipper with Obico, a web-based interface, you get to control, monitor, and even get AI-powered help with your prints from anywhere. Imagine checking on your print from your phone and getting alerts if something's up. That's what Obico does for you.
Why Remote Access and AI Are Game Changers in 3D Printing?
Having remote access to your Sovol SV06 series printer is super handy. It means you can manage your prints from anywhere using just your phone or computer. This is perfect for those long prints or if you need to step away from your printer. Plus, with AI features from Obico, you get an extra layer of security against print failures.
Up Next: Connecting Your Sovol SV06 to Obico
If you've upgraded your Sovol SV06 series printer with Klipper firmware or have the Sovol Klipper Screen, the next part of this guide is just for you. We're going to walk you through connecting your printer to Obico. This way, you can start enjoying remote control and AI features that will take your 3D printing to the next level. Stay tuned for an easy, step-by-step guide on making this cool upgrade to your printing experience!
Installing Obico for Klipper on Sovol SV06 Series
If you own a Sovol SV06 Series 3D printer with Klipper installed or connected to Sovol Klipper screen and wish to unlock remote access and AI features by installing Obico for Klipper, follow these straightforward steps:
Step-by-Step Installation Guide
Step 1: SSH into Your Printer's Board
To start, establish a secure connection with your printer's internal computer via SSH:
- Open a Terminal or Command Prompt on Your Computer – think of this as the doorway to your printer's computer.
- Type the Following Command and Press Enter:
ssh mks@your-printer-ip-address
Replace your-printer-IP-address with the actual IP address of your Sovol SV06 Series printer. You can find this information in the Advance Settings on your printer's display screen.
Enter Your Credentials:
- Username:
mks - Password:
makerbaseThis is similar to logging into your printer's computer system.
Step 2: Clone the Obico for Klipper Repository
Now, let's proceed to the next step:
- Navigate to Your Home Directory: In the terminal where you've connected to your printer's board, you are now within your printer's computer system. Get to your home directory with this command:
cd ~
Think of it as accessing your computer's "home" folder.
- Clone the Obico for Klipper Repository: Next, bring in the Obico for Klipper software from GitHub. Enter this command:
git clone https://github.com/TheSpaghettiDetective/moonraker-obico.git
This is akin to downloading a program to your computer. With this, you've successfully cloned the Obico for Klipper repository onto your printer's computer, setting the stage for the installation.
Step 3: Change Directory to the Obico Repository
Let's move on to the next step:
- Enter the Newly Cloned Repository: To work with the Obico for Klipper files you've just downloaded, navigate into the repository folder. Do this with the following command:
cd moonraker-obico
Think of it as opening a folder on your computer. Now, you're inside the Obico for Klipper repository and ready to proceed with the installation.
Step 4: Run the Installation Script
You're almost there! Let's move on to the next step: Execute the Installation Script: To install Obico for Klipper, run a special script by entering the following command and pressing Enter:
./install.sh
This script will configure Obico for Klipper on your printer's computer. Obico for Klipper is now being installed on your Sovol SV06 Series printer. Please follow the on-screen prompts for the next steps in the installation process.
Step 5: Follow Installation Prompts
Let's continue with the next step, where you'll provide specific configurations: While the installation script is running, it will prompt you for specific settings. Here's what to enter when prompted:
- Moonraker Host: When asked for the Moonraker host, type in:
127.0.0.1
This informs Obico where to find the Moonraker software.
- Moonraker Port: When prompted for the Moonraker port, enter:
7125
This sets the communication port for Moonraker.
- Moonraker Config File: You'll be asked to specify the path to your Moonraker configuration file. Usually, it's located at:
/home/mks/klipper_config/moonraker.conf
Ensure you enter the correct path to your configuration file.
- Klipper Log Directory: When asked for the Klipper log directory, provide the path to your Klipper log files, typically found at:
/home/mks/klipper_logs
This helps Obico locate the Klipper logs. By providing these settings, you're assisting Obico for Klipper in effective communication with your Sovol SV06 Series printer's software. Continue to follow the installation prompts as needed. Upon completing these steps, you'll have successfully installed Obico for Klipper on your 3D printer. To optimize this setup, follow these additional steps:
Step 1: Sign up for an Obico Account
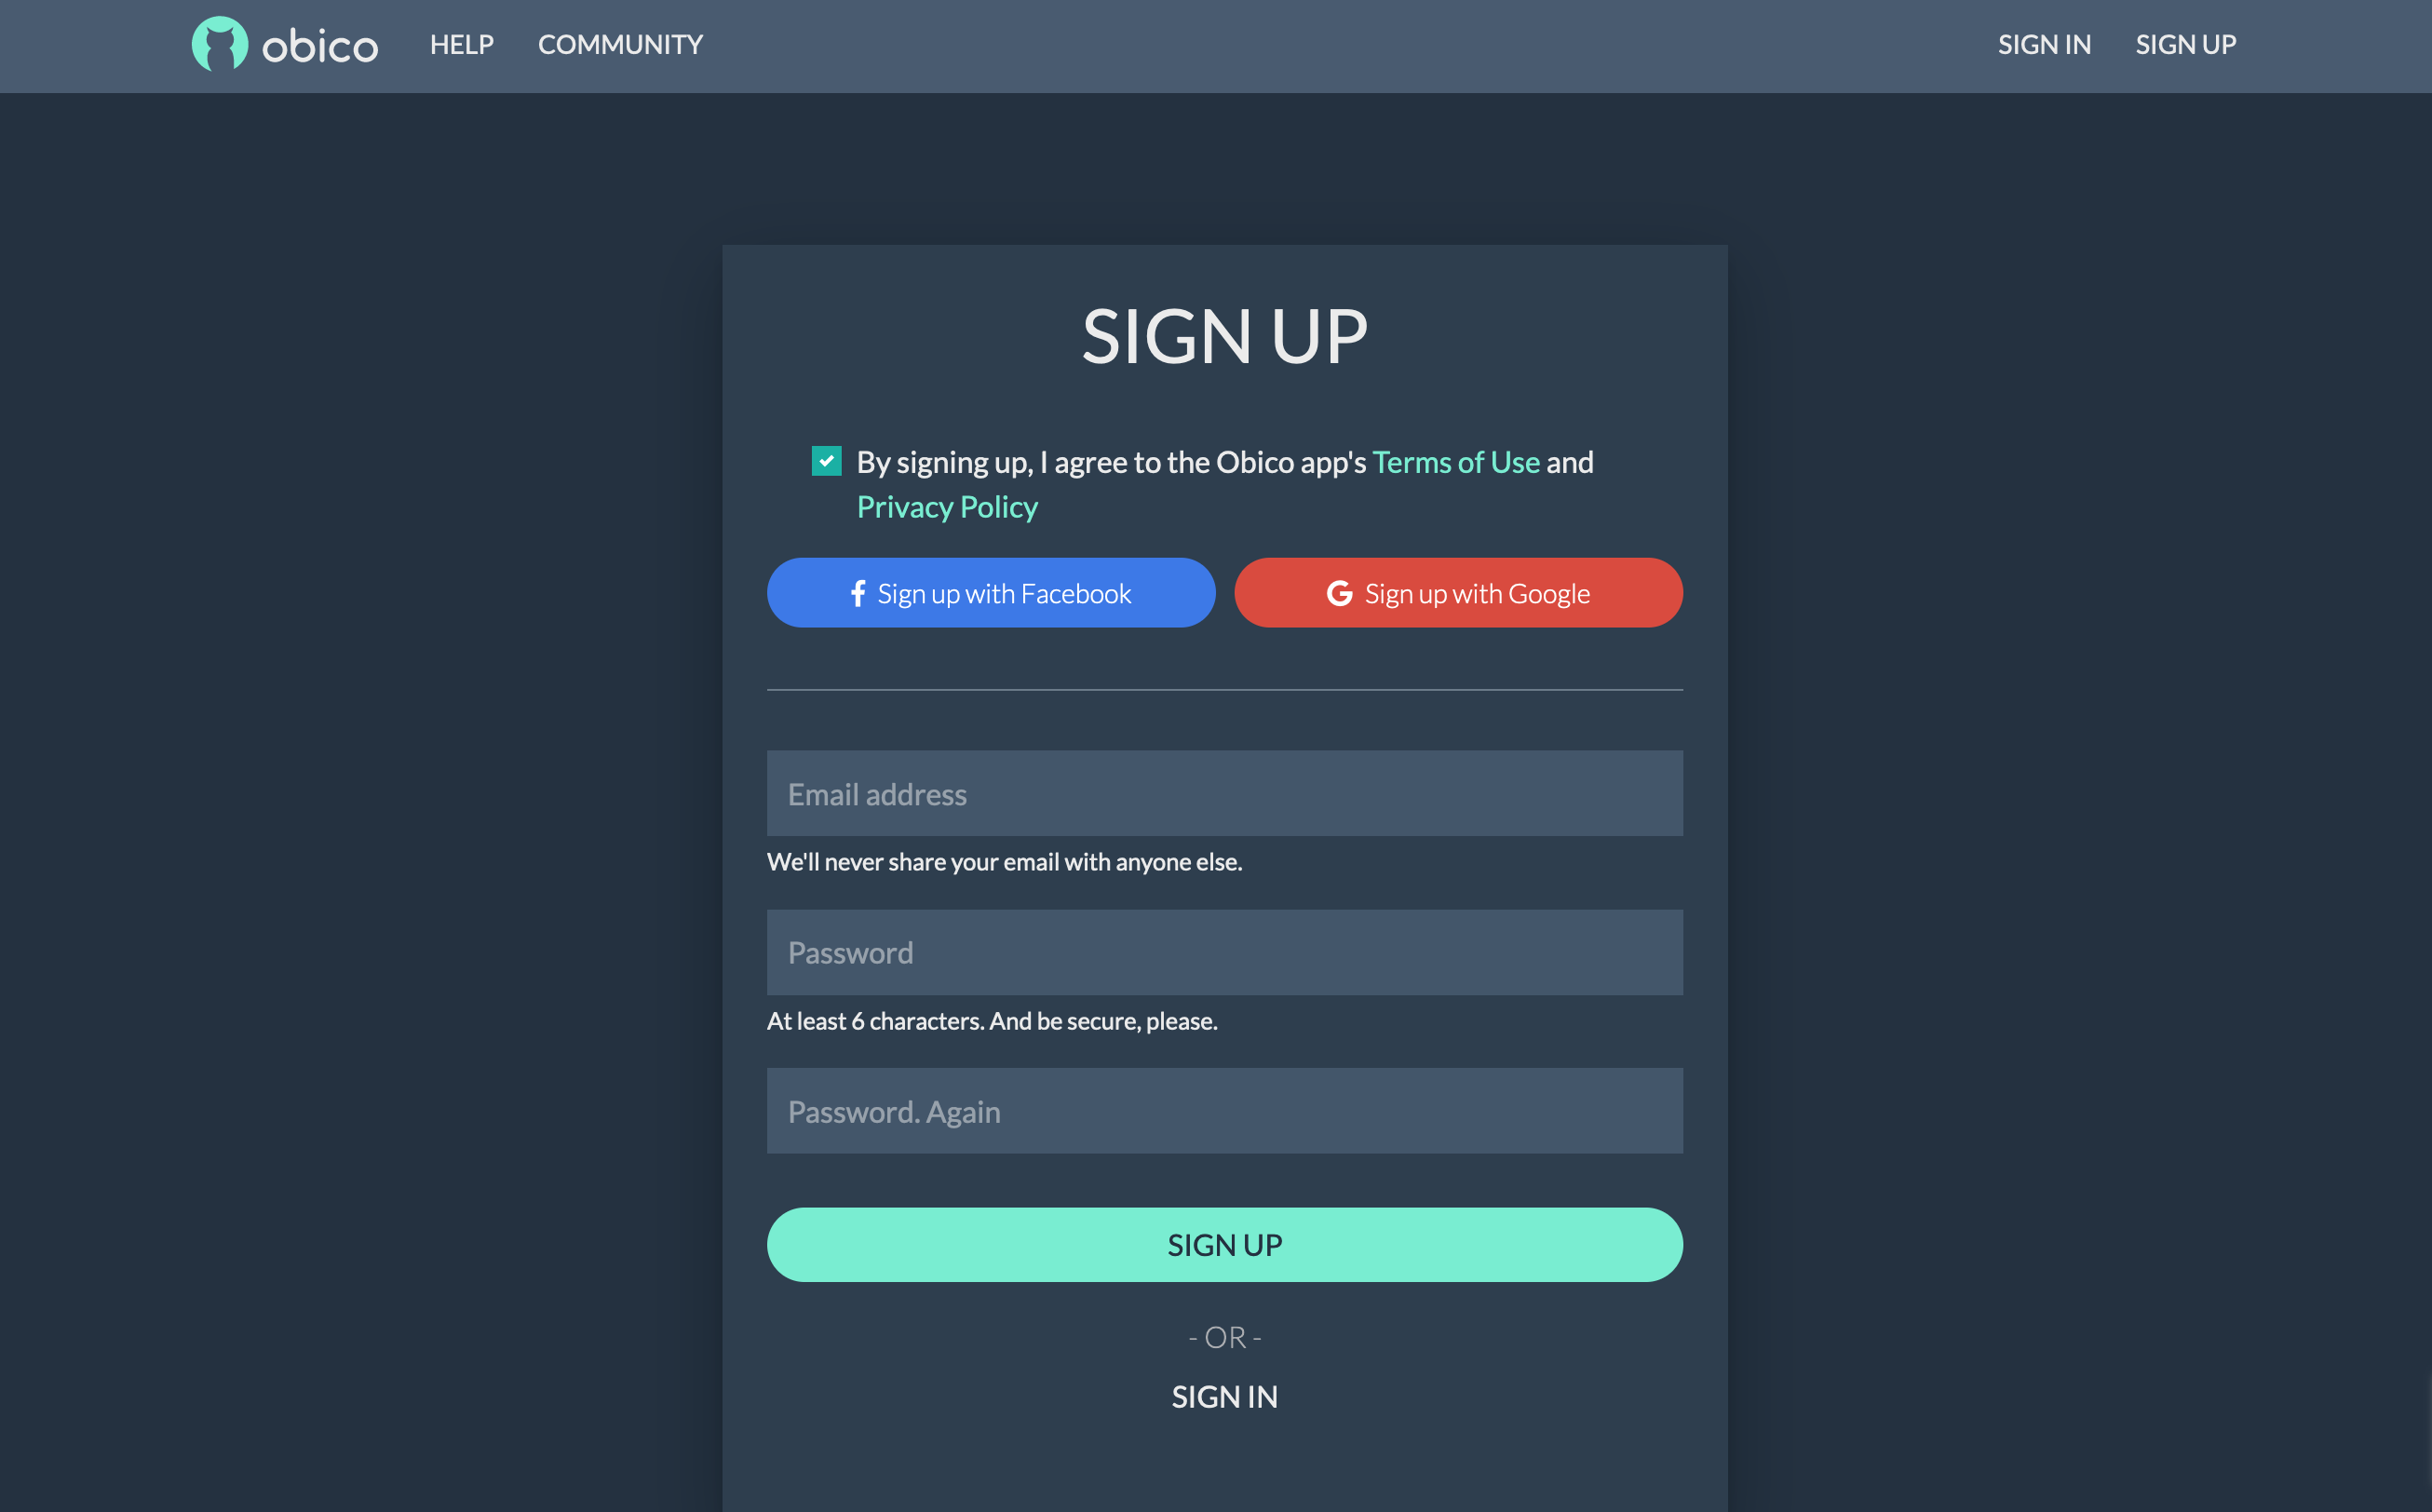
If you haven't already, create an Obico account to get started. You can do this through the Obico mobile app or the web app. Here's how:
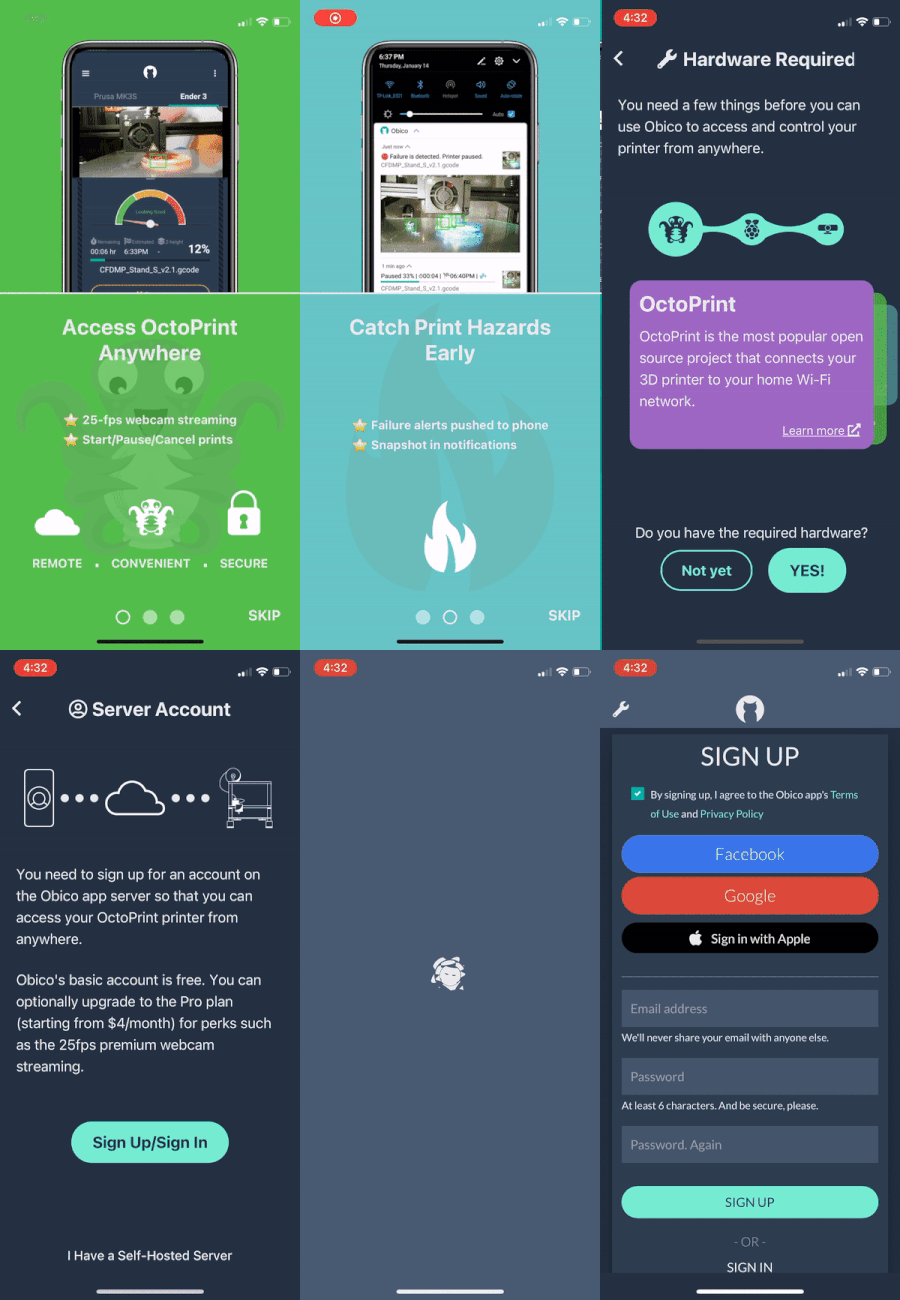
- 📱 Mobile App: If you're using the mobile app, open it and follow the on-screen prompts to sign up for an Obico account.
- 🌐 Web App: If you prefer to use the web app, open a web browser and go to the Obico Website. Click on the "Sign Up" option and follow the registration process. You can sign up with your email, Google, or Facebook account.
Step 2: Link Your Printer to Obico
To connect your Sovol SV06 Series 3D printer to Obico and unlock its remote access and AI-powered features, follow these steps:
- Visit the Obico Website: Access the Obico Website (or your own Obico server if you have one).
- Sign In: Log in to your Obico account using the credentials you just created. Once logged in, navigate to the "Printers" page on the Obico platform.
Step 3: Select "Klipper" and Connect Your Printer
- Select "Klipper": Click "Link New Printer," and when prompted to choose your printer platform, select "Klipper" and then click “next.”

- Automatic Recognition: At this point, the Obico app should automatically detect your printer if it's on the same local network. If it is recognized, you can simply click the "Link" button in the Obico app to establish the connection between Obico and your printer.
Step 4: Give Your Printer a Custom Name (Optional)
You have the option to provide a custom name for your Sovol SV06 Series 3D printer if you prefer.
Step 5: Explore Your Printer Feed
With the setup complete, you can now enjoy the benefits of real-time monitoring, failure detection, and remote control of your 3D printer through the Obico platform. By following these steps, you'll have successfully set up Obico for Klipper on your 3D printer, granting you remote access and AI-powered features to enhance your 3D printing experience. Note: If Auto-Discovery Doesn't Work: Link Your Printer Manually In case your printer isn't automatically recognized on the Obico website, you can manually link it by following these steps:
- Enter Manual Linking Mode: Return to your terminal and enter 'y' to initiate manual linking mode.
- Switch to Manual Setup: In the Obico app, select "Switch to manual setup instead."
- Retrieve a Six-Digit Code: You'll be provided with a six-digit code.
- Paste the Code: Paste the code into the terminal to manually link your printer. These steps ensure that even if auto-discovery doesn't work, you can still establish the connection between Obico and your Sovol SV06 Series 3D printer.
What Obico for Klipper Brings to Your Sovol SV06 Experience
Here, we'll explore the array of features and benefits that Obico for Klipper brings to the table, enhancing your Sovol SV06 Series 3D printing experience.
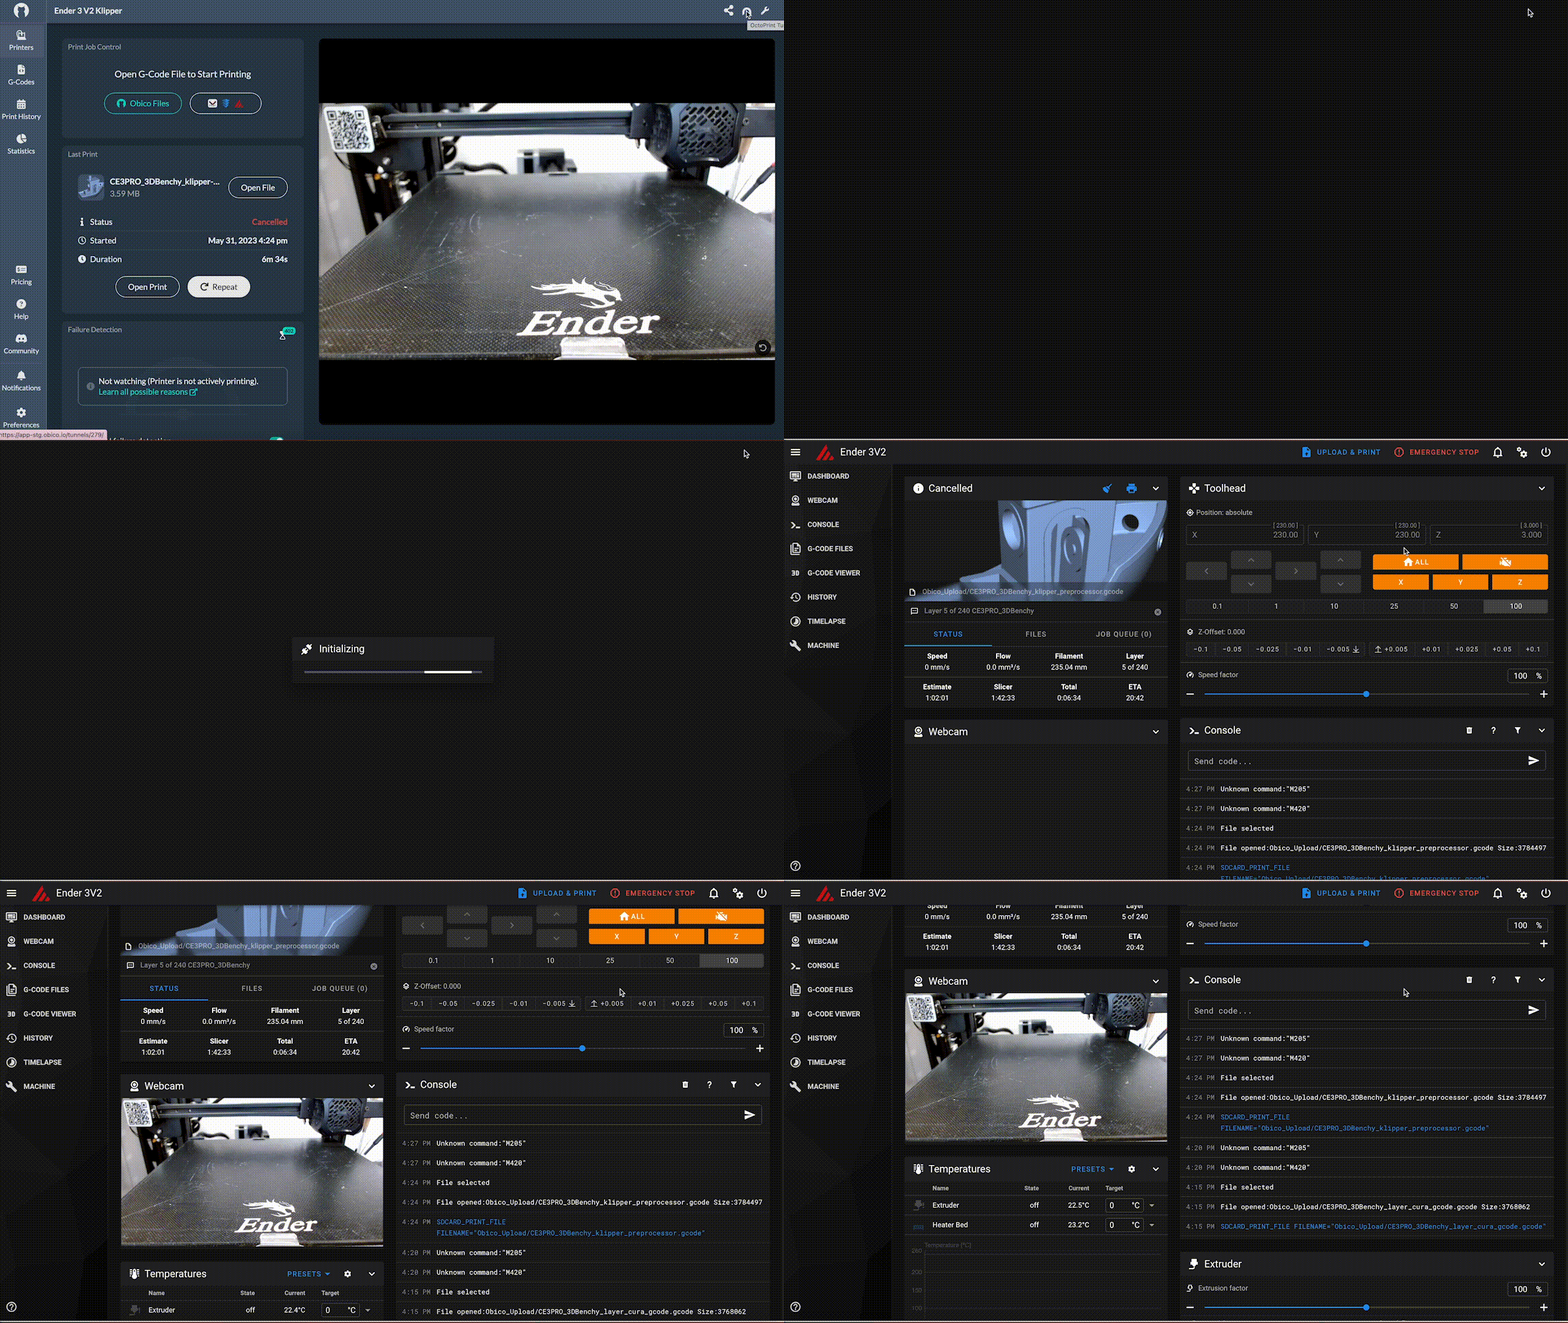
Remote Access via Mainsail/Fluidd
Obico for Klipper allows you to take advantage of the features of both Mainsail and Fluidd interfaces for your Sovol SV06 printer. This means you can remotely access and control your printer with ease, whether you're nearby or far away. Each interface comes with its own set of handy features, enhancing your ability to monitor and adjust your prints. This setup offers great convenience, letting you benefit from the strengths of Mainsail and Fluidd to manage your printing tasks effectively from any location.
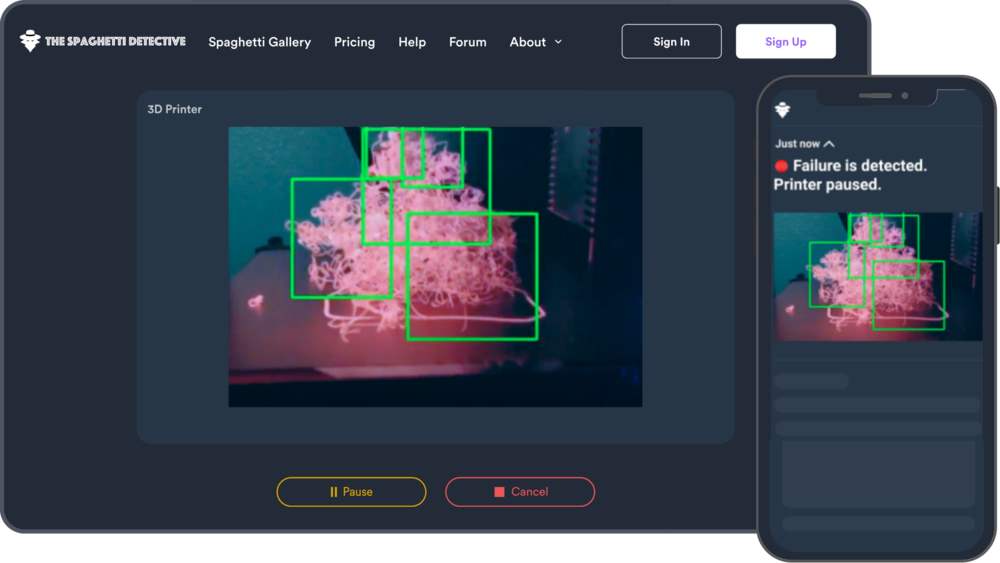
AI-Powered Failure Detection
Obico enhances your printing experience with its AI failure detection capability. This system continuously monitors your printing process and quickly identifies any potential issues, helping to prevent print failures. It's like having a vigilant, always-on assistant ensuring that your prints are flawless.
Mobile App for Enhanced Accessibility
Obico's user-friendly mobile app, available for both iOS and Android, offers enhanced accessibility to manage your Sovol SV06 printer. This app allows you to control your printer, adjust settings, and monitor print progress directly from your smartphone or tablet, making 3D printing more adaptable to your lifestyle.
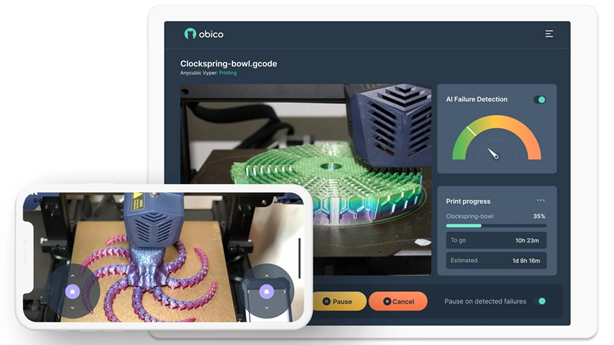
Comprehensive Notifications System
Stay constantly informed about the status of your prints with Obico's comprehensive notification system. Whether you prefer push notifications on your mobile device or email alerts, Obico keeps you updated on every aspect of your 3D printing projects.
Discord Integration for Community Engagement
For those who use Discord, Obico's integration with this platform is particularly useful. It allows you to receive updates and notifications about your printing activities directly on your Discord server, enabling you to stay connected with your 3D printing community and share insights about your projects.
Conclusion
Wrapping things up, it's really exciting to see how combining the Sovol SV06 series printer with Obico for Klipper transforms your 3D printing experience. It's like giving your printer superpowers – with remote access and AI watching over your prints, you've got more freedom and less stress. Whether you’re a 3D printing newbie or a seasoned pro, this setup makes everything smoother and smarter. It's not just about what you print anymore; it's about enjoying the journey and embracing the future of 3D printing with confidence and ease.
