
NOZZLE NINJA

First Layer AI Error Detection for OctoPrint & Klipper Now Available!

OBICO_NOZZLE_NINJA_COMPATIBLE_BADGE

81 posts tagged with "how-to"

View All Tags

The Ender 3 series of 3D printers have made all the news for the last couple of years. Featuring an amazing set of features at a budget pricing, Ender 3 has made 3D printing accessible for several hobbyists and first-time users.

Another equally important thing that's been making rounds in the 3D printing community is the Klipper firmware. First released in 2016, Klipper is quickly ranking up amongst users as the go-to firmware for high-speed 3D printing. It's free, easy to use, and has many useful features that help you get the best printing experience.

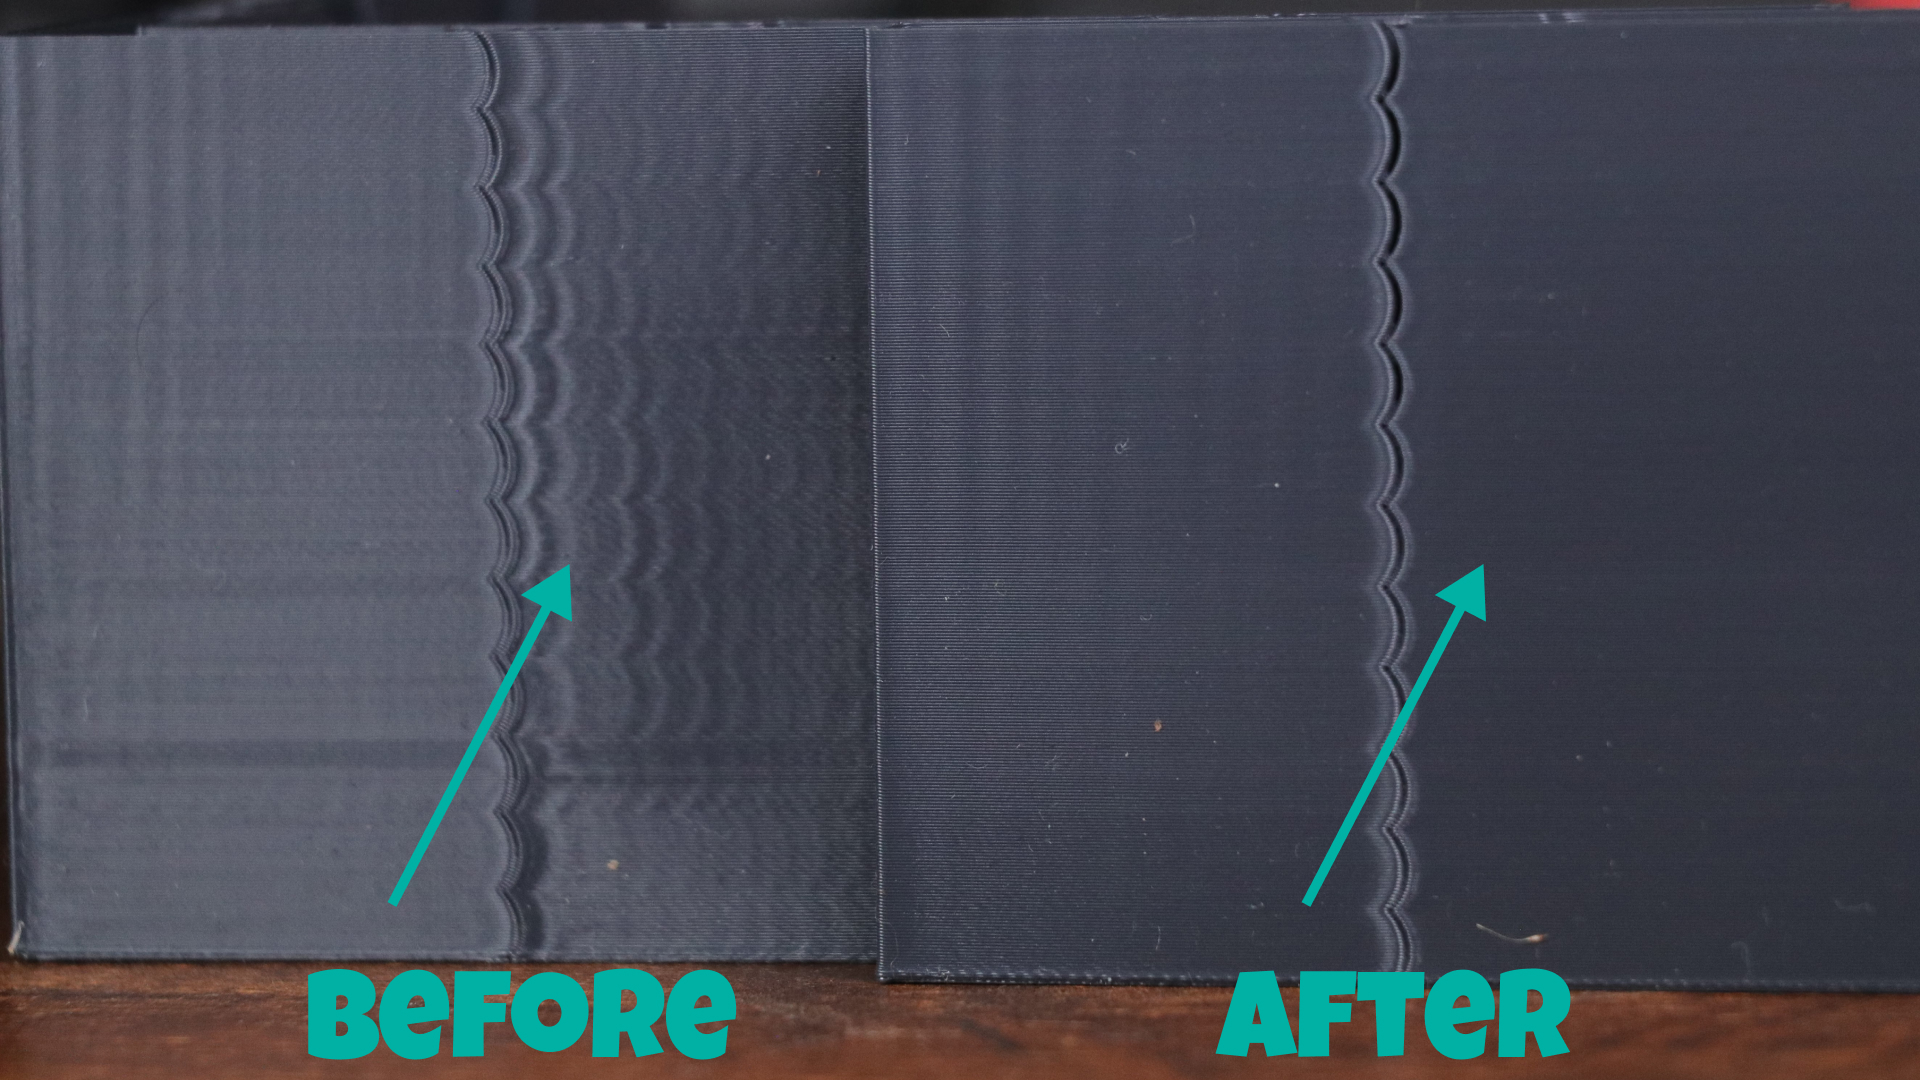
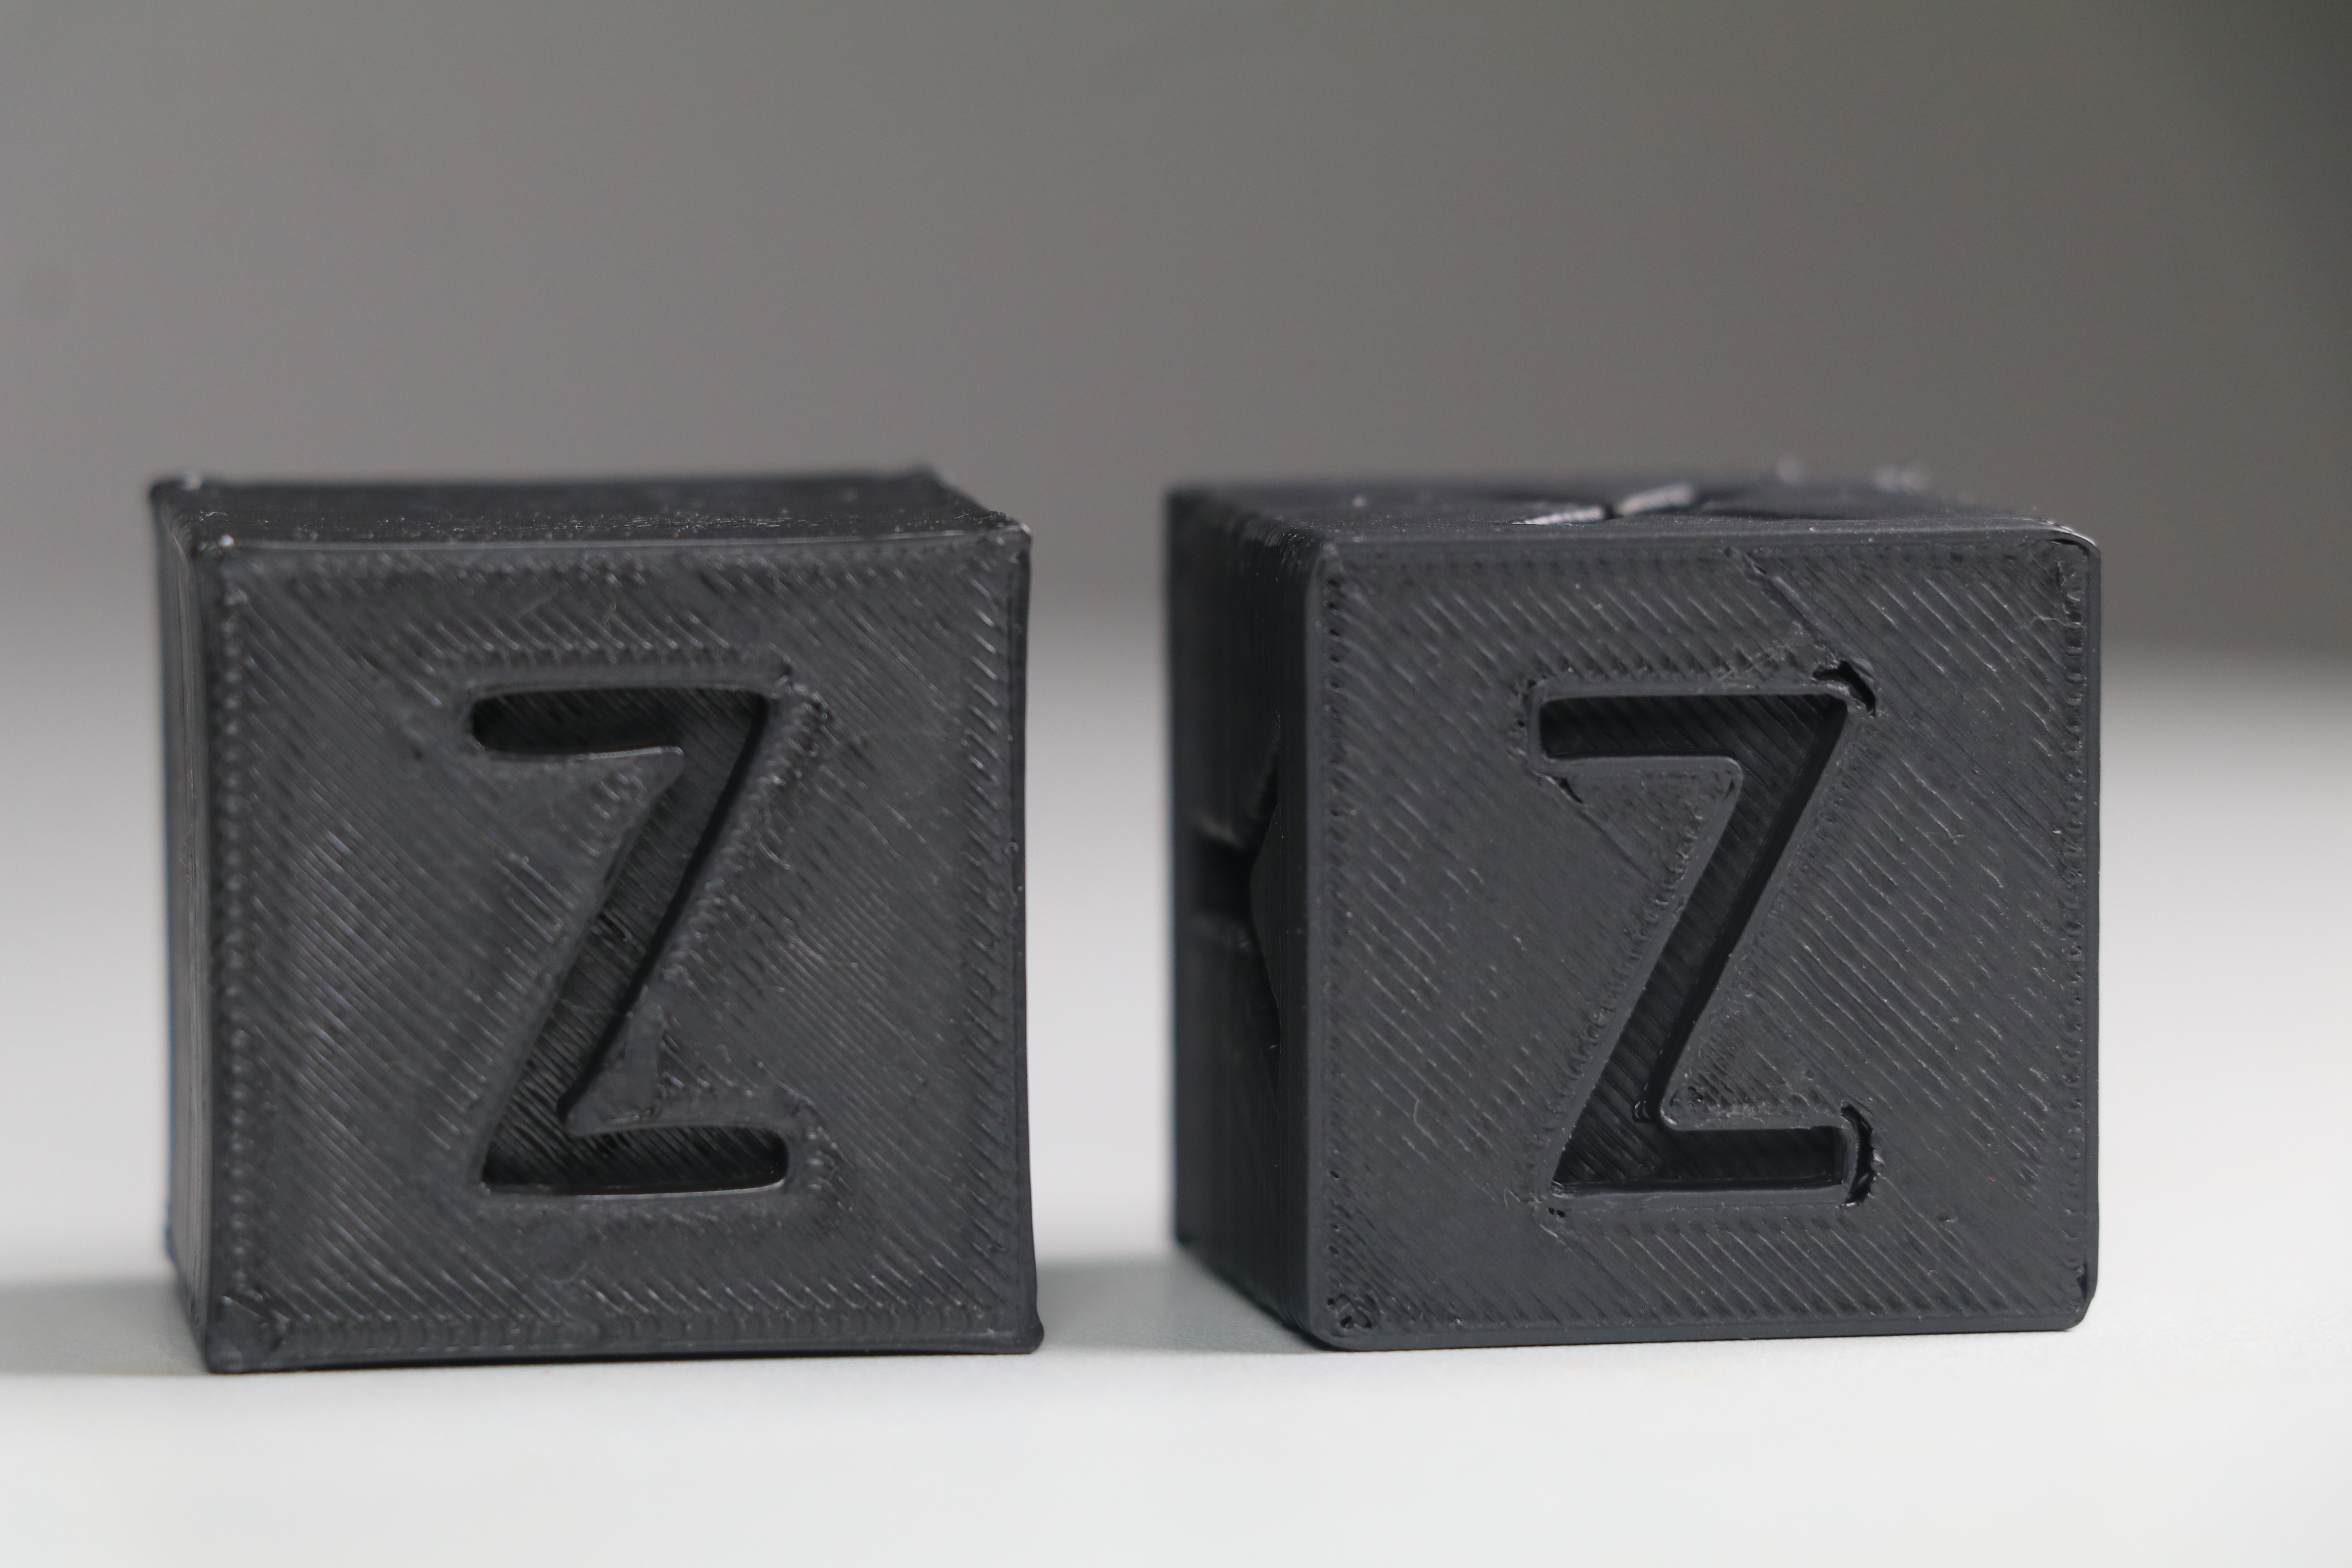
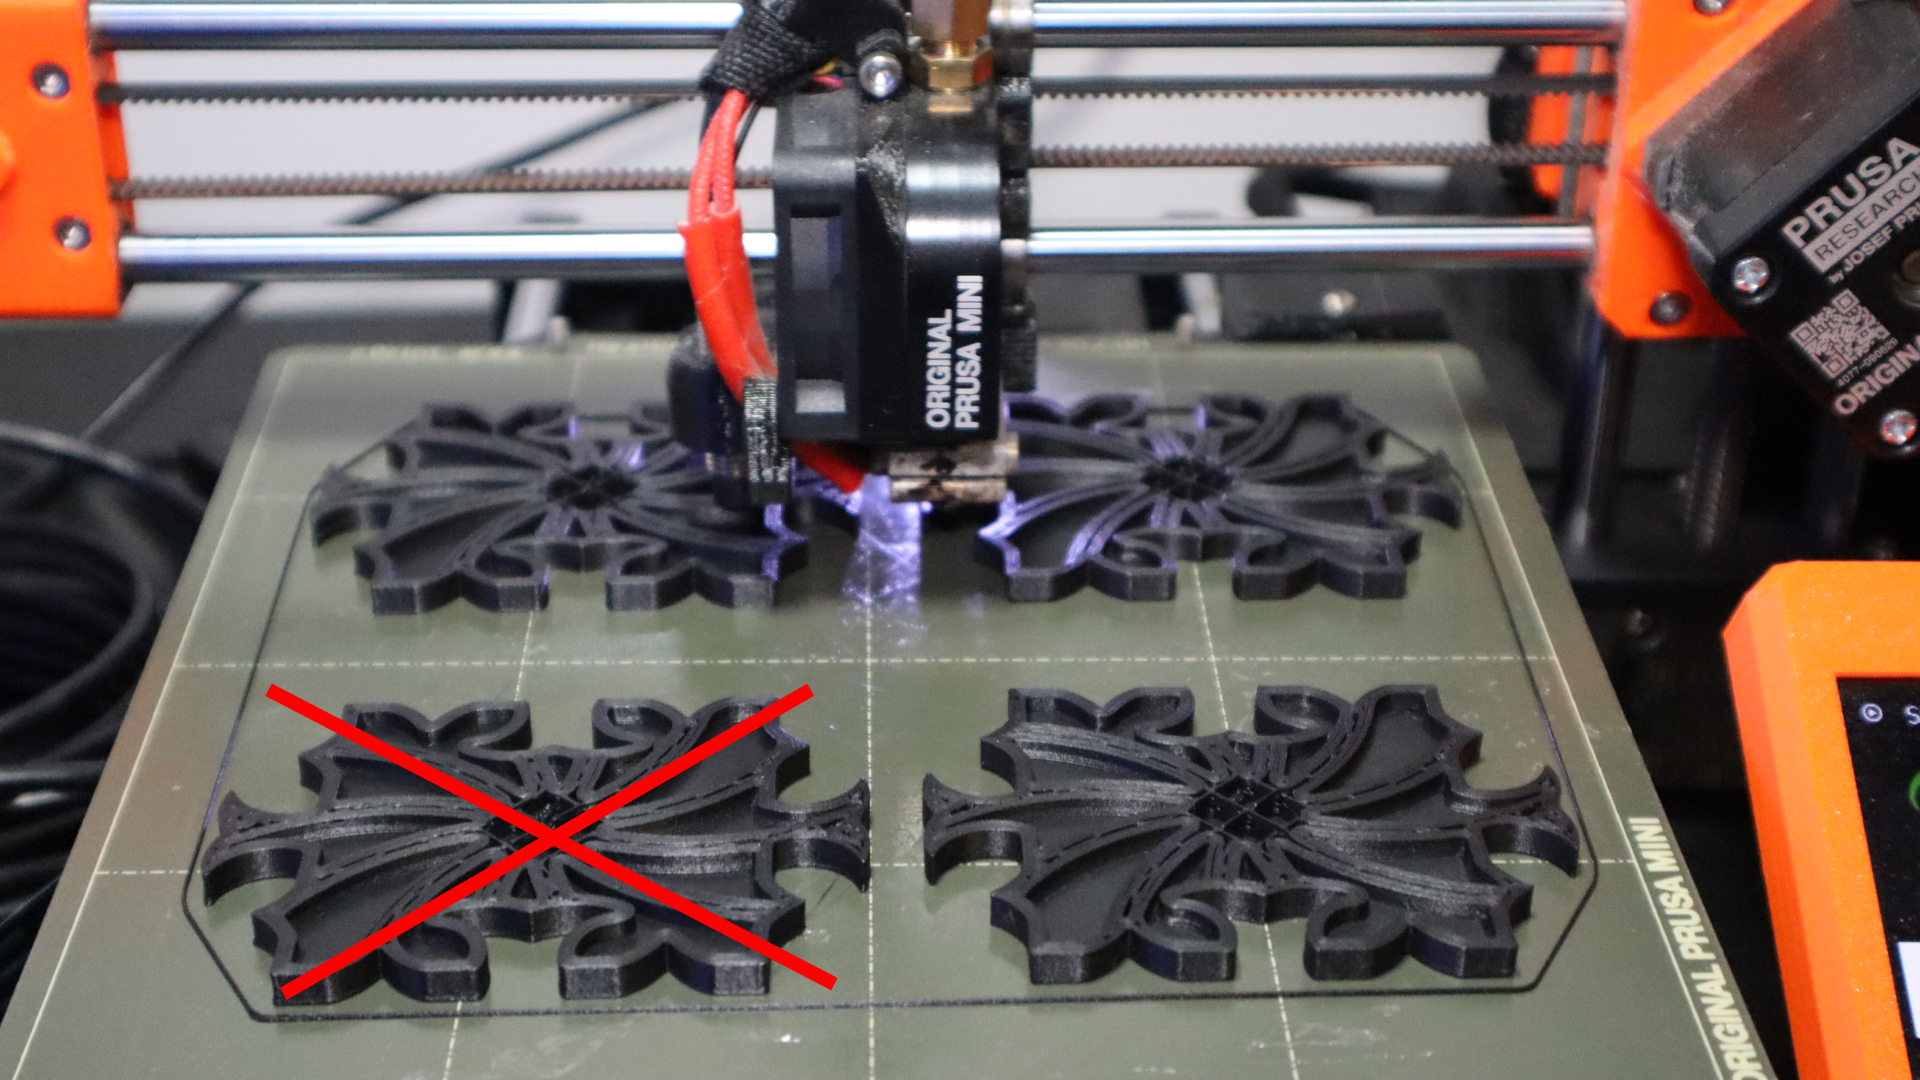
We've explored the combination of Klipper and Ender in depth with several of our articles. Klipper elevates the performance of Ender 3 well-beyond expectations and with a bit of fine-tuning the print quality rivals even that of the high-end 3D printers.

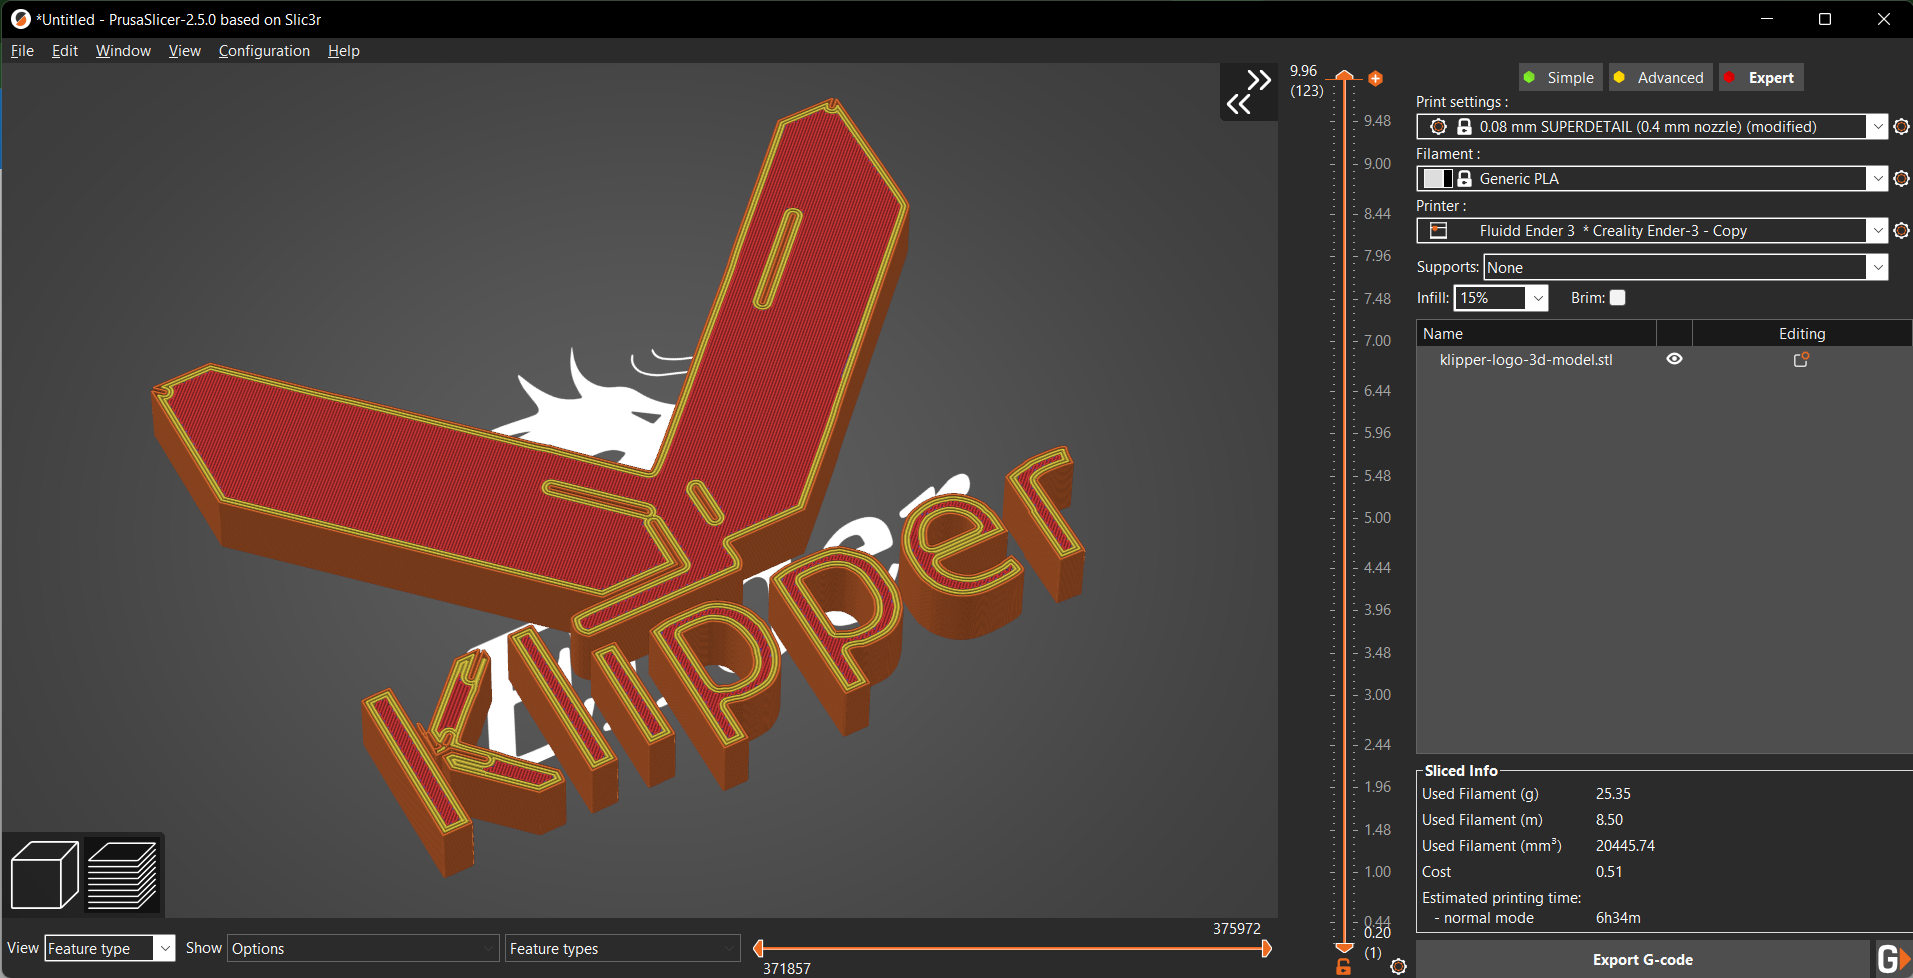
In this article, we'll explore this partnership in detail and understand how you can fine-tune your Ender 3 to get the most out of the Klipper firmware.

Let's Klippify the Ender!

The first Lithophanes in the 1820s were made out of porcelain material. It was a pretty labor-intensive and expensive process. But, with the rise of 3D printing technology and affordable 3D printers, you can single-handedly 3D print exquisite lithophanes at your home.

That said, 3D printing quality Lithophanes is still a relatively challenging process. You need to fine-tune several little parameters and carefully set your slicer settings to get the best-looking Lithophane on your 3D printer.

In this article, we’ll break down the science behind 3D printing lithophanes. We’ll look at the various tools you can use to prepare a lithophane and understand the crucial factors to consider while 3D printing it.

Let’s print some 3D images.

Klipper’s Input Shaping functionality stands out particularly well owing to its excellent execution and utility. It lets you print at higher speeds while ensuring that the print quality is not affected due to the 3D printer’s fast movements. It’s probably one of the most sophisticated and our favorite features in the Klipper firmware.

Yet, for several users, Input Shaping is still a mystery and a concept that seems too technical and complex to understand.

In this article, we’ll break down Input Shaping in Klipper for you and help you understand how it can assist you in achieving excellent print results. We’ll start by understanding it in detail and learn more about how it works in Klipper. We’ve also included a step-by-step guide that’ll help you configure Klipper for your 3D printer. In this guide, we will tune input shaper on an Ender 3 3D Printer, but this guide is relevant for similar 3D printers as well.

Let’s start shaping our Klipper 3D printers!

Gone are the days in 3D printing where you constantly need to be tethered to a 3D printer. There are now automated software tools that allow you to monitor and control your printer without being present in the same room. Some of these applications give you unrestricted access to your machines and let you operate them from anywhere in the world.

In this article, we’ll look at eight remote 3D printing software you can use to run your 3D printers remotely. These programs are suited equally well for hobbyists and professional 3D printing farms and can be a great way to ease out the manual workload in your workflow.

Let’s power up your remote 3D printing setup!

Update on the Orange Pi Zero 2 for OctoPrint Project

In an ongoing effort to get find an easy way for makers to install OctoPrint with the Raspberry Pi shortage ongoing, we developed an easy to install raspberry pi alternative for OctoPrint using the Orange Pi Zero 2.

Installation works similarly to installing OctoPi on a Raspberry Pi. You can get a complete OctoPrint Kit that includes a webcam and everything you need to get started, or just the Orange Pi Zero 2 Board in our online store (available for U.S and Canada only).

Introduction

Klipper is quickly ranking its position as one of the best 3D printing firmware in the community. Using a combination of Raspberry Pi and web interface, Klipper significantly improves your 3D printer’s speed, print quality, and user experience.

Pair it up with Cura, and you open up a world of new possibilities for your 3D printing workflow. Cura is one of the most widely used and popular 3D printer slicers with top-notch features that help you achieve high-quality 3D prints.

Yet, as good as they are, there are some pointers you need to be mindful of when using Cura and Klipper together. In this article, we’ll understand how you can use these two software side-by-side to get the best quality results from your 3D printer.

Let’s Klip and Slice.

Klipper as a 3D printer firmware and PrusaSlicer as a 3D printing slicer have become widely popular in the past few years. They’re both completely free to use and loaded with features, and you get the benefits of open-source development with either of these programs.

It makes sense to use them together to streamline your 3D printing workflow and make the most out of these two pieces of software. In this guide, we’ll go over the process of setting up Prusaslicer with your Klipper 3D printer. It’s simple and quick and can help save you from the hassle of manually uploading your print files.

We’ll begin with understanding the benefits of using these two software together and then look at the detailed setup process. Let’s begin!

Klipper firmware is getting all the praise lately owing to its vast range of features and top-notch performance. It also offers several configuration options to calibrate your printer to deliver high-quality 3D prints.

One crucial parameter we’ll be configuring today is PID tuning for your 3D printer. Setting the correct PID settings ensures that your hot end and print bed are heated in the least time possible and maintain the set temperature with great precision.

This article will guide you through the PID calibration process for your 3D printer using Klipper. It’ll help you to understand more about these PID settings and sort out any heating issues with your machine.

Let’s start tuning up these beds and hot ends!

Introduction

Pressure Advance in Klipper is designed to compensate for the side effects of instant speed changes that occur during fast print speeds. It reduces stringing, gives your prints sharp corners, and delivers a high print quality even at speeds above 100 mm/s.

But tuning pressure advance in Klipper and understanding its functioning can be puzzling to new Klipper users. So, in this article, we’ve gathered all the information you need to know about Pressure advance and set it up in Klipper. It’ll help you understand the benefits of this feature and how you can use it to sharpen up your 3D prints.

Let’s Advance!

Klipper firmware has been around since 2016 in the 3D printing community. It’s free, open-source, and has steadily become a mainstream 3D printing firmware, second only to Marlin.

Yet, Klipper’s earlier versions missed key features like the Octolapse, Exclude objects, and plug-in integration found on Octoprint and Marlin combo. This lack of certain valuable features restricted users from using Klipper as their primary 3D printing firmware.

However, since the recent updates, some of these features are slowly making their way into the Klipper firmware. For example, you can now shoot Octolapse-like videos on your 3D printer using the Klipper timelapse.

Likewise, Klipper now also supports the Exclude objects functionality to rescue you from failed prints. But, it needs some initial setup and configuration, which might be puzzling to new Klipper users.

So, this article will take you through the entire process of setting up Exclude objects for your Klipper 3D printer. We’ll look at this feature in detail and understand how you can use it in your 3D printing workflow.

Let’s exclude the failed prints.