
NOZZLE NINJA

First Layer AI Error Detection for OctoPrint & Klipper Now Available!

OBICO_NOZZLE_NINJA_COMPATIBLE_BADGE

52 posts tagged with "Tech"

View All Tags

Camera mount for Creality 3D printer/Courtesy: Thingiverse

Creality's Ender 3 3D printer is one of its best-selling models, and it's popular among students, enthusiasts, and hobbyists. As a result, it is safe to say that Ender 3 users are mostly hustlers looking for ways to get the most out of their 3D printer. Many users do not see the need to connect a camera to their 3D printers, but it can greatly improve your 3D printing experience. Many feel that installing. Camera is a tedious task but it is not so. In fact, it is quite easy. All you need is a good camera and a camera mount. This article discusses the various Ender 3 camera mounts that can be installed on your 3D printer.

What is OctoPrint and why would you want it?

OctoPrint Bed Level Visualizer plugin display screen/Courtesy: OctoPrint

We are all aware of how critical, yet difficult, it is to level a 3D printer bed. All of your prints will fail if you don't have a level bed, wasting your time, materials, and money. Even having an auto-bed leveling feature is not always sufficient, and your prints may still fail. To solve this issue, OctoPrint's Bed Level Visualizer plugin is the only tool you need to easily level your print bed.

To help you understand this useful OctoPrint plugin, we've written a complete guide on the Bed Level Visualizer to help you set it up quickly and eliminate your bed leveling issues.

What is the OctoPrint Bed Level Visualizer Plugin?

Bed level visualizer is a useful OctoPrint plugin that converts the bed topography report into a comprehensive 3D map to show the varying elevation (height) across a 3D printer bed, assisting users in leveling the same. This plugin also assists you in determining whether your bed is warped or simply tilted. Thus, the bed is leveled by carefully tightening or loosening the leveling screws at peaks and valleys respectively, to make it as flat as possible for a successful print.

The Bed level visualizer plugin was created by jneilliii (GitHub page). This plugin was installed on at least 35.84k instances in the previous month (August 2022), with at least 759 new installations in the previous week (at the time of writing this article).

The core of 3D printing is a 3D model. 3D modeling for 3D printing is important as all 3D prints start with a digital CAD model that is "sliced" in a slicing software which the 3D printer prints. Being an integral part of 3D printing, having a working knowledge of 3D modeling and the various tools becomes crucial.

In this article, we'll go over the fundamentals of 3D modeling for 3D printing, as well as the distinction between inorganic and organic 3D models, and the popular software for each type.

We've included 3D modeling software for beginners for those on a low budget, as well as a few high-end options for professionals.

But first, to make sure we're all on the same page, let's go through the fundamentals of 3D printing.

How does 3D Printing work?

A CAD design (left screen), slicing software (right), and the finished print / Courtesy: Ultimaker

3D printing, also known as additive manufacturing, is a method of creating three-dimensional objects layer by layer using a computer-aided design, or CAD. 3D printing builds objects by layering materials such as polymers, composites, or biomaterials that vary in shape and size, as well as rigidity and color.

Even though 3D printing isn't new, there are some who will benefit from our guide to the most common 3D printing terms for beginners.

Regardless of the 3D printing technology being used, it all starts with a 3D CAD model. In this article, we will go through the fundamentals of 3D modeling and its different types, with a focus on 3D printing.

To further help you in selecting the best CAD software for your 3D models, we will also list out a number of 3D modeling software suitable for both beginner and advanced users.

So let's jump in!

Klipper is one of the few 3D printing firmware that natively supports an external camera for monitoring your 3D printer. Klipper’s web interface makes it easy to attach a camera to the Raspberry Pi and monitor your printing progress.

But Klipper is a relatively new firmware with limited resources and guides detailing its various features. As a new user or beginner, it’s easy to get confused about the installation and configuration of a camera on your Klipper 3D printer.

This article aims to make this process easy for you and help you set up a camera on your Klipper-connected 3D printer. Read on to learn in-depth about Klipper’s camera setup procedure and how a camera can benefit your 3D printing workflow.

Introduction

Using the timelapse feature in Klipper, you can record your entire 3D printing process and share bits of it on your social media platforms. These videos are also a great tool to analyze print failures and pinpoint the causes behind a failed print.

Yet, despite their usefulness, setting time-lapse videos in Klipper can be challenging for several users. And while it's a relatively easy setup, the initial configuration can confuse beginner Klipper users easily.

In this article, we'll simplify this process for you. We'll go over the entire procedure step-by-step and configure the timelapse functionality for your Klipper instance. By the end of this guide, you'll be able to record picture-perfect timelapse videos of your 3D prints and share them within your social circle.

Let's start shooting.

3D printing is an evolving technology and engineers are constantly upgrading it to eliminate any primal issues in it. Till recently it was common to tether your 3D printer to your computer to run print jobs. But now, you can easily add WiFi to your 3D printer.

Adding WiFi to your 3D printer gives you an unprecedented advantage and we will be discussing the same in this article and how to set it up with ease.

The Basics of 3D Printing?

Creality Ender 3 FDM 3D printer/Courtesy: Creality

3D printing is a manufacturing technology that creates three-dimensional objects by adding layers of material one on top of the other until the entire object is formed. Because it produces objects in an additive manner, the process is also known as additive manufacturing.

In comparison to traditional manufacturing methods, this process eliminates the need for tooling and reduces material waste.

The entire ecosystem of the 3D printing process can be used to explain how it works. Here's a quick rundown:

  • Software: 3D printing begins with design software, which is used to create a 3D model. After that, the 3D model is sliced in a slicing software to generate a G-code file.
  • Hardware: As the 3D printer can only read G-code files, the file is uploaded to the printer, which prints the designed object.
  • Materials: Materials for 3D printing include filaments, resins, polymer or metal powders, and metal wires.
  • Post-processing: After the 3D printer prints the object, the part usually needs to go through some sort of post-processing stage, such as support structure removal, sanding, acetone vaporing, UV curing, washing, coloring, dyeing, Hot Isostatic Pressing annealing, and so on.

Introduction

Klipper is an upcoming and popular 3D printing firmware that's quickly becoming the standard in high-speed 3D printing. Its extensive feature set, vibrant community, and continuous development make it the go-to option for several new users and professionals.

Yet, Klipper is still in its nascent stages, and there's little information available on how to get the most out of the firmware. It causes new users to limit themselves to the basic functionalities and miss out on some valuable features of the Klipper firmware.

In this article, we'll go over some of the useful tips and tricks you can use with your Klipper 3D printer to get the most out of it. It'll help you use Klipper in the best way possible and improve your 3D printing experience.

Let's get started with some tips and tricks to optimize your klipping experience.

One of the first things many makers to to improve their experience after buying a 3D printer is install Octoprint. And why not? It's one of the best upgrades you can get for your 3D printer because it lets you control and monitor everything about your 3D printer and print jobs right from your browser.

OctoPrint, however, only works on your local network by default, which could limit its use. And let's face it, sitting through hours of print time isn't something most of us look forward to. And, while life comes in the way and we have to travel, we can certainly do better than worrying about whether our print is on track or whether it has encountered any issues.

And simply being notified of an issue is frustratingly useless. You don't want to be a bystander when something goes wrong with your 3D prints. Instead, you want to be able to take the steps needed from wherever you are to make sure your 3D printing jobs stay on track.

Accessing OctoPrint Away From Home

When you are away from home, you can access OctoPrint using a variety of methods; the easiest being with the use of OctoPrint Remote Access plugins. This method is ideal for people who aren't technical savvy and want a simple and quick setup process. However, you can also use other methods like direct access, port forwarding, or VPN and to know more about these techniques, you can read our guide.

Over the years, developers have created numerous plugins that allow OctoPrint Remote Access. This, however, makes it difficult for new users to choose the right plugin, one that is both simple to use and feature-rich.

But don't worry, we've got you covered with a list of the best OctoPrint remote access plugins so you can access OctoPrint and your 3D printer from anywhere!

tip

Check out Orange Pi for OctoPrint. Boards and complete kits are available now for immediate shipping!

What are we doing?

We are planning to develop an easy to install, no compromise raspberry pi alternative for OctoPrint. We will bulk order an alternative single board computer. It will be equivalent to or better than a raspberry pi 3B+ 1GB. It will be guaranteed to let you easily install OctoPrint without any additional configuration. Aside from the fact that raspberry pi's are very hard to find, this alternative provides all of the following:

  • Install OctoPrint through a streamlined process similary to the OctoPi image developed for Raspberry pi.
  • Guaranteed to work with OctoPrint
  • Monitor and control 3D printer using a camera that is guaranteed to work (if purchasing kit)
  • Get customer support from the Obico team

This article will go over these websites, as well as the various benefits and drawbacks of various 3D model sites. There are numerous lists available, but this article will focus on sites that have a majority, or at least a large number, of models designed specifically for 3D printing.

Printables.com

Printables is a 3D printing models repository from Josef Prusa, a well-known name in the 3D printing industry. Earlier this year (2022) the Printables platform was launched as a rebranded version of the earlier PrusaPrinters. With this new brand, Prusa is attracting users from outside the Prusa ecosystem.

Printables has a large collection of free 3D models that anyone can download and use under the terms of the license.

Features

3D Model Repository: Printables has a large 3D model repository and a huge global community. It has over 235,000 registered users, 120,000 models published, and 550,000 monthly visitors.

Reward System: It has a designer reward system. Designers are rewarded with either actual filaments or website badges.

More than a Repository: Printables is much more than a 3D model repository because you can interact with its large and active community, enter contests to win exciting prizes, and join regional groups to connect with people in your area. Users can also participate in educational projects, read high-quality Prusa blogs, and shop at the Prusa Eshop.

Pros

  • All 3D models are available for free download.
  • On the Printables platform, any designer can upload and share their models.
  • Contests are held on a regular basis, and anyone can enter to win great prizes such as Prusa 3D printers.
  • It has a simple user interface.
  • The 3D models can be viewed using a 3D viewer.

Cons

  • Designers cannot monetize their models at this time.
  • The number of options available on the site may overwhelm new users.
Example Models

Keychain Pill Box

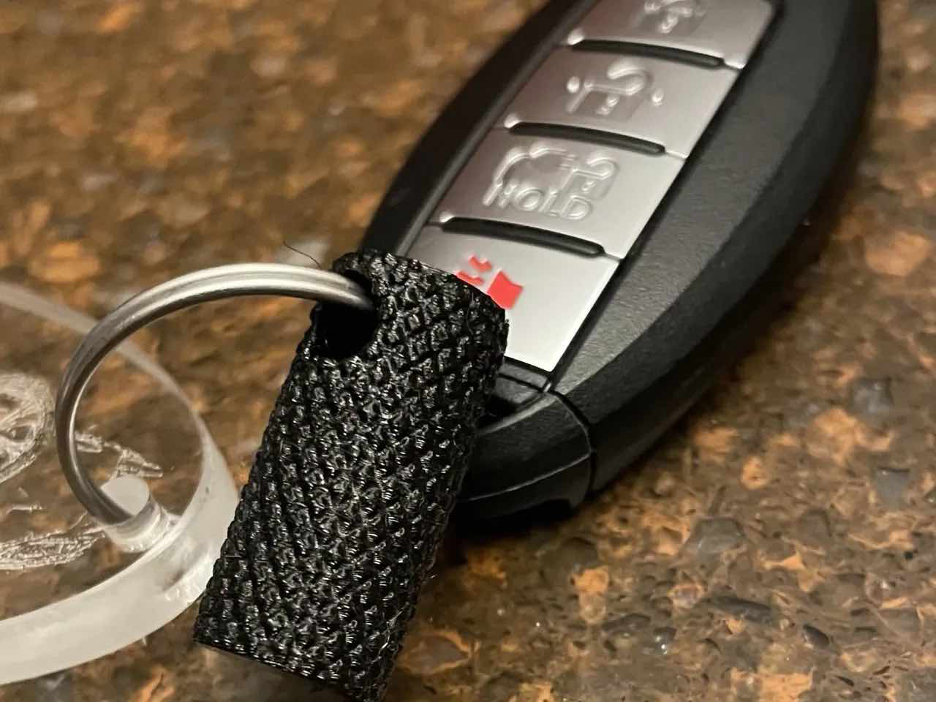
Keychain pill box by Gard7

A small keychain pill box to keep your medications close at hand. The creator's recommended settings for printing this model are 10mm detail settings with PETG.

Bottle Holder Crutches

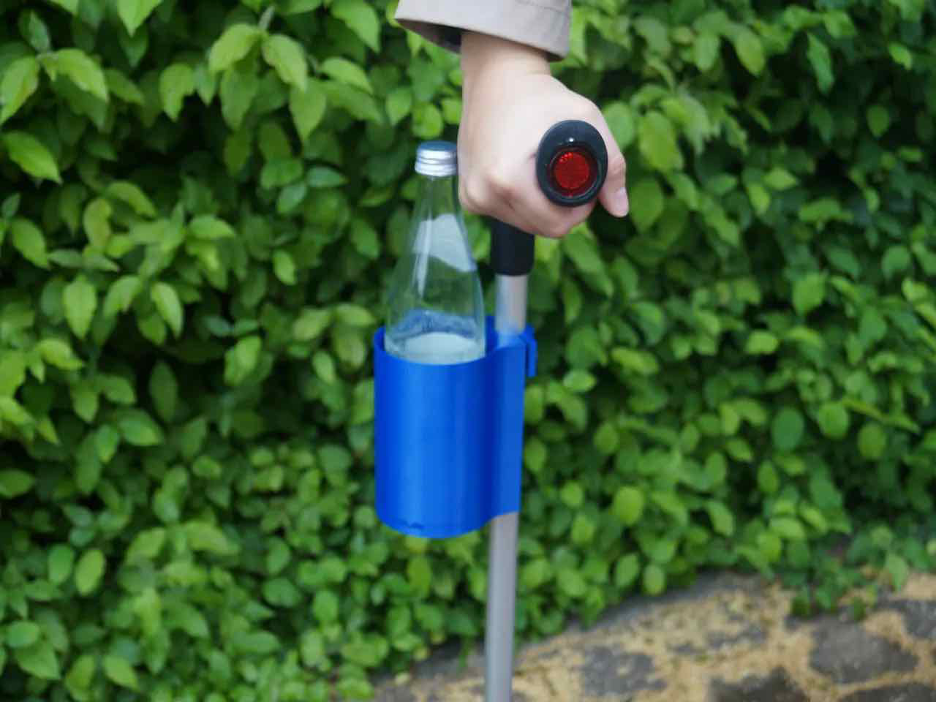
Printables Bottle Holder Crutches by STEP

This is a crutch bottle holder. The creator recommends printing this model with 0.2mm resolution, 20% infill, and PETG material. You'll also need 4x M6x25 screws and 4x M6 nuts.