Temperature Tower Test in OrcaSlicer: A Comprehensive Guide
Try JusPrin, the first GenAI 3D printing tool built on OrcaSlicer.
Introduction to Temperature Tower Test with OrcaSlicer
3D printing is a fascinating technology that allows you to create physical objects from digital models. However, to achieve the best results, you need to fine-tune your printer settings and optimize your filament parameters. One of the most important factors that affects the quality of your prints is the temperature.
Temperature affects how well the filament melts, flows, and bonds with the previous layers. If the temperature is too low, the filament may not extrude properly, resulting in under-extrusion, poor adhesion, and weak parts. If the temperature is too high, the filament may ooze, string, or warp, resulting in over-extrusion, blobs, and deformations.
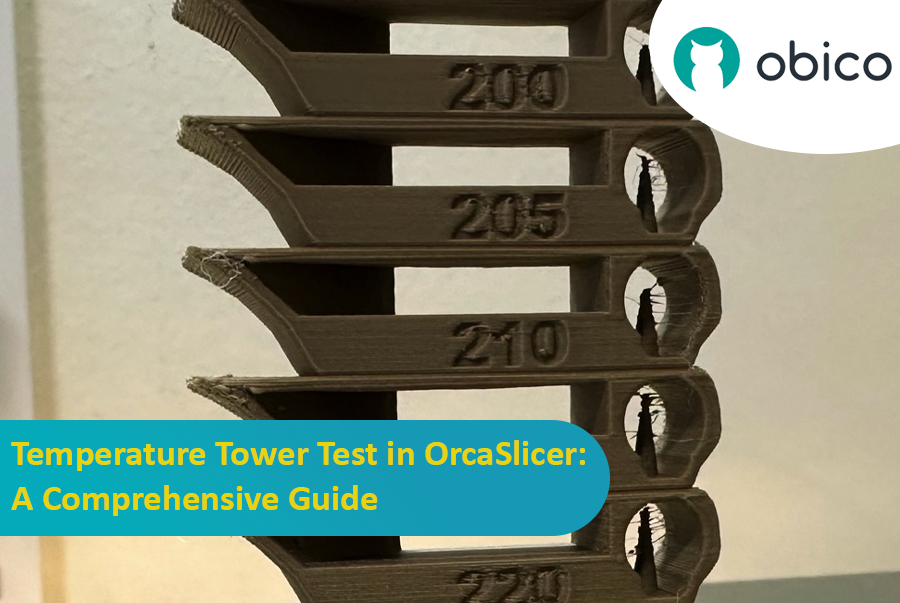
To find the optimal temperature for your filament, you need to perform a temperature tower test.
The temperature tower test is a simple and effective way to test a range of temperatures and compare the results. You can use a free and powerful software called OrcaSlicer to generate and print a temperature tower with ease.
If you're new to this software or want a refresher on its capabilities, be sure to check out our full guide: Getting started with OrcaSlicer.
OrcaSlicer is a 3D printing slicer that supports a variety of printers, filaments, and processes. It has many features and advantages that make it a great choice for 3D printing enthusiasts. Some of these features include:
- Automatic calibration and tuning of printer and filament settings
- Advanced algorithms for optimal slicing and printing performance
- Customizable and user-friendly interface and workflow
- Support for multiple languages and platforms
- Integration with online services and communities
In this guide, we will show you how to use OrcaSlicer to perform a temperature tower test and analyze the results. We will also discuss the benefits and applications of temperature tower testing, as well as some practical tips for successful testing. By the end of this guide, you will have a better understanding of how temperature affects your print quality and how to use OrcaSlicer to achieve optimal results.
Why Temperature Tower Testing Matters
Temperature is one of the most critical parameters that affects the quality of your 3D prints. Different filaments have different melting points and optimal temperature ranges. Even within the same type of filament, different brands and colors may have different temperature requirements. Therefore, it is important to test the temperature for each filament you use and adjust your settings accordingly.
Temperature tower testing is a simple and effective method to test the temperature for your filament. A temperature tower is a vertical tower with multiple blocks, each printed at a different temperature. Once the print is complete, you can examine each block of the tower and determine the optimal temperature for the filament.
Benefits and Applications of Temperature Tower Testing
Temperature tower testing has many benefits and applications for 3D printing. Some of these are:
- Improving the print quality and appearance of your parts: By finding the optimal temperature for your filament, you can improve the extrusion, flow, and bonding of the filament, resulting in smoother, stronger, and more accurate parts. You can also avoid common printing defects and issues, such as stringing, oozing, warping, curling, cracking, layer separation, poor adhesion, or poor surface quality.
- Reducing the printing time and material waste: By finding the optimal temperature for your filament, you can reduce the amount of time and material needed to print your parts. You can also avoid unnecessary reprints and repairs, saving you time and money.
- Increasing the strength and durability of your parts: By finding the optimal temperature for your filament, you can increase the mechanical properties and performance of your parts. You can also reduce the risk of failure and damage, increasing the lifespan and reliability of your parts.
- Enhancing the compatibility and performance of different filaments: By finding the optimal temperature for your filament, you can enhance the compatibility and performance of different types of filaments, such as PLA, ABS, PETG, TPU, Nylon, etc. You can also experiment with different brands and colors of filaments, expanding your options and possibilities.
- Exploring the effects and possibilities of temperature variations: By finding the optimal temperature for your filament, you can also explore the effects and possibilities of temperature variations on your prints. You can create different effects and features, such as glossy or matte finishes, translucent or opaque colors, flexible or rigid parts, etc.
Setting Up OrcaSlicer for Temperature Tower Testing
To perform a temperature tower test with OrcaSlicer, you need to follow these easy steps:
-
Download and install OrcaSlicer (OrcaSlicer GitHub).
-
Launch OrcaSlicer and select the printer, filament, and process you want to use for the test. You can use the default profiles or create your own custom profiles.
-
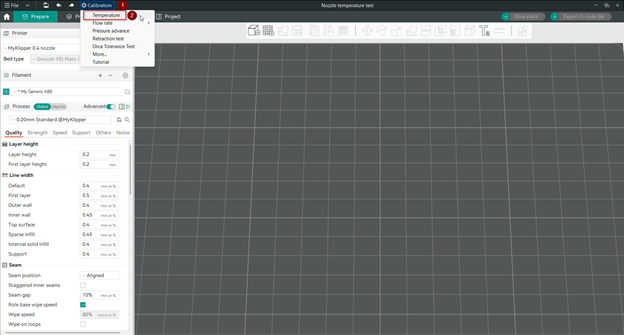
Select the Calibration menu and choose the Temperature option.
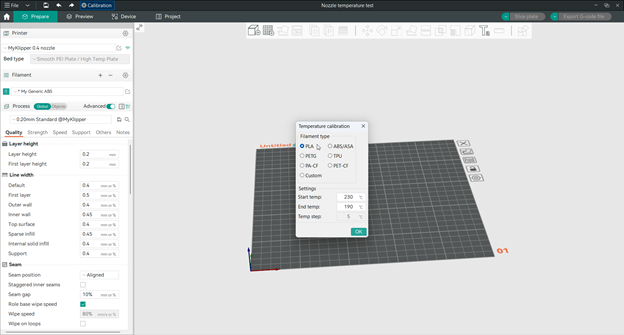
This will open a new window, through which you will identify the material that you will print with, and you have many options:
- PLA (Ranged from 230 to 190 °C)
- ABS/ASA (Ranged from 270 to 230 °C)
- PETG (Ranged from 250 to 230 °C)
- TPU (Ranged from 240 to 210 °C)
- PA-CF (Ranged from 320 to 280 °C)
- PET-CF (Ranged from 320 to 280 °C)
- The custom option
You can also edit the start and end temperatures for any material. And there is the temperature step that is 5 °C by default and you cannot change it.
-
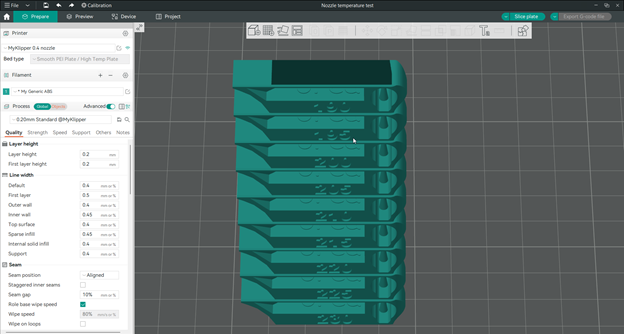
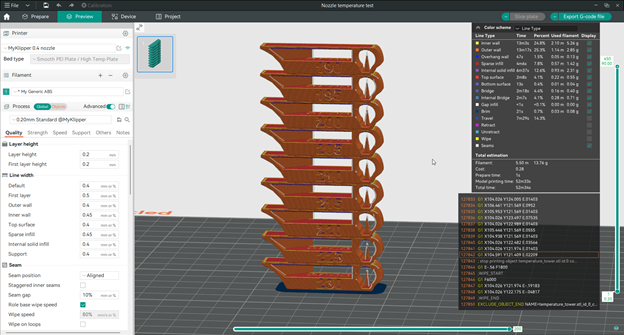
After choosing the material and identifying the right temperatures, a new project consisting of a temperature tower model will be created. You can adjust the other settings of the model, such as the layer height. You can also add a skirt or a brim to improve bed adhesion.
-
Slice the project and save the G-code file to your SD card or send it directly to your printer via USB or Wi-Fi.
-
Print the temperature tower and observe the results.
Designing an Effective Temperature Tower
To design an effective temperature tower, you need to consider the following factors:
- The Temperature Range: Determine the range of temperatures to test for your filament. Use the recommended temperature range from the filament manufacturer as a reference, or experiment with different ranges. For example, PLA typically ranges from 190°C to 230°C, while ABS ranges from 230°C to 270°C.
- The Temperature Increment: Decide on the temperature change between each block of the tower. Smaller increments provide more accuracy but may take longer and use more material. Common increments are 5°C or 10°C.
Note: The temperature tower method in OrcaSlicer has a fixed temperature increment of 5°C. You cannot change this value.
- The Layer Height: Choose a low or high layer height based on the desired quality and speed. Lower heights offer a smoother surface but take longer, while higher heights are quicker but yield a coarser finish. A typical height for temperature tower testing is 0.2 mm or 0.3 mm.
- The temperature gradient: This is the direction of the temperature change along the tower. You can choose to start from the lowest temperature at the bottom and increase to the highest temperature at the top, or vice versa. The former is more common and recommended, as it reduces the risk of heat creep and clogging in the extruder. The latter may be useful for testing the effects of cooling and warping on the print.
Note: The default setting in OrcaSlicer temperature tower is to start from the higher temperature, which is better.
- The layer change: This is the point where the temperature changes from one block to another. You can choose to change the temperature at the beginning or the end of each block, or somewhere in between. The former is more common and recommended, as it ensures that each block is printed at a consistent temperature. The latter may be useful for testing the effects of temperature transitions on the print.
Note: There is no option to control that in OrcaSlicer temperature tower.
Tip: Explore Obico for OctoPrint and Klipper!
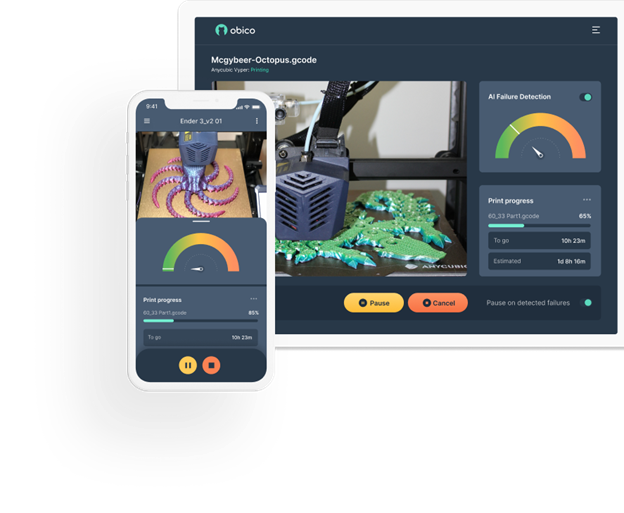
While your temperature tower is printing, why not explore Obico, the ultimate Smart 3D printing software? With Obico, you can monitor and control your 3D printer from any device and anywhere. You can also relax with Obico's AI failure detection system that keeps an eye on your print and notifies you of any issues. Connect your printer to Obico for free and enjoy unlimited webcam streaming, 3D printer status notifications, 3D printer remote access, and more!
Analyzing Results and Making Adjustments
After your print finishes, analyze the results and make adjustments with the following steps:
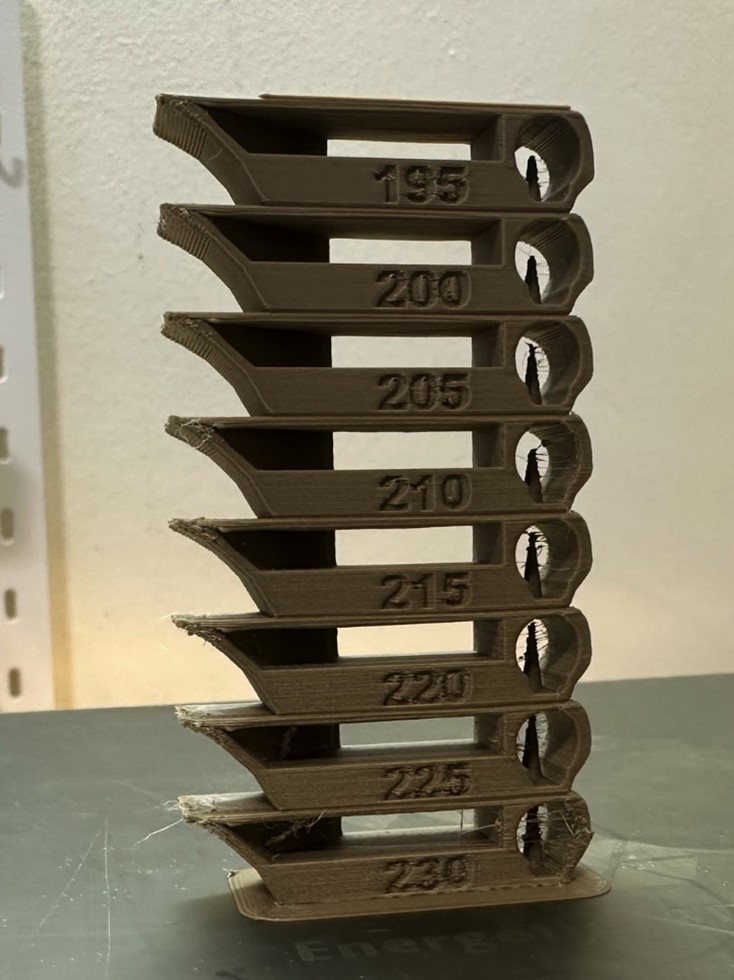
- Inspect each block of the tower for defects or issues like under-extrusion, over-extrusion, stringing, oozing, warping, curling, cracking, layer separation, poor adhesion, or poor surface quality.
- Compare the blocks and identify the one with the best overall quality. This block represents the optimal temperature for your filament.
- Note down the temperature value of the optimal block and update your filament settings in OrcaSlicer. Remember to save the filament profile and create a new project to exit calibration mode.
- Repeat the test with a different filament or a different printer, if needed.
Practical Tips for Successful Temperature Tower Testing
To perform a successful temperature tower test, follow these practical tips:
- Use a Clean and Calibrated Printer: Before the test, ensure your printer is clean and calibrated. Check the nozzle, extruder, bed, belts, pulleys, fans, and sensors for any dirt, debris, wear, or damage. Perform nozzle cleaning, bed leveling, and PID tuning. Follow this guide on PID tuning and its importance, and this guide for PID tuning in Klipper firmware.
- Use Fresh and Dry Filament: Before the test, ensure your filament is fresh and dry. Check for signs of moisture, such as bubbles, hissing, or steam during extrusion. Store your filament in a sealed bag or container with desiccant. You can also dry your filament in an oven or a dehydrator before use.
- Maintain a Consistent and Stable Environment: Before and during the test, ensure your environment is consistent and stable. Avoid any changes or fluctuations in temperature, humidity, airflow, or lighting. Use an enclosure for your printer if possible. You can also use a thermometer and a hygrometer to monitor your environment.
- Record and Document Your Results: After the test, record and document your results. Use a camera or a scanner to capture images of the tower. Measure dimensions with a ruler or caliper. Organize and store your data in a spreadsheet or notebook.
Conclusion
In this guide, we have shown you how to use OrcaSlicer to perform a temperature tower test and analyze the results. We have also discussed the benefits and applications of temperature tower testing, along with practical tips for successful testing. By following this guide, you will have a better understanding of how temperature affects your print quality and how to use OrcaSlicer to achieve optimal results.
We hope you have enjoyed this guide and learned something new and useful. If you have any questions, feedback, or suggestions, please feel free to comment on this article. Happy printing!
Also available in: Deutsch | Español | Français | Italiano | Nederlands | Polski | Português | Русский
