Tolerance Test in OrcaSlicer: A Comprehensive Guide
Introduction
3D printing has revolutionized the way creators, engineers, and hobbyists bring their ideas to life. However, the transition from a digital model to a tangible object isn’t always straightforward. One key challenge is ensuring parts fit together seamlessly. In this comprehensive guide, we’ll delve into the world of tolerance testing using OrcaSlicer, a valuable tool for 3D printing. We will understand together how to know the right tolerances value to design successful prints which fit together well.
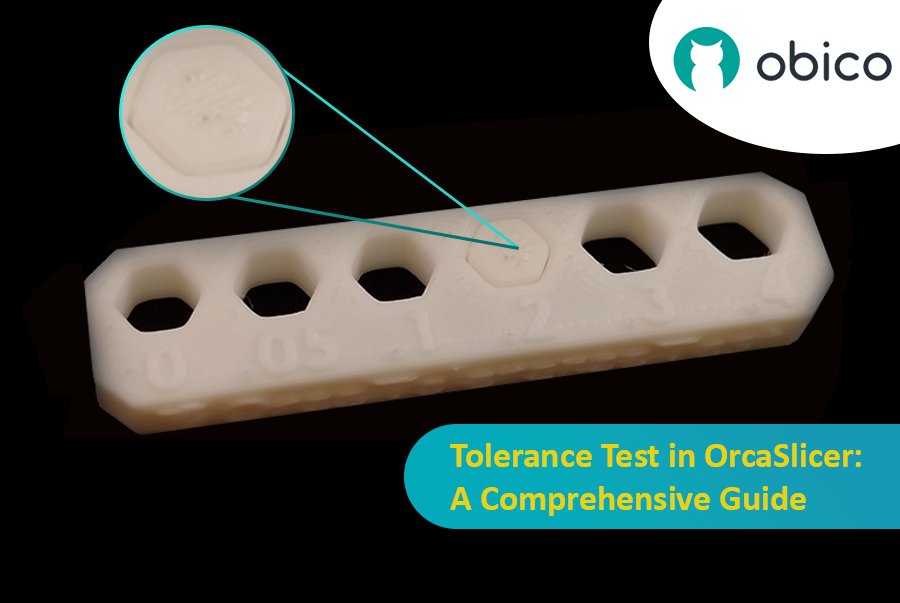
But before we get started testing our 3D printer, let’s understand some important related topics.
The Importance of Tolerance in 3D Printing
In the world of 3D printing, tolerance is all about precision. It's the measure of how accurately a 3D printer can replicate the dimensions specified in your digital design. Imagine you're creating a puzzle; if the pieces are too big or too small, they won't fit together. Similarly, for 3D printed parts to function and fit together as intended, the printer must be able to accurately produce parts within very tight dimensional limits. Good tolerance affects everything from how smoothly moving parts interact to the overall look and strength of the finished product.
But why do you need to make the tolerance test?
Well, in 3D printing things do not always go right. Every filament type has its own shrinkage coefficient and this affects how your print turns out. Different printers, with their unique mechanics and settings, can also produce varied results. That's why testing for tolerance is crucial - it helps you understand how your specific printer and chosen filament behave together, allowing you to adjust the tolerances in your design for the perfect print.
Overview of OrcaSlicer
In this article we will use OrcaSlicer for our tolerance test our 3D printer tolerance. What makes Orcaslicer special at this point is that it provides easy tests via the build in calibration tools.
OrcaSlicer is an open-source slicer for FDM printers. It is a fork of Bambu Studio, a popular slicing software for BambuLab 3D printers. OrcaSlicer was developed by a programmer who wanted to improve the original software and add more features and options for users. Some of the main features of OrcaSlicer are:
- Auto calibrations for all printers: OrcaSlicer provides automatic calibration options for all types of printers, ensuring optimal performance.
- Sandwich (inner-outer-inner): This mode, an improved version of the External Perimeters First mode, enhances print quality by optimizing layer sequencing.
- Precise wall: Achieve precise and consistent wall thickness for your prints.
- Polyholes conversion support: Easily handle complex geometries with polyholes.
- Klipper support: Seamlessly integrate with Klipper firmware for advanced control.
- More granular controls: Customize settings to fine-tune your prints.
OrcaSlicer is available for Windows, Mac, and Linux platforms. You can download the latest stable or nightly version from the GitHub page. If you’re curious to explore OrcaSlicer further, our comprehensive guide provides detailed instructions to get started with it. It's designed to help you understand the essentials. Afterward, explore more topics to master 3D printing with OrcaSlicer.
What is the Tolerance Test in OrcaSlicer?
The tolerance test in OrcaSlicer is a 3D model which typically consists of a base and a hexagon tester. The base contains six hexagonal holes, each with varying tolerances: 0.0mm, 0.05mm, 0.1mm, 0.2mm, 0.3mm, and 0.4mm. Once you’ve printed the test, you will use the hexagon tester to determine which holes fit just right neither too tight nor too loose. Then you will consider this new value in your design. It is easy and direct approach!
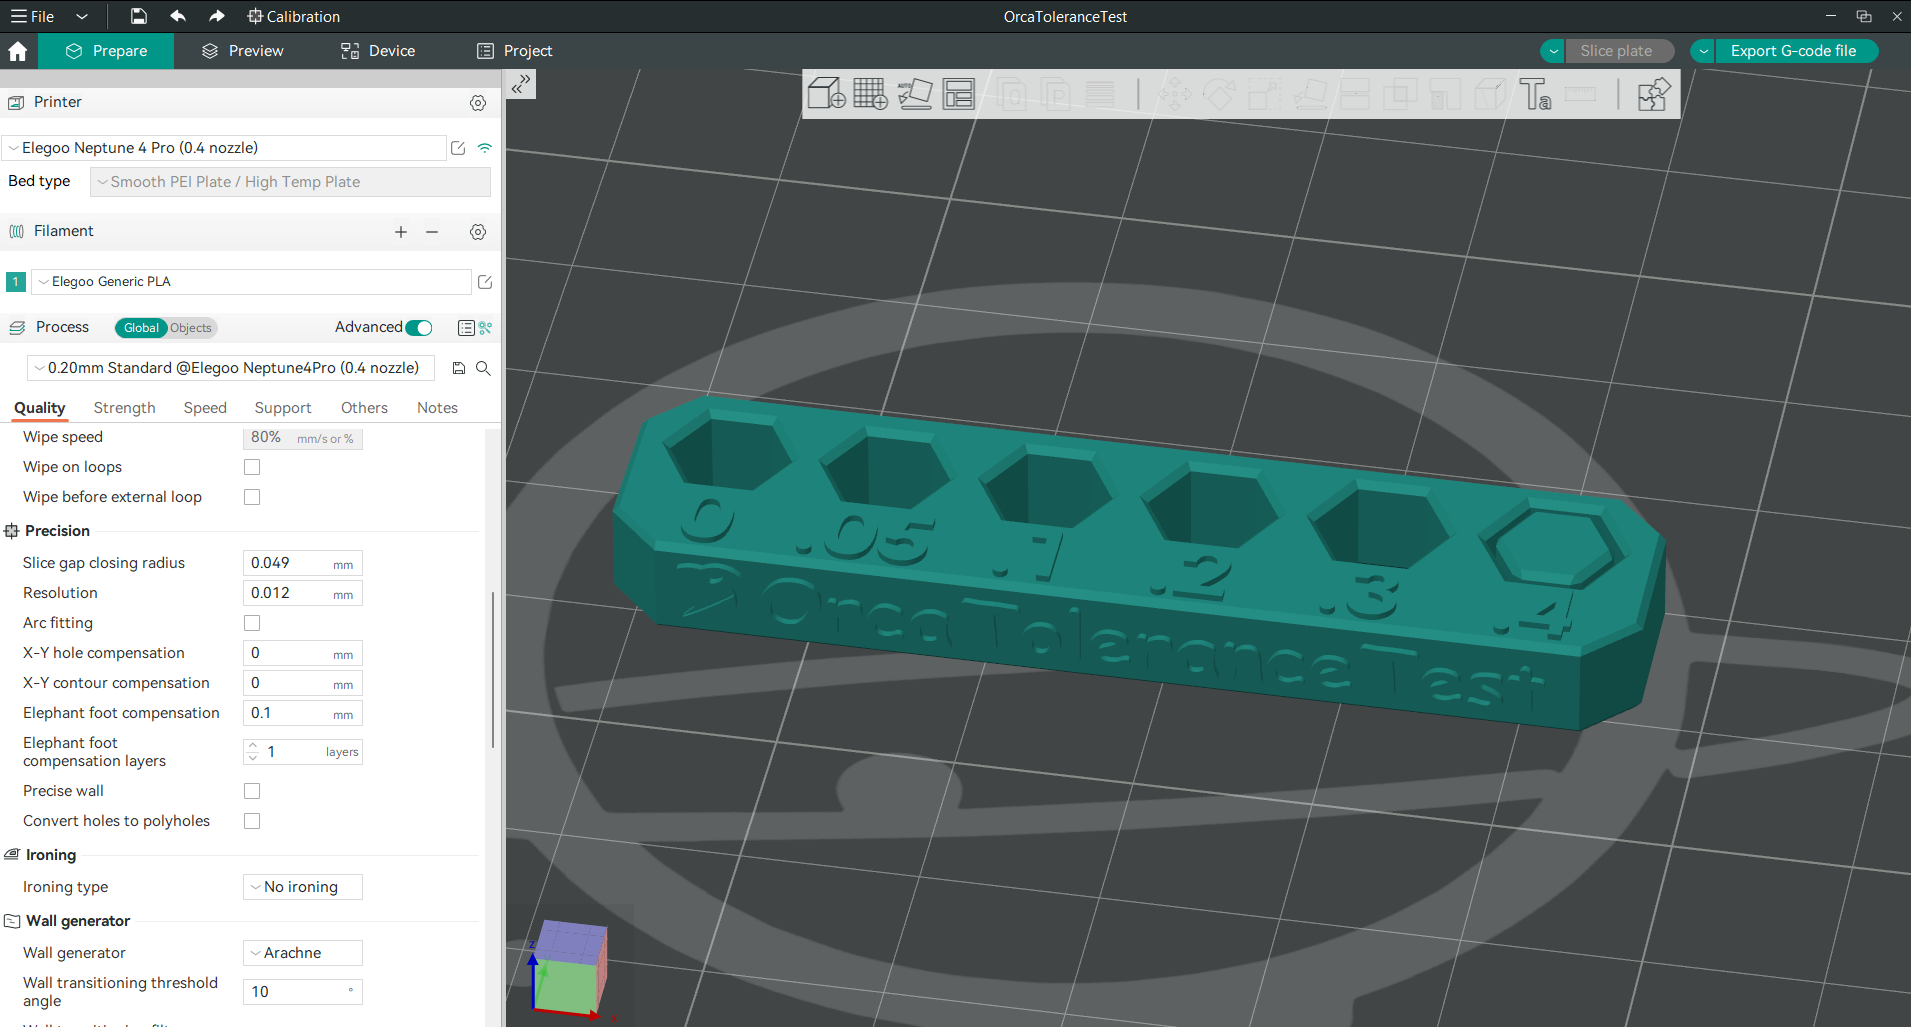
Note: You must know that the tolerance test in OrcaSlicer is for your own information. It informs you of what kind of tolerances your printer is capable of. Then you will consider this value in your design.
Let’s get started testing our printer tolerance using OrcaSlicer!
-
Open calibration menu and click on Orca tolerance test.
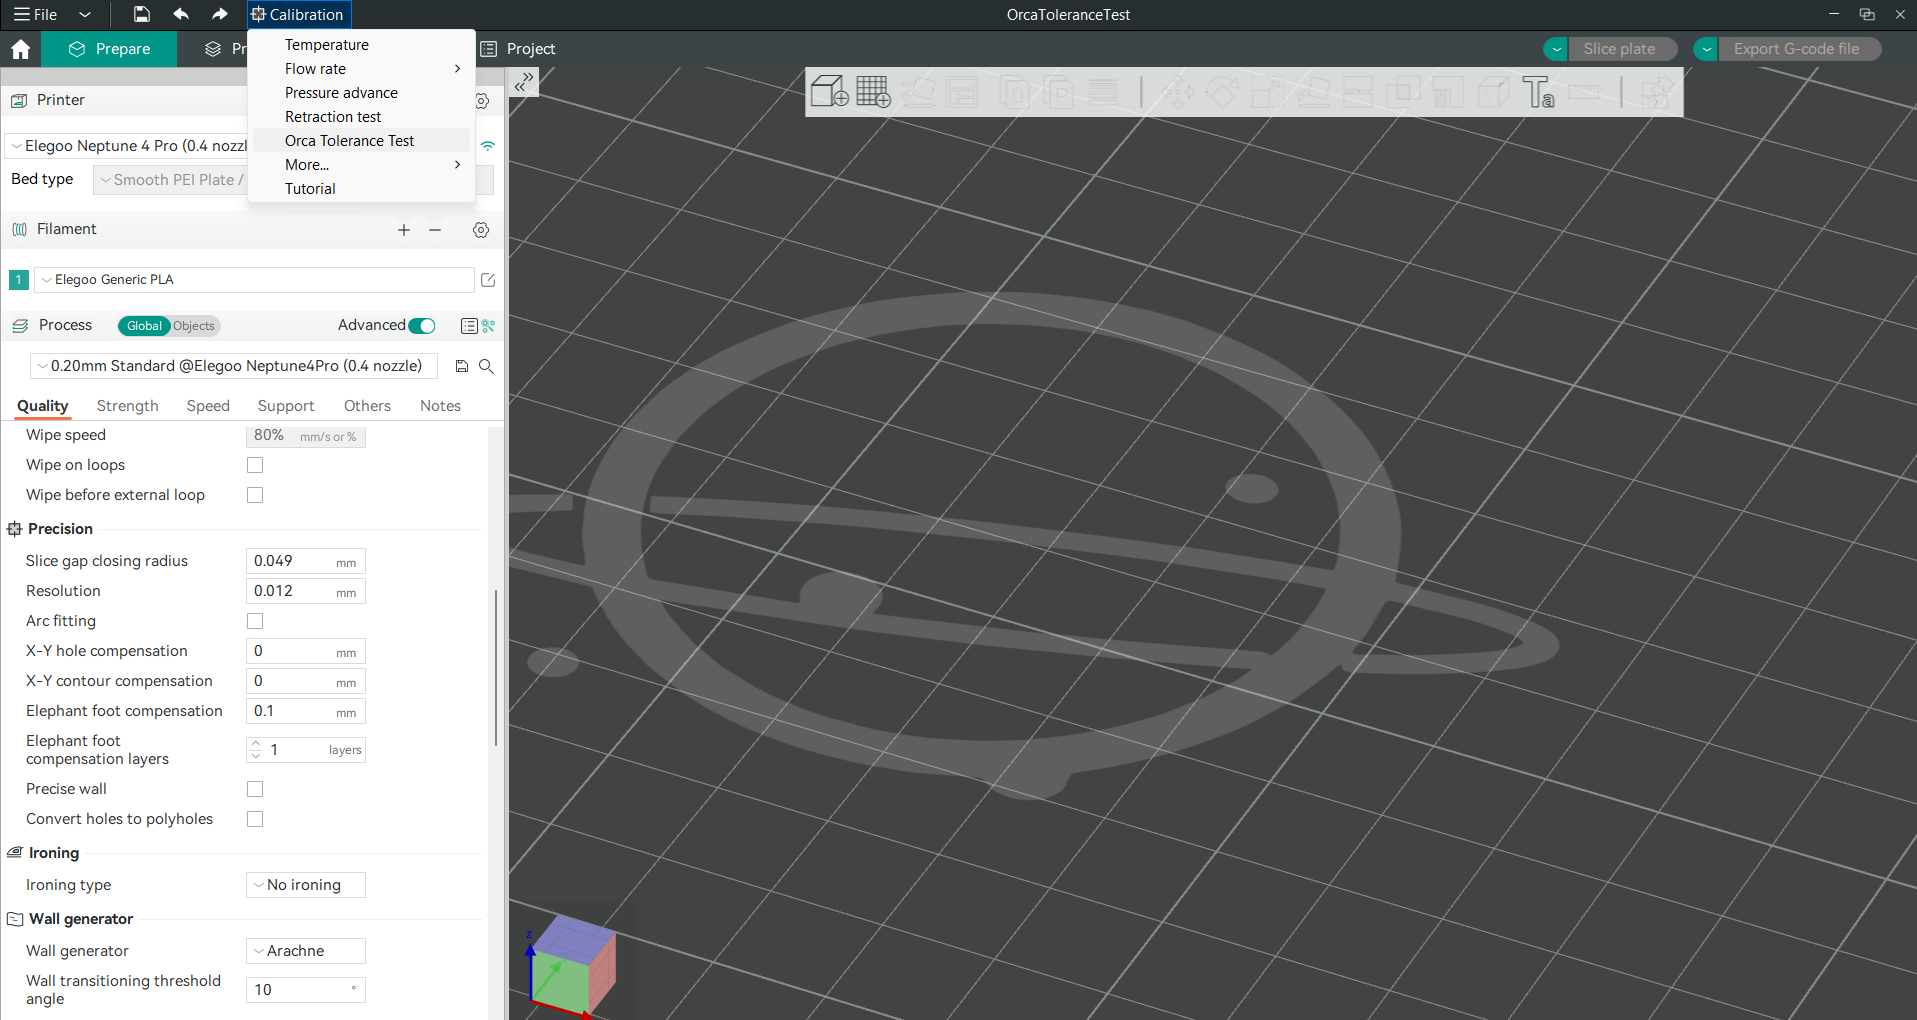
This will open you a project with the tolerance 3D test model.
-
Select the printer, filament, and process you would like to use for the test.
-
Slice the 3D model and print the test.
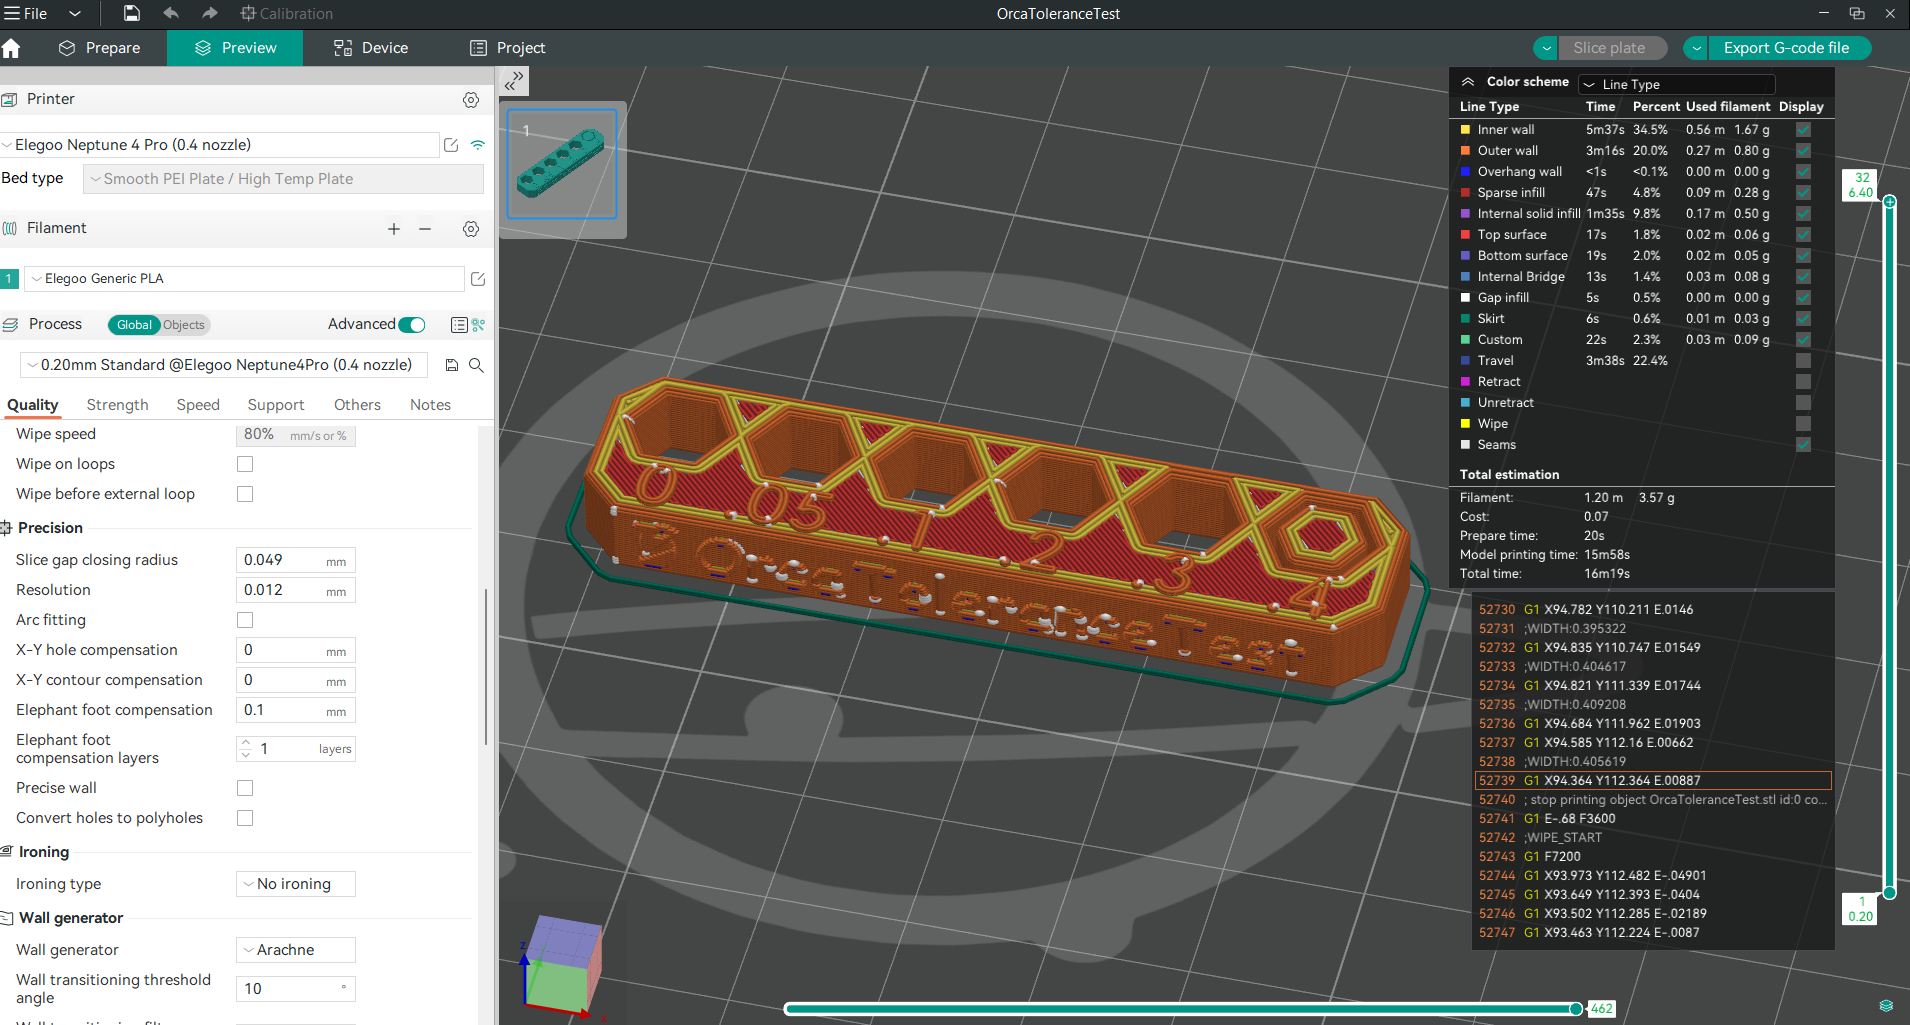
Important Note:
When performing your tolerance test, avoid using slicer features that could impact the outer and inner dimensions. Specifically, be cautious with X-Y hole compensation and X-Y contour compensation, both of which have a default value of 0 mm. Altering these settings may inadvertently affect the accuracy of your test results.
Relax with Obico
Tip: Explore Obico for OctoPrint and Klipper!
While your tolerance test is printing, why not explore Obico, the ultimate Smart 3D printing software? With Obico, you can monitor and control your 3D printer from any device and anywhere. You can also relax with Obico's AI failure detection system that keeps an eye on your print and notifies you of any issues. Connect your printer to Obico for free and enjoy unlimited webcam streaming, 3D printer status notifications, 3D printer remote access, and more!

Obico also offers mobile apps for iOS and Android, so you can access and manage your 3D printer from any device and location. Join Obico for free and enjoy the ultimate 3D printing experience.
- Once your test print is complete, use the M6 Allen key or the printed hexagon tester to see which holes the tester fits into just right. It shouldn't be too loose or too tight. This helps you understand the smallest gap your printer can accurately produce.
- Compare the fit of the tester in different holes. The hole size that best matches the tester without too much force or looseness is your printer's optimal tolerance level.
- With this newfound knowledge, adjust the tolerance settings in your designs to match what your printer is capable of. This ensures parts will fit together well in future prints.
Note: Tolerance testing isn't a one-time process. As you try new materials or make changes to your printer setup, it's a good idea to run new tests to see if your tolerance levels need adjusting.
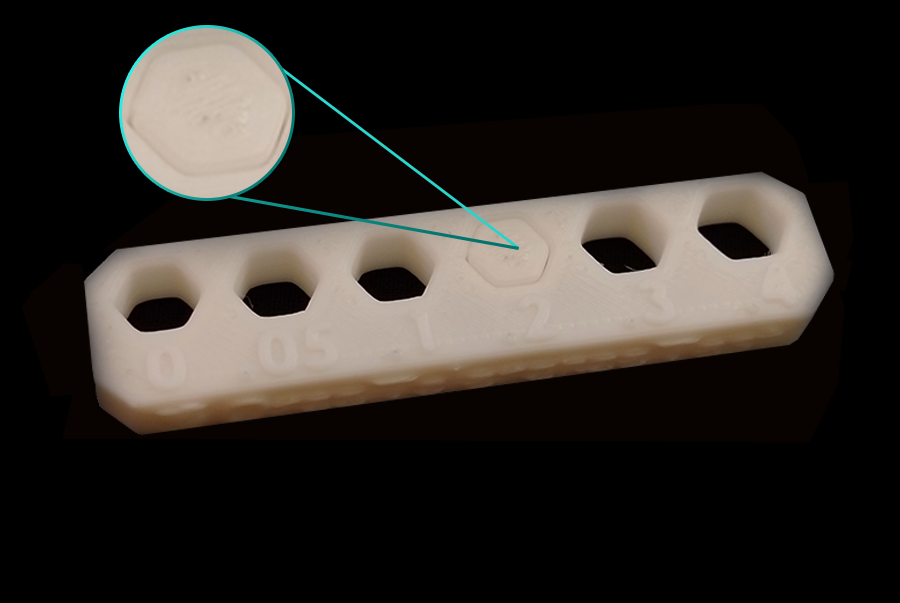
As we see in our test after print, the optimal tolerance value is 0.2mm. This means that when designing parts to be printed, allowing a 0.2mm tolerance will likely result in parts that fit together perfectly, just as intended. This value is specific to the material and printer setup used for this test. It's important to remember that different materials may expand, contract, or behave differently under the same conditions, which could alter the ideal tolerance settings. Therefore, when switching materials or making significant changes to your printer setup, it might be necessary to conduct a new set of tolerance tests to find the optimal settings for those specific conditions.
FAQs on Tolerance Testing with OrcaSlicer
-
What exactly is a tolerance test in OrcaSlicer?
A tolerance test in OrcaSlicer involves printing a specially designed model to determine how accurately your printer can replicate specified dimensions. This helps ensure parts fit together perfectly.
-
Why is it important to perform tolerance tests?
Tolerance tests help identify the precise settings needed for your printer to produce parts that match your design specifications, ensuring parts fit seamlessly and function as intended.
-
How often should I conduct a tolerance test?
It's advisable to perform a tolerance test whenever you switch to a new filament type, make significant adjustments to your printer, or if you notice changes in print quality over time.
-
Can the same tolerance settings be applied across different printers?
No, each printer may have its own unique characteristics and requirements. It's best to perform individual tolerance tests for each printer you use.
-
Do different materials require different tolerance settings?
Yes, materials can vary in how they react to heat and cooling, affecting their final dimensions. Testing tolerances for each material type you use is recommended.
-
What if my printed parts still don't fit together after adjusting for tolerance?
If parts still don’t fit, consider re-evaluating your tolerance test results or exploring other factors such as printer calibration and slicer settings.
Conclusion
In 3D printing, making parts that fit together perfectly isn't always easy. This guide showed us how to use OrcaSlicer to test our printer tolerance and adjust the right value in our design so our projects turn out just right. Tolerance is all about making sure the printer can make parts the exact size we need them. If we get it right, everything fits together like puzzle pieces.
OrcaSlicer helps us do this by testing different sizes and seeing what works best. We learned that things like the type of material we use can change how our prints come out, so testing is really important. For example, we found that a 0.2mm space between parts is a good rule of thumb for making sure they fit well, but this might change with different printers or materials.
Doing these tests often, especially when we switch materials or notice our prints looking a bit off, helps us keep everything running smoothly. It’s a bit like making sure your bike’s gears are tuned right: it takes some effort, but it’s worth it for a smooth ride.
In short, testing for the right fit makes our 3D printing projects much better. OrcaSlicer is a great tool for this, making it easier to figure out the best settings for our printer, design and materials. So, keep testing and adjusting, and you'll get prints that fit together perfectly every time!
If you’re interested in further calibration and tests using OrcaSlicer, feel free to explore our comprehensive guide. It provides detailed instructions, tips, and tricks to enhance your experience with this powerful open-source slicer.
