Z-Hop in Orca Slicer: The Secret to Perfect 3D Prints
Ever seen those little strings hanging off your 3D print like tiny spider webs? Or the nozzle scratching over a beautiful layer? If you’ve experienced these issues, you’re not alone—and there’s a fix. Enter Z-Hop, a feature in Orca Slicer that will take your 3D prints from good to great.
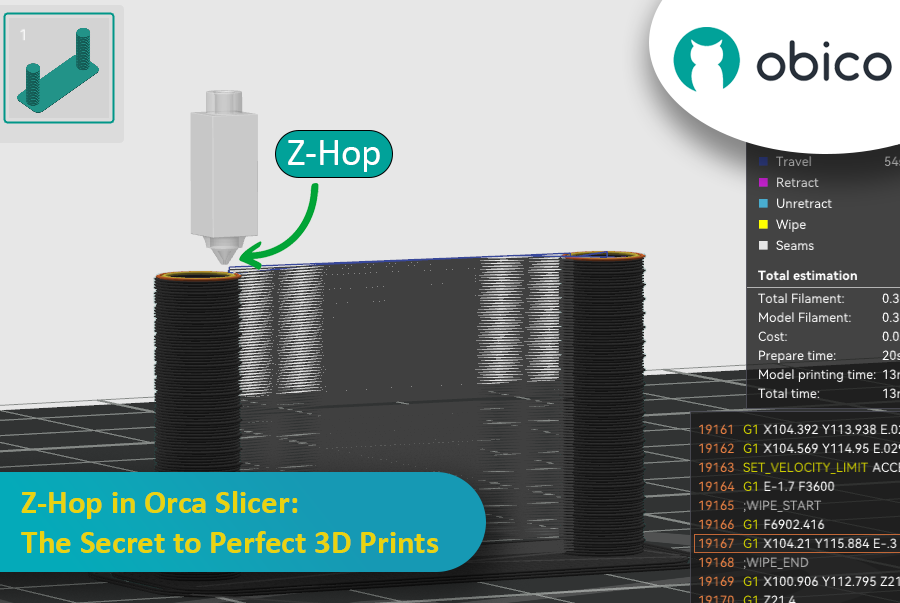
Whether you’re new to 3D printing or a hobbyist, getting the settings right makes a huge difference. In this guide, we’ll be exploring Z-Hop—what it is, how to use it, and why it’s a game changer.
Let’s get started!
Getting Started with Orca Slicer
Before we get into Z-Hop and retraction, let’s get started with Orca Slicer. It’s built on top of Bambu Studio (a fork of the well-known PrusaSlicer). It has many unique features that give the user more control over their 3D prints. From advanced calibration tools to slicing customization.
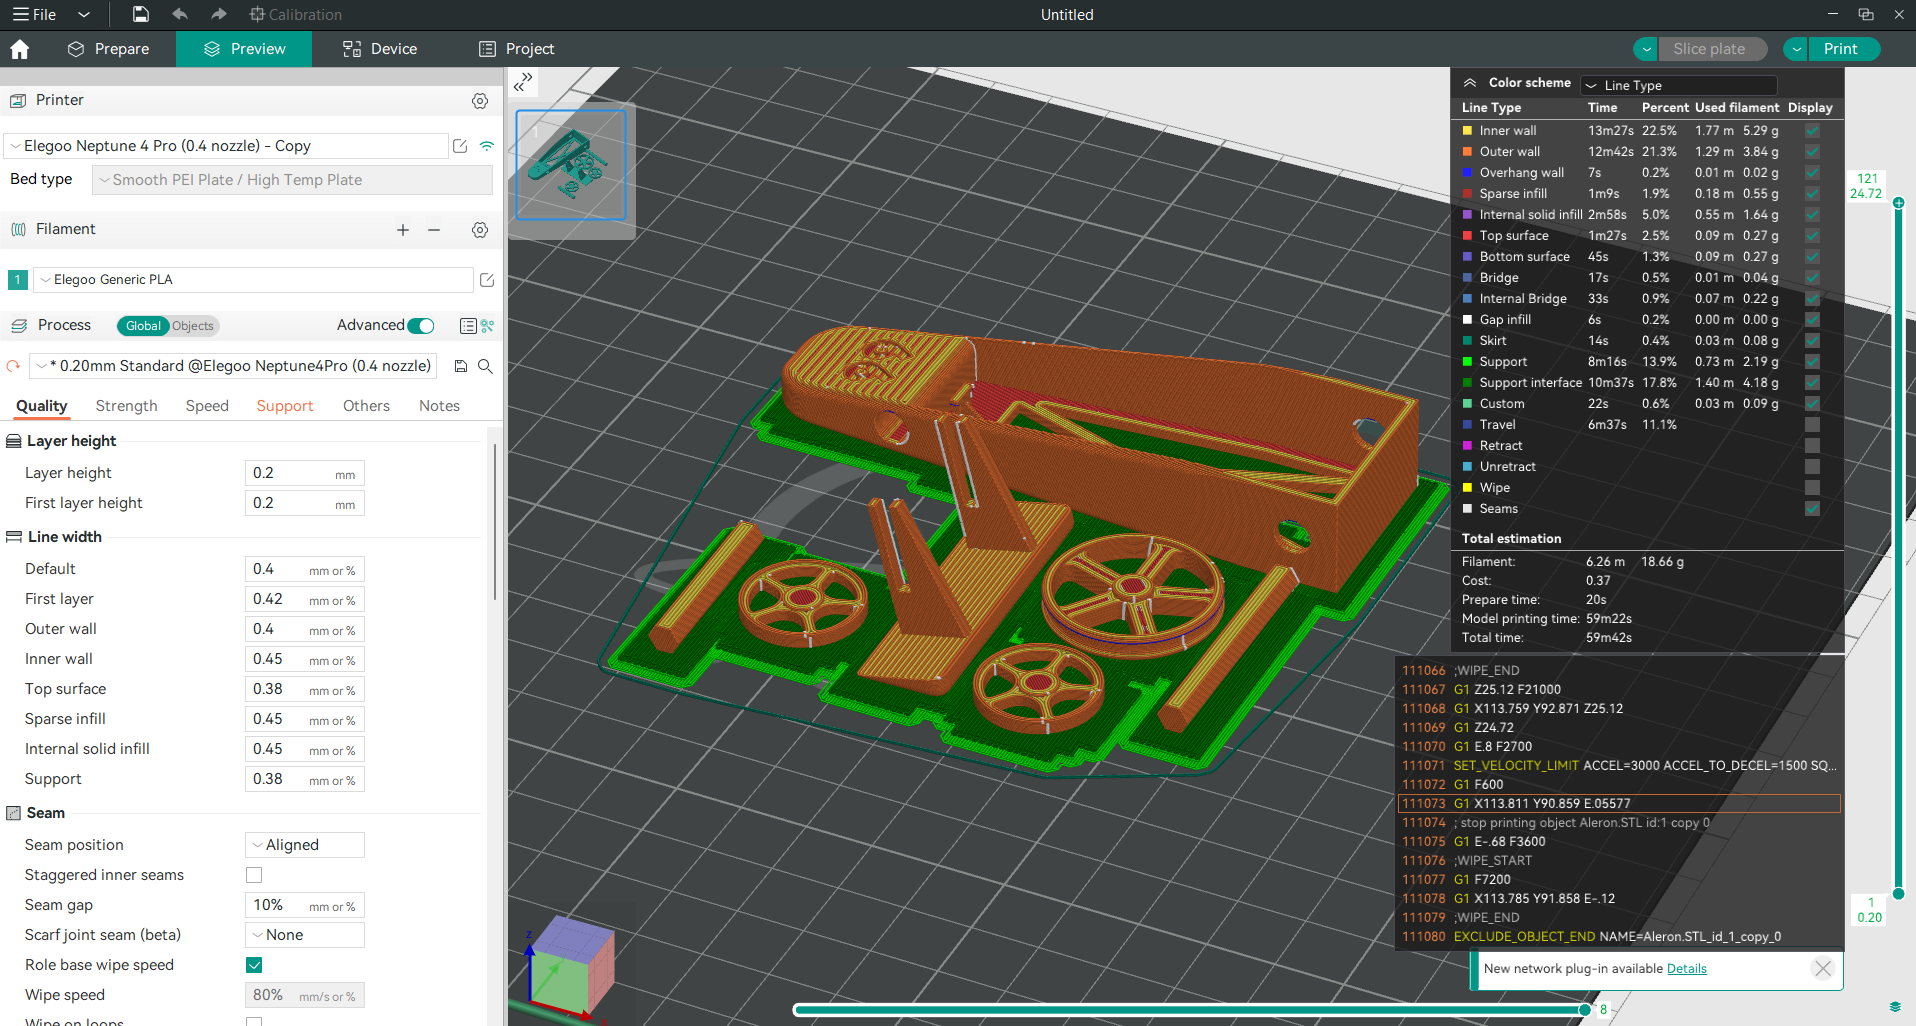
For a full introduction on how to download, install, and set it up, check out this introduction guide: OrcaSlicer: An Introduction and How to Get Started. This guide covers everything from downloading the software to fine-tune your printer settings with Orca Slicer’s features. It also has many linked resources and guides to help you master every aspect of the slicer.
For full download and installation instructions, visit Orca Slicer Download, which has a step-by-step installation guide.
Now that you have Orca Slicer, let’s get into the details of Z-Hop and retraction settings—two features that can make a huge difference in your 3D prints.
Retraction: Your First Line of Defense Against Stringing
Imagine you’re painting a picture. Every time you lift your brush to move to a new section, you accidentally drip paint across the canvas. Frustrating right? That’s what happens when your 3D printer moves the nozzle across your print without retraction.
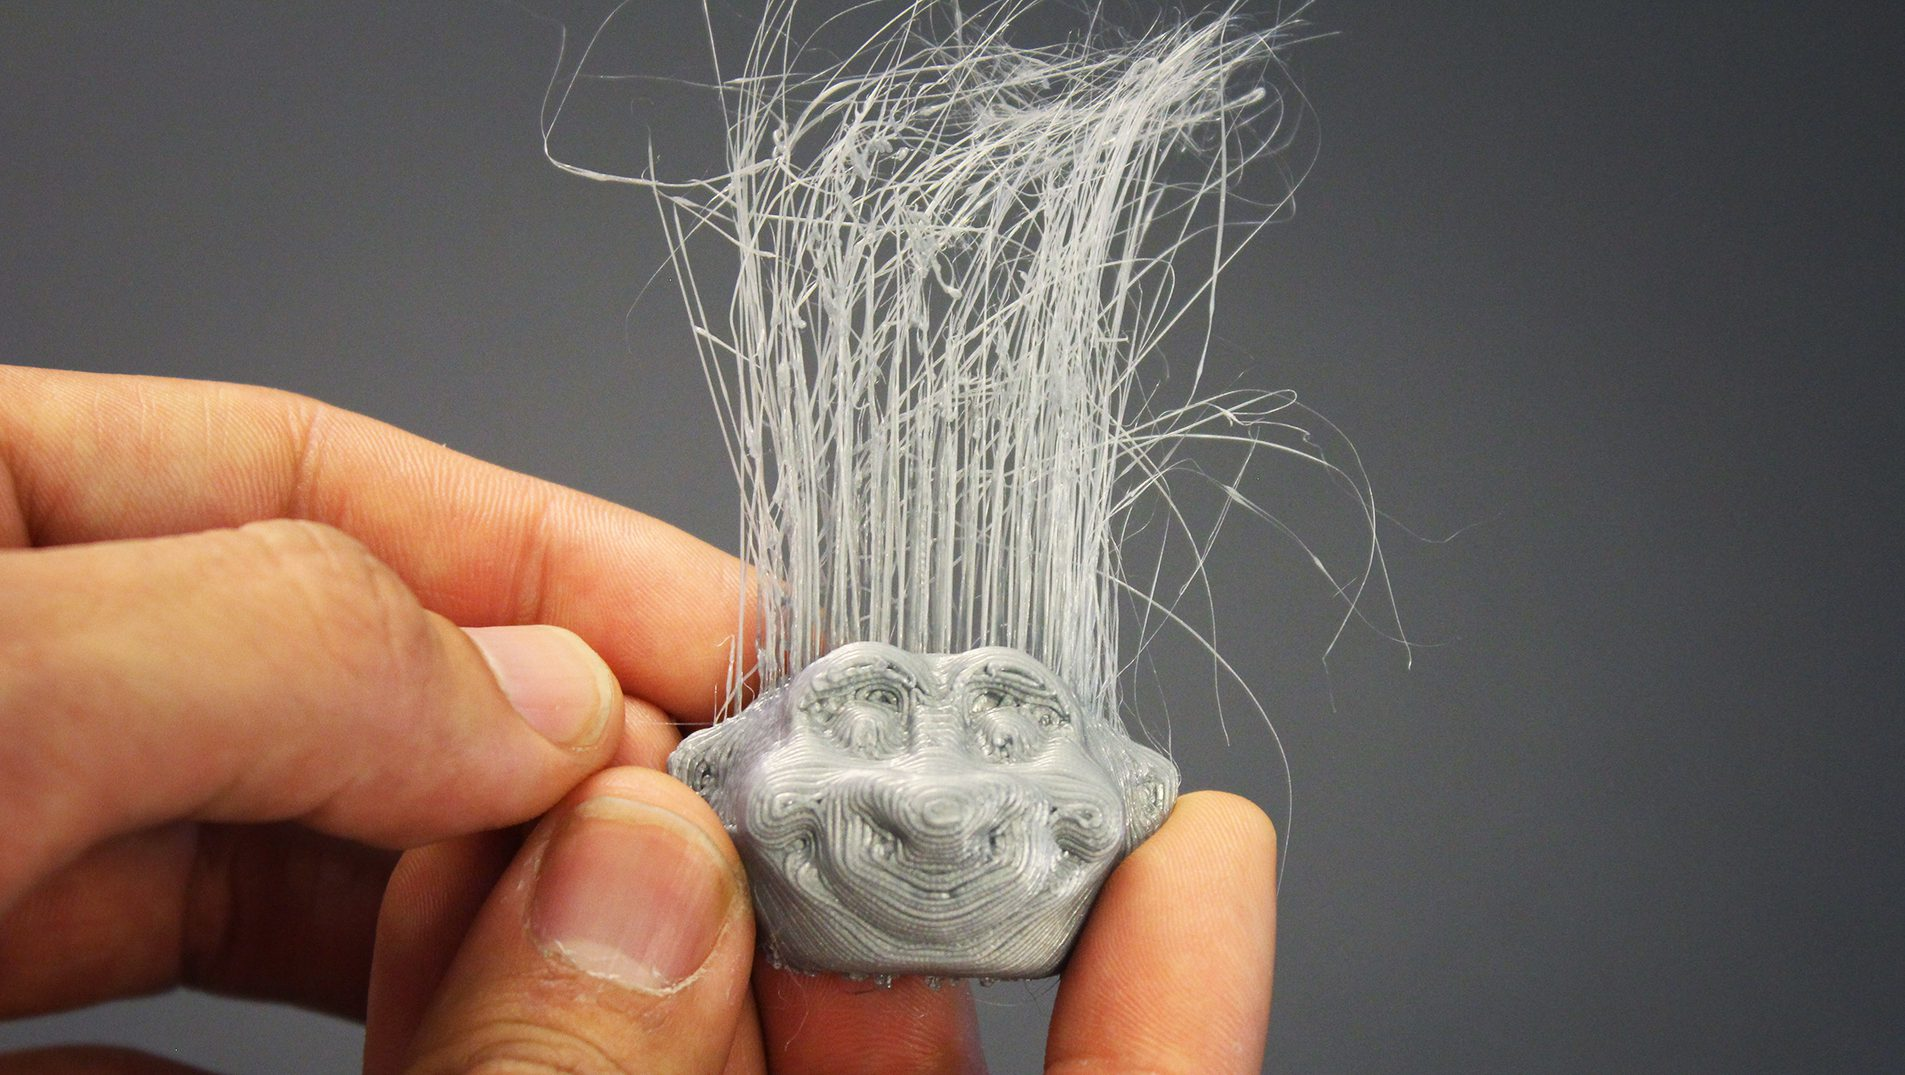
Source: geeetech.com
In FDM 3D printing, the extruder moves the nozzle around to create your object layer by layer. During these moves called “travel moves,” the filament can still ooze out and leave strings across your print. This is where retraction comes in. Retraction pulls the filament back slightly to relieve the pressure and stop the filament from oozing out during travel. But to get the best results, you have to enable and configure it right.
How to Enable Retraction in Orca Slicer
-
Open Orca Slicer and load your 3D model.
-
Go to "Printer Settings" (click the pencil icon next to your printer’s name).
-
Go to the "Extruder" tab and scroll down to the "Retraction" section.
-
Check the box to enable retraction.
-
Adjust these settings:
Retraction Length: For direct-drive setups use 0.5 mm to 2 mm; for Bowden extruders use 5 to 7 mm.
Retraction Speed: This is how fast the filament is pulled back—40-60 mm/s for direct drive and 30-50 mm/s for Bowden setups.
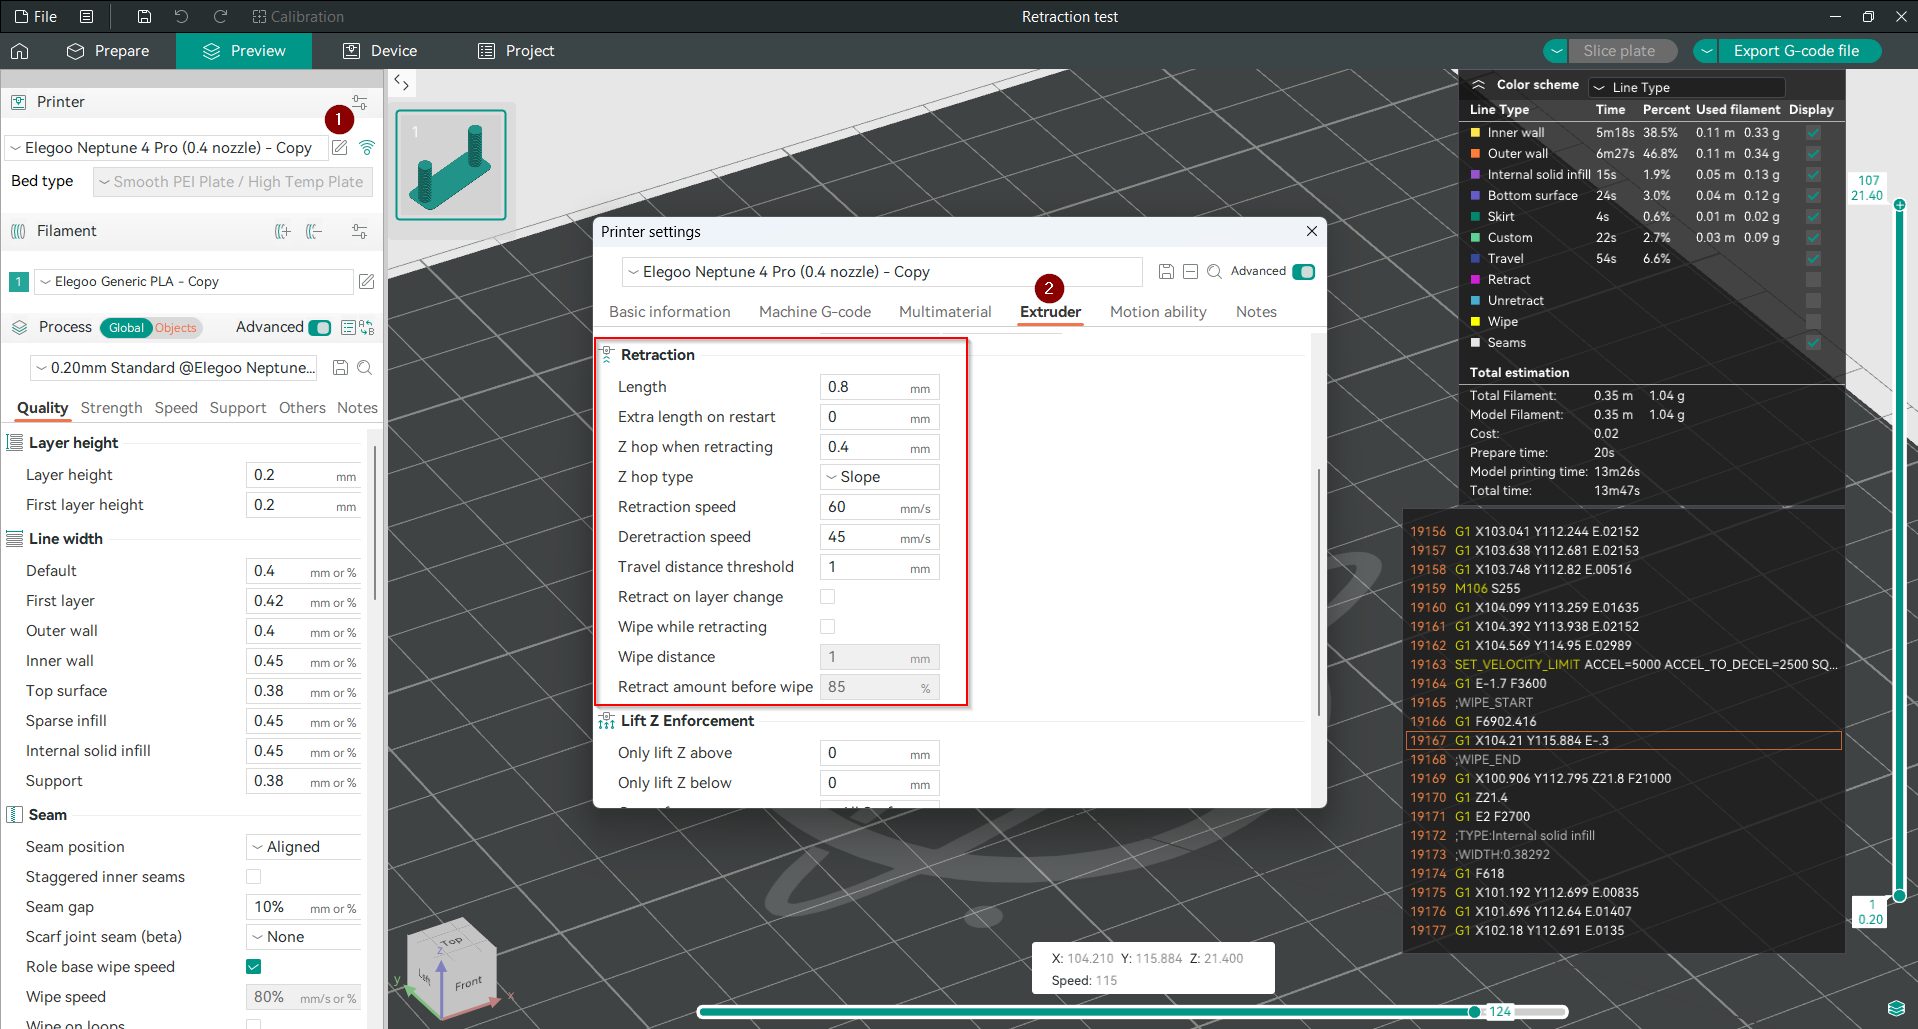
Once you’ve enabled retraction, your printer will pull the filament back during travel moves, preventing stringing. But there’s another issue: nozzle drag. That’s where Z-Hop comes in.
For a better understanding of retraction settings in Orca Slicer and to fine-tune your printer for the best results, head over to our guide: Retraction Test in Orca Slicer.
What Is Z-Hop and Why Should You Care?
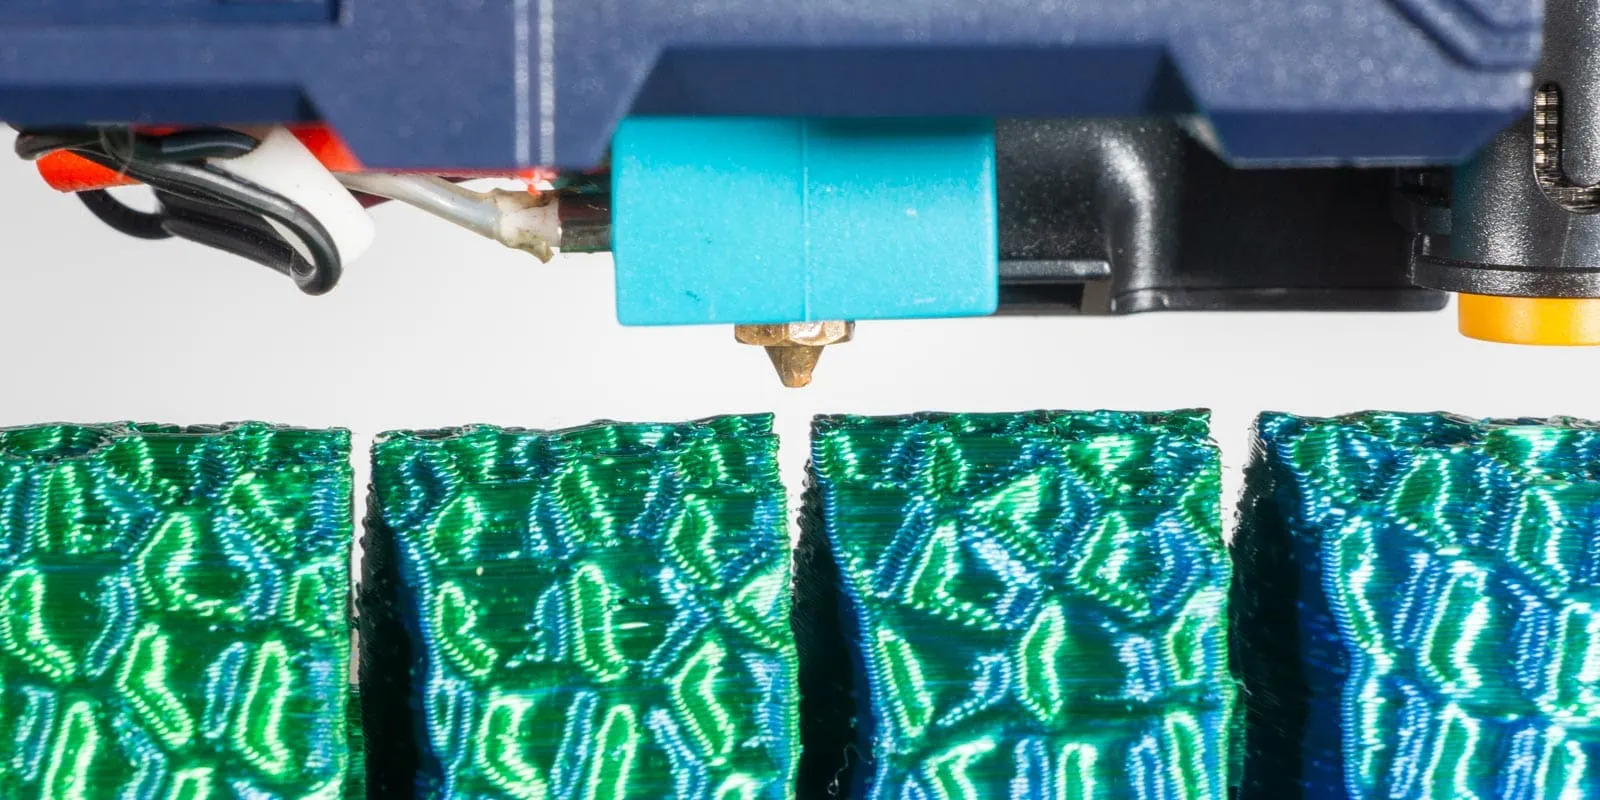
Okay, let’s talk about Z-Hop—an often-overlooked setting that can save your prints from disaster. Z-Hop works in conjunction with retraction to prevent one of the most annoying things in 3D printing: nozzle collisions.
Source: clevercreations.org
Imagine this. You’re printing a delicate model. The nozzle is moving back and forth, doing its thing, but then it clips the top layer of your print. Ouch! This collision leaves a scratch or smudge on the surface of your model, ruining what could have been a perfect print. Z-Hop solves this by lifting the nozzle just enough to avoid these collisions during travel moves.
In short, Z-Hop lifts the nozzle above the printed layer when it moves across the print. By lifting it, you prevent the nozzle from dragging across the part and leaving unwanted marks, stringing or damaging fragile areas. For models with lots of overhangs or intricate details, Z-Hop can be a lifesaver.
Why Z-Hop Matters in FDM 3D Printing
Fused Deposition Modeling (FDM) 3D printing prints are created by extruding melted filament layer by layer. The printer’s tool head moves around the print bed in two ways:
Printing moves: When the filament is extruded to form part of the printed object.
Travel moves: When the tool head moves between different points on the print bed without extruding any filament.
During these travel moves, especially when the nozzle has to cross over already printed sections, there is a risk of collisions. The nozzle can drag across the print, leaving behind scratches, smudges, and stringing (those pesky, thin filaments that stretch from one part of the print to another). That’s where Z-Hop comes in—it lifts the nozzle just enough to prevent this.
How to Enable Z-Hop in Orca Slicer
Now that you know why Z-Hop is important, let’s go through how to enable it in Orca Slicer.
There are two ways to configure retraction and Z-Hop settings in Orca Slicer:
The first method, which we used previously in the retraction settings, is via the Printer Settings under the "Extruder" tab. These settings apply to the printer’s profile configuration.
The second method, which offers more options, is via Filament Settings. This is useful because you can set Z-Hop and retraction settings for the specific filament you’re using. If you don’t change these settings here, the slicer will default to the Printer Settings.
Let’s focus on the Filament Settings method, which gives you more flexibility over your material-specific printing needs:
- Click the pencil icon next to your chosen filament to get to “Filament Settings.”
- Go to the “Settings Overrides” tab and scroll down to find the “Z-Hop” section in the retraction settings.
- Check the box for “Z-Hop When Retracting” to enable it. This will make the nozzle lift slightly during travel moves to avoid collisions with your print.
- Set the Z-Hop height (0.5mm to 1mm is a good starting point). This controls how high the nozzle lifts during retraction to prevent smudging or damage.
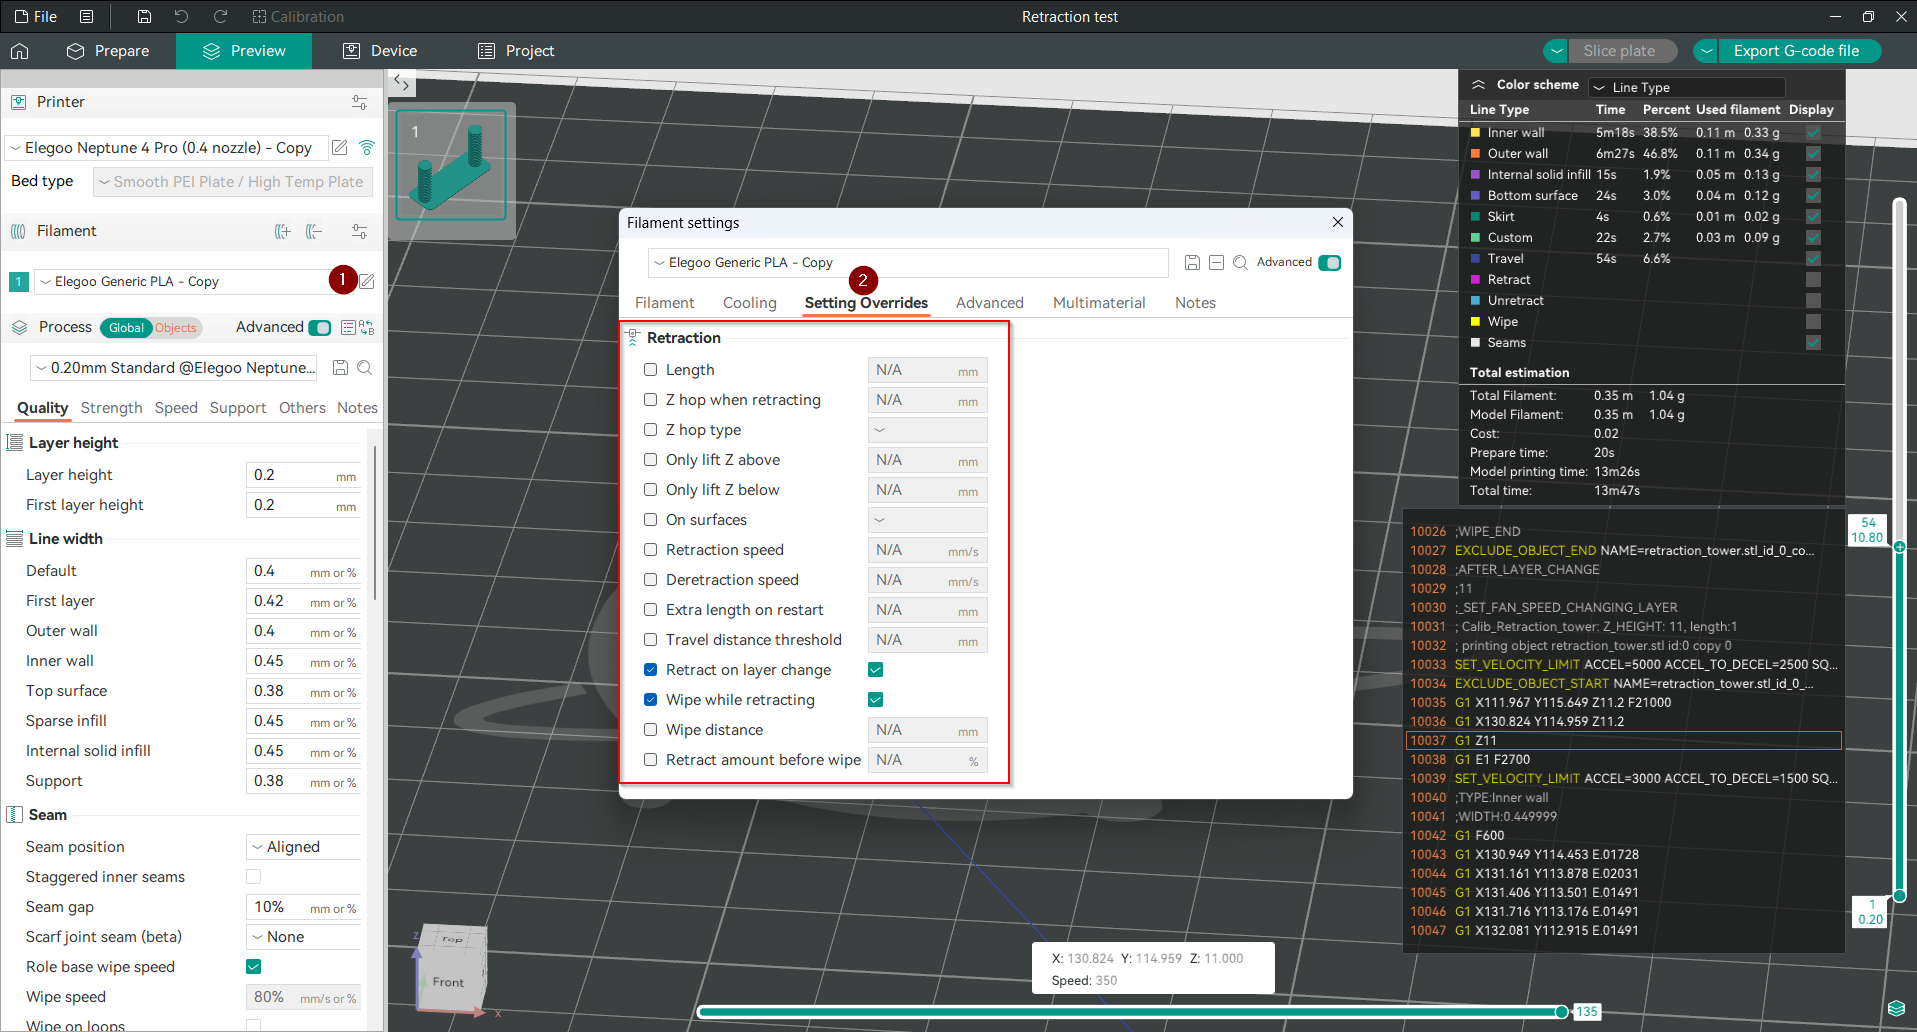
Next up, we’ll dive into the Z-Hop settings in more detail to help you get the best print quality.
Z-Hop Settings in Orca Slicer
Orca Slicer has several Z-Hop settings to let you control how and when the nozzle lifts during travel. This level of control helps you find the sweet spot between print speed, quality, and safety.
Let’s go over the Z-Hop settings and what they do.
1. Z-Hop When Retracting
This will lift the nozzle every time a retraction occurs. Retraction is when the printer pulls the filament back to prevent oozing during travel moves. Adding Z-Hop to retraction prevents the nozzle from hitting the print as it moves between sections.
When enabled, the printer will lift the nozzle by the specified Z-Hop distance every time it retracts. This is especially useful when printing tall or complex parts where the risk of nozzle collisions is higher.
Why use this setting?
If your prints are getting damaged during travel moves or you see stringing between travel paths, enabling Z-Hop when retracting can help fix these issues. It gives the printer the clearance it needs to move without leaving marks on the print.
2. Z-Hop Type: Auto, Normal, Slope, Spiral
Orca Slicer also lets you choose the type of Z-Hop movement, which can have a big impact on print quality and time. The four Z-Hop types are:
-
Auto: When “Auto” is selected, the printer will choose the best Z-lift method for the print geometry. Here’s how it works:
During travel moves within a single layer, the printer checks if the nozzle will pass over any overhang areas. Overhangs can expand or warp during printing, and using slope lifting (lifting the nozzle at an angle) can risk scraping or colliding with these sections, as it covers a wider XY area. If there’s no risk of collision, the printer will use slope lifting. However, if there’s potential for contact, it switches to spiral lifting, which moves in a tighter, more controlled path, reducing the risk of damaging the part.
For layer changes, the printer always defaults to spiral lifting to avoid collisions and ensure smooth transitions.
-
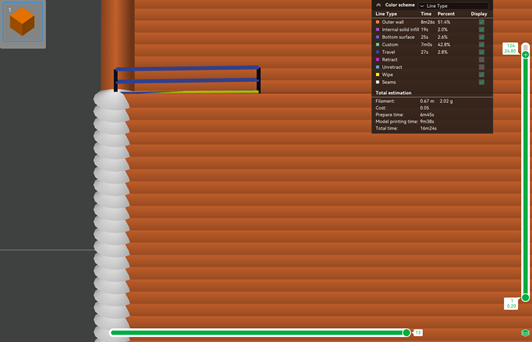
Normal: This is the standard Z-Hop mode; the nozzle lifts up, moves to the next point, and then lowers back down in straight line. While it works, it can sometimes cause stringing if your filament oozes a lot.

Source: wiki.bambulab.com
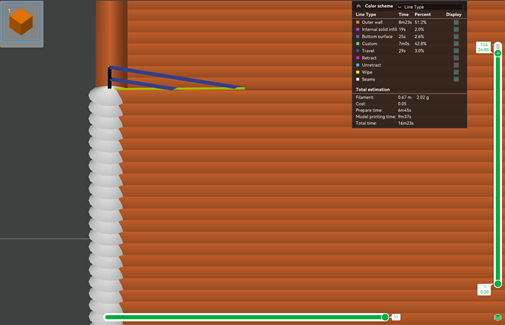
- Slope: In slope mode, the nozzle lifts at an angle instead of straight up. This can save time and reduce stress by not traveling as far. But it’s more likely to bump the print, especially for larger prints.
Source: wiki.bambulab.com
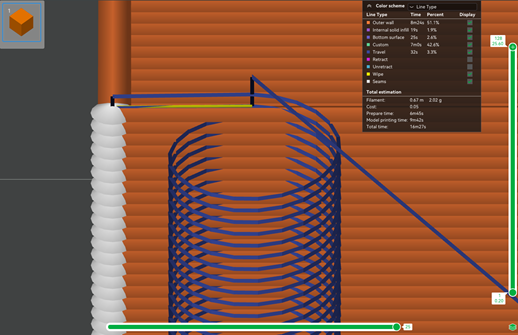
- Spiral: Spiral Z-Hop lifts the nozzle in a spiral motion, which reduces the chance of collision while still preventing stringing. This is the slowest of the three but gives the best balance of not damaging and a clean travel path.

Source: wiki.bambulab.com
Choosing the right Z-Hop type depends on your model’s geometry and the material you’re printing with. For most prints, Auto works well, but if you’re printing delicate or tall structures, experimenting with Spiral or Slope can yield better results.
3. Only Lift Z Above/Below
Sometimes Z-Hop is only needed for specific parts of your print. Orca Slicer allows you to set boundaries for when Z-Hop should be triggered based on the Z-height of the print. This can be very useful for multi-height prints where you only need Z-Hop in the upper delicate parts.
Only Lift Z Above: If you enter a positive value (in mm), here Z-Hop will only trigger once the print reaches that height. For example, if you’re printing a model with a wide base but a delicate top section, you can set Z-Hop to only lift the nozzle once the printer reaches the higher, more intricate layers.
Only Lift Z Below: On the other hand, this setting restricts Z-Hop to the lower parts of the print. By entering a positive value, Z-Hop will only be used below that height, so the nozzle won’t lift unnecessarily during the taller parts of the print.
Why use these settings?
Using Only Lift Z Above/Below can save you print time. By only enabling Z-Hop when it’s really needed, you can prevent your print from taking longer than it should while still preventing the nozzle from damaging delicate areas.
4. Z-Hop on Surfaces: All, Top Only, Bottom Only
Sometimes you may only need Z-Hop to happen on specific surfaces of your print. Orca Slicer allows you to force Z-Hop based on surface orientation so you have more control over the nozzle.
All Surfaces: When set to "All Surfaces," Z-Hop will be applied whenever the nozzle travels over any surface of the print. This is the most general option and is good for prints with detailed geometry all over.
Top Only: This setting forces Z-Hop only on the top surfaces of the print. If you’re printing a model with a solid base and detailed top, like a figurine or sculpture, this setting will prevent the nozzle from damaging the top layers.
Bottom Only: Z-Hop only applies when printing the bottom layer. Useful if you have slight warping or parts with small surface areas on the bottom of the build plate.
Top and Bottom: For prints where both top and bottom are fragile, Z-Hop applies to both. A balanced option for multi-part prints or models with complex geometry at both top and bottom.
Z-Hop and Material Considerations
Not all materials are created equal, and different materials can affect how well Z-Hop works. For example, PLA, ABS, and PETG are more tolerant and work well with Z-Hop to prevent nozzle drag on delicate parts.
But with flexible materials like TPU or TPE, you should be more careful. These materials can stretch or compress when retracted, and Z-Hop is less effective. In fact, too much Z-Hop or retraction with these materials can cause jamming or inconsistent extrusion. (The flexible nature of the filament increases the pressure in the nozzle, so frequent pressure changes with Z-Hops can create a bad combination of stringing and under-extrusion.)
If you’re printing with these materials, you should dial back on both retraction and Z-Hop or even disable Z-Hop altogether.
Z-Hop vs. Print Time: Balancing Quality and Speed
Here’s the thing: while Z-Hop can save your print from disaster, it comes with a trade-off—extra print time. Every time the nozzle lifts and moves, it takes a second or two longer to complete that travel move. Over the course of a long print, those extra seconds add up.
For simple models or prints where stringing isn’t a big issue, you might not need Z-Hop. In those cases, you can skip it and rely on retraction to prevent oozing. But for complex or delicate prints, Z-Hop is worth the extra print time as it prevents the nozzle from damaging or touching unwanted parts.
When to Avoid Z-Hop
While Z-Hop is super helpful, there are a few times when you should skip it:
When printing with flexible materials, TPU can be tricky. Retraction and Z-Hop can cause jamming or poor extrusion. For these prints, disable Z-Hop and reduce retraction.
For Simple Prints: If your model is simple with large flat surfaces and no intricate details, Z-Hop is overkill. You can get away with just retraction.
When Print Speed Matters: If you’re in a hurry or working on a tight deadline, disabling Z-Hop can help shave valuable minutes off your print time.
Tuning Z-Hop with Orca Slicer’s Calibration Tool
Testing is key to getting the best results with Z-Hop. Orca Slicer has built-in calibration tools so you don’t waste material on full prints. Use the Retraction Test to try different Z-Hop heights, retraction settings, and find the sweet spot for your setup.
For more info on how to do a retraction test in Orca Slicer check out this article: Retraction Test in Orca Slicer.
FAQs
Q1. What is Z-Hop in 3D printing?
Answer: Z-Hop is a 3D printing feature that lifts the nozzle slightly during travel moves to prevent it from dragging across the printed part. This stops unwanted marks, smudging, and collisions that can damage your print.
Q2. Why should I use Z-Hop in my prints?
Answer: Z-Hop stops nozzle collisions with the printed part, which can cause scratches, smudges, or even ruin fragile parts of the model. It’s good for intricate prints with overhangs, tall structures, or delicate details so you get a smooth finish.
Q3. How do I enable Z-Hop in Orca Slicer?
Answer: To enable Z-Hop in Orca Slicer:
- Click the pencil icon next to your filament to go to "Filament Settings."
- In the "Settings Overrides" tab, find the Z-Hop section under Retraction.
- Check the box for "Z-Hop When Retracting."
- Set the Z-Hop height (0.5 mm to 1 mm is a good starting point) to lift the nozzle during travel moves.
Q4. What is retraction, and how does it help my prints?
Answer: Retraction pulls the filament back during travel moves to stop oozing and stringing (those thin, unwanted filaments between different parts of the print). Proper retraction settings can greatly improve print quality by reducing these defects.
Q5. How do I enable retraction in Orca Slicer?
Answer: To enable retraction:
- Open Orca Slicer and load your 3D model.
- Go to "Printer Settings" and click on the "Extruder" tab.
- Scroll down to the Retraction section and check the box to turn it on.
- Adjust the Retraction Distance (0.5-2 mm for direct drive, 5-7 mm for Bowden extruders) and the Retraction Speed (40-60 mm/s for direct drive, 30-50 mm/s for Bowden setups).
But for accurate results, you should print the retraction test.
Q6. What are the different types of Z-Hop in Orca Slicer?
Answer: Orca Slicer has four Z-Hop movement types:
Auto: Automatically chooses the best Z-Hop mode for the print.
Normal: Lifts the nozzle straight up and moves it; reduces collisions but may increase stringing.
Slope: Lifts the nozzle at an angle, saves time but increases the chance of bumping the print.
Spiral: Lifts the nozzle in a spiral motion, reducing collisions and stringing.
Q7. Can I control when Z-Hop happens during a print?
Answer: Yes, you can configure Z-Hop based on the print’s height:
Only Lift Z Above: Z-Hop only activates when the print reaches a certain height.
Only Lift Z Below: Z-Hop applies to the lower parts of the print. You can also restrict Z-Hop to specific surfaces, like Top Only, Bottom Only, or Both.
Q8. Does using Z-Hop increase print time?
Answer: Yes, Z-Hop does add a little print time since the nozzle lifts and moves slowly during travel moves. But it’s worth it to prevent nozzle damage and get a smooth finish on delicate or complex prints.
Q9. Should I use Z-Hop for every print?
Answer: No. Z-Hop is most useful for complex or delicate models where nozzle collisions are likely. For simple prints with flat surfaces or minimal overhangs you don’t need Z-Hop and can rely on retraction to prevent stringing.
Q10. When should I avoid using Z-Hop?
Answer: You should not use Z-Hop when:
Printing with flexible filaments like TPU, retraction and Z-Hop can cause jamming or inconsistent extrusion.
Printing simple models with flat surfaces and minimal details, where Z-Hop is not needed.
Speed is key and you need to reduce print time. Disabling Z-Hop will save you minutes.
Q11. What materials work best with Z-Hop?
Answer: PLA, ABS, and PETG work well with Z-Hop, preventing nozzle drag on delicate areas. Flexible materials like TPU and TPE don’t work as well with Z-Hop as they can stretch or compress when retracted and cause extrusion issues.
Q12. What’s the difference between retraction and Z-Hop?
Answer: Retraction pulls back the filament during travel moves to prevent oozing and stringing, and Z-Hop lifts the nozzle slightly to prevent dragging it across printed layers. Both features improve print quality, but they serve different purposes—retraction controls filament flow, and Z-Hop prevents nozzle collisions and scratches and helps with reducing stringing.
Q13. How do I perform a retraction test in Orca Slicer?
Answer: To perform a retraction test:
- Go to the Calibration Menu in Orca Slicer and select Retraction Test.
- Adjust the retraction settings and print the retraction tower.
- Analyze the tower to find the best retraction length and speed for your setup. See this guide for more details: Retraction Test in Orca Slicer.
Final Thoughts
Z-Hop is one of those features that might seem small but has a big impact on your print quality. By lifting the nozzle during travel moves, Z-Hop prevents stringing, smudging, and nozzle collisions so your final print comes out smooth and professional.
With Orca Slicer, you have all the tools to fine-tune your Z-Hop settings for the best results. Whether you’re printing a delicate figurine with lots of overhangs or a simple functional part, knowing when and how to use Z-Hop will take your prints to the next level.
Now go print! 😉
