Klipper Exclude Object Feature - Setup and Configuration

Klipper firmware has been around since 2016 in the 3D printing community. It’s free, open-source, and has steadily become a mainstream 3D printing firmware, second only to Marlin.
Yet, Klipper’s earlier versions missed key features like the Octolapse, Exclude objects, and plug-in integration found on Octoprint and Marlin combo. This lack of certain valuable features restricted users from using Klipper as their primary 3D printing firmware.
However, since the recent updates, some of these features are slowly making their way into the Klipper firmware. For example, you can now shoot Octolapse-like videos on your 3D printer using the Klipper timelapse.
Likewise, Klipper now also supports the Exclude objects functionality to rescue you from failed prints. But, it needs some initial setup and configuration, which might be puzzling to new Klipper users.
So, this article will take you through the entire process of setting up Exclude objects for your Klipper 3D printer. We’ll look at this feature in detail and understand how you can use it in your 3D printing workflow.
Let’s exclude the failed prints.
Exclude Objects Feature
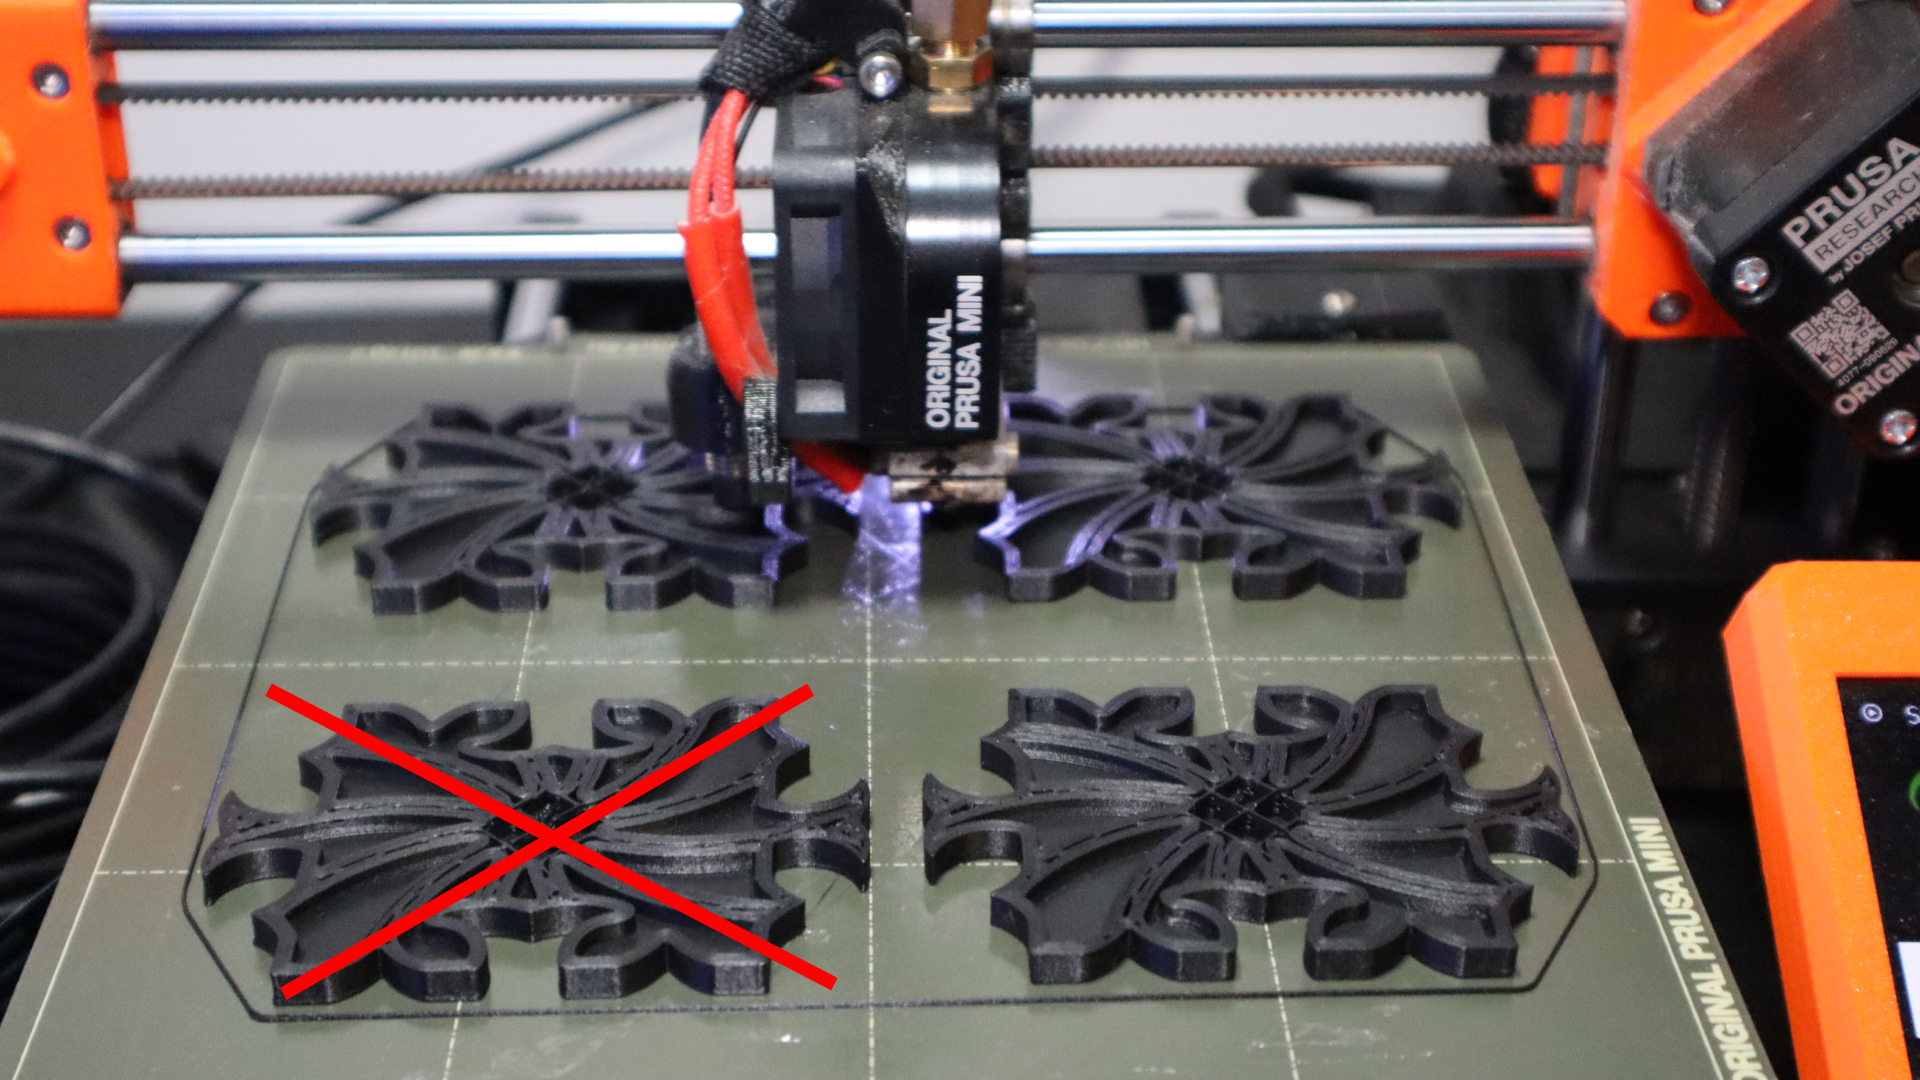
Suppose you’re printing a bunch of objects on your print bed, and one fails midway through the printing process. Even though only one of your prints has failed, you will need to cancel the entire printing cycle to avoid any further damage to your prints or machine.
The time and filament wastage are relatively minimal if it's a short print. But, if you’re executing long-hour batch prints, a canceled print can result in losing several printing hours and lots of wasted filament material.
Klipper’s Exclude objects feature helps you out specifically in such scenarios. Using this feature, you can selectively ‘exclude’ the failed prints from your current printing process. This way, you can continue printing the rest of your models, even if one of your prints fails midway.
It can be convenient for batch prints, in print farms, and when you have tight deadlines on your printing deliverables. Exclude objects will save considerable filament material (that would’ve otherwise been wasted), printing hours, and unnecessary frustration of failed prints.
And even if you don’t necessarily print multiple parts on your printer right now, it’s better to have this feature configured in case you need to carry out batch prints. It’s accessible to set up Exclude objects in Klipper, and you don’t have to use it if you don’t need it.
How to Enable Exclude Object for Klipper?
Both the Fluidd and Mainsail interfaces support the exclude objects functionality for Klipper. The configuration process is similar in both of these programs. But, to keep it simple, we’ll use the Mainsail UI in this article.
If you haven’t installed either of these interfaces on your 3D printer, you can refer to our Fluidd installation guide or Mainsail for Klipper article. These pieces will walk you through the entire Klipper installation process step-by-step.
Let’s begin configuring the Exclude Object feature for your Klipper instance.
Configure Exclude Objects in Klipper
- Open the printer.cfg file in your configuration section.
 Photo Courtesy of Maple Leaf Makers via YouTube
- Add [exclude_object] command in the file.
- Save and Restart the file.
- Open the moonraker.conf file.
- Search for [file_manager] in the code. If not, add the command.
 Photo Courtesy of Maple Leaf Makers via YouTube
- Type enable_object_processing: True below the [file_manager] line.
- Save and Restart the file.
Enable Label Objects in Slicer
This step will let you individually name each model in your 3D printing file. It’ll help you distinguish between identical models and cancel only the failed part. You can individually label objects easily in Ultimaker Cura. But, with PrusaSlicer, there’s a slight setup step.
- Go to the Print Settings >> Output options in PrusaSlicer.

- Enable the Label Objects option.
That’s it. We’ve now set up and configured the Exclude objects feature in Klipper. Let’s see how to use the Mainsail web UI.
Using Exclude Object

- Slice and Upload a multipart print to your Klipper 3D printer.
- The Gcode viewer on the Dashboard now displays a new [x] symbol. Click on the symbol.
- You’ll notice a popup window with a list of your parts. You can cancel any of these parts by clicking the cross icon on the right side of their name.
- Once confirmed, the part list will indicate it as an Excluded Object.
The printer will continue printing the rest of the models from the next layer onward, except for the excluded objects. And that’s it; you’re now set up to use the Exclude objects in case any one of your prints goes haywire.
Next Steps: Install Obico for Klipper if you haven't already

Once you’ve configured Exclude objects for your 3D printer, you can install Obico on your machine.
Obico for Klipper is the perfect companion to remotely monitor your 3D prints from anywhere in the world. The Obico tool lets you access your 3D printer remotely and control and monitor your machine from any device, even outside your home network.
Furthermore, Obico features AI failure detection that can automatically detect your print failures and notify you on your device. Obico can stop the print for you or give you the option to pause it from your smartphone.
In essence, Obico acts as your 3D printing assistant and gives you a secure and easy way to monitor your prints remotely. Installing Obico for Klipper is a breeze, and you can get started monitoring your prints via your smartphone or desktop within minutes.
The combination of Exclude objects and Obico’s AI detection can work in your favor and help you easily save your failed prints. Let’s understand how you can benefit from this pairing.
Combining Exclude Object & Obico
Obico uses AI to automatically detect print failures and instantly notify you about the same. Let’s suppose one of your prints fails during the printing process. In this scenario, Obico’s AI can quickly detect the failed part and send you a push notification.
You can configure Obico to entirely stop the printing process or pause it temporarily to inspect the failed parts. After inspection, if you realize the particular part cannot be printed, you can use the exclude object function and cancel the failed print. You can resume the printing process, and the printer will continue to print the rest of the parts as usual.
Obico gives you an edge in this scenario by detecting a print failure on your behalf and eliminating the need for constant print monitoring. By combining its AI failure detection and remote monitoring capabilities, it can notify you if a part fails and prompt you to take corrective action.
Let us know your thoughts on the Exclude objects feature in Klipper. Have you ever used it before, or are there any potential scenarios where it might come in handy for you? Feel free to comment below and share your experiences.