Voron Stealth Burner Nozzle Camera Setup Guide
This guide will walk you through installing the 3DO 4K nozzle camera on your Voron 2.4 3D printer with a Stealth Burner tool head.
Required Hardware:

- Voron 2.4 with Stealthburner
- 3DO 4K nozzle camera kit (distributed by 3DO for EU and KB3D or Fabreeko for U.S.)
- The kit includes
- 4K Camera
- 2*10mm SHCS screws (for PCB mounting) -4x
- 5050 SK6812 WWCW 6000K LED - 2x
- 1x High-quality high-temperature USB cable (FEP + Silicone)
Printed Parts
You will need to print a new main body for the stealth burner to accommodate the nozzle camera. Head over to the nozzle camera github page and find the main body for your hotend.
In the stealth burner section of the repository, you will find sets of files for standard stealth burner hotends and extended stealth burner hotends such as the Phaetus Rapido or the Slice Engineering Mosquito Magnum Plus.
For example, print the following parts for standard stealth burner hotends:
Install the camera

Photo Courtesy of 3DO Github
Install the camera as shown above. The ribbon cable is somewhat delicate but it can be folded to help route it. Be careful not to fold it back and forth multiple times to avoid damaging it.

Photo Courtesy of 3DO Github
The PCB can be mounted to the fan with VHB tape (only tested with LGX lite extruder) or it can be mounted on the outside using the four included screws and the pcb_mount which is the same as the ADXL345 mount for the Stealthburner.
Lights
The led lights included in the KB3D kit and Fabreeko kitare quite a bit brighter than the ones specified in the stealth burner BOM, so you may want to consider swapping the lights.
If you plan to use the nozzle camera long term, you may find it easiest to re-use the components such as lights, fans, etc.. from your Stealthburner main body already installed on your printer. If you plan to do this, simply swap the components from the old part to the new one.
If you plan to install new components (lights and fans) on the main body, head over to the Voron Stealthburner manual after installing the camera and follow the instructions as you did previously.
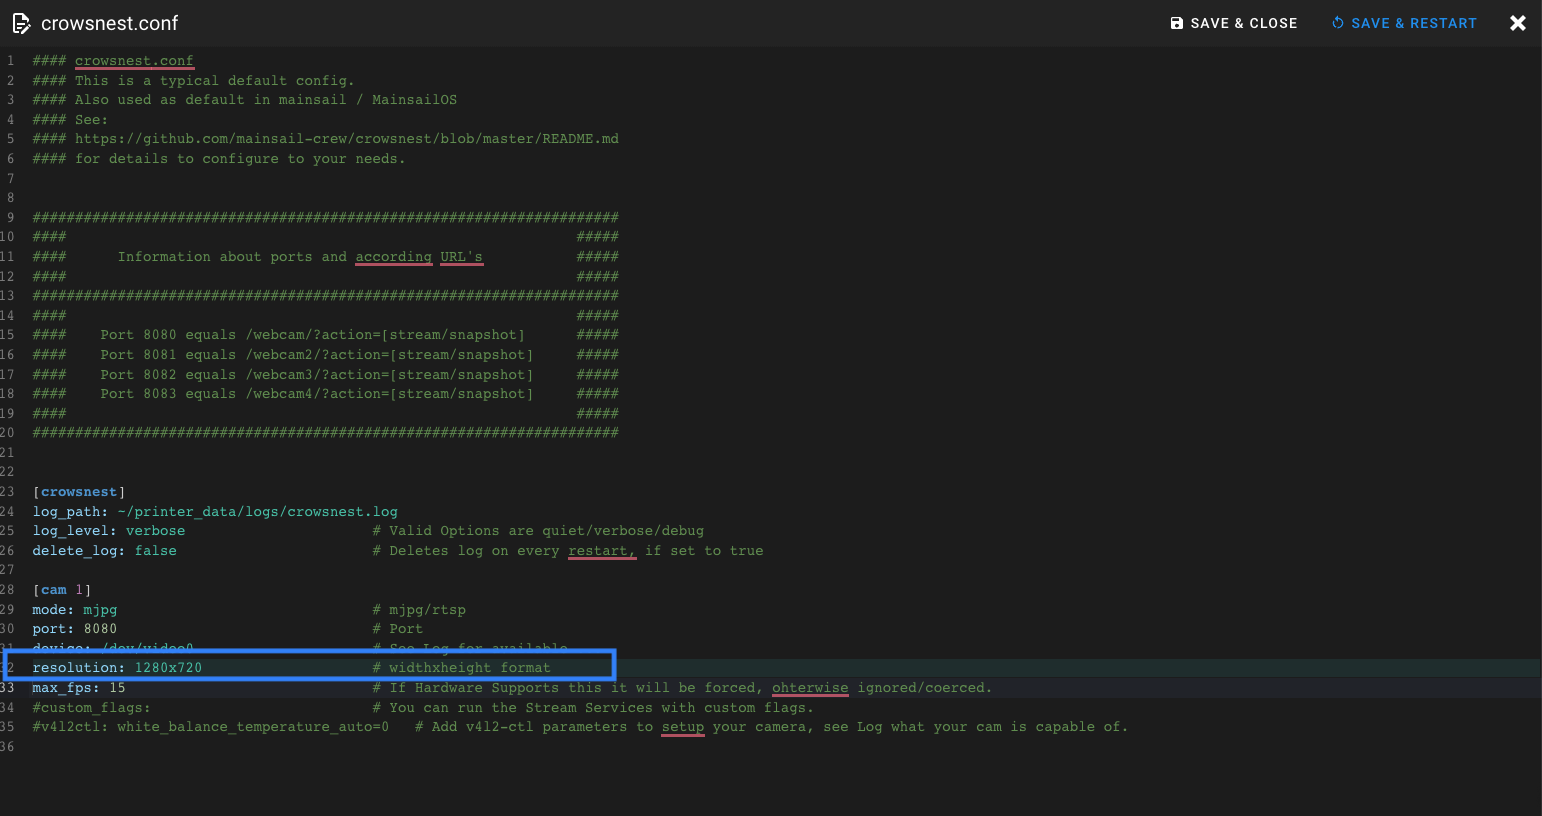
Set camera resolution to 1600x1200
- Open your preferred web interface such as Mainsail or Fluidd.
- Go to Machine. Open the folder that contains your webcam settings such as
crowsnest.conf

- Edit the resolution for the nozzle camera to be 1600x1200 or higher if you webcam can handle it
:::
If you get warnings about Obico consuming too much CPU power, you can disable the webcam in Obico by setting disable_webcam_streaming = True under [webcam] in the moonraker-obico.cfg file.
Data collection
Once your stealth burner is fully assembled and installed, you are ready for data collection. You can now move onto collecting the data. You will need to install a special plugin for data collection. Follow the Celestrius Data Collection Guide for Klipper to get started.
FAQ (Adapted from 3DO)
- Does it work in an enclosed printer?
Yes, tho our camera is rated at 60C we have been running it for 48hrs in a 70C industrial heat chamber without any issues.
- Why is FPC so long?
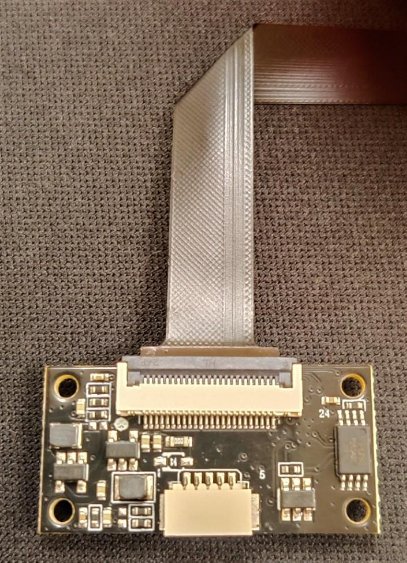
We decided on having 25cm between the camera and PCB for more flexibility on future mount designs.
- Can I bend/fold the FPC to make it shorter?
Yes, FPC is flexible and can be bent, if you want to fold it (180deg) we recommend doing this max one time in the same spot, or else you risk breaking the lanes inside FPC.
Example of folding FPC

- What are the camera specifications?
4K (Sony IMX258) | |
|---|---|
Sensor Size | 1/3.06 |
Mega-Pixel | 13MP |
Frame Rate | 30FPS@4K 60FPS@1080P |
Lens type* | Fixed Focus |
FoV | 80Deg |
Operating temperature** | -20°C TO 60°C |
Storage temperature | -40°C TO 80°C |
*Focus distance from the back side of the camera to the object is set to 34.5mm
(It’s possible to change the focus distance by breaking glue seal holding the lens in place and rotating the lens. Be sure to re-apply glue after adjustment)
**Tested in a 70C heat chamber for 24hrs without any issues. Not recommended for machines with high chamber temperatures.
Obico has no affiliation with the Nozzle Camera from 3DO.
Thanks to the contributors that made the 3DO Nozzle Camera project possible
CAD Design & Testing
- Olof Ogland (Known from Bondtech)
- Kenneth Munkholt (VZ Community)
- Dennis Jespersen (From RatRig Community)
Software Development & Testing
- Meteyou (Mainsail founder)
- KwadFan (Crowsnest founder)
- Rogerlz(Crowsnest Tester)
Beta Testers
- Mitsuma (From RatRig Community)
- Joao Barros (From RatRig Community)
