Prusa Mini Nozzle Camera Setup Instructions

This guide has been adapted from and inspired by Ananord’s guide on Instructables and Chilicoke’s Nozzle Camera Youtube guide in addition to other work from the community.
This guide will show you how to install an endoscope camera on your Prusa Mini 3D printer. This setup will assume you already have your Prusa mini connected to OctoPrint running on a Raspberry Pi.
Required Components:
-
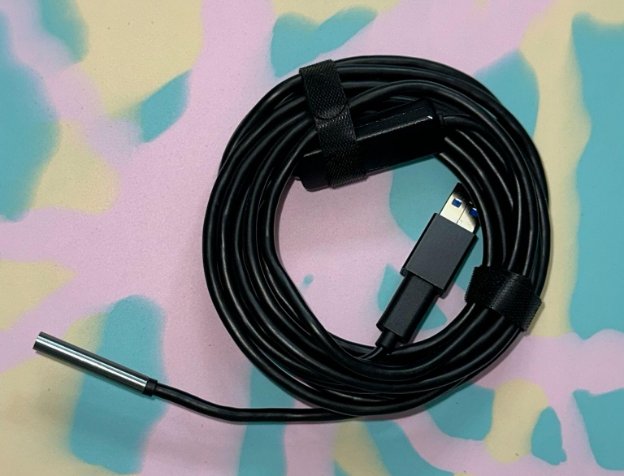
5.5mm USB-C Endoscope Camera from Amazon or similar
-
Reinforced or Standard 3D printed mount for Prusa Mini/Mini+ by Scorrigan87 - (remix of the original mount by Shadow703793)
-
M4 x 20 socket head cap screw (or similar) and M4 Nut
-
Permanent marker
Prepare the mount
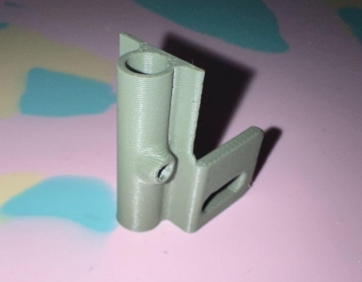
- Print the endoscope mount found on Printables.com.
a. The mount will not be anywhere near the hotend, so it can be printed in any material. In this case, we printed it with Polymaker PLA with 6 perimeters and 25% infill.
- Assemble the mount
a. This simple mount attaches to the rear 5015 fan on the Prusa Mini/Mini+ with a M4x20 Socket head cap screw and an M4 nut.
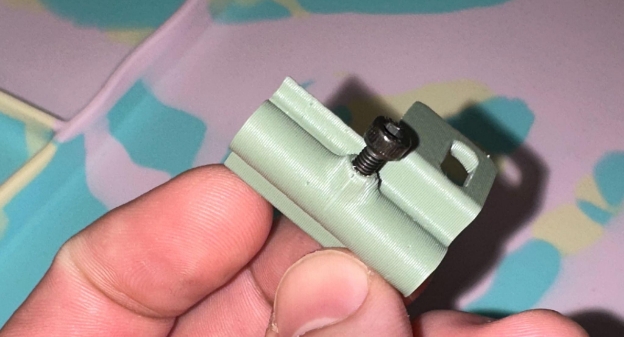
b. A M3x6 (or similar) screw can be used as a set screw to to keep the camera from twisting when the printer is moving. If you printed the mount vertically, keep in mind that this hole is not super strong, so you may consider pre-drilling the hole with an m3 drill bit if the fit is too tight.

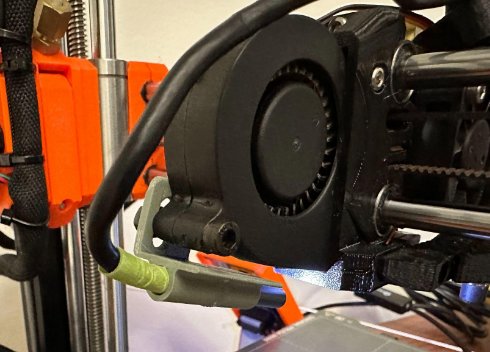
- Install the mount
a. Install the mount on the fan using the M4x20 screw and M4 nut as shown. Do not connect the camera yet.
Prepare the camera
- Connect the camera to OctoPrint.
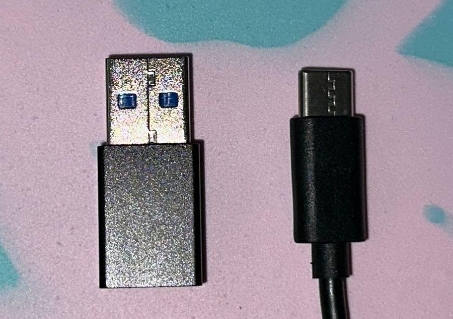
a. Connect the USB-C to USB adapter (included with the camera) and plug the camera into your Raspberry Pi running OctoPrint. b. Connect to OctoPrint to ensure the camera is working properly. Restart OctoPrint if no image is shown.
- Determine the direction of the camera
a. Since the camera is cylindrical, it is difficult to determine the direction without looking at the live camera feed. Determine the direction of the camer and use a sharpie to mark the up position of the camera. Do not worry about making it perfect, we will adjust the positioning in a later step.
Mount the camera
- Insert the endoscope into the mount

a. Place the endoscope so that the camera nozzle is correctly oriented in OctoPrint’s webcam stream.


b. The camera used in this guide has a focal length of 30-100mm, but testing has shown that positioning the camera between 30-50mm from the nozzle, angled slightly down, works best.
- Cable Management
a. Before tightening the set screw to position the camera into its final place, use zip ties to route the cables along the cable loom that is already in place, Be sure to use a zip tie as close to the bottom of the cable loom as possible to fix the point of the cable and prevent movement while the printer is in motion. This step can be tricky with the rigid cables used with these endoscopes, but try your best to get the cable routed and secured firmly. Test your work by moving the toolhead slowly side to side and up and down to simulate printing.
- Tighten the set screw
a. Ensure the position of the camera is as desired and then tighten the set screw to secure the camera.
If the camera still isn’t secure, you can wrap a small piece of masking or electrical tape around the base of the camera to increase its’ diameter slightly to create a tighter fit.
Set higher camera resolution
The information below assumes you will add the endoscope camera in replacement of any other camera you have installled. If you are comfortable, you may prefer to set up the endoscope camera as a second camera. You can follow Charlie Powell's guide to add the endoscope as a second camera. Just be sure to set the endoscope camera resolution to 1280x720.
Unless you have otherwise changed it, your camera stream defaults to a resolution of 640x480 at ten frames per second. For data collection, we want to capture images at a slightly higher resolution.
- SSH to your Raspberrry Pi a. Ssh to your Raspberry Pi running OctoPrint and enter the following command:
sudo nano /boot/octopi.txt
This will open the nano text editor inside the terminal. Using the arrow keys on your keyboard to navigate the cursor, change the camera from auto to usb by editing this line:
#camera="auto"
To become:
camera=”usb”
- Change the resolution a. Change the resolution from 640x480 to 1280x720 by changing the following line from:
#camera\_usb\_options="-r 640x480 -f 10"
To:
camera\_usb\_options="-r 1280x720 -f 10"
Enter “Control-O” on your keyboard to write the file and “enter” to confirm the file name.
- Restart webcamd
a. Restart the webcamd by entering the following command:
sudo service webcamd restart
Due to raspberry pi cpu performance, there is a necessary tradeoff between resolution and framerate. During testing, we have been able to run the endoscope camera at 1280x720 resolution at 10 frames per second, but we have occasionally seen the cpu get overloaded when running this way. If you get a cpu usage warning, try changing the resolution to 960x720 or lowering the frame rate to 5 frames per second