How to Install a Nozzle Camera on Your 3D Printer
This guide is deprecated. We are no longer maintaining this guide. Please refer to our nozzle camera partners, Mintion and 3DO for nozzle camera installation guides and tutorials. You are still welcome to use an endoscope nozzle camera, but they are not officially supported, it is up to you to come up with a mounting solution for your 3D printer.
This guide will walk you through how to install a nozzle camera on your 3D printer. We recommend the cameras:
- Any USB endoscope camera with at least 720P. There are many printable mounts for a variety of USB endoscope cameras for many different 3D printers. Find a mount and endoscope combination that works for you or design your own mount for your USB endoscope of choice.
- Mintion Nozzle Camera
- The 4K Nozzle Camera from 3DO is an awesome high-quality camera designed specifically to be used as a nozzle camera. There are ready-made mounts for a variety of 3D printers. If you are in the US or Canada, you can get a 3DO nozzle camera from KB3D or Fabreeko. If you are in Europe, you can get it from 3DO directly.
We have detailed guides for the Prusa Mini and the Voron StealthBurner as well as some recommendations for other printers. We will add additional detailed printer guides in the future.
- Prusa Mini
- Voron StealthBurner
- Other Printers and Compatible Mounts
This guide was initially created specifically for Prusa Mini 3D printers, but most of the instructions can be applied to most common 3D printers such as Creality Ender 3 and other similar printers. Installing the nozzle camera on another printer will require some connecting the dots, but it should be mostly straightforward if you use this guide.
This guide has been adapted from and inspired by Ananord’s guide on Instructables and Chilicoke’s Nozzle Camera Youtube guide in addition to other work from the community.
This guide will show you how to install an endoscope camera on your Prusa Mini 3D printer. This setup will assume you already have your Prusa mini connected to OctoPrint running on a Raspberry Pi.
Required Components:
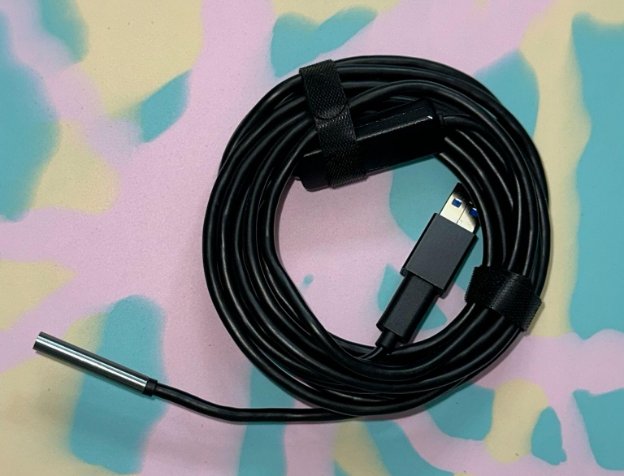
-
5.5mm USB-C Endoscope Camera from Amazon or similar
-
Reinforced or Standard 3D printed mount for Prusa Mini/Mini+ by Scorrigan87 - (remix of the original mount by Shadow703793)
-
M4 x 20 socket head cap screw (or similar) and M4 Nut
-
Permanent marker
Since writing this guide, the 3DO nozzle camera now has a compatible mount for Prusa Mini 3D printers. If you prefer it, you can get a 3DO camera from Fabreeko or KB3D
Prepare the mount
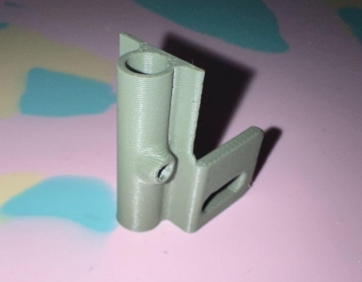
- Print the endoscope mount found on Printables.com.
a. The mount will not be anywhere near the hotend, so it can be printed in any material. In this case, we printed it with Polymaker PLA with 6 perimeters and 25% infill.
- Assemble the mount
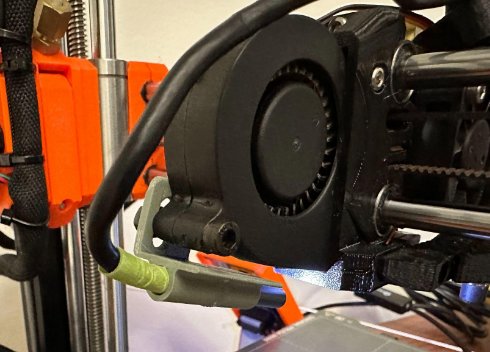
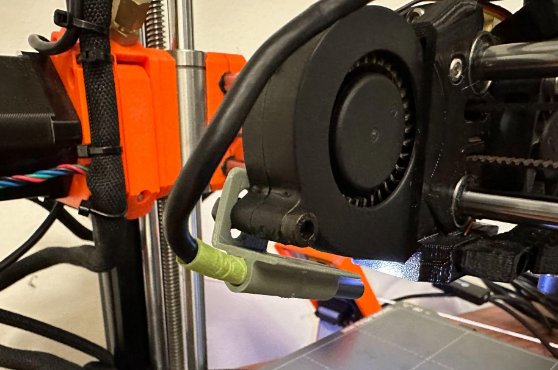
a. This simple mount attaches to the rear 5015 fan on the Prusa Mini/Mini+ with a M4x20 Socket head cap screw and an M4 nut.
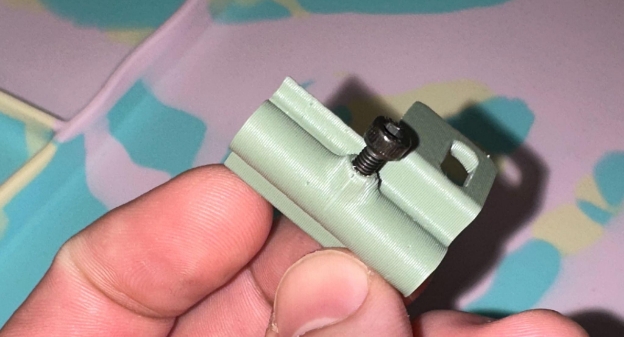
b. A M3x6 (or similar) screw can be used as a set screw to to keep the camera from twisting when the printer is moving. If you printed the mount vertically, keep in mind that this hole is not super strong, so you may consider pre-drilling the hole with an m3 drill bit if the fit is too tight.
- Install the mount
a. Install the mount on the fan using the M4x20 screw and M4 nut as shown. Do not connect the camera yet.
Prepare the camera
- Connect the camera to OctoPrint.
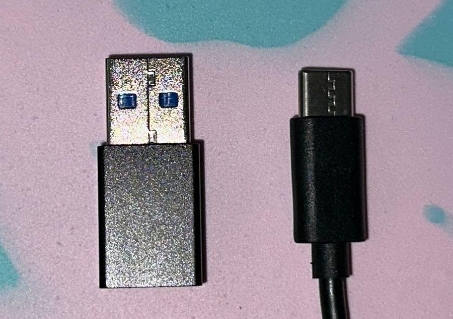
a. Connect the USB-C to USB adapter (included with the camera) and plug the camera into your Raspberry Pi running OctoPrint. b. Connect to OctoPrint to ensure the camera is working properly. Restart OctoPrint if no image is shown.
- Determine the direction of the camera
a. Since the camera is cylindrical, it is difficult to determine the direction without looking at the live camera feed. Determine the direction of the camera and use a sharpie to mark the up position of the camera. Do not worry about making it perfect, we will adjust the positioning in a later step.
Mount the camera
- Insert the endoscope into the mount

a. Place the endoscope so that the camera nozzle is correctly oriented in OctoPrint’s webcam stream.

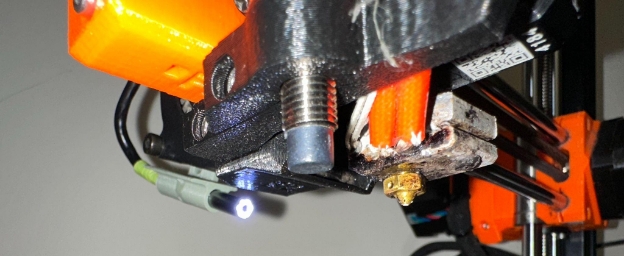
b. The camera used in this guide has a focal length of 30-100mm, but testing has shown that positioning the camera between 30-50mm from the nozzle, angled slightly down, works best.
- Cable Management
a. Before tightening the set screw to position the camera into its final place, use zip ties to route the cables along the cable loom that is already in place, Be sure to use a zip tie as close to the bottom of the cable loom as possible to fix the point of the cable and prevent movement while the printer is in motion. This step can be tricky with the rigid cables used with these endoscopes, but try your best to get the cable routed and secured firmly. Test your work by moving the toolhead slowly side to side and up and down to simulate printing.
- Tighten the set screw
a. Ensure the position of the camera is as desired and then tighten the set screw to secure the camera.
If the camera still isn’t secure, you can wrap a small piece of masking or electrical tape around the base of the camera to increase its’ diameter slightly to create a tighter fit.
Set higher camera resolution
The information below assumes you will add the endoscope camera in replacement of any other camera you have installed. If you are comfortable, you may prefer to set up the endoscope camera as a second camera. You can follow Charlie Powell's guide to add the endoscope as a second camera. Just be sure to set the endoscope camera resolution to 1280x720.
Unless you have otherwise changed it, your camera stream defaults to a resolution of 640x480 at ten frames per second. For data collection, we want to capture images at a slightly higher resolution.
- SSH to your Raspberry Pi a. Ssh to your Raspberry Pi running OctoPrint and enter the following command:
sudo nano /boot/octopi.txt
This will open the nano text editor inside the terminal. Using the arrow keys on your keyboard to navigate the cursor, change the camera from auto to usb by editing this line:
#camera="auto"
To become:
camera="usb"
- Change the resolution a. Change the resolution from 640x480 to 1280x720 by changing the following line from:
#camera\_usb\_options="-r 640x480 -f 10"
To:
camera\_usb\_options="-r 1280x720 -f 10"
Enter "Control-O" on your keyboard to write the file and "enter" to confirm the file name.
- Restart webcamd
a. Restart the webcamd by entering the following command:
sudo service webcamd restart
Due to Raspberry Pi CPU performance, there is a necessary tradeoff between resolution and framerate. During testing, we have been able to run the endoscope camera at 1280x720 resolution at 10 frames per second, but we have occasionally seen the CPU get overloaded when running this way. If you get a CPU usage warning, try changing the resolution to 960x720 or lowering the frame rate to 5 frames per second
This guide will walk you through installing the 3DO 4K nozzle camera on your Voron 2.4 3D printer with a StealthBurner tool head.
Required Hardware:

- Voron 2.4 with StealthBurner
- 3DO 4K nozzle camera kit (distributed by 3DO for EU and KB3D or Fabreeko for U.S.)
- The kit includes
- 4K Camera
- 2*10mm SHCS screws (for PCB mounting) -4x
- 5050 SK6812 WWCW 6000K LED - 2x
- 1x High-quality high-temperature USB cable (FEP + Silicone)
Printed Parts
You will need to print a new main body for the stealth burner to accommodate the nozzle camera. Head over to the nozzle camera github page and find the main body for your hotend.
In the StealthBurner section of the repository, you will find sets of files for standard StealthBurner hotends and extended StealthBurner hotends such as the Phaetus Rapido or the Slice Engineering Mosquito Magnum Plus.
For example, print the following parts for standard stealth burner hotends:
Install the camera

Photo Courtesy of 3DO Github
Install the camera as shown above. The ribbon cable is somewhat delicate but it can be folded to help route it. Be careful not to fold it back and forth multiple times to avoid damaging it.

Photo Courtesy of 3DO Github
The PCB can be mounted to the fan with VHB tape (only tested with LGX lite extruder) or it can be mounted on the outside using the four included screws and the pcb_mount which is the same as the ADXL345 mount for the StealthBurner.
Lights
The led lights included in the KB3D kit and Fabreeko kit are quite a bit brighter than the ones specified in the StealthBurner BOM, so you may want to consider swapping the lights.
If you plan to use the nozzle camera long term, you may find it easiest to re-use the components such as lights, fans, etc from your StealthBurner main body already installed on your printer. If you plan to do this, simply swap the components from the old part to the new one.
If you plan to install new components (lights and fans) on the main body, head over to the Voron StealthBurner manual after installing the camera and follow the instructions as you did previously.
Set camera resolution to 4096x3840
- Open your preferred web interface such as Mainsail or Fluidd.
- Go to Machine. Open the folder that contains your webcam settings such as
crowsnest.conf
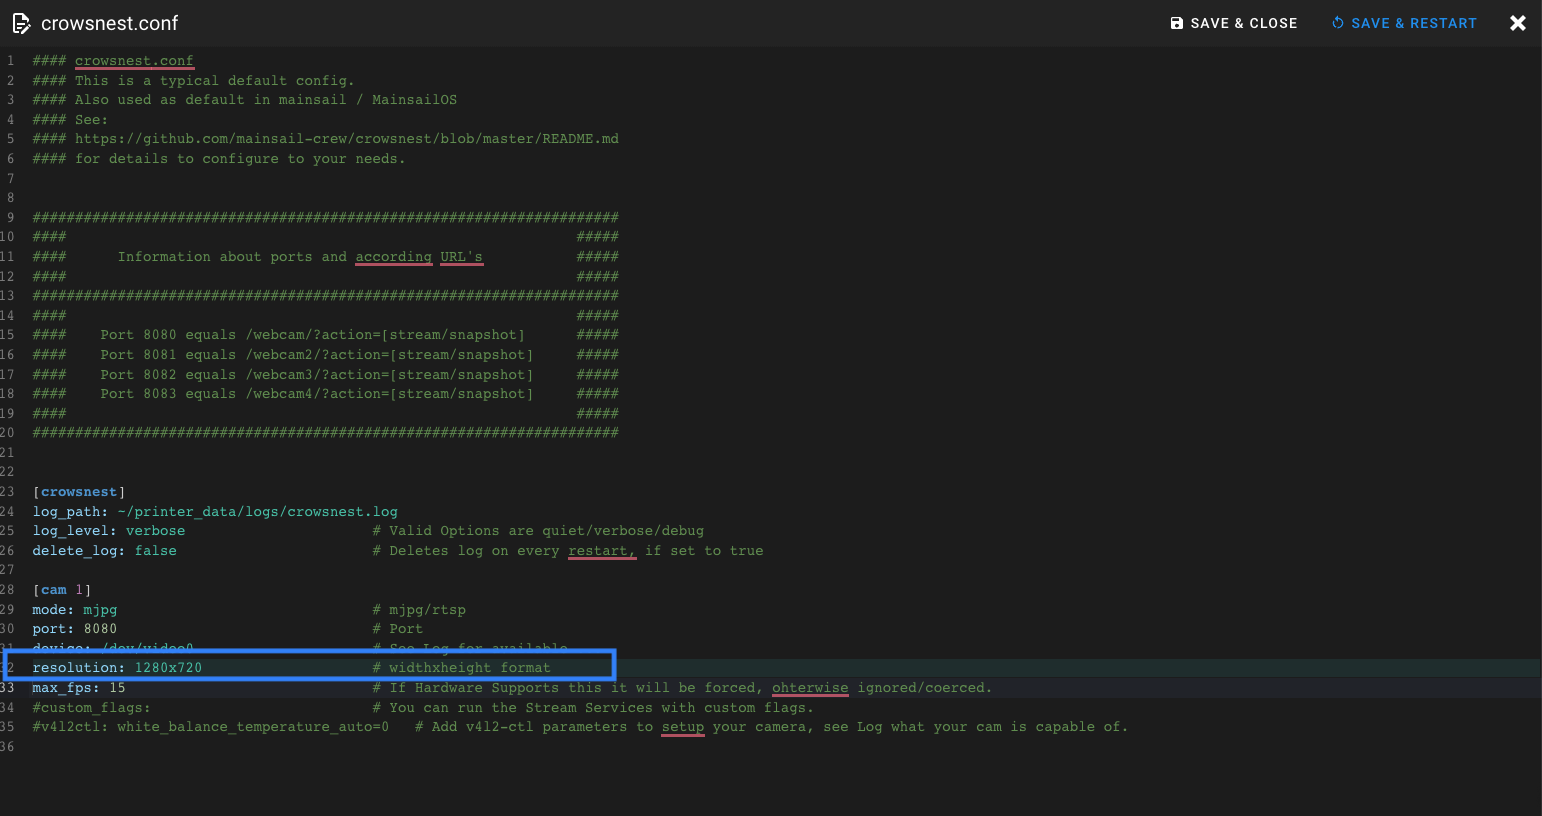
- Edit the resolution for the nozzle camera to be 4096x3840 or the maximum resolution that your webcam can handle
This is a very high resolution. It may not produce a good quality webcam stream in Mainsail/Fluidd or Obico. You can change back to a normal resolution when not running Celestrius tests.
If you get warnings about Obico consuming too much CPU power, you can disable the webcam in Obico by setting disable_webcam_streaming = True under [webcam] in the moonraker-obico.cfg file.
Data collection
Once your stealth burner is fully assembled and installed, you are ready for data collection. You can now move onto collecting the data. You will need to install a special plugin for data collection. Follow the First Layer AI Data Collection (Project Celestrius) to get started.
FAQ (Adapted from 3DO)
- Does it work in an enclosed printer?
Yes, though our camera is rated at 60C we have been running it for 48hrs in a 70C industrial heat chamber without any issues.
- Why is FPC so long?
We decided on having 25cm between the camera and PCB for more flexibility on future mount designs.
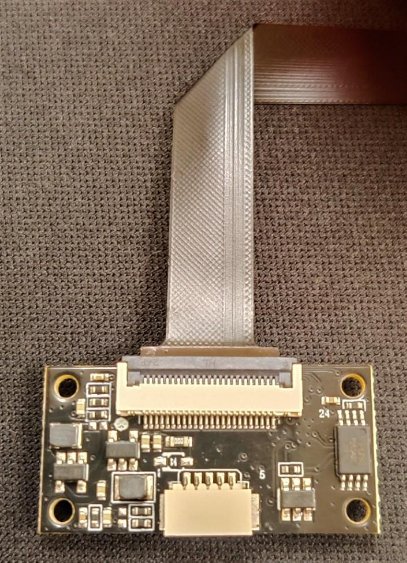
- Can I bend/fold the FPC to make it shorter?
Yes, FPC is flexible and can be bent, if you want to fold it (180deg) we recommend doing this max one time in the same spot, or else you risk breaking the lanes inside FPC.
Example of folding FPC
- What are the camera specifications?
4K (Sony IMX258) | |
|---|---|
Sensor Size | 1/3.06 |
Mega-Pixel | 13MP |
Frame Rate | 30FPS@4K 60FPS@1080P |
Lens type* | Fixed Focus |
FoV | 80Deg |
Operating temperature** | -20°C TO 60°C |
Storage temperature | -40°C TO 80°C |
*Focus distance from the back side of the camera to the object is set to 34.5mm
(It’s possible to change the focus distance by breaking glue seal holding the lens in place and rotating the lens. Be sure to re-apply glue after adjustment)
**Tested in a 70C heat chamber for 24hrs without any issues. Not recommended for machines with high chamber temperatures.
Obico has no affiliation with the Nozzle Camera from 3DO, but they are a great team making an awesome nozzle camera product!
Thanks to the contributors that made the 3DO Nozzle Camera project possible
CAD Design & Testing
- Olof Ogland (Known from Bondtech)
- Kenneth Munkholt (VZ Community)
- Dennis Jespersen (From RatRig Community)
Software Development & Testing
- Meteyou (Mainsail founder)
- KwadFan (Crowsnest founder)
- Rogerlz(Crowsnest Tester)
Beta Testers
- Mitsuma (From RatRig Community)
- Joao Barros (From RatRig Community)
Nozzle camera options for other specific printers
While we have specific guides for Prusa Mini and Voron printers, there are many working nozzle camera mounts and guides out there. Below, we will list some that we have come across. Although there is not a detailed guide for these mounts, installation is similar to installation on the Prusa mini or Voron, but of course there will be some specific differences based on your 3D printer.
The 3DO nozzle camera currently has ready to print mounts for the following 3D printers.
Endoscope cameras are much lower quality than the 3DO nozzle camera, but they will still work for the purpose. We have experimented with a number of Endoscope cameras. As long as it is at least 720P, it should be fine. Here are some various Endoscope camera mounts available thanks to the community. In most cases, a specific endoscope is recommended on the model page.
- Nozzle Camera for Ender 3/Cr-10 by Nik Sajevik on Printables
- Endoscope Mount for Anycubic i3 Mega by macsims on Thingiverse
- Ender 3V2 5.5mm Endoscope mount for Ender 3V2 by Tim Williams on Printables.
- Endoscope Mount for Ender 3, CR-10 by Makers Mashup on Printables
If you find another endoscope mount that works for you, or you make one yourself, please let us know! We would love to include it on our list!