Setup Multiple Cameras In OctoPrint
This guide assumes you are running OctoPi with the new camera stack (released in May, 2023.)
In this guide, we will walk you through the detailed steps of setting up multiple cameras using OctoPrint running Marlin firmware. Additionally, we will guide you through the process of adding these webcams to the Obico app, enabling you to take advantage of Nozzle Ninja, Obico's new first layer AI. Nozzle Ninja utilizes a specialized nozzle camera to provide an up-close view of the print and monitors for first layer issues such as over-extrusion, under-extrusion, poor bed adhesion, bed leveling issues, and more. The AI then sends you a first layer report and notifications via push notification or email.
Prefer a video guide instead? The video below will walk you through the process of adding multiple webcams to OctoPrint using the multi-cam plugin.
Step-by-Step Guide
Step 1: Find the IP Address of Your Raspberry Pi
- Download and install an IP scanner: Use a tool like Angry IP Scanner (available at angryip.org).
- Scan your network: Open Angry IP Scanner and start a scan of your local network.
- Identify your Raspberry Pi: Look for a device named octopi in the list. Note its IP address.
Step 2: SSH to Your Device Using PuTTY or any other suitable method
- Open PuTTY: Download and install PuTTY if you haven't already.
- Enter IP Address: In the "Host Name (or IP address)" field, enter the IP address of your Raspberry Pi identified in the previous step.
- Specify SSH Protocol: Ensure that the SSH radio button is selected.
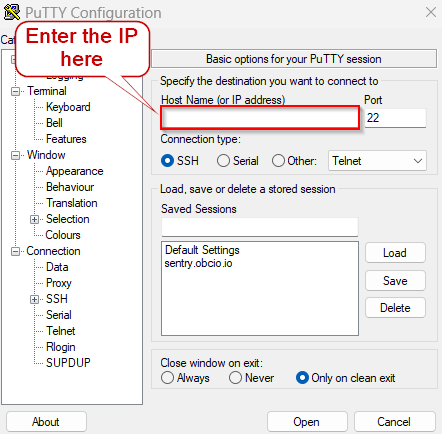
- Click Open: This will open a new terminal window.52. Login: When prompted, enter the username
piand press Enter. - Enter Password: Type the password
raspberry(or your custom password if you have changed it) and press Enter. You should now be logged into your Raspberry Pi.
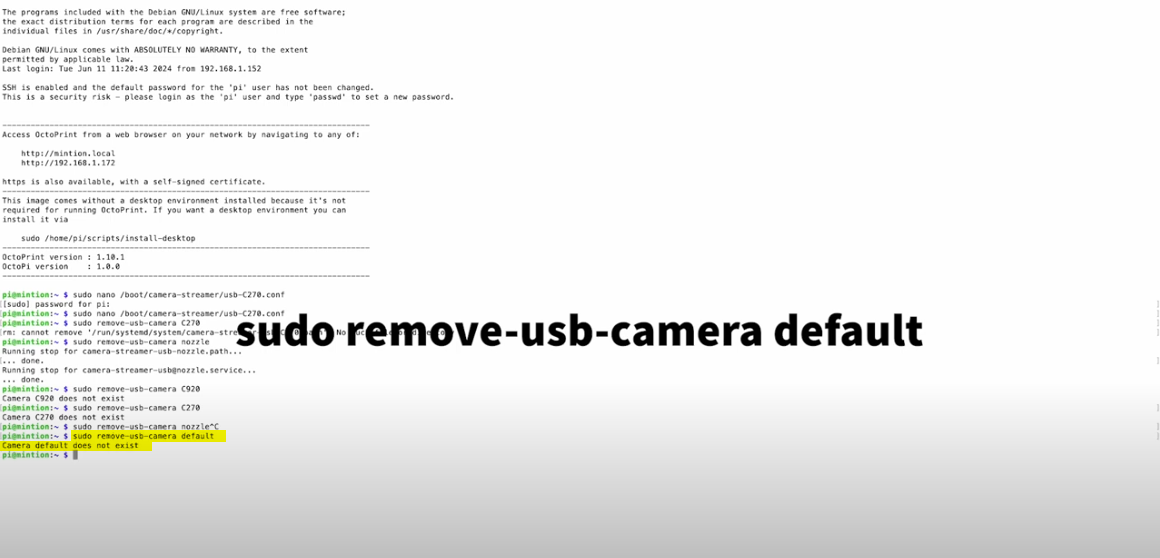
Step 3: Remove the Default Webcam
- Remove the default webcam using the command:
sudo remove-usb-camera default
- If the default camera does not exist, you will receive a message saying
camera default does not exist.
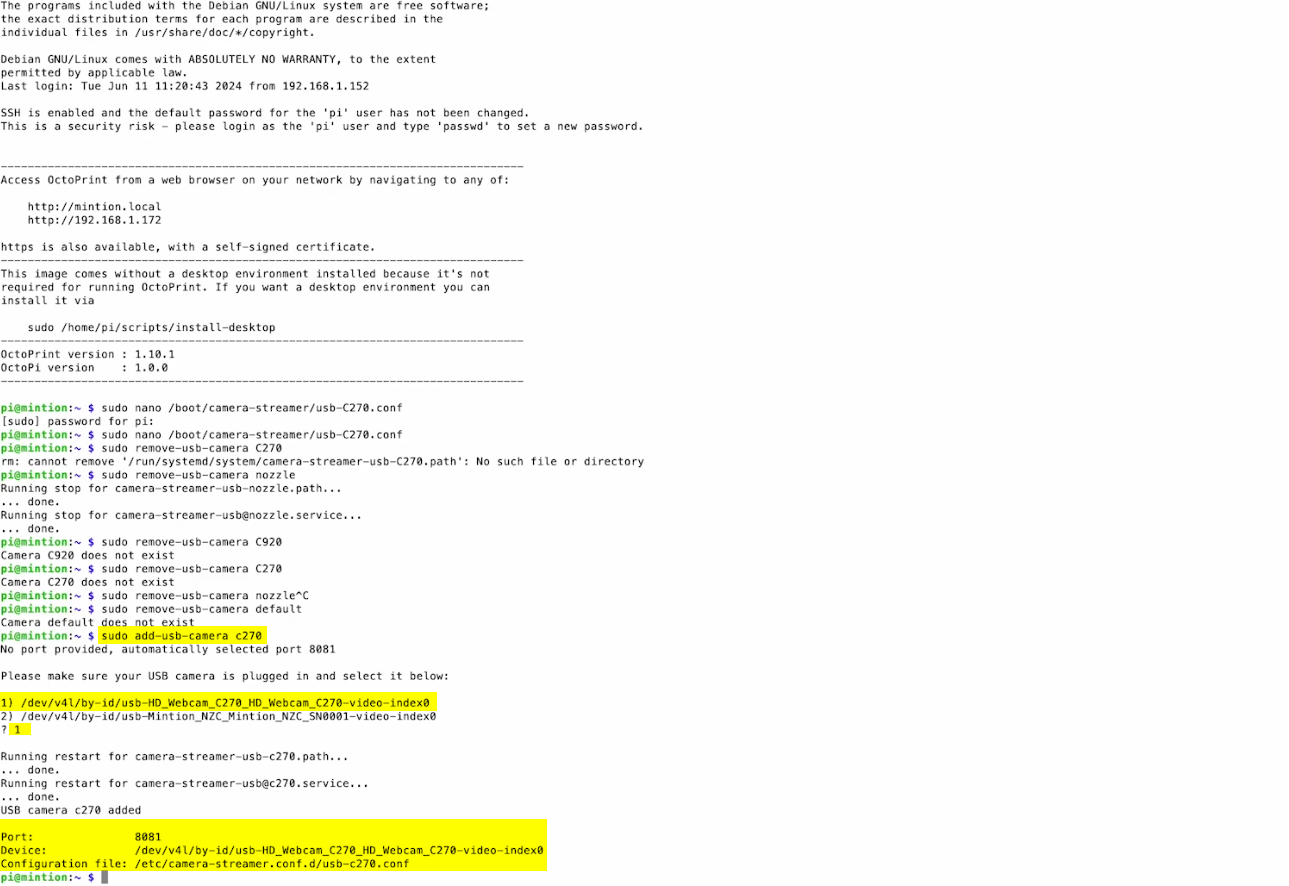
Step 4: Add a New Webcam
- Add a new webcam using the command:
sudo add-usb-camera <camera_name>
Replace <camera_name> with the name of your camera. For example, for a Logitech C270 webcam:
sudo add-usb-camera C270
-
The system will list the connected cameras. Select your camera by entering its number from the list.
-
The system will automatically assign a port, e.g., 8081. Copy and paste the provided information (port, device, and configuration file path) to a safe place for future reference as we will need it later for some configuration.
Step 5: Add Another Camera
- Add another webcam using the command:
sudo add-usb-camera <nozzle_camera_name>
Replace <nozzle_camera_name> with the name of your nozzle camera. For example:
sudo add-usb-camera nozzle_cam
- The system will list the connected cameras. Select your nozzle camera by entering its number from the list.
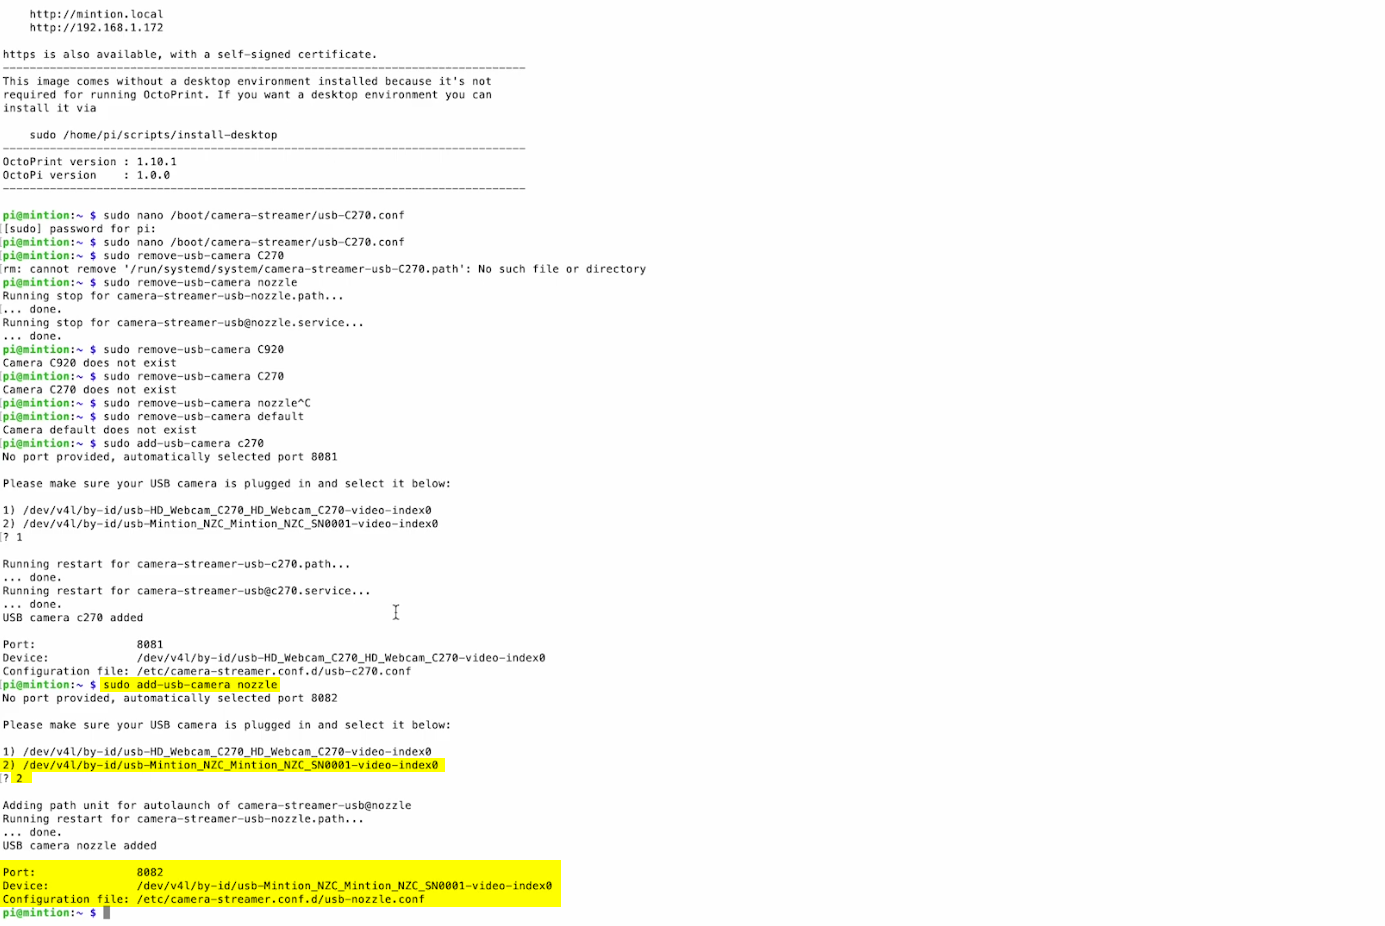
- The system will automatically assign a new port, e.g., 8082. Copy and paste the provided information to a safe place for future reference.
Step 6:
- Open the configuration file for the first camera using:
sudo nano <configuration_file_path>
Replace <configuration_file_path> with the actual path provided earlier.
- Add the following line under the options section:
--http-listen=0.0.0.0
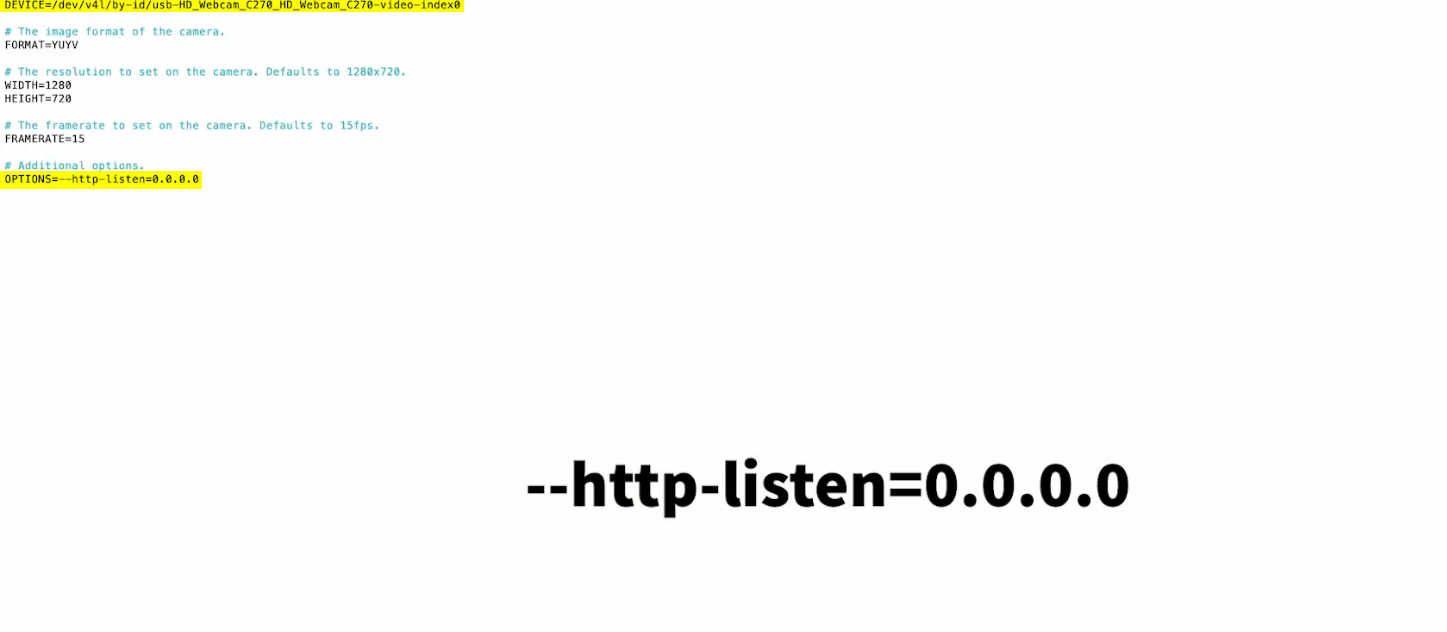
- Save the file by pressing Ctrl+O, then exit by pressing Ctrl+X.
- Repeat the above steps for the nozzle camera's configuration file:
sudo nano <nozzle_camera_configuration_file_path>
Add the same line:
--http-listen=0.0.0.0
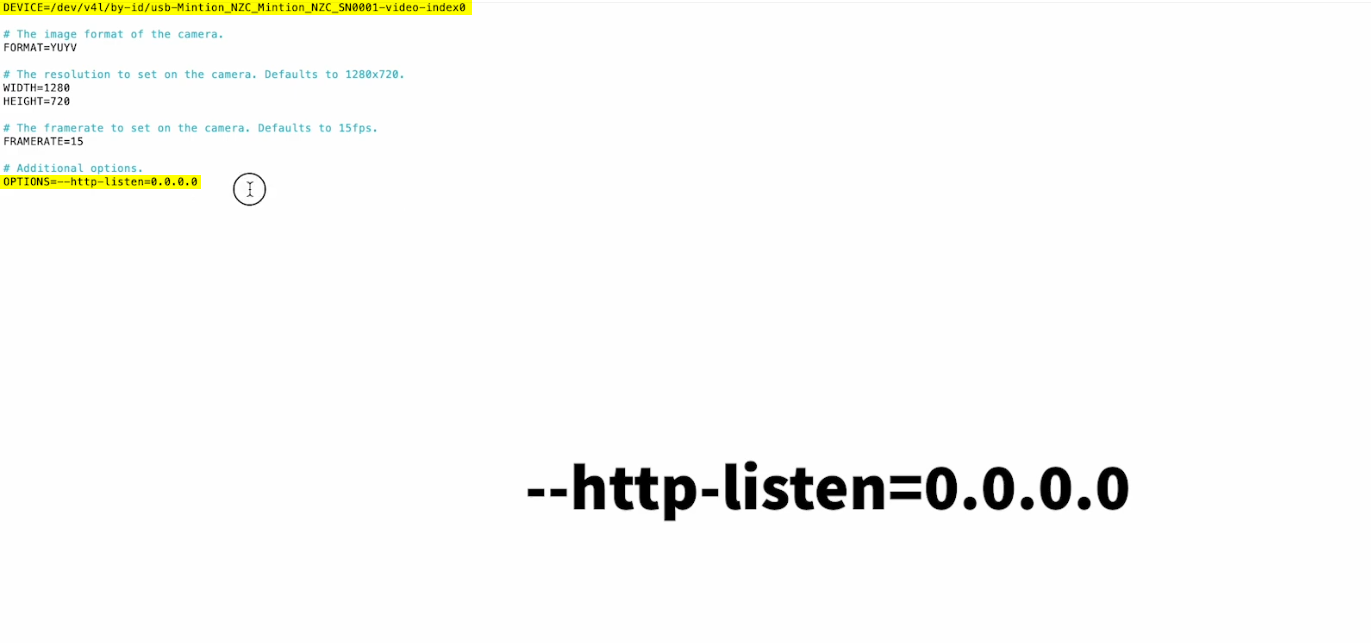
Save and exit.
Step 7: Restart Camera Streamer
- Restart the camera streamer using the following command:
sudo systemctl restart camera-streamer
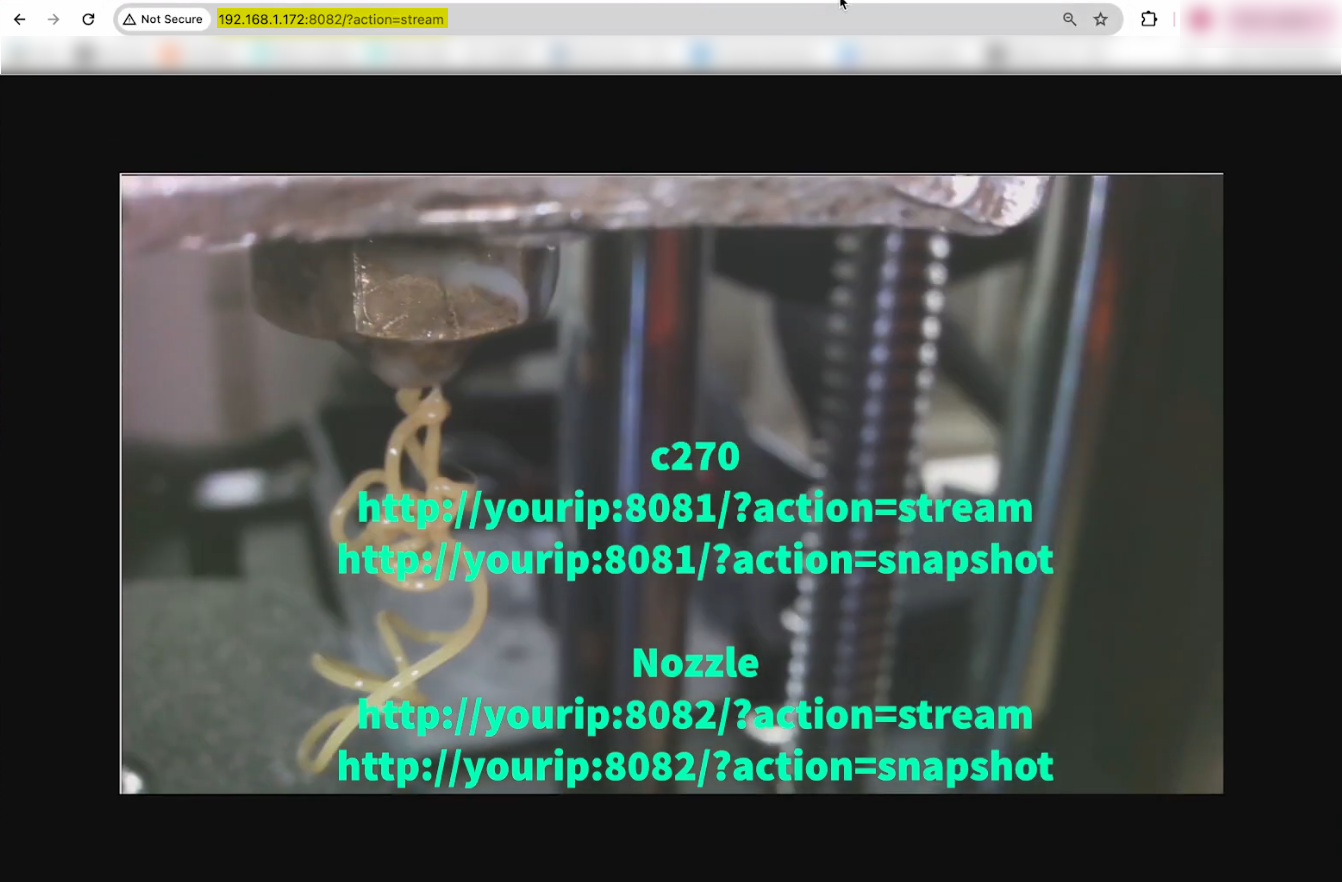
Step 8: Verify Webcam Streams
- Verify the webcam streams are working by opening the following URLs in your web browser:
For the first camera:
- Stream:
http://<your_device_IP>:8081/?action=stream - Snapshot:
http://<your_device_IP>:8081/?action=snapshotFor the nozzle camera: - Stream:
http://<your_device_IP>:8082/?action=stream - Snapshot:
http://<your_device_IP>:8082/?action=snapshot
- Stream:
Step 9: Configure OctoPrint
- Access OctoPrint by navigating to
http://<your_device_IP>in your web browser. - Go to the "Plugin Manager" under the settings menu.
- Find and disable the "Classic Webcam" plugin.

- Restart OctoPrint by clicking the restart button in the settings menu.
- Install the "Multi-Cam" plugin if it is not already installed:
- Search for "Multi-Cam" in the Plugin Manager and click install.
- Restart OctoPrint after installation.
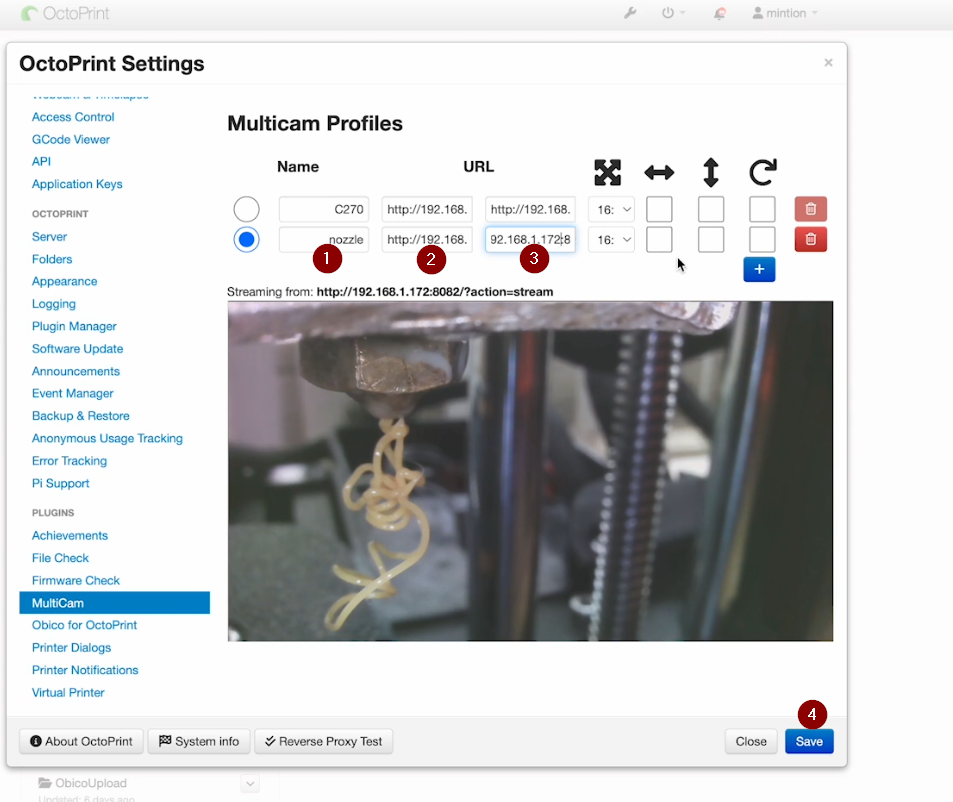
- Configure the Multi-Cam plugin:
- Go to the Multi-Cam plugin settings.
- Enter a name for the first camera.
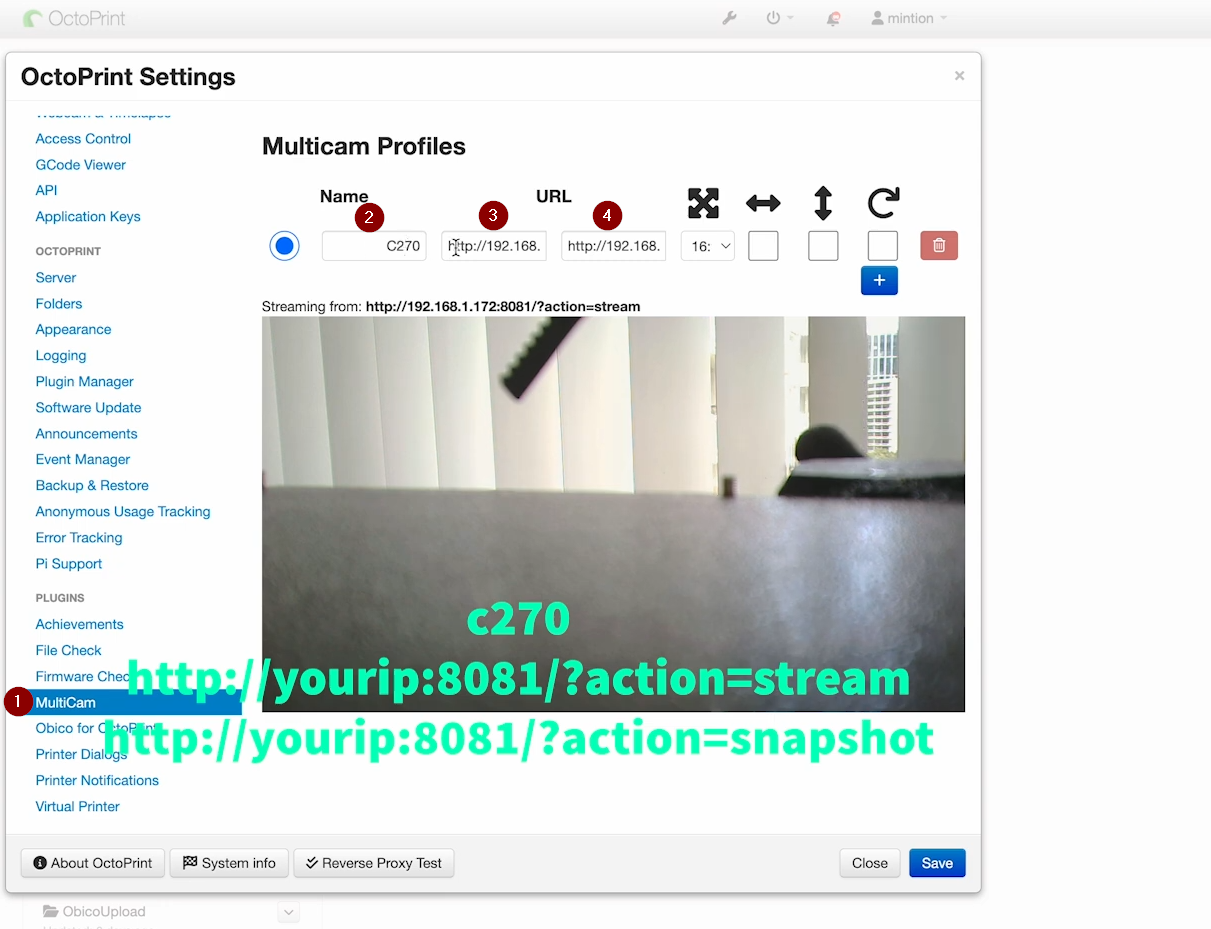
- Enter the stream URL (e.g.,
http://<your_device_IP>:8081/?action=stream) and the snapshot URL (e.g.,http://<your_device_IP>:8081/?action=snapshot) for the first camera. - Repeat the same for the second camera using the URL with port 8082.
Step 10: Configure Obico
-
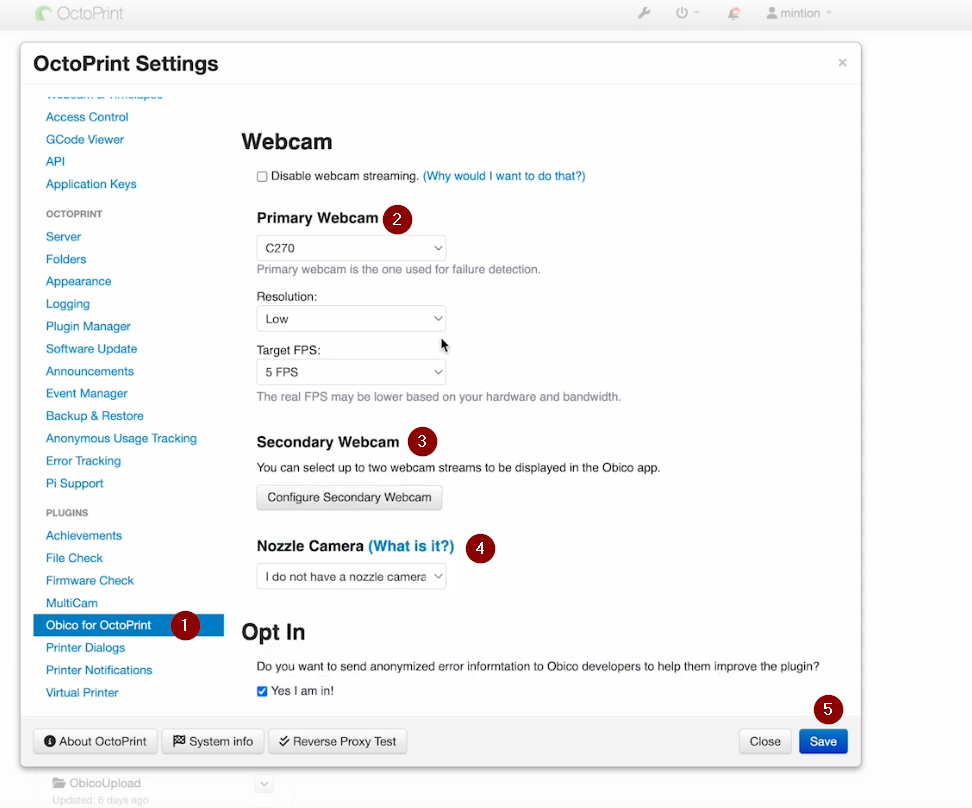
Go to the OctoPrint settings and navigate to "Obico for OctoPrint".
-
In the Obico settings, find the webcam section.
-
Obico will automatically detect the webcams configured with the Multi-Cam plugin.
-
Select your USB webcam as the primary camera.
-
Select your nozzle camera as the secondary camera.
-
Ensure the nozzle camera is set as the nozzle camera for the first layer AI.
-
Restart OctoPrint one more time.
Final Check
- Ensure both webcams are configured correctly in both OctoPrint and the Obico app.
- Access either one or multiple camera streams simultaneously.
- You are now ready to utilize the Nozzle Ninja and Obico's first layer AI features.
Summary
By following these detailed steps, you can set up and manage multiple webcams in OctoPrint and leverage the advanced features of the Obico app for better print monitoring and quality control. Enjoy enhanced first layer monitoring with Nozzle Ninja and stay informed with real-time notifications from Obico.