Configure a Gmail account as SMTP server to send emails
note
This is a community-contributed guide. This guide is based on certain Obico community members' own setup and hence may not work for you.
To use Gmail's SMTP server for sending email, follow the following simple steps.
1. Make sure the 2-Step Verification is turned on for the Gmail account.
Follow this guide to turn on 2-Step Verification.
2. Add an "app password" for your self-hosted Obico Server.
- Go to the account page for the Gmail account you intend to use.
- Select "Security".
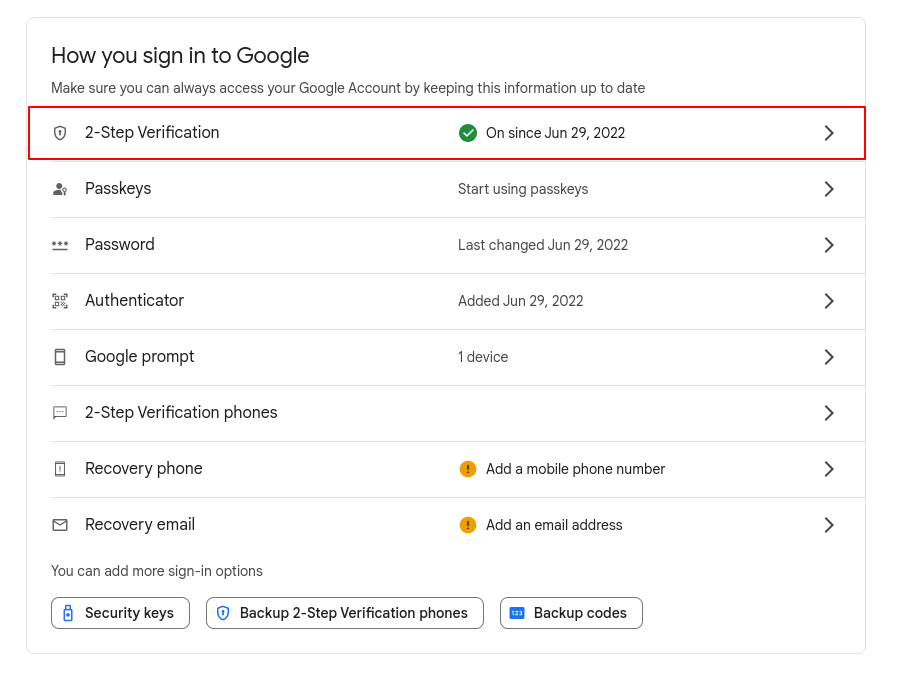
- Under "How you sign in to Google" select "2-Step Verification".
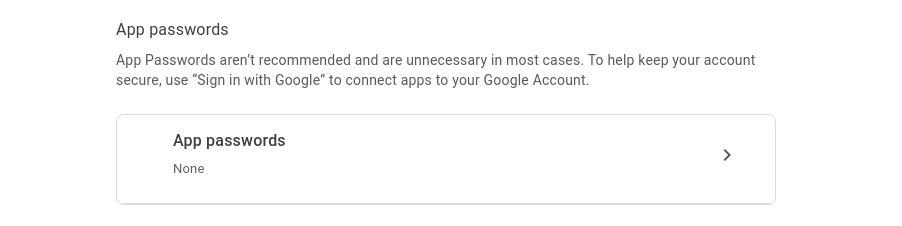
- At the bottom, choose "App Passwords".
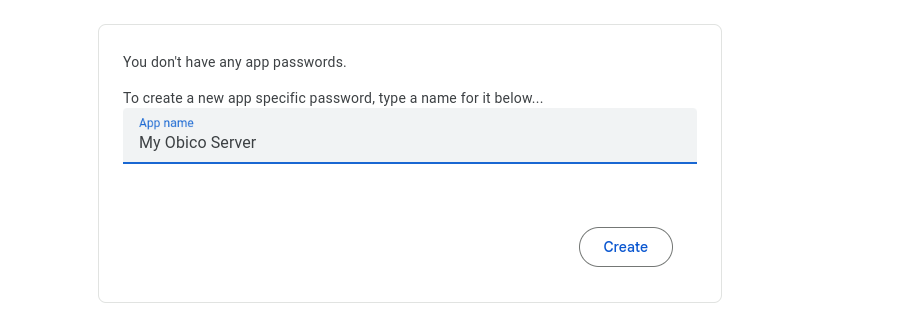
- Choose a name for this app password, such as "My Obico Server".
- Click "Create".
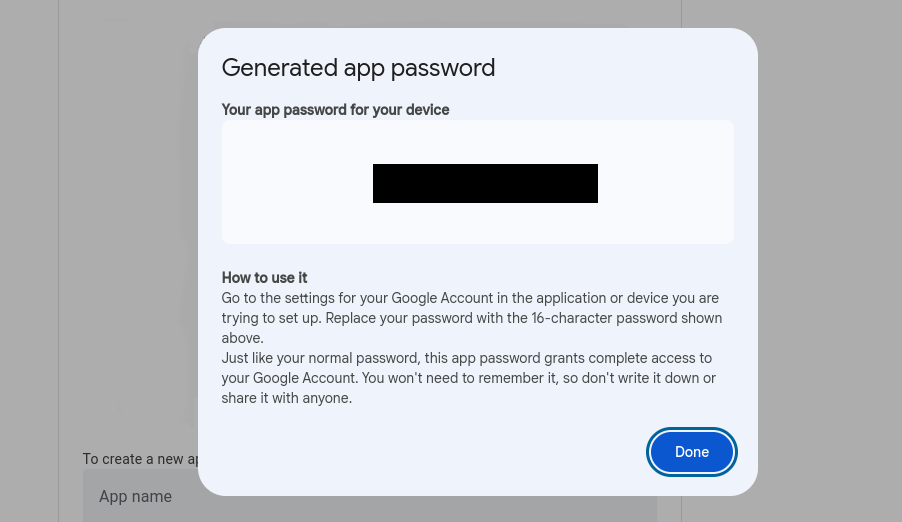
- On the next screen, copy the text in the white box. This is the pass you will use in the next step.
If you run into issues creating an app password, you can check out Google's guide.
3. Configure .env with the correct email settings.
EMAIL_HOST=smtp.gmail.com
EMAIL_HOST_USER=the_full_email@gmail.com
EMAIL_HOST_PASSWORD=the_app_password_you_copied_from_previous_step
EMAIL_PORT=587
EMAIL_USE_TLS=True
tip
If you can't find the .env file, check out this guide.
4. Restart the server.
docker compose up --build -d
5. Send a test email
Follow this guide to configure email settings and this guide to send a test email.